Team Fun & the Gilded Autumn Pumpkin Home Décor Project

This past weekend I gathered with my Team, The Blue Mountain Stampers for a special biannual event. This event allows us to gather and celebrate everyone’s accomplishments over the last 6 months. We have a special project, along with prizes, and appetizers. So today I thought I’d share our project that we made.

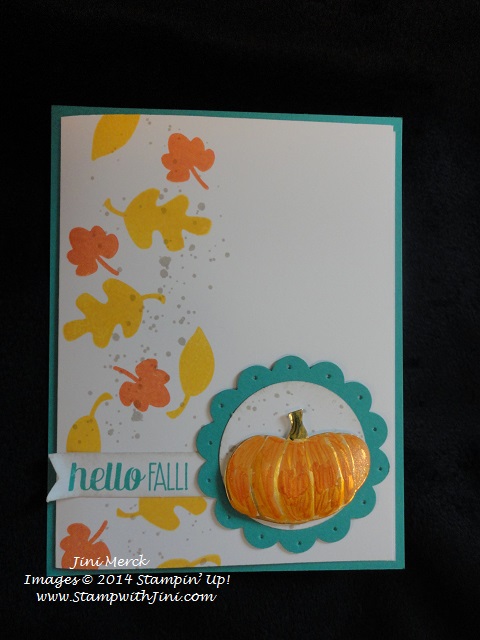
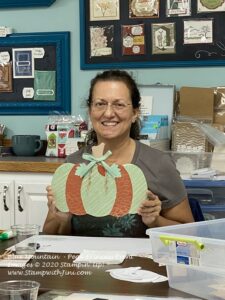
This project was a lot of fun to make and everyone’s turned out differently since they could decide on which patterns they wanted to use. Here is mine.

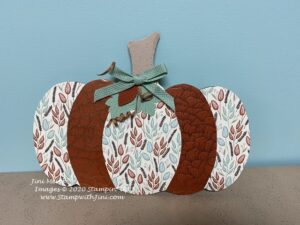
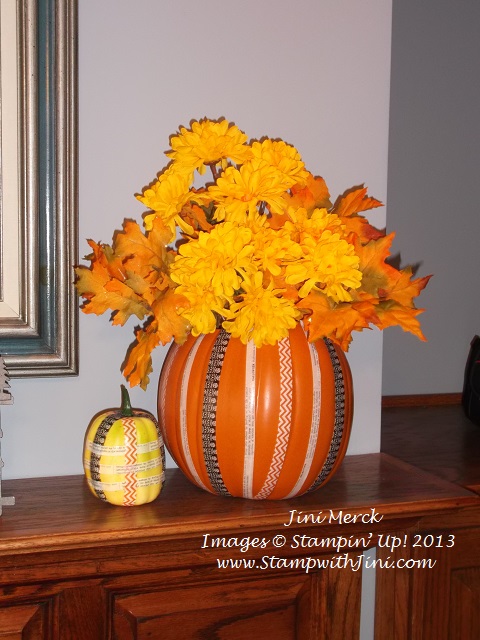
I really love the colors and patterns of the Gilded Autumn Suite of Products and so I couldn’t resist making a home décor item with them. I also really love the way the little swirls of copper ribbon finish off this project. They are so easy to make – I bet you are wondering how I made them too!

You’ll need a wooden skewer or dowel along with your heat tool and Heavy Spray Starch. Yep, that’s it! You’ll also need a bit of patience as you make them since it does require some dry time tho. I’m not sure how they would hold up outside, but since I’m planning on using this project inside my home I wasn’t worried about our heavy Georgia humidity of late.

Want to see how we made them? Here is a video for you.

Gilded Autumn Pumpkin Home Decor Project Video Tutorial


Gilded Autumn Pumpkin Home Decor Project Tutorial PDF

I’ve also included a link for the pumpkins and PDF pattern on this Tutorial for you.

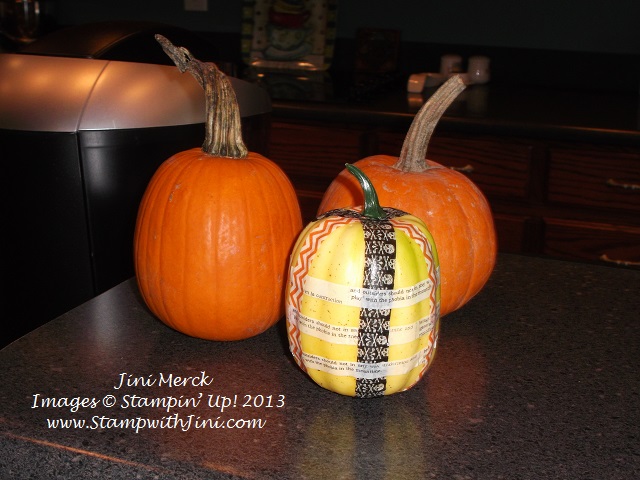
Want to make some of these too? Here is the information on the wooded pumpkins for you that I found on Amazon along with a PDF pattern for this pumpkin.

12″ Wooden Pumpkin Cutouts

Wooden Pumpkin Pattern PDF

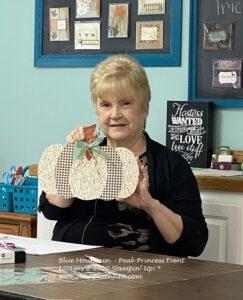
I really love these gatherings we have a lot of fun together and it’s a great time to share what’s been happening in our lives, and relax too. Here are a couple of pictures for you of some of the finished projects.

Have you ever thought about getting a discount on your favorite Stampin’ Up! products? Or join a group of crafters who enjoy crafting together? Then the Blue Mountain Stampers might be right for you!

What are the Blue Mountain Stampers?

That’s the name of our stamping community. I enjoy welcoming new members to our group. We’re from all over. If you’re considering joining Stampin’ Up!, you may have questions about how I would support you as part of my team. I do offer a variety of ways to learn, grow and to have FUN as a Blue Mountain Stamper!

  • Exclusive Team Resource Page – videos, PDFs and more
  • Exclusive Face book Group – A great way to share and connect with other team members and share
  • Monthly Creative Challenges
  • Swapping Opportunities
  • Team Retreats
  • Meetings – both local and online/virtual
  • Monthly Crafting Day
  • Monthly Lunch & Learn
  • Recognition & Incentives
  • Training available for workshops, clubs, classes and more!
  • Additional support and business coaching available

We have a very active group that share and answer each other’s questions on our Exclusive face book group.  If you’re looking for fun, a place to grow and share with others…You’ll fit right in!

Hobbyists are welcome!

  • Did you know?  90% of my Blue Mountain Stampers’ are Happy Shoppers – purchasing for themselves, (along with their family and friends.)  That’s right…you can just get a discount on products you love!
  • We welcome the crafter who’s looking to be a “happy shopper” (and save money), as well as those of you that want to build a business (and make money).
  • Everyone is welcome after all there’s room for both and everyone in between.

And there is NO Obligation when you purchase your starter kit – Join the Blue Mountain Stampers and see what it’s all about!

Right now is a great time to join with our GET & GO PROMOTION

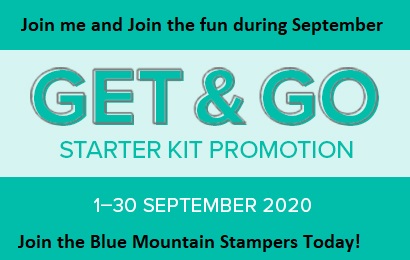
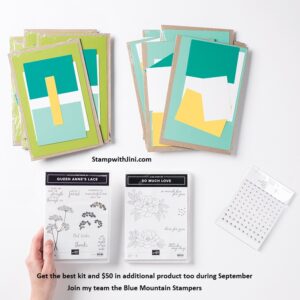
Not only will you receive 2 additional Stamp Sets in your kit and card kits to make things with you’ll also get to choose $125 in product too! AND Shipping is free! That’s almost $200 in product for just $99 plus tax!!!

And there is no obligation

But you’ll want to hurry since there are less than 48 hours left to take advantage of this great promotion!

CLICK HERE to learn more

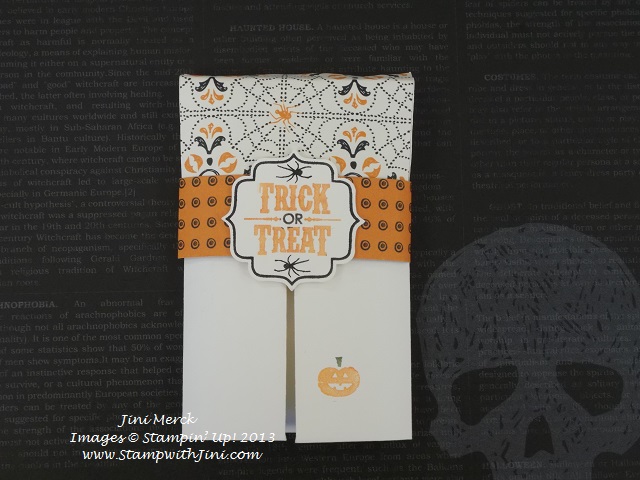
Don’t forget to stop back by tomorrow when I’ll be sharing a quick and easy treat item with you!

Online Store Cinnamon Cider

Click here to order your Stampin’ Up! Products online 24/7! (US only)

Shop at my Online Store and use Host Code B74BJ7HF

Click Here to learn more about using the Hostess Code If you order Online make sure your profile information is up to date and you’ve allowed me to send you your free gift, a Beautiful Autumn Class with PDF & Videos.

If your Online order is $150 or more make sure not to use the host code so that you can take advantage of the Host Benefits yourself – No worries, I’ll still send you your free gift. It’s my way of saying thank you for choosing me as your demonstrator!

Marvelous Metallic Pumpkins

I love to learn new techniques. Do you? Today’s project combines two things I love techniques and the Stampin’ Blendabilities Markers. Whoo hoo! I find myself using my Blendabilities all the time – they are just so much fun to color with and I’m not really a coloring type of person normally. But I’m finding coloring with my Blendabilities is very relaxing and  I always feel so accomplished when I’m finish coloring an image LOL.

I’ve used the Fall Fest stamp set and coordinating Fun Fall Framelits that are available in a money saving Bundle (137628) for this project. This is such a great set for the fall, it’s not such for Halloween as you can see.

marvelous metallic pumpkins

So wondering what and how I did this? It is sooooo easy and it really gives your project a WOW effect. I’m hoping you can see the wonderful look that this little pumpkin has in my photo.

Want to learn this really quick and easy technique? I’ve made a quick video for you. So without delay – Here is my Marvelous Metallic Pumpkins Video Tutorial.

Love it? All you need is a sold image for this project and you’re set to go – the ideas are endless. I haven’t noticed there is any problem so far with my Stampin’ Blendabilities Markers – The only tip is lighter hand when coloring is better since the StazOn Ink is also alcohol based too much pressure picks up the StazOn. That is why for your regular projects you’ll want to use our Memento Tuxedo Black Pad.

Want to learn more about Stampin’ Blendabilities? I’ve got a Blend with Friends Class coming up in October. Not only will you get to practice with the Blendabilities Markers, but the class includes a bundle of products that will get you started. Sound interesting?

Why not contact me today (706 754-7124 or [email protected]) to learn more about the Blend with Friends Class or you can click HERE to see my full calendar of events. I think you’ll really love using our Stampin’ Blendabilities Markers once you try them and they are such a great deal too!

Supplies:

Stamp Set: Fall Fest (135194), For All Things (135152/135155), and Gorgeous Grunge (130514/130517)

Ink: White Cotton StazOn Pad (106960), Tangerine Tango (1269416), Sahara Sand (126976), Bermuda Bay (131171), and Crushed Curry Classic Ink Pads (131173)

Cardstock: Gold Foil (132622), Bermuda Bay (131197), and Whisper White card stock (100730)

Accessories: Fun Fall Framelits Dies (135856), 1 ¾” Circle Punch (119850), 2 3/8″ Scallop Circle Punch (118874), Paper Piercing Tool (126189) and Stampin’ Pierce Mat (126199), Old Olive (130999) and Pumpkin Pie Stampin’ Blendabilities Markers (130997), and Stampin’ Sponges (101610)

Click here to order your Stampin’ Up! Products online 24/7! (US only)

Hostess code HKNSYMNZ

Place an Online order with me and use my Hostess Code HKNSYMNZ and I’ll send you a FREE Tutorial with instructions to create 4 fun projects using the Wonderful Wreath stamp set!

Click Here to learn more about using the Hostess Code

Weekly Deals (Special ends Monday, September 22nd, 2014 at 11:50 p.m. (MT)

PAPER PUMPKIN

My idea of the perfect pumpkin

Ahhh… it is September and here in North Georgia that means the mornings are cooler, the leaves are starting to turn and pumpkins are starting to appear in the stands on the side of the road. Not too long ago it would have meant getting ready to sew a Halloween outfit for my children. I loved planning and putting together costumes based on their current passion at the time. After all who doesn’t like a good craft project LOL!

I’m feeling nostalgic today (stepping back in time 19 years) and thought I’d share a picture with you for my children’s first Halloween together. Johnathan was 3 and thought that dad hung the moon. Larry was a Animal Control Officer with Gwinnett County at the time and so of course, Johnathan wanted to grow up to be just like his dad. I created this costume using one of the old discarded uniforms that I cut down and modified – Kaitlin of course was a puppy. Although most people thought she was a bunny –  LOL. I’m not a seamstress by any means, just using my middle school home ec. skills, but Johnathan didn’t care. He wore this costume a lot playing dress up and pretending he was going to work just like dad!

Johnathan & Kaitlin Halloween 1995

Now a days there isn’t any costume sewing or pumpkin carving, but I still love to decorate and make treats for friends and family – and so the new Curvy Keepsake Box Thinlits Die is perfect for fall. I’ve been having a blast making all kinds of projects with my newest Thinlit!

Merry Everything Curvy Keepsake Box

Today’s project is a quick and easy one when you use the Curvy Keepsake Box Thinlit – Here is the down and dirty details of how I made this project.

Using Tango Twist card stock I ran the Thinlits Die through my Big Shot twice. Then I ran the pieces through again using my Decorative Dots Embossing Folder. I used some of my Multipurpose Liquid Glue to attach the two pieces. (Our Multipurpose Liquid Glue is great for items with lots of texture.)

Next, I stamped the image onto Whisper White card stock using my Memento Tuxedo Black Pad and colored this cute little guy with my Old Olive Stampin’ Blendabilities Markers. This cute little Dracula image drew me to this stamp set from the beginning!  (Remember you can get the stamp and punch and save 15% when you order them as a bundle 137635/137636).

We don’t carry any Old Olive ribbon in the width I wanted so I simply made my own with the Whisper White 5/8″ Satin Ribbon and my Old Olive Blendabilities Marker. I love that I can customize my ribbon this way – It is soooo easy to do! (Scroll down and you’ll see a quick video tutorial on how I did this.)

I used our cute little Handheld Stapler to attach the punched image and ribbon to the box, put the handles through the hole and voila – finished!

I think this little pumpkin turned out just right. What is your perfect pumpkin?

Want to see my quick video tutorial on Custom Color Ribbon?

Another great reason to have our NEW Stampin’ Blendabilities Markers – I’m really loving them and think you will too! Want to learn more about Blendabilities? Watch for my upcoming Blend with Friends Events – it’s a great way to get started!

Supplies:

Stamp Set: Merry Everything (135068/135071)

Inks: Memento Tuxedo Black Pad (132708)

Paper: Tangelo Twist (133677) and Whisper White card stock (100730)

Accessories: Old Olive Stampin’ Blendabilies Markers (130999), Whisper White 5/8″ Satin Ribbon (134549), Curvy Keepsake Box Thinlits Die (135853), Decorative Dots Embossing Folder (133520), Note Tag Punch (135860),  Handheld Stapler (135850) and Silver Mini Staples (135847), and Multipurpose Liquid Glue (110755)

Click here to order your Stampin’ Up! Products online 24/7! (US only)

Hostess code HKNSYMNZ

Weekly Deals (Special ends Monday, September 15th, 2014 at 11:50 p.m. (MT)

The Final Thank You Thursday!

I’ve got some fun last minute Halloween projects that I made and want to share with you today. This first one is a home décor item that I made using our Witches’ Brew Designer Washi Tape.

Witches' Brew Designer Washi Tape pumpkins (1)

Don’t you love these fake pumpkins that have available the last few years? I’ve done all kinds of things with them, including having the kids carve a pumpkin that will last forever. For this project I simply cut off the top, added the Witches’ Brew Designer Washi Tape (132156)  in a pattern that made me happy, placed a piece of green foam for flowers and added the mums and leaves. Quick and easy-peasy.

This second project includes some real pumpkins that Larry brought home to sit on my kitchen counter for a pop of fall color.

Witches' Brew Designer Washi Tape pumpkins (2)

Sorry about the photos – it’s another rainy day here in North Georgia which can make taking pictures tricky.

I love making little treats for family and friends

Halloween envelope gum holder (2)

so here is a great little project that holds a pack of gum.

Halloween envelope gum holder (1)

Halloween Candy Bar Slider – surprise!

And last but not least I wanted to share a picture that my daughter sent me when she found her little Halloween Candy Bar Slider tucked into her dresser drawer at college – the timing was perfect since they had just had a dorm Halloween event where she dressed up as I Dream of Jeannie and passed out candy. (Seriously – thus the weird eye make up.) She’s such a hoot!

Kaitlin with Halloween Candy Bar Slider

If you missed my post on my Halloween Candy Bar Sliders and video tutorial on how to make them CLICK HERE to see more about my Halloween Candy Bar Slider Video Tutorial.

Final Thank You Thursday!

Stampin’ Up! is wrapping up it’s October’s Thank You Thursday with a final 24 Hour sale on it’s Chevron Ribbon. A great way to wrap things up don’t you think?

Available are 5 great colors –

Basic Black 3/4″ Chevron Ribbon #130010

Chevron Basic Black Ribbon

Calypso Coral 3/4″ Chevron Ribbon #130018

Calypso Coral Chevron Ribbon

Crushed Curry 3/4″ Chevron Ribbon #130019

Chevron Crushed Curry Ribbon

Island Indigo 3/4″ Chevron Ribbon #131151

Chevron Island Indigo Ribbon

Smoky Slate 3/4″ Chevron Ribbon #131152

Chevron Smoky Slate Ribbon

Place your order with me today before these great deals are gone and don’t forget to check out our wonderful Weekly Deals and Clearance Rack items that are available too.

Click here to order your Stampin’ Up! Products online 24/7! (US only)

When you place an order with me today you’ll get FREE shipping! Want to place your order online? Use Hostess Code 7QBVKVTN when placing your order online so that I know you want the FREE shipping.)

The fine print: Place an order with me today by email or online and I will send you a coupon for the amount of shipping to be used on your next order in November. FREE Shipping special expires at 9 p.m. (ET) Thursday, October 31st and is only offered through Stamp with Jini.


Jack of All Trades

Need a quick and easy card for Halloween? How about using our Jack of All Trades stamp set? It’s really so versatile you can use it throughout the fall season.

Photo

Since Jack of All Trades is a two step stamp set you can use it with or without the jack-o-latern faces, the choice is yours. And with that cute little face who can resist.

Supplies:

Stamp Set: Jack of All Trades, Spooky Bingo Bits

Inks: Basic Black, Garden Green and Pumpkin Pie

Paper: Pumpkin Pie, Basic Black and Whisper White

Accessories: Big Shot and Top Note Die

Click here to order your Stampin’ Up! Products online 24/7! (US only)