

Ahhh… it is September and here in North Georgia that means the mornings are cooler, the leaves are starting to turn and pumpkins are starting to appear in the stands on the side of the road. Not too long ago it would have meant getting ready to sew a Halloween outfit for my children. I loved planning and putting together costumes based on their current passion at the time. After all who doesn’t like a good craft project LOL!
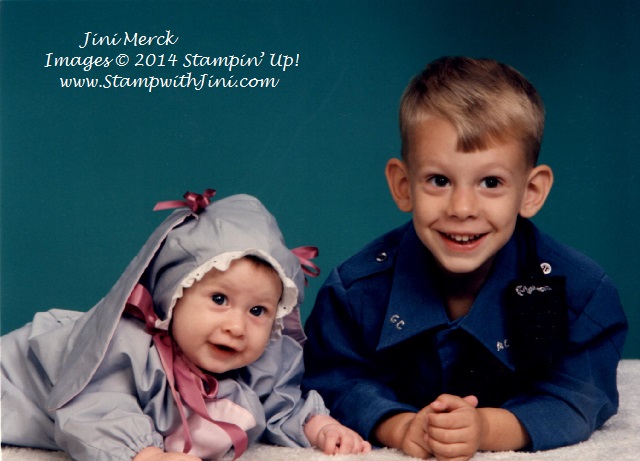
I’m feeling nostalgic today (stepping back in time 19 years) and thought I’d share a picture with you for my children’s first Halloween together. Johnathan was 3 and thought that dad hung the moon. Larry was a Animal Control Officer with Gwinnett County at the time and so of course, Johnathan wanted to grow up to be just like his dad. I created this costume using one of the old discarded uniforms that I cut down and modified – Kaitlin of course was a puppy. Although most people thought she was a bunny – LOL. I’m not a seamstress by any means, just using my middle school home ec. skills, but Johnathan didn’t care. He wore this costume a lot playing dress up and pretending he was going to work just like dad!
Now a days there isn’t any costume sewing or pumpkin carving, but I still love to decorate and make treats for friends and family – and so the new Curvy Keepsake Box Thinlits Die is perfect for fall. I’ve been having a blast making all kinds of projects with my newest Thinlit!

Today’s project is a quick and easy one when you use the Curvy Keepsake Box Thinlit – Here is the down and dirty details of how I made this project.
Using Tango Twist card stock I ran the Thinlits Die through my Big Shot twice. Then I ran the pieces through again using my Decorative Dots Embossing Folder. I used some of my Multipurpose Liquid Glue to attach the two pieces. (Our Multipurpose Liquid Glue is great for items with lots of texture.)
Next, I stamped the image onto Whisper White card stock using my Memento Tuxedo Black Pad and colored this cute little guy with my Old Olive Stampin’ Blendabilities Markers. This cute little Dracula image drew me to this stamp set from the beginning! (Remember you can get the stamp and punch and save 15% when you order them as a bundle 137635/137636).
We don’t carry any Old Olive ribbon in the width I wanted so I simply made my own with the Whisper White 5/8″ Satin Ribbon and my Old Olive Blendabilities Marker. I love that I can customize my ribbon this way – It is soooo easy to do! (Scroll down and you’ll see a quick video tutorial on how I did this.)
I used our cute little Handheld Stapler to attach the punched image and ribbon to the box, put the handles through the hole and voila – finished!
I think this little pumpkin turned out just right. What is your perfect pumpkin?
Want to see my quick video tutorial on Custom Color Ribbon?
Another great reason to have our NEW Stampin’ Blendabilities Markers – I’m really loving them and think you will too! Want to learn more about Blendabilities? Watch for my upcoming Blend with Friends Events – it’s a great way to get started!
Supplies:
Stamp Set: Merry Everything (135068/135071)
Inks: Memento Tuxedo Black Pad (132708)
Paper: Tangelo Twist (133677) and Whisper White card stock (100730)
Accessories: Old Olive Stampin’ Blendabilies Markers (130999), Whisper White 5/8″ Satin Ribbon (134549), Curvy Keepsake Box Thinlits Die (135853), Decorative Dots Embossing Folder (133520), Note Tag Punch (135860), Handheld Stapler (135850) and Silver Mini Staples (135847), and Multipurpose Liquid Glue (110755)
Click here to order your Stampin’ Up! Products online 24/7! (US only)
Hostess code HKNSYMNZ
Weekly Deals (Special ends Monday, September 15th, 2014 at 11:50 p.m. (MT)
Love the picture of the kids!
Thanks Anna, Johnathan just rolled his eyes when I was telling him about it this weekend. I just told him he was safe I’m sure his friends don’t visit my blog – LOL!