

I’ve been wanting to share this bundle with you, but unfortunately it got delayed. So today I’m going to share the lovely little cards that we were able to create during the event in Houston. While I didn’t choose this as my bundle for the event, one of my fellow table mates let me borrow hers.
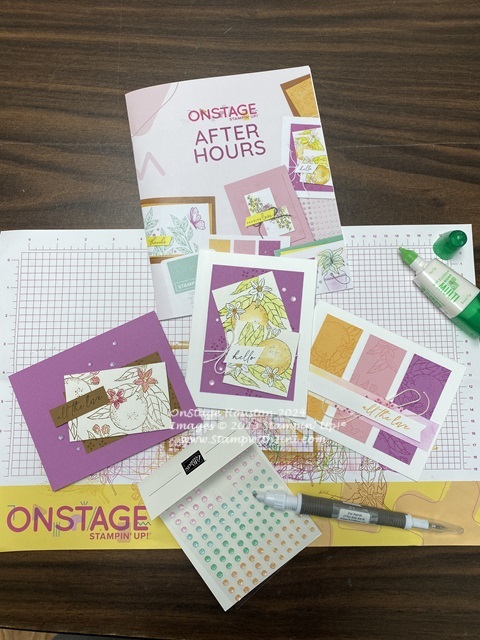
So over the next few days I’ll be sharing these cards made with the Citrus Blooms Bundle (163295) with you along with how we made them.

This bundle is part of our Mediterranean Blooms Suite (163300). So without further delay here’s today’s card.
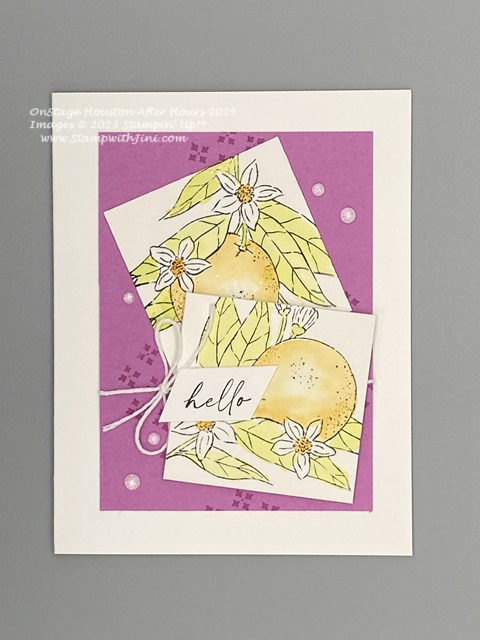
This card uses our Water Painters (151298) and our Fluid 100 5×7 Watercolor Paper (149612) to create this soft look. Add more ink to your wash for a bolder look if you prefer, the choice is up to you!
You’ll need the following supplies to make this card.
Supplies:
- Citrus Blooms stamp set (163286)
- Lemon Lime Twist Classic Ink
- Petunia Pop Classic Ink
- StazOn Jet Black Ink Pad (101406)
- Water Painters (151298)
- 2024-2026 In Color Shimmer Gems (163781)
- Stampin’ Dimensionals (104430)
- Stampin’ Seal (149699/152812)
- Paper Towel for water coloring
Paper & More
Measurements:
- Basic White Thick Card stock: Cut 8 1/2″ x 5 1/2″; scored at 4 1/4″
- Petunia Pop Card stock: Cut 3 1/4″ x 4 1/2″
- Watercolor Paper: Cut (2) 2 1/4″ x 2 1/4″
- Basic White Card stock: Cut 2 1/2″ x 5/8″
- Baker’s Twine Essentials Pack (white): Cut 12″
- 2024-2026 In color Shimmer Gems (Pretty in Pink): 5 assorted
Assembly:
- stamp the small “diamond” image using Petunia Pop Classic Ink onto Petunia Pop panel randomly.
- Stamp the sentiment “hello” onto strip of Basic White Card stock using StazOn Ink Pad.
- Stamp orange image onto Watercolor Paper using Stazon Ink Pad. Repeat on second square.
- Using your Water Painter color the images using Lemon Lime Twist and Peach Pie Classic Ink. Allow to dry. (I like to use a clear block as a pallet for my water coloring – simply tap the ink pad onto the clear block to add ink rather than squeezing your ink pad and using the lid)
- Adhere the first water colored panel to the Petunia Pop panel tilted it to the left as shown.
- Wrap a piece of Baker’s Twine around the panel and tie into a bow. Adjust as desired.
- Using your Stampin’ Dimensionals add the second water colored panel to the card front, tilting it to the right.
- If needed adjust bow and trim ends of twine then adhere the layered panel to the card front.
- Using your Paper Snips trim the ends of the sentiment panel at an angle on both ends.
- Adhere sentiment to the card front.
- Add Pretty in Pink Shimmer Gems to the card front randomly using your Take Your Pick Tool.
- Stamp inside panel and envelope as desired.
That’s it. Then stop by tomorrow when I’ll be sharing the second card that night.
Enjoy!

CLICK HERE to order your Stampin’ Up! products Online 24/7! (US only)
Shop at my Online Store and use Host Code XM7XH6F2 with a product order of $50 or more and receive a FREE Gift from me; my Card Kit for my In Color Card Class!