

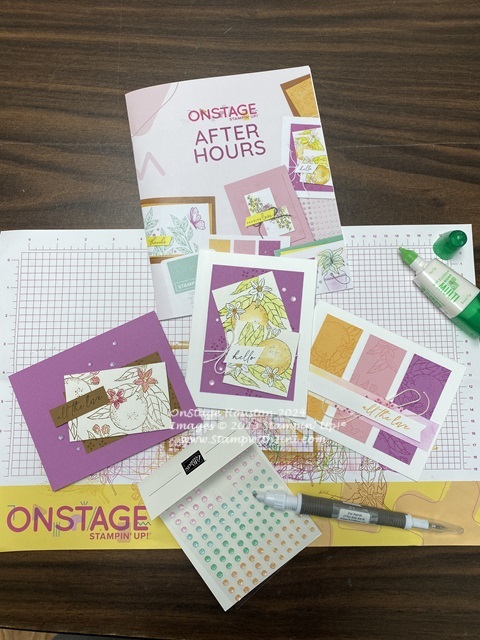
Yesterday, I shared the lovely watercolor card I made at OnStage in Houston during our After Hours event. Today I’m sharing the second of the three cards.
I love the linear look this card has and the combination of the 2024-2026 In Colors together.
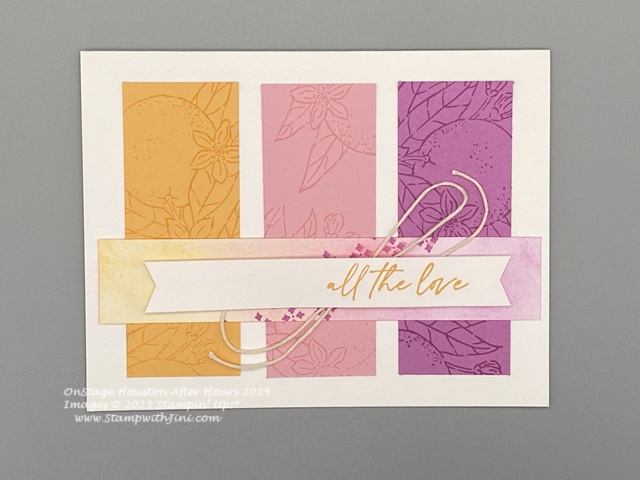
What do you think? Like the color combination too? I love the soft color behind the sentiment we created with our Small Blending Brushes (160518). Here is how we made this card.
You’ll need the following supplies to make this card.
Supplies:
- Citrus Blooms stamp set (163286)
- Peach Pie Classic Ink
- Pretty In Pink Classic Ink
- Petunia Pop Classic Ink
- Small Blending Brushes (160518)
- Baker’s Twine Essential Pack (155475)
- Stampin’ Dimensionals (104430)
- Stampin’ Seal (149699/152812)
Paper & More
Measurements:
- Basic White Thick Card stock: Cut 5 1/2″ x 8 1/2″; scored at 4 1/4″
- Peach Pie Cards stock: Cut 1 3/8″ x 3 1/2″
- Pretty in Pink Card stock: Cut 1 3/8″ x 3 1/2″
- Petunia Pop Card stock: Cut 1 3/8″ x 3 1/2″
- Basic White Card stock: Cut 5 1/4″ x 1″
- Basic White Card stock: Cut 4 3/4″ x 5/8″
- Baker’s Twine Essentials Pack (Very Vanilla): Cut 12″
Assembly:
- Stamp the “orange” image onto Peach Pie Card stock using Peach Pie Classic Ink.
- Stamp the “orange” image onto Pretty in Pink Card stock using Pretty in Pink Classic Ink.
- Stamp the “orange” image onto Petunia Pop Card stock using Petunia Pop Classic Ink.
- Adhere the 3 panels to the card front. Adhere the Pretty in Pink panel down first in the center and then space out the other two panels evenly on the right and left sides.
- Using your Blending Brush add color using Petunia Pop, Peach Pie, and Pretty in Pink onto 1″ strip of Basic White Card stock.
- Then using Petunia Pop Classic Ink and “diamond” image stamp stamp several times at an diagonal across the center of the strip as shown.
- Adhere the strip to the card front about 1 inch up from the bottom.
- Tie the Very Vanilla Baker’s Twine into a large bow and adhere it to the card front. The sentiment from the next step will cover the adhesive.
- Using your Paper Snips cut a banner onto the right and left ends of the Basic White Card stock strip.
- Stamp the sentiment “all the love” onto the strip of Basic White on the right end using Peach Pie Classic Ink.
- Using Stampin’ Dimensionals adhere the sentiment on the the card front.
- Stamp the inside panel and envelope as desired.
That’s it. Then stop by tomorrow when I’ll be sharing the last card we made that night.
Enjoy!

CLICK HERE to order your Stampin’ Up! products Online 24/7! (US only)
Shop at my Online Store and use Host Code XM7XH6F2 with a product order of $50 or more and receive a FREE Gift from me; my Card Kit for my In Color Card Class!