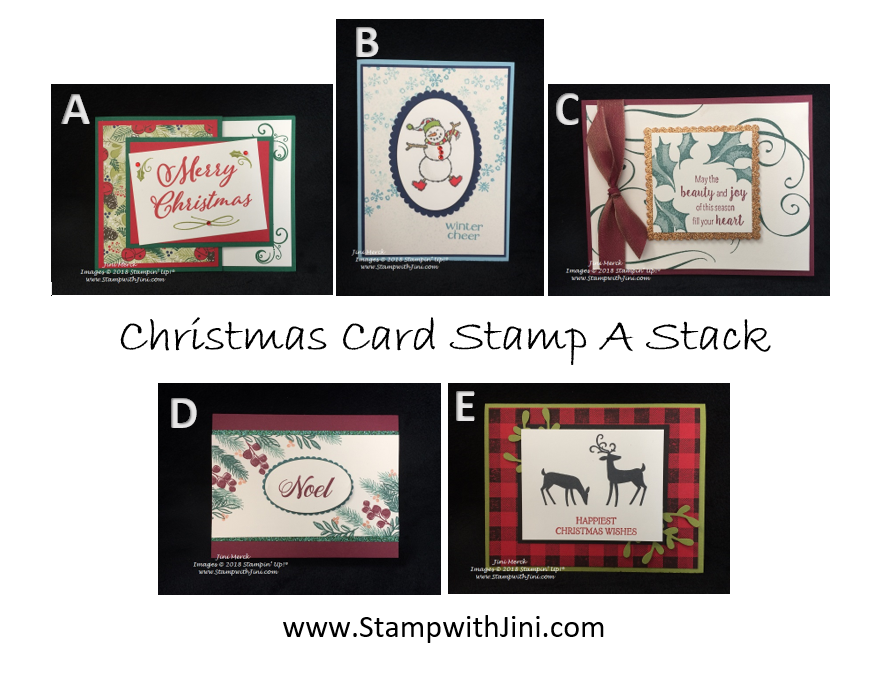
Save your Spot for my Christmas Card Stamp A Stack

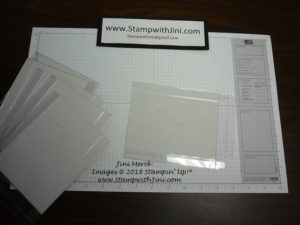
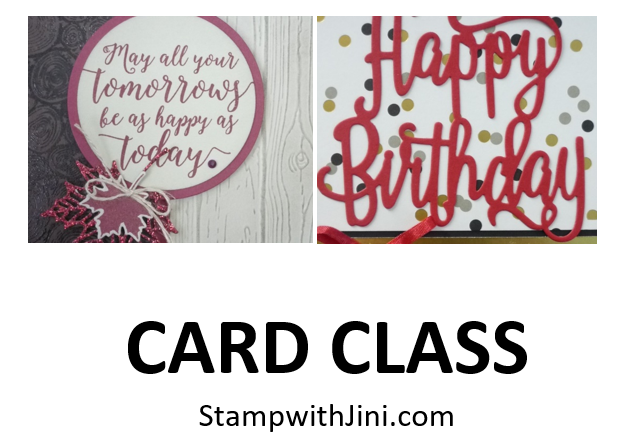
Create 10 cards per set, choose from 5 different designs, envelopes included

Make as many sets as you want!

Cards are clean and simple designs

YOU Choose which designs you make and you have 5 to choose from!!!

Thursday, November 1st 10 am – 4 pm

OR  

Saturday, November 17th 10 am – 4 pm

Work at your own pace. Everything is included except your favorite Adhesives


 Class Fee: $15 (per set of 10 cards)

Buy 4 sets and get the 5th for FREE!!!

R.S.V.P and Prepay by Friday, October 26th to hold your spot

Don’t forget to tell me how many of each design you want


See my Class to Go Option HERE on my Calendar of Events

Need Adhesive? No problem, pick yours up at the class.
to RSVP and hold your spot

Rooted in Nature – It’s not just for fall

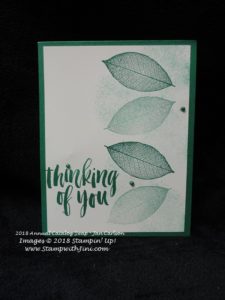
The Rooted in Nature stamp set (146479/146482) is a set filled with wonderful tree inspired images and sentiments. It’s a wonderful set for all kinds of cards that can take you all through the year, such as this Thinking of You  card.

Done in Shaded Spruce and using the Touches of Texture stamp set (141934/143251) to create some interest behind the leaves.

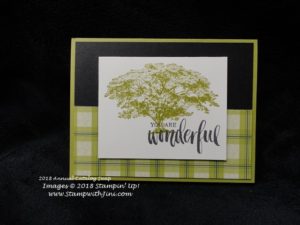
Or how about this one which evokes cool fall nights with it’s plaid from the Under the Mistletoe Designer Series Paper (146921).

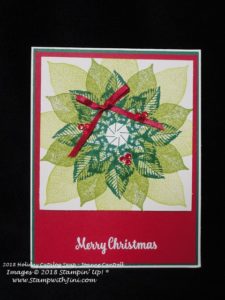
But it’s not just for all occasions – check out this card using the sentiment from the Star of Light stamp set (142110) and the Circular Stamping Technique I shared with you HERE.

Lovely, and the Red Rhinestones Basic Jewels (146924) just sparkle in the light.

Click here to order your Stampin’ Up! Products online 24/7! (US only)

Shop at my Online Store and use Host Code W2NX46E9


Click Here to learn more about using the Hostess Code If you order Online make sure your profile information is up to date and you’ve allowed me to contact you

Last Chance to Sign Up for My October Card Class

During this event, you’ll make 6 cards (2 each of 3 designs)

Work at your own pace. Everything is included except your favorite Adhesives

Cards are clean and simple designs AND you choose the sentiments

The class includes cards for birthdays, thinking of you, thank you, seasonal, and more.

Thursday, October 25th 10 a.m. – 12 p.m.

 Class Fee: $15 (FREE with a minimum order at class)

 R.S.V.P and Prepay by Friday, October 19th to hold your spot

OR

Sunday, October 28th 2 p.m. – 4 p.m.

 Class Fee: $15 (FREE with a minimum order at class)

 R.S.V.P and Prepay by Monday, October 22nd to hold your spot

to RSVP and hold your spot


It’s more fun with friends so why not bring a new friend and get a gift!

RSVP is a must for all events! So I can have your stamps here and supplies cut and ready for class.
[email protected] or call 706 754-7124
Doors open 5 minutes before class
Adhesive not included

Pleasant Pheasants

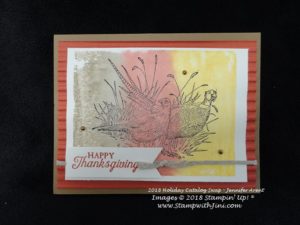
Have you seen the Pleasant Pheasants stamp set in the holiday catalog? My eye was immediately drawn to the beautiful pheasants and other fall images. Perfect to color or use with techniques like this card.

How was this technique done? You’ll need a large Clear Block, some Stampin’ Write Markers, and a Stampin’ Spritzer filled with water.

Scribble the color onto the Clear Block with the Stampin’ Write Markers, this card uses Soft Suede, Cajun Craze, and Crushed curry. Then spritz with the water and stamp onto the paper. You can leave the block in place for a few seconds to help the paper absorb the color. Then all you have to do is dry and use as desired. Yep, it’s that easy!

And did you know that Stampin’ Up! has given us an qucik and easy way to create? There is a special You Can Make It Bundle option (150097) which gives you what you need to get started, why not check it out HERE.

I’ve given you a complete supply list below. Why not try this technique yourself? It’s super easy and a lot of fun.

Supplies: 

Stamp Set: Pleasant Pheasants (147687/147684)

Inks: Cajun Craze  (147085) and Early Espresso Classic Ink (147114)

Paper: Cajun Craze (119684), Soft Suede (115318) and  Whisper White Card stock (100730)

Accessories: Soft Suede Dark Stampin’ Blends (146875), Stampin’ Write Markers, Corrugated Dynamic Embossing Folder (148026), 3/16″ Braided Linen Trim (147808), Pearl Basic Jewels (144219), Stampin’ Spritzer (126185), Banner Triple Punch (138292)

Click here to order your Stampin’ Up! Products online 24/7! (US only)

Shop at my Online Store and use Host Code W2NX46E9


Click Here to learn more about using the Hostess Code If you order Online make sure your profile information is up to date and you’ve allowed me to contact you

Many Blessings

Today’s been kind of crazy and I still need to run to town (now that its pouring, sigh). So this is going to be a quick post today, but never fear I’ll be back again to share tomorrow. LOL

Do you like a wonderful set that covers multiple occasions? Why not check out the Many Blessings stamp set found in the Holiday Catalog on page 46? This set is filled with images and blessings that you can use throughout the fall and holiday season.

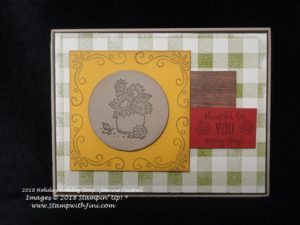
Check out this lovely card

done in shades of fall and it also uses a bit of our Wood Textures Designer Series paper.

I’m loving this Buffalo Check background and find myself reaching for it constantly – it goes with all kinds of sets, just like this one.

Supplies: 

Stamp Set: Many Blessings (147775) and Buffalo Check (147797/147794)

Inks: Old Olive (147090) and Early Espresso Classic Ink (147114)

Paper: Wood Textures Designer Series paper (144177), Crumb Cake (120953), Cajun Craze (119684), Crushed Curry (131199), Early Espresso (119686), and Very Vanilla Card stock (101650)

Accessories: Stampin’ Sponges (141337) and 2″ Circle Punch (133782)


Click here to order your Stampin’ Up! Products online 24/7! (US only)

Shop at my Online Store and use Host Code W2NX46E9


Click Here to learn more about using the Hostess Code If you order Online make sure your profile information is up to date and you’ve allowed me to contact you

Painted Harvest Thank You Cards

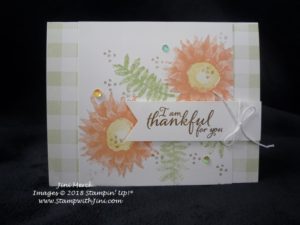
Each month I stamp a special Thank You card for everyone who places an order with me and so today I thought I’d share the one I made for October.

This set is an oldie but goodie and I love the ease of working with these images. The set itself is a 2 Step set which means it gives you lots of options for color combinations. And this set is a bit special, since when you line of the mark that is shown to you on the sheet you get this beautiful image, turn it a bit and you’ll get a fuller flower. So much fun to play with and try different combinations!

The layout for this card was inspired by our Demonstrator Stampin’ Success Magazine that we get each quarter with tons of ideas and tips. I loved the color combination of the Grapefruit Grove and Petal Pink.

I’ve typed up a quick tutorial for you so you can make some too.

Painted Harvest Thank You Card PDF

If you have had problems getting a good image before with our larger stamps – here is a quick tip for you that I hope you’ll find helpful.

How to Get a Good Image with the Buffalo Check Stamp Video Tutorial

Enjoy!


Supplies: 

Stamp Set: Painted Harvest (144783) and Buffalo Check Background (147797/147794)

Inks: Soft Sea Foam (147102), So Saffron (147109), Petal Pink (147108), Grapefruit Grove (147142), Soft Suede (147115), and Pear Pizzazz Classic Ink (147104)

Paper: Whisper White Thick Card stock (140272) and Whisper White Card stock (100730)

Accessories: Whisper White Baker’s Twine (124262), Iridescent Sequin Assortment (144212), Take Your Pick Tool (144107) and Triple Banner Punch (138292)


Click here to order your Stampin’ Up! Products online 24/7! (US only)

Shop at my Online Store and use Host Code W2NX46E9


Click Here to learn more about using the Hostess Code If you order Online make sure your profile information is up to date and you’ve allowed me to contact you


Paper Pumpkin Holiday Card Kit for November

Stampin up is giving us a hint as to what is inside the November kit!

Get cozy this Christmas season with Paper Pumpkin, it’s your One-Stop Box™ for holiday paper crafting fun.

When you subscribe by November 10, we’ll send you our specially-designed box filled with everything you need for a holly-jolly, handmade holiday.

  • November’s kit gives you everything they need to make plenty of those! (10 cards; 5 of 2 unique holiday designs.)
  • Hint: The box is a great sneak of what’s inside!
  • Coordinating colors:
    • Cherry Cobbler, Crumb Cake, Garden Green, Gold, Soft Suede, Very Vanilla, Whisper White

Remember, a subscriber gets all of this PLUS an exclusive stamp set AND an ink spot—all for $19.95 (shipping included).

Want more cards? Increase the amount of kits you’ll receive – you can even get one so a friend can craft with you or as a gift.

The Details:

  • New subscribers must subscribe by November 10 to receive the holiday kit.
  • Canceled subscribers must enter active status by November 10 to receive the holiday kit. (Simply Log In to your account and update your information)
  • Current subscribers must remain active through November 10 to receive the holiday kit.
  • Product availability may be limited toward the end of the subscription period.

Click HERE to subscribe and get my Paper Pumpkin Perks!

You can also purchase a prepaid subscription – but make sure you set up your account and put your code in before the November 10th deadline or you won’t receive the November kit.

Click here to order your Stampin’ Up! Products online 24/7! (US only)

Shop at my Online Store and use Host Code W2NX46E9


Click Here to learn more about using the Hostess Code If you order Online make sure your profile information is up to date and you’ve allowed me to contact you

Stampin’ Blends Holder

I’m loving my Stampin’ Blends and as my collection has grown I’ve needed to find a better way to hold them. And since I’m a very visual person I wanted to be able to see the colors easily too, rather than them laying in my drawer. Here is what I came up with after checking out my options.
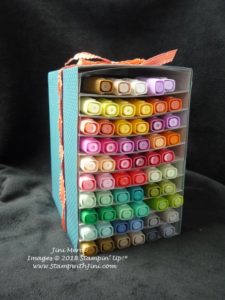
Want to see how I made it? You’ll need just a couple of things: a package of our Acetate Card Boxes, Tear & Tape,  tag board (such as Designer Series Paper backing), and 12×12 Designer Series Paper of your choice

I will say I have a couple of things I would do differently. I used the white tag board from our Designer Series Paper. I found this was not stiff enough and would use our Glimmer Paper or Specialty Designer Series Paper backing the next time to give it more support. I would also add card stock strips to each layer so that see the color and so I know where to place my markers when I’m finished. (Since each shelf holds 3 combo sets I’d simply cut the 3 colors for each shelf and add them to the top of the heavy tag board to make them pretty!)

(I’ve given you the measurements I used for this project. Just know if you use the thicker tag board the measurements will change a bit so you’ll want to modify the measurements so that they work for you.)

Or if you make it like mine you could lay it on it’s side so the Blends stacked on each other which would help the sagging since the weight would be on the small edge of the Acetate Card Boxes.
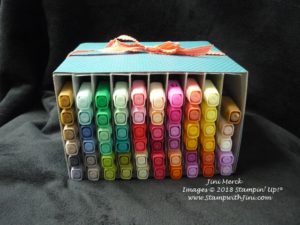
Here is how I made mine:

  1. I cut the one flap end off of each box. I measured the box and cut my board backing. (4 1/2″ x 5 3/4″)
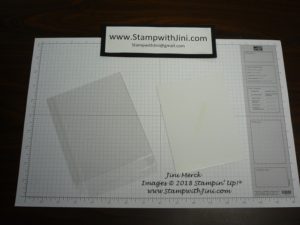
2. I repeated this for the number of boxes I wanted. I did the complete package so I had a bit of room to grow.

3. I added Tear & Tape to the tag board backing and then adhered them to each box.
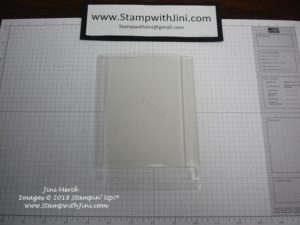
4. I then assembled the boxes
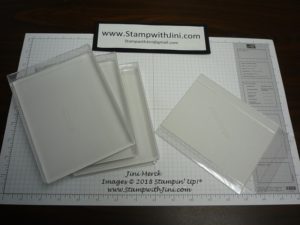
5. Added Tear and Tape to the back side of the tag board backing and stacked them together

At this point I measured the tower of boxes.

5. Cut the tag board sides, and top and added more Tear and Tape. (7″ x 5 3/4″ for sides and 7″ x 4 1/2″ for back)
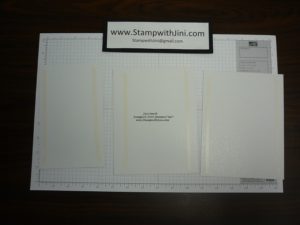
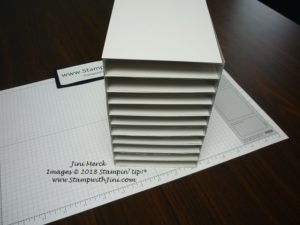
6. Cut another piece for the bottom and added it with Tear & Tape
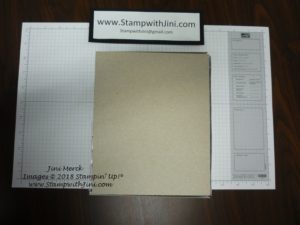
So that now my tower looked like this
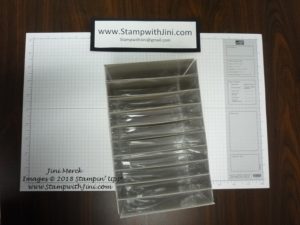
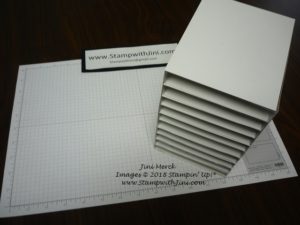
7.  I took some clear packing tape and taped the seams together on all the sides. This gave me some stability and finished the edges so they were clean.
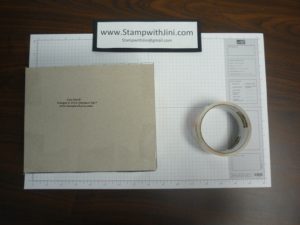
8. I started to decorate my tower. (I chose some retired Island Indigo Designer Series Paper since it matches my crafting space and all of my storage items are that color at this point.)

9. I measured the back of the box with enough to wrap around it a bit. Adhered it to the back and sides and then the bottom and top of the tower. Trimmed the corners. Added some more Tear & Tape to the side flaps. ( 12″ x 6 1/4″)
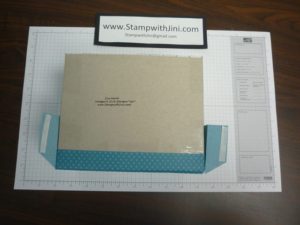
10. And adhered things down.
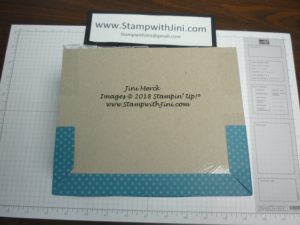
11. Now that the back was done I could move on to the sides – Because I wanted the fewest seams to show I measured two side panels that would have a bit of over hang and wrap the side and top/bottom completely. (5 3/4″ x 12″ scored 1/2″ on one end)
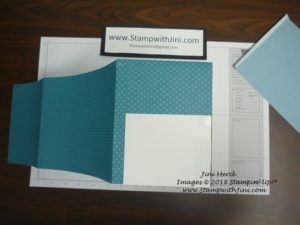
12. So I added some tear and tape to the top section and started to wrap around my tower
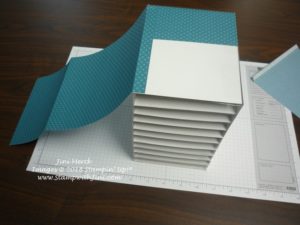
scoring with my fingers as I went.

13. Then added a second piece. Adhering again only on the small flap that would be the bottom of my box.
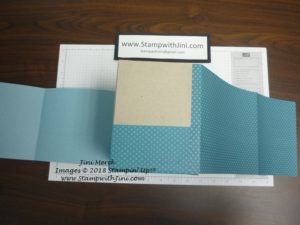
At this point I could wrap the second piece around to make sure things lined up the way I wanted them too. Making sure that the seams were flat and the edges lined up.
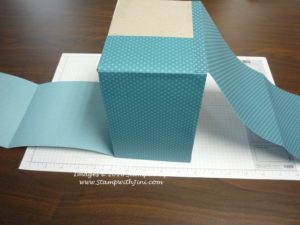
14. Now I added more Tear and Tape along the edges where I wanted it and Multipurpose Liquid Glue on the center areas. Then I carefully adhered each side down starting the the bottom (since I wanted the top seam to look the best.)
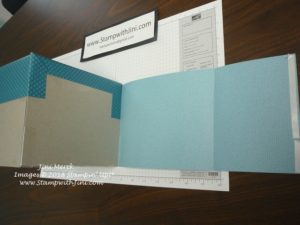
15. Then I repeated the process for the top piece – added more adhesive  and began wrapping it.
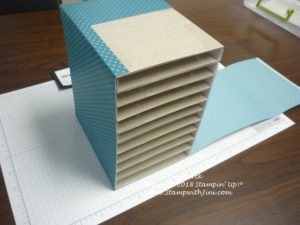
 

Once everything was the way I wanted I wrapped a ribbon around the tower as a handle so that I could easily lift it to move the tower.
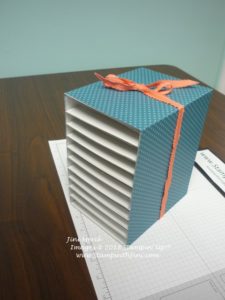
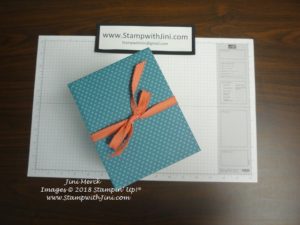
That’s it. I love the fact that this tower can be customized the way you want it – make it as tall or short as you’d like. Even make two 5 box towers and attach them to each other! The options are unlimited.
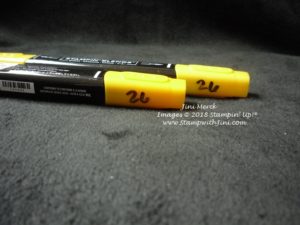
And a quick tip for you: Number your Stampin’ Blends – I’ve put a number on each cap with my Sharpie so that I can quickly see which ones go together. So for instance my Light & Dark Mango Melody has the number 26 on them. Mine happen to be in the order I got them – but you can number them any way you would like.


Supplies: 

Accessories: Acetate Card Boxes (1446258), Tear & Tape (138995), and  Multipurpose Liquid Glue (110755)


Click here to order your Stampin’ Up! Products online 24/7! (US only)

Shop at my Online Store and use Host Code W2NX46E9

#imbringingbirthdaysback with Falling for Leaves

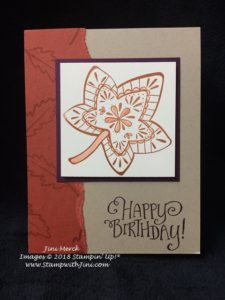
Today’s card is one I made to send out for my October birthdays – the set just seemed to be a perfect choice with this beautiful maple leaf.

This stamp set as wonderful on its own, but also has a coordinating die set, Detailed Leaves Thinlits Dies which gives you even more options.

I’ve made a quick tutorial for you.

Falling for Leaves October Birthday PDF

If you’d like a birthday card from me too, why not email me your name, address and birthday and I’ll be happy to mail one to you!

Enjoy!

Supplies: 

Stamp Set: Falling for Leaves (147680) and Better Together (141733/141736)

Inks: Cajun Craze Classic Ink (147085) and Blackberry Bliss Classic Ink (147092)

Paper: Crumb Cake Card Stock (120953), Cajun Craze (119684), Blackberry Bliss (133675) and Whisper White Card stock (100730)

Accessories: Blender Pens (102845)

*Falling for Leaves Bundle (147921)

Click here to order your Stampin’ Up! Products online 24/7! (US only)

Shop at my Online Store and use Host Code W2NX46E9
 

Click Here to learn more about using the Hostess Code If you order Online make sure your profile information is up to date and you’ve allowed me to contact you

Paper Pumpkin’s Flash Sale Is Here!

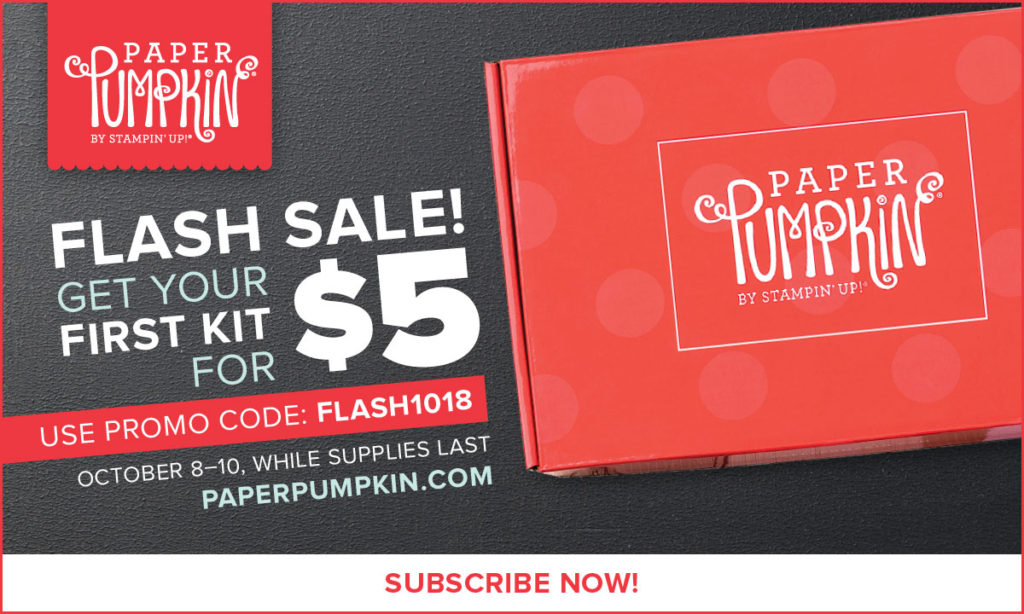
Paper Pumpkin has a LIMITED NUMBER of October kits to offer at this special introductory rate.

  • The flash promotion price for new subscribers is $5(US)
  • The flash promotion starts October 8, 2018
  • The sale will continue until our supplies run out or the October subscription period ends on October 10, whichever comes first.
  • If our supply runs out before October 10, we’ll end the sale and automatically begin accepting new subscribers for November (which features our one-of-a-kind, exclusive holiday kit in a specially-designed box).
  • Enter the code FLASH1018 before the sale ends to receive this special introductory price.

Not only will you get a FANTASTIC kit you’ll also get my Paper Pumpkin Perks which includes a FREE monthly craft time. Contact me for any questions or sign up today HERE! Join with a friend and craft together.

Click here to order your Stampin’ Up! Products online 24/7! (US only)

Shop at my Online Store and use Host Code W2NX46E9


Click Here to learn more about using the Hostess Code If you order Online make sure your profile information is up to date and you’ve allowed me to contact you