Fun, colorful and a clean and simple layout – 3 things I love and the Silly Safari Stamp set makes it 4! Any set with animals is always fun to work with for me. How about you?
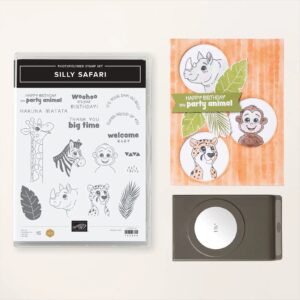
The Silly Safari Stamp set (165254) has big bold images that are great for coloring with our blends and since giraffes are a family favorite I chose to use it as the focal point for today’s card.
This card done in our 2025-2027 In Colors uses my card sketch #9 which I’ll share with you below the video tutorial in case you’d like use my sketch resource for your paper crafting too.
My post is short and sweet today as we head into a long holiday weekend which I hope you enjoy what ever you choose to do. So without further delay here is the video tutorial for you.
I’m loving the new 2026 In Colors. How about you? There is nothing like new color to freshen up our color pallet and so I find myself reaching for them and trying different combinations. So today’s tutorial uses two of our NEW In Colors Golden Glow and Peaceful Pine to create a Get Well Card for a family friend.
I’ve chosen to pull out the Friendly Foliage stamp set (Online exclusive 167021) and a simple technique for this card. Don’t you just love the sentiments in this set – a little bit of everything that we need to create those special cards.
I’ve chosen to team it up with the now retired Textured Notes Dies for this technique, but you could use any die set you choose or shape for that matter. I wanted a rectangle since it mimicked the outline on the stamped image.
Want to see how I created this card? Why not check out my video tutorial and PDF with a supply list, measurements and more.
Friendly Foliage Masking Technique Card Tutorial PDF
Need a quick and cheerful card to say hello to a friend? Have you seen the All Aflutter Bundle (167570)? It’s got some wonderful all occasions sentiments.
Today’s card uses this fun Bundle found in the NEW 2026 May-August Mini Catalog and the punch makes it so easy to create this fun little butterflies quickly. And it’s a two-step stamp set so you can add colors to your images so quickly like I did today.
The monochromatic Painted Patterns Designer Series Paper makes a great back drop and since it has all 5 In Colors it’s also a great way to build your color collection too.
I’ve got a quick video tutorial for you so you can make one too! Why not check it out?
And of course here is a PDF with the supplies list, measurements and more!
It’s that LIVE, a new Mini and the NEW May Online Exclusives and so I’ve got some of my organizational items for you along with a couple of tips videos to share.
First, the Designer Series Paper Charts – have all the colors, item numbers, etc. all in a quick and easy chart. Whether you hang the chart for quick reference or cut the chart up and attach it to your storage it gives you everything in one spot so you don’t have to keep looking it up. And I’ve got both the Mini & Online Exclusives together on just one chart for May.
And today I’m going to share how I keep my stamps organized in the new cases, we’ve had them a while and I find I want to make sure I’ve got everything on the plastic sheet before I put it back. This little trick helps me do that.
Originally I tried stamping them onto the inside of the insert, but I found that to be more time consuming and didn’t always work well since it has a slick coating. This is working better for me and is more consistent.
I also wanted to share a quick tutorial for how I’ve labeled the NEW magnetic ink pad cases. I’m really loving the ease of opening these cases and think you will too.
There is a learning curve to these new felt stamp pads but if you are used to using the StazOn or Memento Inks you’ll want to ink up your stamps the same way. “Walk the stamp” around the pad or you can twist and tap to apply ink pad the first time and then “walk it”. A bit of VersaMark will help hold the ink better too if it is a solid image. Simply add a layer of VersaMark first and then add ink, no need to clean in between.
And of course, as always when you receive your new photopolymer stamp set you’ll want to “season” it. How do you do that? I run them along my jeans several times to help. Or I use an eraser over it and then clean off the residue. Is there a tip you use that works well for you? Why not leave me a comment and let me know what works for you?
Then stop back by I’ll be sharing some of my other organizational items that I use.
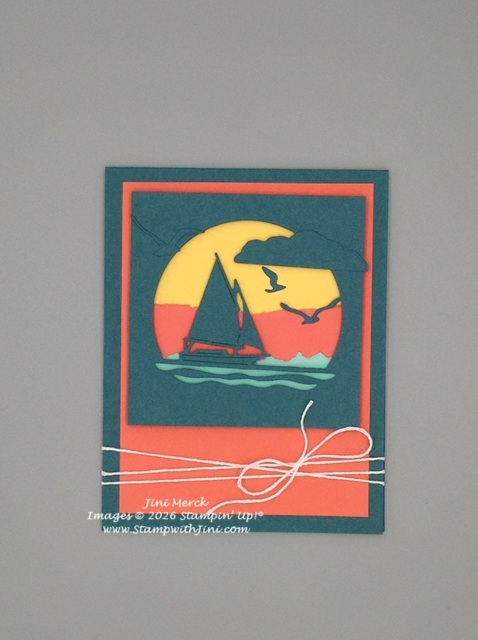
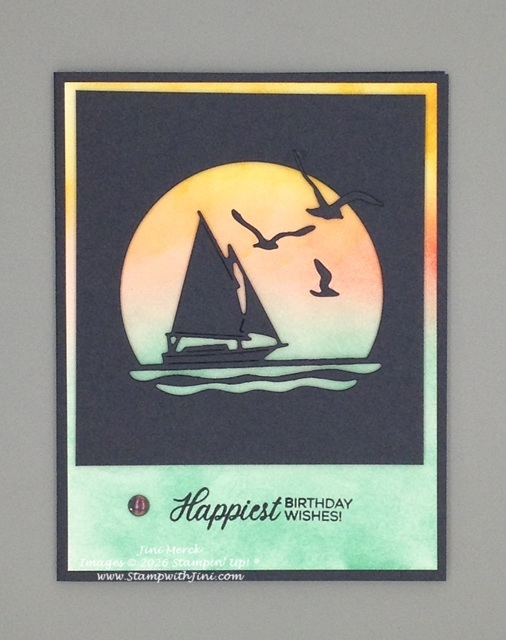
Today’s card uses a quick and simple technique that is so easy to do. It’s one of the first techniques I used when I learned how to stamp as it is an easy way to add color to your projects.
This card creates the feel of the setting sun with just two colors and a simple image. These type of cards I find are great for the guys in my life.
Want to see how I created this card? Check out my video tutorial.
And of course here is a PDF tutorial for you too.
Loveliest Tree Painters Tape Technique Birthday Card Tutorial PDF
Enjoy! And then stop back by next week as we get ready to launch the NEW 2026 May-August Mini Catalog!
I love a quick and simple card sketch and today’s throw back Thursday uses my Card Sketch #2 that I’ve shared with you earlier. So here is a bright cheerful spring card using the Pretty Florals Designer Series Paper on our Last Chance List.
Clean and simple this layout makes showing off our Designer Series Paper so simple. And I love the fact our papers give us an easy way to see what colors work together simply.
Check out this quick video tutorial I made for this card along with the PDF and PDF for the Card Sketch too!
And if you love this paper and the In Colors I’ve used you’ll want to make sure to get yours before they are gone these products are while supplies last.
Today’s card is perfect for spring and reminds me of my mother who always looked forward to those first flowers popping up in the spring.
This card uses my Card Sketch #2 making it a great way to create quick and simple cards like this one that highlight our Designer Series Paper. I simply did this card in landscape rather than the portrait version.
Here is a quick video tutorial showing you how I created the card and PDF for both the card and Card Sketch.
While this set is part of a money saving bundle and includes a circle punch I’m only using the stamp set for this card.
Bright and cheerful it’s perfect any time of year and of course who doesn’t love a giraffe? Do you ever stamp onto your Designer Series Papers? Check out the upper panel of Darling Duckling Designer Series Paper that I’ve used for this card. It’s added not only color and texture to the top of this card but also a great backdrop for the foliage I’ve stamped too! Why not give it a try?
Here is my video tutorial for you and a PDF with the supplies, step by step directions, and even the video link so everything is in one place when you are ready to craft.
As I mentioned this card uses my Card Sketch #13. These Sketches are great when you need a little inspiration. I’ve been sharing them with you for a while and if you’d like to make them as a reference for you’re crafting too I’ve got a hand PDF that gives you the measurements and more. Put them on a ring or make this little crate I’ve shared with you to keep them on your desk and have them at your finger tips.
Use the color combinations listed on the PDF and you will have a reference for color combos too!
It’s that time of year – as we say goodbye to our 2025 Annual Catalog and 2024-2026 In Colors I thought I shared a card using the New Stampin’ Positioner (available in the May-August Mini) and one of our Last Chance Stamp sets, Thanking You stamp set (Last Chance 163718).
I love this kind of stamp since this big bold image makes creating thank you cards sooo simple! Check out today’s card highlighting this stamp that is leaving.
This card uses a easy heat embossing technique that allows you to have any embossed color that you’d like to heat emboss in. AND the Stampin’ Positioner (167768) makes this technique super easy.
Here is my video tutorial for you sharing this fun little card.
And of course a PDF with the link, supply list, and more!