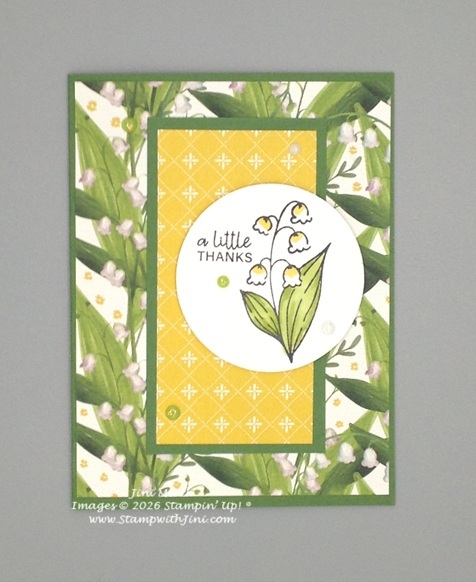
Do you love seeing those little white bells? I know I always did as the leaves poked their heads out in the spring under my oak tree. The white bells always meant the beginning of summer as they bloomed after school ended in June.
I love the way a Suite gives us all kinds of goodies to use that coordinate!
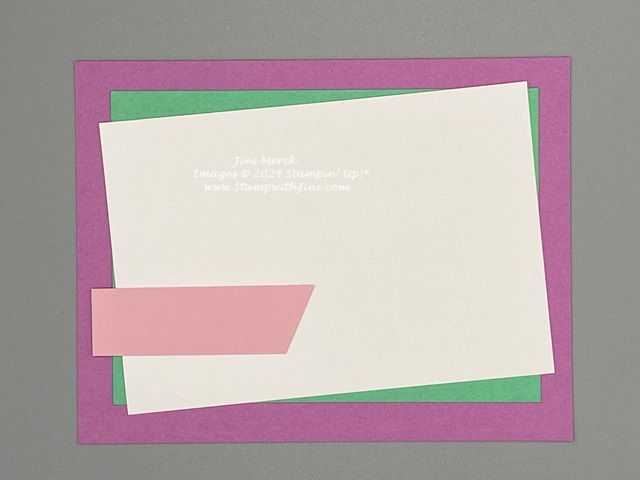
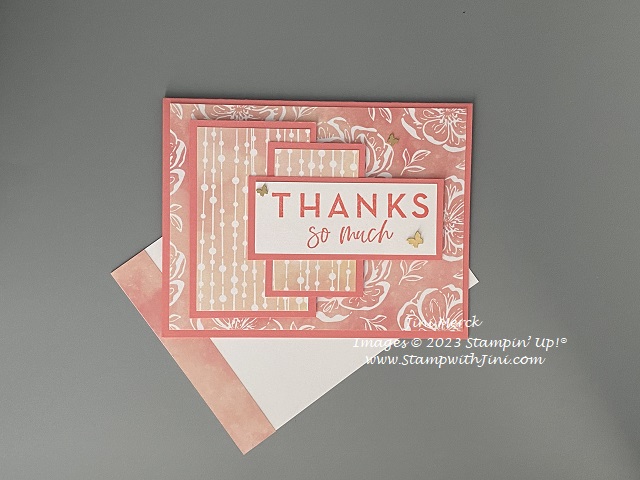
Check out today’s card uses both side of this lovely Designer Series Paper found in the Suite.
Bright and cheerful these little flowers send a little note of thanks. And since this card uses one of my Card Sketches you’ll be able to create it too as you craft.
Here is a video tutorial sharing how I created this card.
And a Card Sketch for your convivence. Whether you print the PDF for a binder or create the little card to put in the crate I shared with you or simply on a ring the choice is yours!
If you like this idea of Sketches to be inspired why not check out my Sketches category to see more sketches that you can use too? Or simply search Sketches with the magnifying glass.
It’s that time of year – as we say goodbye to our 2025 Annual Catalog and 2024-2026 In Colors I thought I shared a card using the New Stampin’ Positioner (available in the May-August Mini) and one of our Last Chance Stamp sets, Thanking You stamp set (Last Chance 163718).
I love this kind of stamp since this big bold image makes creating thank you cards sooo simple! Check out today’s card highlighting this stamp that is leaving.
This card uses a easy heat embossing technique that allows you to have any embossed color that you’d like to heat emboss in. AND the Stampin’ Positioner (167768) makes this technique super easy.
Here is my video tutorial for you sharing this fun little card.
And of course a PDF with the link, supply list, and more!
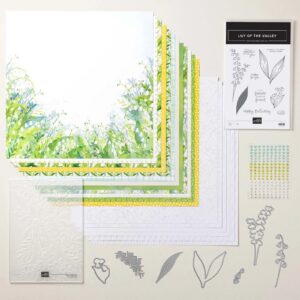
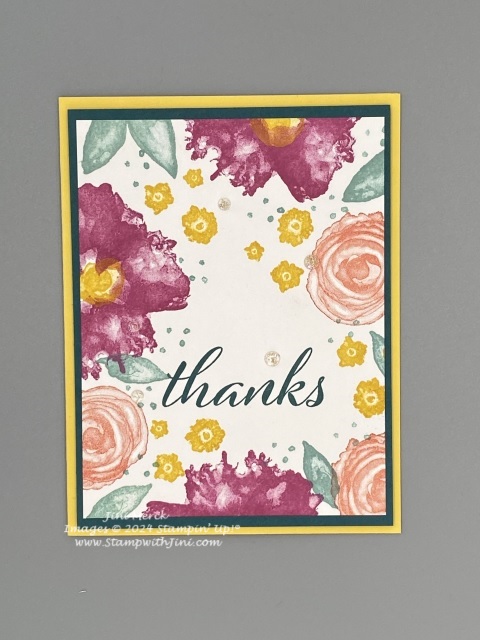
This paper is part of the Florals in Bloom Suite (165193) that I’ve been sharing with you. The paper is cheerful and perfect for creating with the In Colors and teaming up the old and new.
This paper draws me in with it’s lovely images and colors and today’s card layout makes it shine. The sentiment while from the Bee My Valentine stamp set (162457) works wonderfully with this paper for a thank you card that has a wonderful bright and cheerful feel to it.
Today’s card uses the fun In Color Petunia Pop and our elegant Thoughtful Designs Specialty Paper along with a quick and simple technique.
After all this time of year we need thank you cards for all the special events happening. I’ve created some of these for my daughter who recently got married outdoors at a waterfall so I think they went well with the outdoor feel of the wedding.
Here is a quick video tutorial for you along with the PDF tutorial that has the link and measurements along with the full supply list.
Shop at my Online Store and place an order for $60 or more in product receive a FREE Gift from me; my Unbounded Beauty Card Class PDF and a supply kit to create the projects while supplies last.
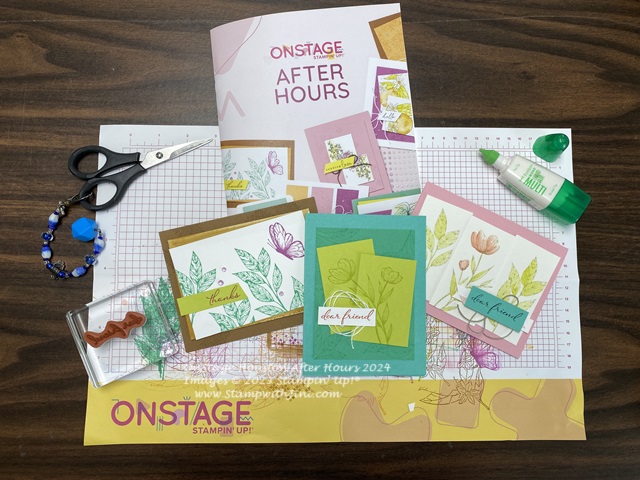
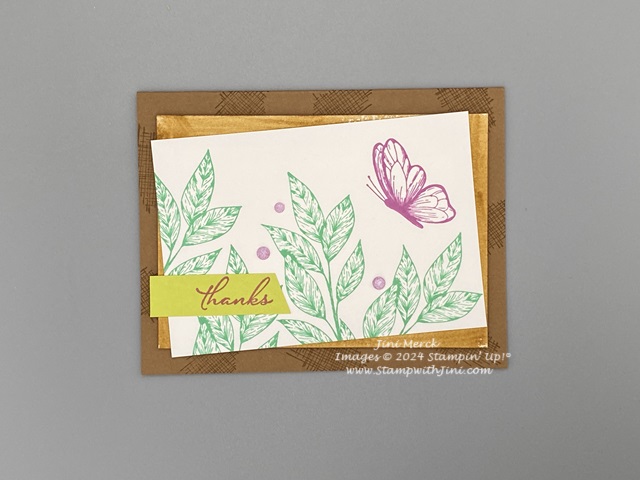
and wonderful all occasion sentiments and I knew I’d enjoy creating with it as soon as I saw it and stamped with it at our OnStage After Hours event in Houston.
Today I’m sharing the 3rd card we did for our Make n Takes during that event.
This event was a lot of fun and was our first chance to play with the new 2024 In Colors. This card uses a fun way to add texture to your project, water color!
Can you see it? Beneath the stamped panel there is a layer that has been given a simple wash of Pecan Pie. So simple but makes a big impact. Check out my video and pdf tutorial and try it yourself!
As always I’ve included a full supply list, measurements, and step by step instructions. The PDF even has the video link so everything is handy and in one place for you when you’re ready to create.
Spotlight on Nature OnStage Thank You Card Tutorial PDF
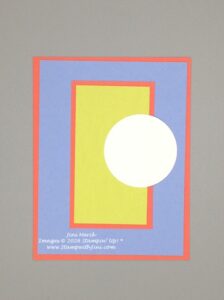
I’ve also got another Card Sketch for you today for you Card Sketch collection to help you create that Stampin’ Up! shared with us.
Are you enjoying my Card Sketches? Did you know that Stampin’ Up! has also provided card sketches in the Annual Catalog? Why not check them out. They are listed on page 22 at the bottom and then used throughout the catalog with different projects too.
Shop at my Online Store and use Host Code XM7XH6F2 with a product order of $50 or more and receive a FREE Gift from me; my Card Kit and my In Color Card Class!
Today’s card is bright and cheerful and it’s a great one for beginner stampers since the Artistically Inked stamp set (Retiring 154542) is a two step stamp set that has wiggle room when lining up the images since it is designed not to match up perfectly.
This stamp set has some great sentiments too for your basic card giving needs and it’s on our Last Chance List so it’s only available while supplies last.
I’ve love the colors I used for this card and the way it turned out.
I’ve whipped up a quick video tutorial for you along with a PDF that includes measurements, supply list and more!
Enjoy! And if you’d like to see more tutorials I’ve shared in the past with you using this set, simply use the magnifying glass to search for the name of the set Artistically Inked stamp set (Retiring 154542).
Shop at my Online Store and use Host Code VFNSEWFD with a product order of $50 or more and receive a FREE Gift from me; my Hey Chuck 2023 In Color Card Class!
I use a ton of thank you cards during the holidays as I like to send a card to family and friends to show my appreciation. After all they showed me I was special enough to take the time and I want to show them how special their thoughtfulness was to me. How about you? Do you send thank you cards during the gift giving season? Or want to create a lovely gift for someone? If you do you’ll enjoy today’s project as it is a quick and easy card to make a bunch of quickly.
I’ve used the Good Feelings Stamp set (158737) for this project as it is a sentiment set that has these great bold sentiments perfect as a focal point on a card like this.
Not only does it had bolder color choices for the holidays, it also has a softer color pallet too so you can use it year round simply by changing the card base and mat colors. And of course the Blooming Pearls (162238) since they come in an assortment of colors work with all of them!
Want to see my card?
Like it? Want to make some of your own?
Here is a quick video tutorial for you and of course my PDF that includes the video link, full supply list, measurements and more!
Shop at my Online Store and use Host Code GXUTXA33 with a product order of $50 or more and receive a FREE Gift from me, my Meandering Meadow Card Class including 2 fun folds!
Thank you cards are always great to have on hand and the Kindest Expression Stamp Set (161415) is great for today’s card with it’s bold size and lovely font.
Shop at CLICK my Online Store and use Host Code VPZ67VCD with a product order of $50 or more and receive a FREE Gift from me, my Abundant Beauty Step It Up Card Class!
Today’s card uses the Sweet Songbirds stamp set (158721) and while it is a quick and easy fun fold it uses some bold color to really make it pop.
Done in Blueberry Bushel and Tahitian Tide it’s bright and cheerful. And while this stamp set has a coordinating Songbird Builder Punch (158726) giving it even more versatility this card is done with simple stamping. My daughter is a music teacher so I’m always creating thank you cards for her and figured this one will work well for her thank you cards that she’ll need for band camp this month. Want to see how I made it? Here is a quick Video and PDF Tutorial for you.
if you’d like to learn more about this fun little stamp set why not check it out in my Online Store.
The PDF has a full supply list and the measurements for you so you can make some too.
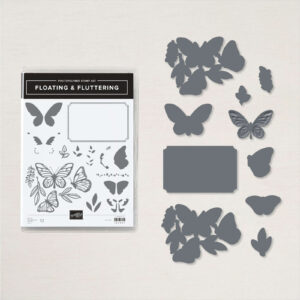
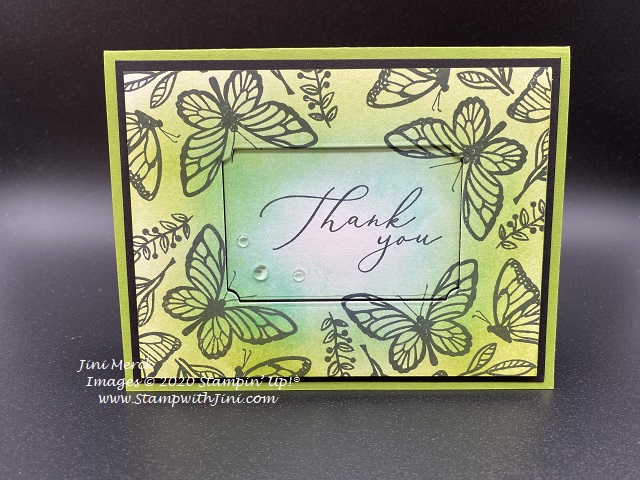
Today I’d like to share another tutorial with you. I’m running a bit behind because my internet is having issues. So please bear with me as I work through this problem over the next few days. Today’s card uses the Floating & Fluttering Bundle found in the 2021 January – June Mini.
This bundle of products doesn’t contain sentiments so it was perfect to team up with the FREE Sale-a-bration stamp set Heal Your Heart (Sale-a-bration 152291) that you can earn when you purchase this bundle and spend $50 in product.
Want to see the card now? I chose one of my favorite color combos for it – Coastal Cabana and Granny Apple Green.
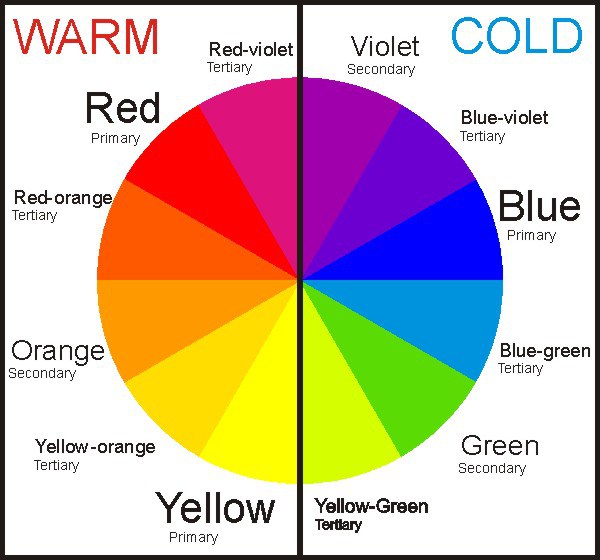
When doing a technique like blending colors you’ll want to choose colors next to each other on the color wheel rather than across from each other for a more pleasing feel. If you use colors across from each other you’ll get a more “muddy” look when you blend them.
If you don’t remember your childhood art class basics, there are primary colors Red, Blue, and Yellow.
When primary colors are mixed with the color next to them you get the secondary colors, orange, violet, green. And of course, if there is more of one of the primary colors in the mix that is more dominate, you’ve got the tertiary colors or 3rd set of colors.
If you’ve been stamping for a while you probably do this intuitively with your color combinations without even realizing it as we all have color palettes we use repeatedly because they make us happy.
On to the tutorial. I’ve created both a video and PDF for you that I wanted to share.
Floating & Fluttering Thank You Card Video Tutorial
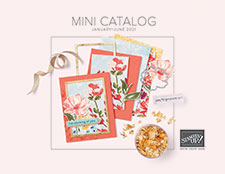
And just a reminder if you haven’t received your January – June Mini Catalog or Sale-a-bration brochure yet please let me know. You can email me at stampwithJini@gmail.com and I’ll get another out to you.