Hostess Appreciation Brunch

This past weekend I held my Annual Hostess Appreciation Brunch – I love to say thank you to my Hostesses with a little pampering and a special project. After all I couldn’t do this without you!

Today I wanted to share with you a couple of pictures from the Brunch.

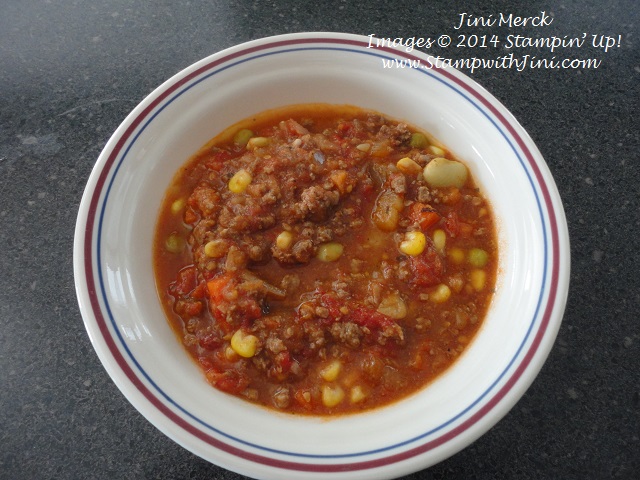
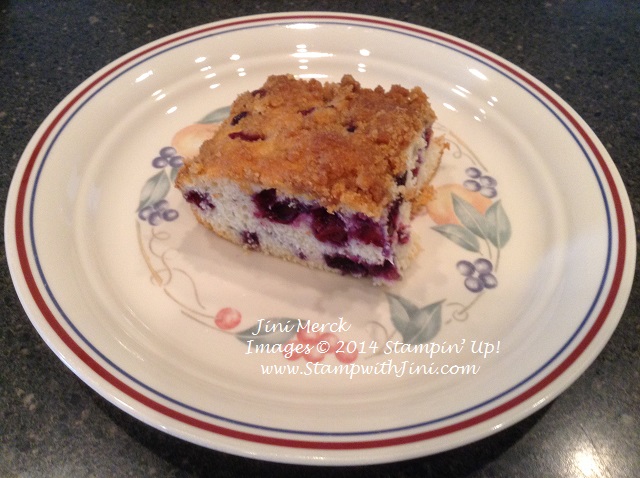
This first picture is of the brunch table.

Hostess Appreciation Brunch 2014 food table

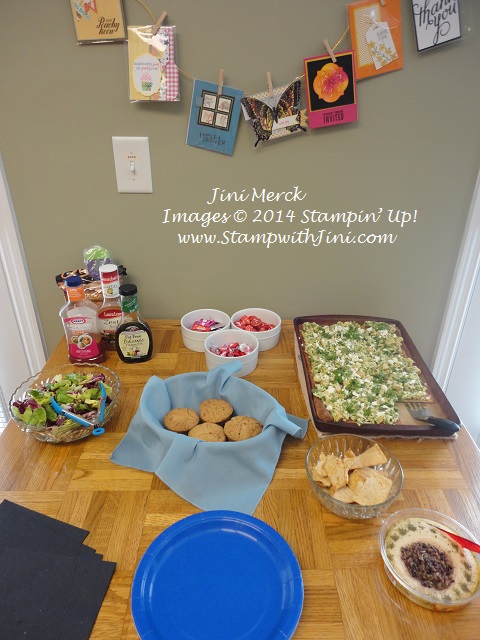
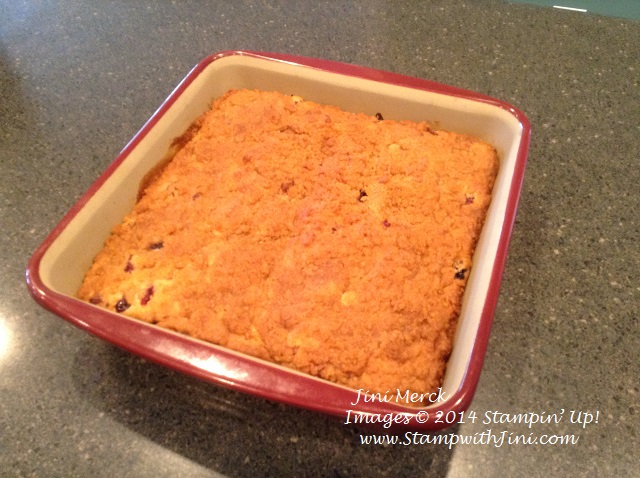
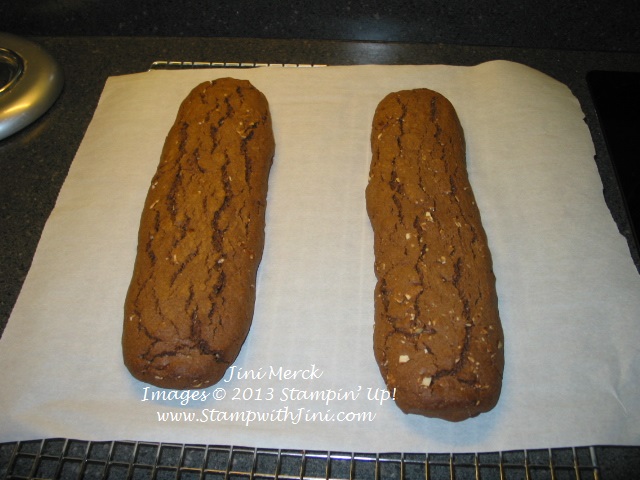
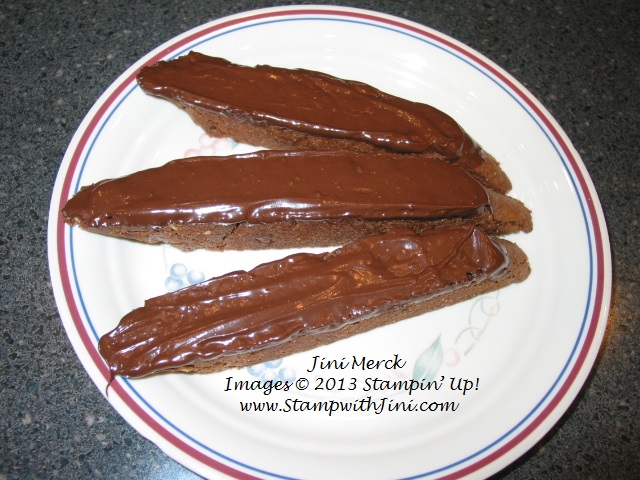
I made one of my newest favorite recipes – Greek Chicken & Artichoke Flatbread. It’s so easy to put together and yummy I thought I would share the recipe with you.

Greek Chicken & Artichoke Flatbread

1 pkg. (11 or 13.8 oz.) refrigerated thin crust pizza crust

1 1/2 c. fresh parsley leaves, divided

2 garlic cloves, peeled

1 tsp. lemon zest

1 jar (12) marinated artichokes, drained

1 tbsp. olive oil

1/4 tsp. salt

1/4 tsp. pepper

4 oz. feta cheese, divided

8 oz. mozzarella cheese, grated

2 c. diced cooked chicken breast

Preheat oven to 400 degrees. Brush large bar pan with oil. Unroll pizza crust onto pan and press to edges. Bake on lowest oven rack 17-20 minutes or until top is golden brown.

Coarsely process 1/2 c. parsley in food processor, remove and set aside for garnish. Add remaining parsley and garlic to processor; process until finely chopped.

Add lemon zest, artichokes, olive oil, salt, pepper, and half of the feta to processor; process until coarsely chopped.

Combine half of the mozzarella, artichoke mixture and chicken; mix well. Microwave, uncovered, on High 1 – 2 minutes or until hot, stirring once.

Sprinkle cooling crust with remaining mozzarella. Top with chicken mixture; spread to edges. Cut flatbread into 16 squares. Crumble remaining feta over top and sprinkle with reserved parsley. Serve.

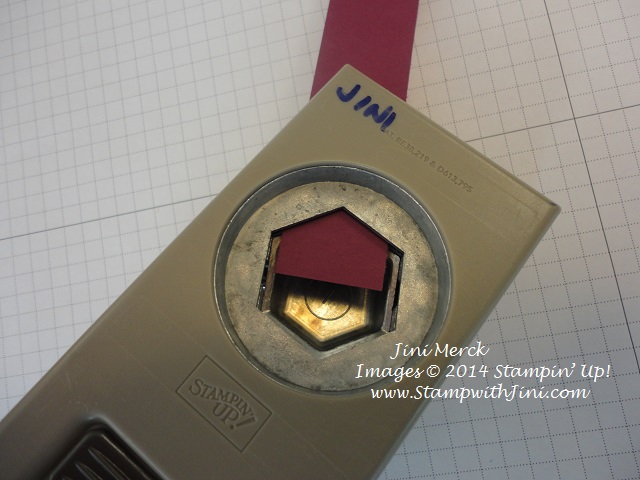
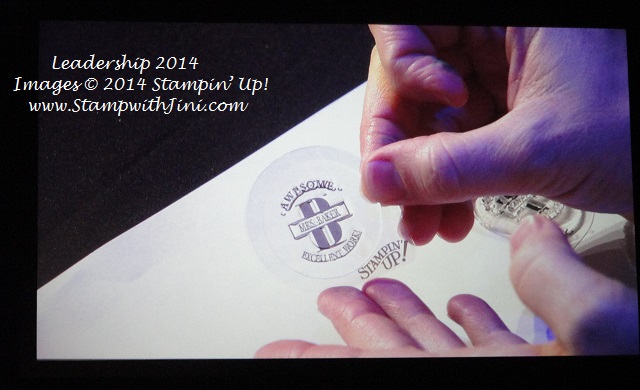
And here is another of Shirley working on her project.

Hostess Appreciation Brunch 2014 Shirley

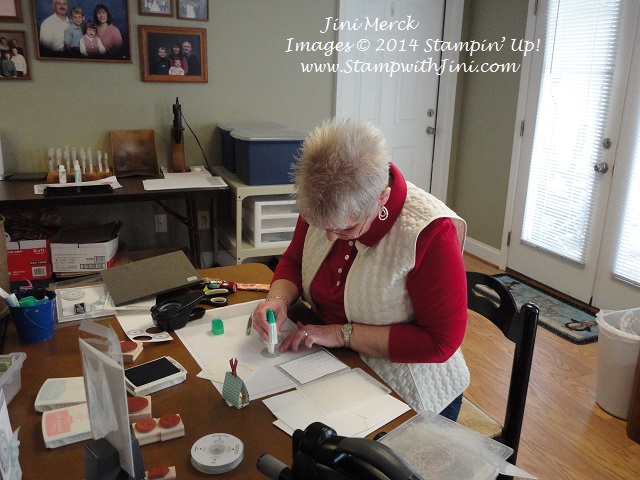
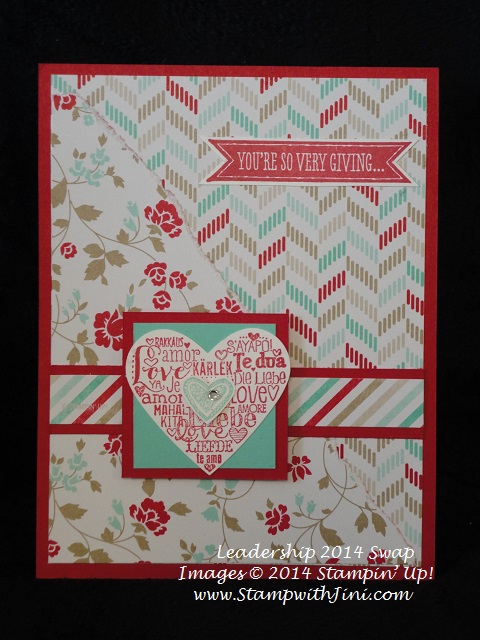
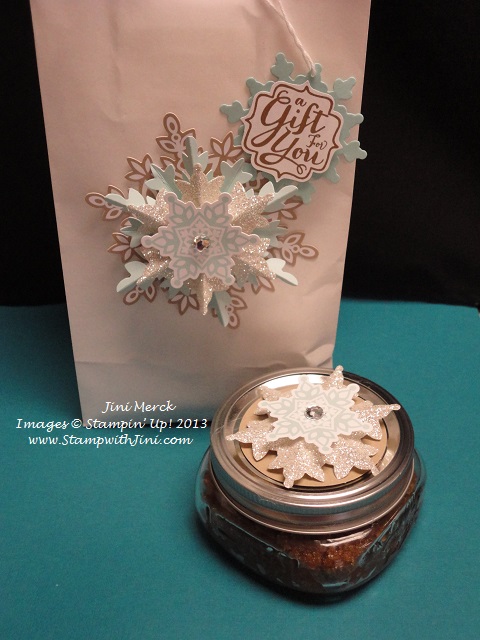
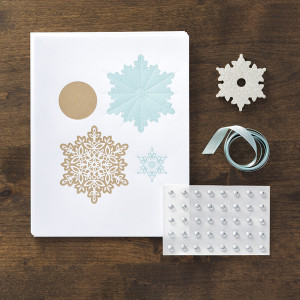
Everyone who attended made a gift set of cards using one of our Sale-a-bration stamp sets.

Would you like to be pampered too? It’s easy to become one of my Hostesses – Just hold a party for you and your friends. Or qualify for Hostess Benefits when you place an individual order.

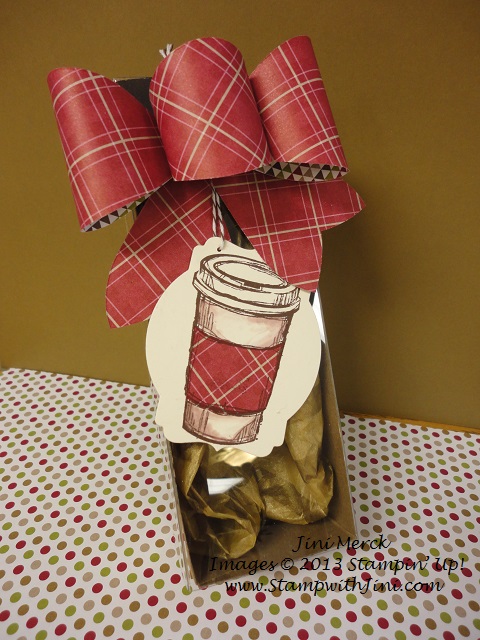
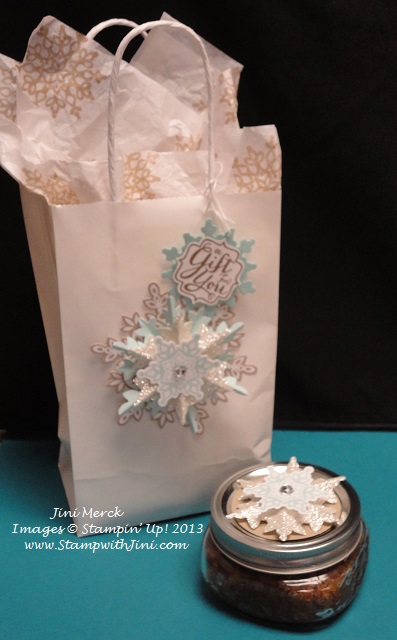
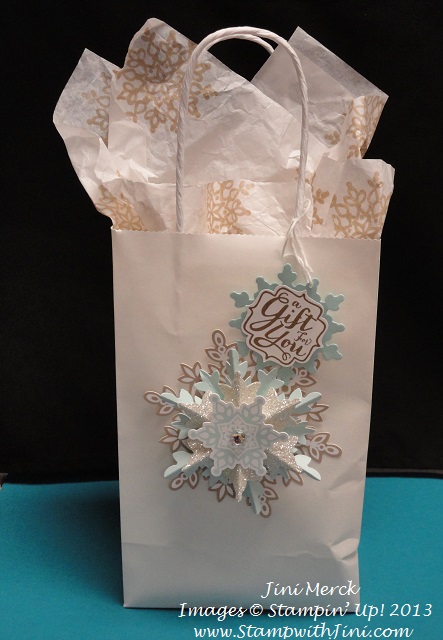
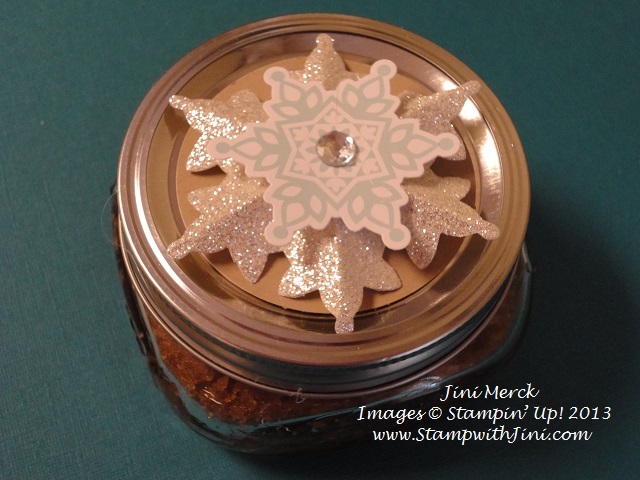
Stop by tomorrow when I’ll be sharing with you the little treat items that I made for everyone. I’ll be filming a quick video tutorial for them later today to share with you.
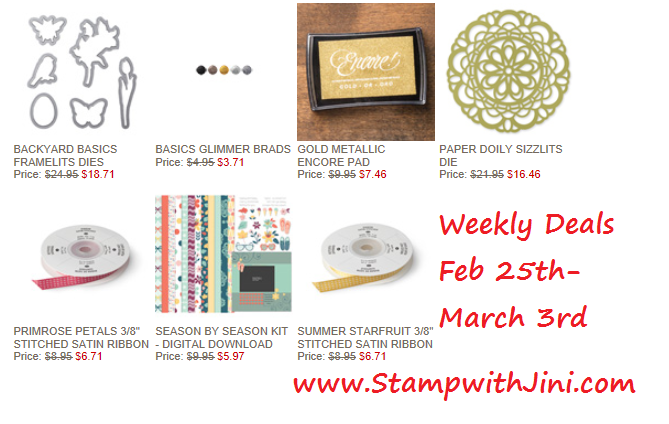
WEEKLY DEALS

Check out these new Weekly Deals.

Weekly Deals Feb 25 2014

TUESDAY DIGITAL DOWNLOADS

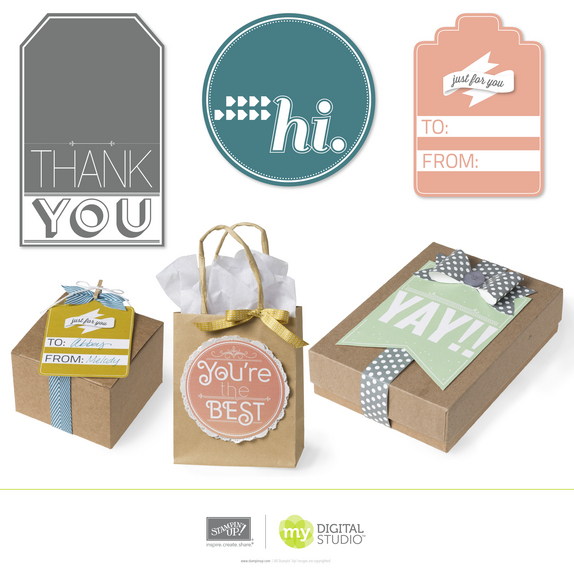
Check out these great new My Digital Studio Downloads just released today!

Just Sayin’ Stamp Brush Set (item 137118)

MDS Just Sayin' Stamp Brush Set

My Digital Class Party Party Ensemble (item 137116)

MDS My Digital Class Party

My Mother Stamp Brush Set (item 137117)

MDS My Mother Stamp Brush Set

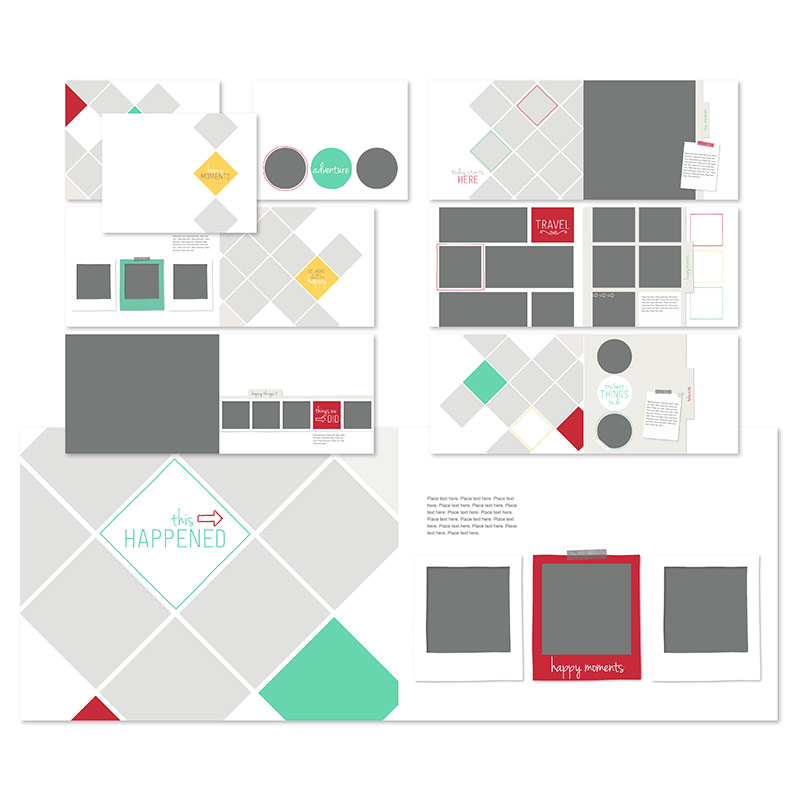
Today Starts Here Photobook Template (item 137120)

MDS Today Starts Here Photobook Template

Word Bubbles Punches (item 137119)

MDS Word Bubbles Punches

Want to see more of our Digital Downloads? Click HERE

Click here to order your Stampin’ Up! Products online 24/7! (US only)

Hostess code UQJ7HZ76

Click Here to learn more about using the Hostess Code

Clearance Rack (while supplies last)

Weekly Deals (Special ends Monday, March 3rd, 2014 at 11:50 p.m. (MT)

Paper Pumpkin Special (Free 2012-2014 In Color Markers when you join now through March 31st, 2014)

New Digital Downloads


Peachy Keen

Peachy Keen is one of our new all occasions sets from the Occasions Catalog and is great for all kinds of projects. Today I’ve teamed it up with the Retro Fresh Designer Series Paper (132993) to create this quick and easy card.

Peachy Keen

I simply stamped the sentiment in Early Espresso, but think it would look great using the Early Espresso Embossing Powder too and add a bit of texture to the card. I love the quick and easy banners that you can make using the Hexagon punch (130919). Yes, you heard me right the Hexagon Punch. Give it a try, you’ll find it so easy to do.

Hexagon Punch Banners

Supplies:

Stamp Set: Peachy Keen (133110/133113)

Inks: Early Espresso (126974)

Paper: Retro Fresh Designer Series Paper (132993), Baked Brown Sugar (131296), Coastal Cabana (131297), and So Saffron Card Stock (105118)

Accessories: Early Espresso Baker’s Twine (123124)

Click here to order your Stampin’ Up! Products online 24/7! (US only)

Hostess code UQJ7HZ76

Snow Storm – Day 3

Snow Storm Feb 13 2014 Day 3

Well the storm has now moved up the east coast and has pretty much finished for us in the North Georgia mountains. The sun has come out and the temperature has started to climb a bit – which is a good thing since things are clearly starting to melt.

We woke to more snow this morning. After sleeting most of the day yesterday, snow is a good thing. We’ve got a snow sandwich on the ground (snow, ice, snow) LOL. But we have fared pretty well so far, our power only flickered off once last night.

Now the cabin fever has set in for my guys and they are itching to get out of the house. I don’t tend to get as antsy since there is always something to do. Of course, it is a great reason to go play in my kitchen and stamp room too!

Quick and Easy Vegetable Beef Soup

This mornings project was a big pot of soup for lunch for my guys. It’s great since I can use the frozen tomatoes from our garden last summer and the ground venison in the freezer. It smells heavenly while it is cooking, and even though I can’t eat it, I enjoy making it for them. They say it tastes great – so I thought I’d share the recipe with you in case you’re looking for a quick and easy vegetable soup.

Quick & Easy Vegetable Beef Soup 

1 1/2 – 2 lbs. lean ground beef

1 onion, chopped

1 ½ c. water

2 (28 oz.) cans diced tomatoes

1 ½ tsp. garlic powder

1 ½ tsp. sea salt, to taste

½ tsp. dried basil

½ tsp. finely ground black pepper, or to taste

3 ½ tsp. beef bouillon

2 (12 oz.) pkg. frozen mixed vegetables

Cook and stir ground beef in the pot until completely browned, 7 to 10 minutes. Stir onion into the meat and continue to cook and stir until the onion is translucent, about 5 minutes. Drain fat from the pot and return to medium heat.

Pour water and tomatoes into the pot. Season soup with garlic powder, sea salt, basil, and black pepper. Stir beef bouillon through the soup. Add frozen mixed vegetables to the pot, stir.

Bring the soup to a boil; reduce heat to low, and cook, stirring occasionally, until the vegetables are cooked through, 20 – 30 minutes.

That’s it – Enjoy!

This recipe is pretty forgiving and so I’ve experimented a bit with the original recipe I found on allrecipes.com. This one is my version of the original with the changes I’ve made. So far my substitution or changes have made it even better. I find you can really change things out easily to suit your preferences. I think I’ll be freezing okra next year to add to the other vegetables. The guys seem to like that and I never know what to do with all the extra okra from the garden.

Click here to order your Stampin’ Up! Products online 24/7! (US only)

Hostess code UQJ7HZ76

Click Here to learn more about using the Hostess Code

Clearance Rack (while supplies last)

Weekly Deals (Special ends Monday, February 17th, 2014 at 11:50 p.m. (MT)

Paper Pumpkin Special (Free 2012-2014 In Color Markers when you join now through March 31st, 2014)

Language of Love

What do you do when it cold or rainy outside? And it’s been that way a lot here in North Georgia – it’s winter after all. I don’t tend to get cabin fever like the rest of my family – for some reason this type of weather makes me want to bake!

blueberry buckle

Yep, I said bake. I love the way it warms up the house and enjoy smelling all those wonderful aromas as I bake. Not that my family complains – they’ve got a freezer full of goodies now.

So today I thought I would share with you one of our favorite recipes for coffee cake that uses the blueberries from the yard. Blueberries are soooo easy to grow and once they get going they give you LOTS of berries.

Freezing the extras is really easy too. Just rinse them off, lay them out on a cookie sheet, dry and pop them in the freezer. (This lets them freeze individually so that you can just pull a few out at a time.) Then place them into bags or containers. I’ll find my containers partially emptied at times, since Larry and our kids love snitching from the containers LOL. A little taste of summer year round!

blueberry buckle piece

Blueberry Buckle

Topping:

½ c. brown sugar

1/3 c. flour

½ tsp. cinnamon

¼ c. butter, softened

Mix topping ingredients together and set aside until batter is finished.

Batter:

2 c. flour

2 tsp. baking powder

½ tsp. salt

¾ c. sugar

¼ c. shortening

1 egg

½ c. milk

2 c. (1 pint) blueberries, washed and drained

Mix together sugar, shortening and egg. Stir in milk. Sift together flour, baking powder and salt; add to shortening mix. Fold in blueberries. Spread batter in greased and floured 8×8 inch pan. Sprinkle with topping. Bake at 350 degrees for 40 – 50 minutes.

Fresh blueberries are best, however you can use frozen. If frozen, do not rinse, as they will turn batter blue – just gently turn into the batter. A few extra minutes may be needed for bake time when using frozen berries. Just check for doneness with a tooth pick.

You can see one of our favorite recipes for fresh blueberries that I share with you last summer by clicking HERE.

Anyhow you want to see the Language of Love stamping project, right?

Here is a card that I received during Leadership that uses the Language of Love and So Very Grateful stamps sets from the Occasions Catalog. Karin shows another way to use the Language of Love stamp set to create a thank you card – it’s clearly not just for Valentine’s Day.

Language of Love Leadership Swap

I am hoping you can see it – but there is a torn edge on the floral pattern of designer series paper that adds interest and texture to this card.

Supplies:

Stamp Set: Language of Love (133074/133077) and So Very Grateful (133050/133053)

Inks: Real Red (126949) and Coastal Cabana (1331175)

Paper: Fresh Prints Designer Series Paper Stack (132996), Real Red (102482), Coastal Cabana (131297), and Whisper White card stock (100730)

Accessories: Full Heart Punch (119883), Small Heart Punch (19883), Bitty Banners Framelits (129267), and Rhinestones Basic Jewels (119246)

Click here to order your Stampin’ Up! Products online 24/7! (US only)

Hostess code UQJ7HZ76

NEW CIRCLE MONOGRAM STAMPS INTRODUCED

Circle Monogram Stamps Demo Banner Image

Now you can say it your way! You’re going to love these NEW Circle Monogram Stamps (132852)

Circle Monogram Stamp image

With our personalized stamps you can create a cool address label or even use it for everything from marking your territory on books or other belonging, to having a fun way to give a personalized touch to gifts and goodies.

Leadership Circle Monogram Stamps screen image

Here are just a few customization ideas (for you or for the perfect gift).

  • Address stamp
  • Thank you
  • From the classroom of (for a teacher gift)
  • From the kitchen of
  • Made with love
  • This book belongs to
  • From the desk of
  • Just married
  • Save the date
  • New Baby

What ways can you think of?

Circle Monogram Stamps Flyer image

Click HERE to see a flyer with more information

Click HERE to see it on my Online Store

This stamp is only available in photopolymer and coordinates with the 1 3/8″ Circle Punch (119860). Clear Block B (117147) is recommended for the Circle Monogram Stamps.

Click here to order your Stampin’ Up! Products online 24/7! (US only)

Hostess code UQJ7HZ76

Clearance Rack (while supplies last)

Weekly Deals (Special ends February 10th, 2014 at 11:50 p.m. (MT)

Paper Pumpkin Special (Free 2012-2014 In Color Markers when you join now through February 10th, 2014)

2014 SAB FREE Event-baner

Don’t forget to RSVP for Sale-a-bration Saturday – Click HERE to see a flyer with details

A Perfect Blend

I love to get together with friends for a cup of coffee and so when I saw this Perfect Blend stamp set in the 2013 Catalog I couldn’t resist adding it to my ever growing coffee and tea themed items. I could easily see making all kinds of gifts and cards with this cute little set that has such great sentiments.

So today I thought I would share with you one of my projects that I made using this cute little Perfect Blend stamp set. It was a gift for a special friend that held two of my homemade and oh sooo decadent chocolate-almond biscotti – hopefully she took a few minutes to enjoy them over a relaxing cup of coffee, before getting back to the hustle and bustle of the holiday season.

Fancy Bubble Bow

I made this gift box using one of our Tag a Bag Gift Boxes – these little boxes really makes things quick and easy. And I used our Season of Style Designer Series Paper since this pattern felt kind of coffee house-ish to me along with the Gift Bow Bigz L Die from the Holiday Catalog.

I made a quick video tutorial so you can see how I made this Fancy Bubble Bow below:

The Gift Bow die makes this Fancy Bubble Bow really so easy to make – And did you know that this great die is in the Holiday Catalog?

Gift Bow Die

Yikes – That means it is only available until January 2nd! So if you have been wanting one for yourself too, why not get one now before they’re gone?

I bet you’re wondering if I’m going to share the recipe, right?

This recipe was given to me by my friend Helen – so I call them Helen’s Chocolate-Almond Biscotti.

Helen’s Chocolate-Almond Biscotti

 ½ c. butter, softened

1 ¼ c. sugar

2 eggs

1 tsp. almond extract

2 ¼ c. flour

¼ c. cocoa

1 tsp. baking powder

¼ tsp. salt

1 c. almonds, sliced or chopped

Preheat oven to 350 degrees. Beat buter and sugar in large bowl until blended. Add eggs and almond extract; beat until smooth. Stir together flour, cocoa, baking powder and salt; gradually add to butter mixture, beating until smooth. Dough will be thick. Stir in almonds with wooden spoon.

Divide dough in half. With lightly floured hands shape each half into a rectangular log about 2 inches in diameter and 11 inches long; place on cookie sheet lined with parchment paper at least 2 inches apart.

Helen's Chocolate-Almond Biscotti (1)

Bake 30 minutes or until logs are set. Remove from oven, cool on cookie sheet 15 minutes.

Helen's Chocolate-Almond Biscotti

Using a serrated knife, cut logs diagonally, using a sawing motion, into ½ inch slices. Arrange slices, cut sides down, close together on cookie sheet.

Bake 8 to 9 minutes. Turn slices over; bake an addition 8 to 9 minutes. Remove from cookie sheet; leave on parchment paper and cool.

Drizzle with glaze or dip ends into glaze.

Helen’s Chocolate Glaze

Place 1 c. semi-sweet chocolate chips and 1 tablespoon shortening into small microwaveable bowl. Microwave at High 1 to 1 ½ minutes or until smooth when stirred. Drizzle or dip.

I’ve even experimented with the recipe a bit and came up with my own version for those allergic to nuts by just substituting a couple things. I thought they were pretty good too, so here you go.

Double Chocolate – Orange Biscotti

Substitute Orange Extract for Almond and Mini Chocolate Chips for almonds.

Helen's Chocolate-Almond Biscotti (2)

These biscotti are a little extra work – but oooh, sooo worth it when you sit down with your cup of coffee and start to dunk! Even Larry loves them and he doesn’t wait for the coffee!!

Hmmmm…I think it is time for a cup of coffee. How about you?

Supplies:

Stamp Set: Perfect Blend (130745/131392)

Inks: Chocolate Chip Classic Ink (126979)

Paper: Season of Style Designer Series Paper (132340) and Very Vanilla Card Stock (101650)

Accessories: Tag a Bag Gift Boxes (130927), Big Shot (113439), Gift Bow Bigz L Die (129977), Deco Labels Collection Framelits (130102), Paper Snips (103579), Bone Folder (102300), Glue Dots (103683)

Click here to order your Stampin’ Up! Products online 24/7! (US only)

Use Hostess Code UHRUCJ9X and get a special Class from me for FREE!

Clearance Rack Blitz (while supplies last)

Weekly Deals (Special ends December 23, 2013 at 11:50 p.m. (MT)

Festive Flurry Ornament Kit (while supplies last)

Need Gift Ideas Image

Festive Flurry Sugar Scrub & Gift Bag

This weekend my daughter wanted to make a couple of gifts for her college girlfriends, of course she informed me of this last minute so I needed something quick and easy.

Kaitlin decided to make them Pumpkin Spice Sugar Scrub and since I had one of our Festive Flurry Ornament Kits (item 135813) that seemed like a great place to start. So while Kaitlin mixed up the sugar scrub I got to work on the gift bags and jars.

Sugar Scrub & Gift Bag together

Here is what we came up with – In less than an hour the two of us had these great handmade gifts for her girlfriends that I think they will really enjoy.

Here is a close up of the gift bag – What did I do to create this lovely gift bag?

Sugar Scrub & Gift Bag  (2)

I used the Festive Flurry Ornament Kit to create the focal point on my bag – It was quick and simple to do with just my glue gun needed, since everything else was in my kit. So all I had to do was punch the pieces out, score and then assemble.

I used the single stamp, A Gift for You (item 134765) that I stamped in Soft Suede onto Whisper White card stock and then punched out the sentiment with the matching Label Bracket Punch. I added a Pool Party snowflake that I cut out using the Festive Flurry Framelits Dies (item 132193) to create the little tag that I hung with Whisper White Baker’s Twine on the handle.

I didn’t have any tissue paper in the color I wanted and the white was kind of blah with the white gift bag – it needed a pop of color. So to create the coordinating tissue paper, I simply took some that I already had laying around and stamped it using one of the snowflakes from the Festive Flurry Stamp Set in Crumb Cake, Isn’t it cool how you can make your tissue paper match your gift bags?

Ok so now the bag was finished and I wanted to decorate the little jars that hold the Pumpkin Spice Sugar Scrub, right?

Sugar Scrub  (4)

So I simply used the Festive Flurry Ornament Kit again – but this time I only used the two smaller snowflakes and punched a 2 1/2″ Circle from Crumb Cake as the base. Once I built my snowflake with the hot glue gun I added it to the lid using Glue Dots, of course you could also use Sticky Strip.

Sugar Scrub  (1)

Sugar Scrubs are a lot of fun to make and are very popular right now. I love the fact that you can find everything in your kitchen to mix up a batch and it doesn’t have any preservatives in it – so they are great for those of us with sensitive skin. And this Pumpkin Spice Sugar Scrub is particularly yummy – when you use it you’re surrounded with the wonderful smell of pumpkin pie!

I love to use mine in the shower, since this recipe is gentle enough you can use it for both a hand scrub or body scrub. It is a wonderful way to moisturize during the winter. Even my hubby likes to use it on his dry hands in the winter.

Want the recipe? I figured you’d would so here it is:

Pumpkin Spice Sugar Scrub

2 c. Brown Sugar

1 c. Sugar

2 T. Pumpkin Pie Spice (reduce, if desired for less intense scent)

1 c. Sunflower Oil (you can also use Safflower or Vegetable oil)

Place ingredients into bowl. Mix until well blended. Store in a air tight container.

This recipe makes enough for a pint jar and can be used anywhere on your body. Just moisten your hands, scoop out a spoon full and rub in a circular motion on your moistened skin. Rinse and enjoy.

Be careful if you’re using this in the shower since the sunflower oil will make the floor slick. You’re going to love how soft this makes your skin feel! I use mine 2-3 times a week and the scrub should last for weeks and weeks if you are careful not to get water into it. You can add a cute little spoon to your gift for scooping if desired.

Sugar Scrub & Gift Bag (7)

If you like this my Pumpkin Spice Sugar Scrub you may want to try my Peppermint Stick Sugar Scrub too. Click HERE for more on my Peppermint Stick Sugar Scrub.

Supplies:

Stamp Set: A Gift for You (item 134765), and Festive Flurry (131778/131781)

Inks: Soft Suede (126978) and Crumb Cake (126975)

Paper: Pool Party (122924), Crumb Cake (120953), and Whisper White (100730)

Accessories: Festive Flurry Ornament Kit (135813),  Label Bracket Punch (132153), Big Shot (113439),  Festive Flurry Framelits Dies (item 132193), Whisper White Baker’s Twine (124262), Glue Dots (103683), 2 1/2″ Circle Punch (120906), plain white gift bag and small mason jar

Click here to order your Stampin’ Up! Products online 24/7! (US only)

Use Hostess Code UHRUCJ9X and get a special Class from me for FREE!

Festive Flurry Ornament Kit (while supplies last)Festive Flurry Ornament Kit

Clearance Rack Blitz (while supplies last) There was a glitch yesterday with the online store – so if you looked early yesterday at the items the pricing was incorrect – you may want to check it out again.

Weekly Deals (Special ends December 16, 2013 at 11:50 p.m. (MT)

A Dozen Thoughts

Todays card is one that I received from my friend Cindy. I just love the colors she used to create this card. The Gingham Garden Designer Series Paper is one of my favorites since I love the colors in it – they are bright and cheerful, don’t you think?  And the greetings in the A Dozen Thoughts stamp set are great for a lot of different occasions too. I especially like the one she used on this card from the set.

A Dozen Thoughts Cindy swap June 2013

Supplies:

Stamp Set: A Dozen Thoughts (item 131056/131059) and Flower Shop (item 130939/130942)

Inks: Island Indigo and Mellon Mambo

Paper: Gingham Garden Designer Series Paper (item 129310), Island Indigo, Mellon Mambo, and Whisper White

Accessories: Pansy Punch (item 130698), Artisan Label Punch (item 130920), Elegant Butterfly Punch (item 127526), Little Leaves Sizzlit, Boho Blossoms Punch, Bakers Twine and Rhinestone Basic Jewels

Click here to order your Stampin’ Up! Products online 24/7! (US only)

Mystery Hostess Code BFNDTYDQ 

This Weeks New Digital Downloads

Need a great baby gift for that someone special? Here is a great option Monthly Memories Baby Photobook Templates (item 134760).

Monthly Memories mds

Why not print it for them as a gift and then all they have to do is add their photos as the baby grows – what fun right?

Tags for All Designer Template (item 134763)

Tags for All Designer Template mds

Quick and easy tags right at your finger tips for any occasion.

Six Sided Sampoer Stamp Brush Set (item 134801)

Six Sided Sampler MDS

Quatrefancy Kit (item 134848)

Quatrefancy Kit MDS

Bright Blossom Blueberries – Take 2

Okay, okay, I know I’m a bit OCSD (that’s Obsessive Compulsive Stamping Disorder for those of you who’ve never heard of it before – lol). I couldn’t resist making yesterday’s card again making a change. And I have to say I really do like this one better, the greeting pops just like I thought it would. (You can click here to my first version of the card.) What do you think? Leave me a comment and let me know which one you like best.

Yesterday I promised to show you one of my favorite blueberry recipes using those yummy berries. So here it is – this never lasts long in my house I can already hear my daughter coming – Quick hide the Blueberry Pizza!

Blueberry Pizza

And your going to love how its soooo easy to make.

Blueberry Pizza

1 ¼ c. powdered sugar

1 c. flour

½ c. butter, softened

1 tsp. vanilla

1 pkg. (8 oz.) cream cheese, softened

1 (8 oz.) ctn. Cool whip

2 c. fresh blueberries

In a medium bowl, mix together ¼ cup powdered sugar, flour and butter to a soft dough. Spread the dough onto a 12-inch pizza pan and bake at 350 degrees for 20 minutes or until golden. Let cool. In a large bowl, combine the cream cheese, remaining cup of powdered sugar and vanilla. Mix well, then fold in whipped topping. Spread mixture over the cooled crust; top with blueberries. Refrigerate for 2 hours before serving.

I know this recipe is called Blueberry Pizza, but it’s just as yummy if you don’t have a pizza pan if you make it in a 9×13 pan. Enjoy!

Click here to order your Stampin’ Up! Products online 24/7! (US only)

Mystery Hostess Code BFNDTYDQ

Team Christmas Party and Gift Exchange

It’s been so crazy around here that I haven’t been able to post about my recent TEAM Christmas get together. I’m truly blessed to have such a wonderful down line and we have such a great time together – they are simply the best. So our Christmas party and gift exchange was no different.

Here are the three of us together –

Christmas Party team photo 2012

Now on to the wonderful gifts – this first photo is of one of the beautiful ornaments that Cindy made. Aren’t they beautiful? I especially love the way that Cindy decorated them using our Ornament Keepsakes Stamp Set, Holiday Ornament Framelits, and Shrinky Dinks®. Remember how much fun those were when we were kids? Cindy just celebrated her first anniversary as a Stampin’ Up! Demonstrator in November, but she has been stamping forever.

Cindy gift swap 2012 ornament

This second photo is of the gift that Janie created – don’t you just love it! Janie used our Be of Good Cheer Designer Series Paper to make these trees. What a beautiful table centerpiece this makes. I love the little bit of bling on top from the Real Red Glimmer Paper – Janie is always thinking out of the box so I always love seeing her creations.

Janie gift swap 2012 trees

And here is a photo of my gift (shhh… don’t tell my family and friends since their getting these too). It is a peppermint stick sugar scrub that I made. I just love these homemade scrubs and even take them into the shower with me! Since I have such sensitive skin commercial products can be a problem, but these are great since they’re all natural!

Peppermint Stick sugar scrub gift exchange 2012

To decorate my peppermint stick sugar scrub I used the Scentsational Christmas Stamp Set. I just love this set with its coordinating Holiday Collection Framelits , and did you know they’re only available until January 3rd? So there is still time to get your own and if you want them both why not get the bundle discount.

Want to make some Peppermint Stick Sugar Scrub for yourself? Here is the recipe.

Peppermint Stick Sugar Scrub

2 cups sugar

2/3 cup extra light tasting olive oil

3 -4 drops peppermint essential oil (I got mine at the health food store)

Place the first two ingredients into a bowl and stir. Add 3-4 drops of essential oil. Mix well. Place into a jar or container that seals.

This recipe makes enough for a pint jar and this scrub can be used anywhere on your body. The peppermint is both refreshing and energizing.

Just moisten your hands, scoop out a spoon full and rub in a circular motion on your moistened skin. Rinse and enjoy. Be careful if you’re using this in the shower since the olive oil will make the floor slick. You’re going to love how soft this makes your skin feel! I use mine 2-3 times a week and the scrub should last for weeks and weeks if you are careful not to get water into it.

Want to join in the fun? Consider joining my team and becoming a Stampin Up Demonstrator?  If you have and are ready, why not join now?  Not only do you get $125 worth of products of your choice for just  $99 … If you have questions I’d love to speak with you about them meanwhile you can Click HERE for more information about becoming a Demonstrator.

Click here to order your Stampin’ Up! Products online 24/7! (US only)


Luau Catalog Launch – Door Prize Winner!

I hope everyone had a wonderful 4th of July. We enjoyed ours here with the traditional food, party and fireworks. I know I haven’t posted in a while but I’ve had a lot of stuff going on with family – but I’m back now.

I wanted to share with you today some pictures of the Luau Catalog Launch event. We had a lot of fun trying out some of the new products found in the NEW 2012-2013 Catalog during the event while doing the two FREE make n’ takes and getting to see some of the new products and samples in person.

Everyone who attended received a little gift from me – a Catalog Survival kit. I made the kits using our NEW In Color, Summer Starfruit and the Comfort Café Designer Series Paper – I just love the designs in this package of DSP!

For those of you who weren’t able to make it, over the next few days, I’ll be sharing those make n’ take cards with you.

If you haven’t gotten the NEW 2012-2013 Catalog yet and want one why not drop me an email or give me a call and I’ll be happy to tell you how you can get your own NEW 2012-2013 Catalog along with your own Catalog Survival Kit as my gift to you.

Here is a photo of the table of “goodies”. I always have so much fun making special goodies for my fellow stampers. My recipe for the Maui Artichoke and Crab dip was a huge hit – So much so, everyone who tried it wanted the recipe and suggested that I share it with you here on my blog.

The recipe is quick and easy to make and was wonderful warm or cold, although I have to say family liked it better warm. It does make a huge batch and I knew I wouldn’t use it all in one day so I actually cut out the center of the bread to fit a serving dish in which I could just set the dip after I warmed it. This dip kept well in the frig too; it didn’t last long enough for me to try and freeze some.

King’s Hawaiian Maui Artichoke and Crab Dip

2 16 oz. loaves King’s Hawaiian Bread

3 8 oz. pkg. Cream Cheese, softened

1 c. Mayonnaise

1/3 c. Dijon Mustard

¾ tsp. Cayenne Pepper

1 tsp. Garlic Powder

2 14 oz. cans Artichoke Hearts, drained & chopped

12 oz. cooked Crab Meat, fresh or frozen, (imitation may be used)

8 oz. Cheddar Cheese, shredded

Carefully hollow out one of the loaves to within 1 inch of sides and bottom. Cube the remaining loaf and bread that was removed into 1-inch chunks. Mix cream cheese, mayonnaise, mustard, cayenne pepper, and garlic powder, until smooth. Fold in artichoke hearts and crab. Gently warm seafood mixture in microwave or stovetop, remove from heat. Reserving a ½ cup cheese for garnishing, mix remaining cheese into mixture. Pour warm dip into hollowed bread loaf. Garnish with remaining cheese. Arrange bread cubes around loaf when ready to serve. Serve warm or cold.

Makes 1 quart

Preparation time; 20 minutes

I know you have waiting patiently to learn who won the Grand Drawing Prize of over $75 in product on display at the Luau Catalog Launch event. So I won’t keep you in suspense any longer. Drum Roll please…………Congratulations to Jill whose name was drawn after the event and won this little pail full of wonderful Stampin’ Up! products.

Click here to order your Stampin’ Up! Products online 24/7! (US only)