My idea of the perfect pumpkin

Ahhh… it is September and here in North Georgia that means the mornings are cooler, the leaves are starting to turn and pumpkins are starting to appear in the stands on the side of the road. Not too long ago it would have meant getting ready to sew a Halloween outfit for my children. I loved planning and putting together costumes based on their current passion at the time. After all who doesn’t like a good craft project LOL!

I’m feeling nostalgic today (stepping back in time 19 years) and thought I’d share a picture with you for my children’s first Halloween together. Johnathan was 3 and thought that dad hung the moon. Larry was a Animal Control Officer with Gwinnett County at the time and so of course, Johnathan wanted to grow up to be just like his dad. I created this costume using one of the old discarded uniforms that I cut down and modified – Kaitlin of course was a puppy. Although most people thought she was a bunny –  LOL. I’m not a seamstress by any means, just using my middle school home ec. skills, but Johnathan didn’t care. He wore this costume a lot playing dress up and pretending he was going to work just like dad!

Johnathan & Kaitlin Halloween 1995

Now a days there isn’t any costume sewing or pumpkin carving, but I still love to decorate and make treats for friends and family – and so the new Curvy Keepsake Box Thinlits Die is perfect for fall. I’ve been having a blast making all kinds of projects with my newest Thinlit!

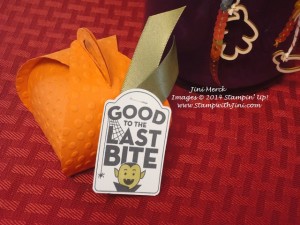
Merry Everything Curvy Keepsake Box

Today’s project is a quick and easy one when you use the Curvy Keepsake Box Thinlit – Here is the down and dirty details of how I made this project.

Using Tango Twist card stock I ran the Thinlits Die through my Big Shot twice. Then I ran the pieces through again using my Decorative Dots Embossing Folder. I used some of my Multipurpose Liquid Glue to attach the two pieces. (Our Multipurpose Liquid Glue is great for items with lots of texture.)

Next, I stamped the image onto Whisper White card stock using my Memento Tuxedo Black Pad and colored this cute little guy with my Old Olive Stampin’ Blendabilities Markers. This cute little Dracula image drew me to this stamp set from the beginning!  (Remember you can get the stamp and punch and save 15% when you order them as a bundle 137635/137636).

We don’t carry any Old Olive ribbon in the width I wanted so I simply made my own with the Whisper White 5/8″ Satin Ribbon and my Old Olive Blendabilities Marker. I love that I can customize my ribbon this way – It is soooo easy to do! (Scroll down and you’ll see a quick video tutorial on how I did this.)

I used our cute little Handheld Stapler to attach the punched image and ribbon to the box, put the handles through the hole and voila – finished!

I think this little pumpkin turned out just right. What is your perfect pumpkin?

Want to see my quick video tutorial on Custom Color Ribbon?

Another great reason to have our NEW Stampin’ Blendabilities Markers – I’m really loving them and think you will too! Want to learn more about Blendabilities? Watch for my upcoming Blend with Friends Events – it’s a great way to get started!

Supplies:

Stamp Set: Merry Everything (135068/135071)

Inks: Memento Tuxedo Black Pad (132708)

Paper: Tangelo Twist (133677) and Whisper White card stock (100730)

Accessories: Old Olive Stampin’ Blendabilies Markers (130999), Whisper White 5/8″ Satin Ribbon (134549), Curvy Keepsake Box Thinlits Die (135853), Decorative Dots Embossing Folder (133520), Note Tag Punch (135860),  Handheld Stapler (135850) and Silver Mini Staples (135847), and Multipurpose Liquid Glue (110755)

Click here to order your Stampin’ Up! Products online 24/7! (US only)

Hostess code HKNSYMNZ

Weekly Deals (Special ends Monday, September 15th, 2014 at 11:50 p.m. (MT)

Hot Diggity Dog!

Well today is going to be a baking marathon type day at my house. I’ve got two bags of bananas sitting on my counter top that I ran across last week on sale that are just calling my name. And it’s a good thing too since Larry just last night mentioned he was hunting for muffins in the freezer and couldn’t find any. LOL

I really enjoy my days holed up in my kitchen with the tunes cranked and the aromas filling the house. How about you, is baking one of the things you enjoy? Got a banana muffin recipe you love? Want to share it? Email me a copy ([email protected]). I love trying new recipes out and someone else’s favorite it always fun to try!

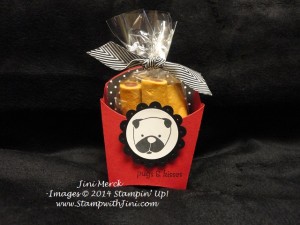
But before I get baking I wanted to share with you this cute little project that I made for the dog lovers in my life using the Hot Diggity Dog stamp set. This cute set was one that I had to have when I saw it since the images are cute and the sentiments are so much fun.

Hot Diggity Dog Fry Box

I’ve done my little Fry Box in Georgia bulldog colors for those UGA fans so this little guy seemed perfect for this project. Too cute, right?

I’m planning on making up a bunch of these for my friend’s pets for Christmas this year. Just a little something, something for the four footed family members. And wouldn’t it be a great little gift for someone who just adopted a new pet too?

I wanted to share with you my tip for creating the panel of color in the back of the Fry Box so I thought I’d put together a little video tutorial for you. Here is my Hot Diggity Dog Fry Box Video Tutorial. Why not check it out?

So what do you think? Fun? This Fry Box Die is great for all kinds of occasions – what would you use it for? Why not leave me a comment and let me know? And thanks in advance for taking the time to leave me a comment.

You’re Wonderful

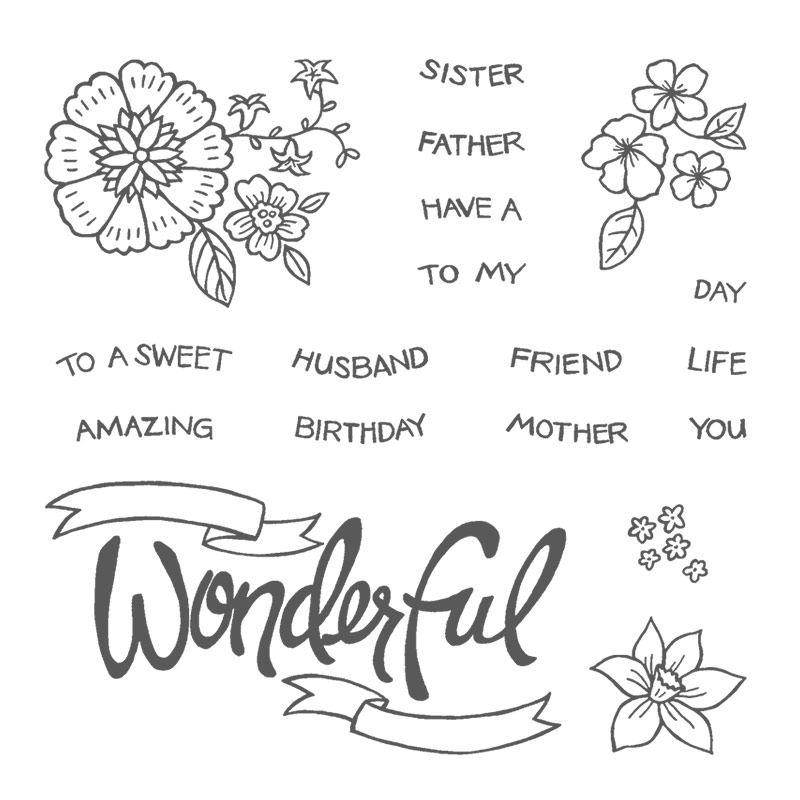
Check out this fun new Photopolymer stamp set just released today

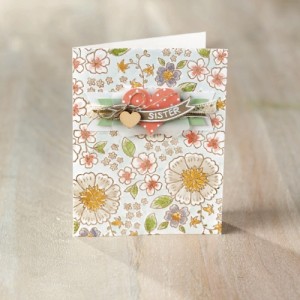
You're Wonderful set image

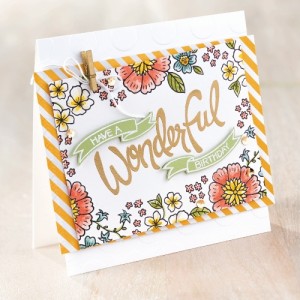
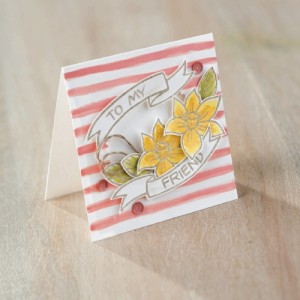
And how about these fun projects made with the set?

You're Wonderful image 1

You're Wonderful image 2

You're Wonderful image 3

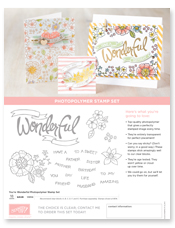
Want to learn more about the You’re Wonderful stamp set (139158)? Just click on the flyer below.

You're Wonderful flyer image

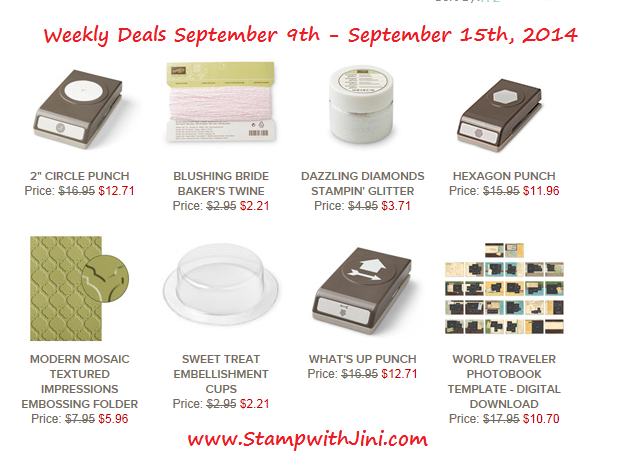
NEW Weekly Deals for September 9th

Weekly Deals September 9 2014

PAPER PUMPKIN PROMOTION ENDS TOMORROW

Header_PP50percent_July1614

Been wanting to give Paper Pumpkin a try? Don’t miss out on this great deal. Sign up today by clicking HERE.

Supplies:

Stamp Set: Hot Diggity Dog (134021/134024)

Inks: Memento Tuxedo Black Pad (132708)

Paper: Neutrals Collection Designer Series Paper Stack (130132), Real Red (102482), Basic Black (121045), and Whisper White card stock (100730)

Accessories: Fry Box Die (132966), 1 3/8″ Circle Punch (119850), 1 3/4″ Scallop Circle Punch (119854)Paper Piercer (126189) and Mat (126199), Fast Fuse Adhesive (129026), Basic Black Chevron Ribbon (130010), and 4″ x 6″ Cello Bag (102757)

Click here to order your Stampin’ Up! Products online 24/7! (US only)

Hostess code HKNSYMNZ

Weekly Deals for September 2nd

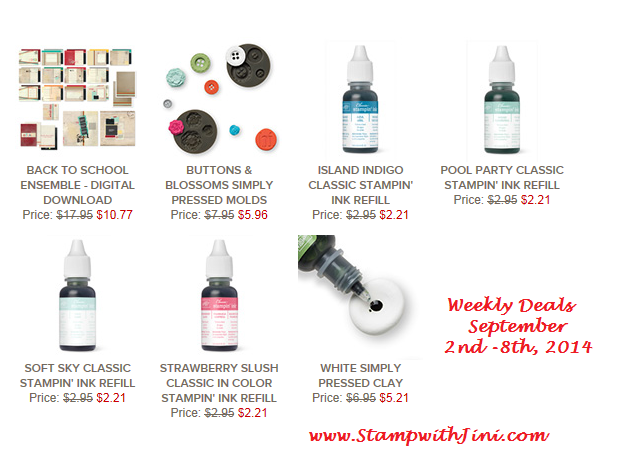
Check out these new Weekly Deals. Stampin’ Up! is offering a great selection of Reinkers this week. So if you haven’t already got yours to go with your stamp pads it’s a great time to get them.

Weekly Deals September 2 2014

And have you seen the Holiday Catalog project on page 14 using the Simply Pressed Clay? If not why not check out this video tutorial.

Cool right? And you can color your Simply Pressed Clay with our Reinkers – So why not get your Simply Pressed Clay this week while it is part of the Weekly Deals and get a great price? You’ll get a chance to get your holiday project done and save too!

Click here to order your Stampin’ Up! Products online 24/7! (US only)

Hostess code HKNSYMNZ

Header_PP50percent_July1614

Paper Pumpkin 50% Off First Two Months (expires September 10th)

Fall Fun with the Chalkboard Banner Kit

Have you ever tried one of our Simply Created Kits? Well they’re great when you don’t have a lot of time or just want to create without any prep time and cutting since pretty much everything comes in the kit that you need, except scissors and adhesive.

They are also easy to step up simply by adding things that you already have. And our kits coordinate with all kinds of different products.

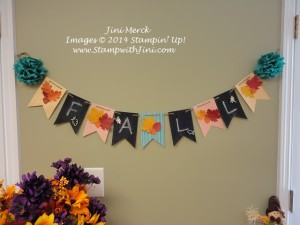
Today I’m going to share with you the fall banner I made that I made for my Holiday Catalog Premiere Party on Sunday with the Chalkboard Banner Simply Created Kit (133795). The banner was quick and easy to put together and looks great I think.

FALL Holiday Catalog Premiere Chalkboard Banner Simply Created Kit

Everyone will think that you spent a lot of time creating. But you know that you didn’t have to!

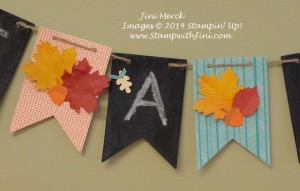
In addition to the kit I used my Autumn Accents Die (127812) to create some leaves and acorns for the pennants in between my letters.

DSC02127

I’ve made a quick video to show you how I did the leaves and acorns.

After I attached the leaves to the pennants I added some of our NEW Autumn Wooden Elements (135846) and a little bit of Bermuda Bay 1/8″ Taffeta Ribbon (131206) that I tied in a knot to the chalk board pennants with a Glue Dot. I’m really loving these little wooden elements – they are just too cute and add just the right pop of color and texture.

Stop back by tomorrow when I’ll be sharing a favorite fall recipe with you.

Supplies:

Paper: Hello Honey (133643), Tangerine Tango (126946), and Cajun Craze Card Stock(126965)

Accessories: Chalkboard Banner Simply Created Kit (133795), Autumn Accents Die (127812), Woodgrain Embossing Folder (127821), Stampin’ Spritzer (126185),  Soft Suede (115663), Cajun Craze (119790), and Island Indigo Classic Stampin’ Ink Refills (122932), Bermuda Bay 1/8″ Taffeta Ribbon (131206), Autumn Wooden Elements (135846)

Click here to order your Stampin’ Up! Products online 24/7! (US only)

Hostess code HKNSYMNZ

Weeky Deals (Special ends Monday, September 2nd, 2014 at 11:50 p.m. (MT)

BIG SHOT BUNDLES PROMOTION

PAPER PUMPKIN Promotion (ends September 10th)

Sea Street Nugget Box Tutuorial

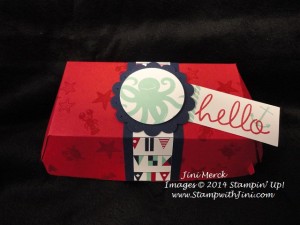
Today’s project is one that my Team made recently during our monthly meeting – I call it a nugget box and it is made with our NEW Hamburger Die that you can find in the 2014 Annual Catalog on page 233.

Sea Street Nugget Box

This die is a lot of fun and you can make such quick and easy treats with it for all kinds of occasions. And it’s a die – so need I say more? I love dies. It’s one of the things that brought me to Stampin’ Up! in the first place. Yes, I’m a Big Shot addict! LOL.

It’s been a bit since I’ve posted a video and I’ve been wanting to share this with you for a while so….

Sea Street Nugget Box Video Tutorial

So what do you think? Want to give it a try and make your own nugget box? I’d love to hear what you’ll use your nugget box for! Leave me a comment and let me know.

Of course, part of the fun of being a demonstrator and being on my Team is the monthly meetings and training that we do together. If this is something that you think you may be interested in, why not drop me a email?

JOIN for $99 and GET $150 in Your Kit!

short & sweet banner image

I’d love to talk with you about joining Stampin’ Up! as a demonstrator. And with the new Short & Sweet promotion starting today (and ending August 28th) – it is a great time to become a demonstrator! (Curious? Stop by tomorrow when I’ll share more details about the promotion with you. Don’t want to wait? contact me at [email protected] today.)

COME BEAT THE HEAT & MAKE A TREAT

Holiday Catalog Premier banner image

Sunday, August 24th at 2 p.m. – 4 p.m.

RSVP requested so I have enough goodies for everyone – Drop in and have some fun!

Click HERE for my Calendar of Events and details

Supplies:

Stamp Set: Sea Street (133985/133988) and Hi There (134213/134216)

Inks: Real Red (126949) and Coastal Cabana (131175)

Paper:  Maritime Designer Series Paper (133696), Real Red (102482), Night of Navy (100867), and Whisper White Card Stock (100730)

Accessories: Big Shot (113439), Hamburger Box Die (133724), Extended Cutting Pads (113478) and Extended Premium Crease Pad (117630),  2 3/8″ Scallop Circle Punch (118874), 1 ¾” Circle Punch (119850), Stampin’ Pierce Mat (126199) and Paper Piercing Tool (126189), and Sticky Strip (104294), Fast Fuse Adhesive (129026)

Click here to order your Stampin’ Up! Products online 24/7! (US only)

Hostess code WYRKXHUE

Weekly Deals (Special ends Monday, August 25th, 2014 at 11:50 p.m. (MT)
BIG SHOT BUNDLES PROMOTION

Paper Pumpkin Promotion – ends September 10th

Header_PP50percent_July1614

Blended Blooms & Blendabilities News

Great news! The release of the Stampin’ Blendabilities Markers are just a few days way!   You’ll be able to order you own Stampin’ Blendabilities Markers on

Tuesday, July 1st! Whoo hoo!

So today I thought I would share with you a project that I made using the Stampin’ Blendabilities Markers that will be available on Tuesday to purchase.

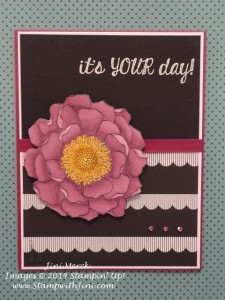
My card is made using the Blended Blooms stamp (135906) from page 167 of the NEW 2014-2015 Catalog. It is one of our single stamps that are available and work well for coloring.

Blended Bloom

And, I have to say with our NEW Blendabilities Markers it’s a lot of fun to color.  I have to be honest and say I was a bit skeptical at first about them since I’m not a big colorer (is that a word?), but by my second image I was hooked.  I find coloring with the Blendabilities, well – relaxing. And It is amazing how quiet a room will get with a group of demonstrators using Blendabilities. Ahhh….a Zen moment! LOL

I really wanted to make my flower pop on this card and a black and white combo seemed the way to go, so I chose to use the Back to Black Designer Series Paper.

I started with the Blended Bloom image that I colored using my Rich Razzleberry Blendabilities (131003) and cut the flower out using my Paper Snips. (And it’s ok if your cutting isn’t perfect – when a little of the white showed, I just took my lightest Blendabilities and touched up the edges.)

Next I cut a piece of the Back to Black Designer Series Paper (4″ x 2 3/4″) so that the scallop was right against the top edge of it since I wanted to add the strip of ribbon above it. I layered this onto the bottom of my Whisper White Card stock (4 1/8″ x 5 3/8″).

I stamped my sentiment from the Fabulous Four stamp set in Versa Mark on to my Basic Black card stock (cut 4″ x 2 1/2″) and embossed the sentiment in White embossing powder.  I was looking for a happy birthday greeting but for some reason this font reminded me of the pattern in the scallop on the Designer Series Paper, so I went with it instead.

I attached the sentiment to the front of the card, added a strip of the 1/4″ Rich Razzleberry Cotton Ribbon (LOVE this ribbon!) and then added it to my Rich Razzleberry card base.

And of course I had to try my Blendabilities on the Rhinestones, right? So I used my darkest marker to color them. Soooooo easy!

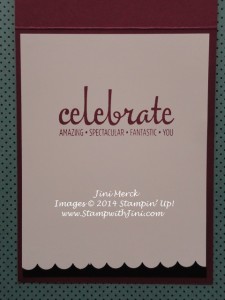
And for the inside I decided to use another sentiment from this set that I stamped in Rich Razzleberry. I also added a scallop edge along the bottom with a bit of Basic Black peeking out.

Blended Bloom Card inside

I really like the way this card turned out and think my friend will like it too. I can already see, I’m going to love coloring again and having another coloring choice is great!

Stampin’ Blendabilities Markers on the Horizon

Blendabilities Banner

 These exclusive alcohol-based marker sets, come in a 3-pack of light, medium and dark shades (of the same color ), and provide your projects a more saturated look with blended colors. Use Stampin’ Up! Whisper White Cardstock with your Stampin’ Up! Blendabilities, or any one of Stampin’ Up! card stocks would work just as well.

On Tuesday, July 1st the following items will be available to order:

  • Cherry Cobbler   (Item #130995 – $11.95)
  • Coastal Cabana  (Item #131000 – $11.95)
  • Daffodil Delight   (Item #130998 – $11.95)
  • Old Olive   (Item #130999 – $11.95)
  • Pumpkin Pie  (Item #130997 – $11.95)
  • Rich Razzleberry  (Item #131003 – $11.95)
  • Skin Tone Assortment (Item #129370 – $22.95)

In addition, the following Blendabilities products will also be available:

  • Memento Ink Pad (Item #132708 – $5.95)
  • Memento Ink Refill (Item #133456 – $4.95)
  • Color Lifter  (Item #129369 – $4.95)

*On August 1st, the remaining six color assortments will be made available to order.

What Sets Them Apart:

  • The Stampin’ Up! rectangular barrel keeps your markers from rolling away!
  • Flat storage helps to maintain the life of each marker.
  • Each marker comes with a tip on each end: brush and fine.
  • Marker tips are made of nylon, which is superior to polyester which can fray.
  • Color coded caps.
  • Blendabilities Markers coordinate wonderfully with our card stock, and can be used with transparent sheets, rhinestones, and pearls.
Want to Learn More about Blendabilities?
I’ve created the following video to get you started.
And here is another video to show you the basics in coloring.

So what do you think? Want yours right away? No worry – I can accept your order today and place your order on July 1st for you when they go live!

Contact me today.

Supplies:

Stamp Set: Blended Bloom (135906), and Fabulous Four (134171/134174)

Inks: Memento Tuxedo Black Pad (132708), Rich Razzleberry (126950) and Versa Mark Pad (102283)

Paper: Back to Black Designer Series Paper (133700), Whisper White (100730), Basic Black (121045), and Rich Razzleberry (115316)

Accessories: Rich Razzleberry (131003), Pumpkin Pie (130997) and Daffodil Delight (130998) Stampin’ Blendabilities Markers, Rich Razzleberry 1/4″ Cotton Ribbon (134564), Basic Rhinestone Jewels (119246), White Embossing Powder (109132) and Heat Tool (129053), Scallop Edge Punch (119882), and Paper Snips (103579)

Click here to order your Stampin’ Up! Products online 24/7! (US only)

Hostess code BRXTH4XS

Weekly Deals (Special ends Monday, June 30th 2014 at 11:50 p.m. (MT)
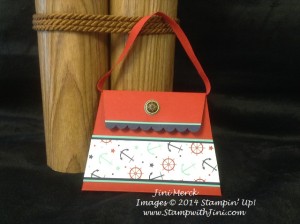
Beach Bag Post it Note Holder

Today’s project is the little gift everyone received who attended my Luau Catalog Launch Party – it was my was of saying thank you. After all I appreciate each and everyone of you!

Beach Bag Post It Note Holder Luau Catalog Launch Party 2014 (1)

I had a lot of fun making these little beach bags. As I mentioned yesterday I just love anything nautical and so the Maritime Designer Series Paper was perfect for this project.

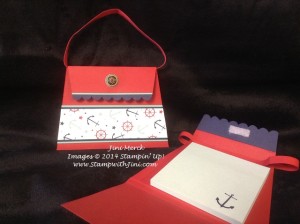
Beach Bag Post It Note Holder Luau Catalog Launch Party 2014 (2)

My little Pool Party sticky notes came from my local dollar store. I squeeled when I found these little pads since they were just the right color LOL.

Do you ever see Stampin’ Up! colors while you are shopping and looking at things? My daughter is always rolling her eyes at me when I say it is such and such color.

The sticky notes are about 1/2 the thickness of the typical stack of post it notes – so you can just use 1/2 of pad of the name band ones if you’d like.

Want to know how I made these? Well here is my latest video tutorial for you so you can make them too. It’s a little longer than normal since I’ve got some helpful tips along the way.

Enjoy!

Beach Bag Post it Note Holders Video Tutorial:

Update: please note that the measurements shown on the Simply Scored Scoring Tool are correct – not what I’m saying. Measurements have been added to the description on the video and should be 3 1/4″, 3 1/2″, 6 3/4″ and 7″. Sorry 🙂

Stop back by tomorrow when I’ll be sharing some more pictures and another recipe from the Luau with you.

Supplies:

Stamp Set: Sea Street (133985/133988)

Inks: Night of Navy (126970)

Paper: Maritime Designer Series Paper (133696), Real Red (102482), Night of Navy (101889), and Coastal Cabana Card Stock (131297)

Accessories: Real Red 1/4″ Cotton Ribbon (134563),  Antique Brads (117273), 1/2″ Circle Punch (119869), Stampin’ Pierce Mat (126199) and Paper  Piercer (126189), Stampin’ Trimmer (126889), Simply Scored Scoring Tool (122334), Multipurpose Liquid Glue (110755), Sticky Strip (104294), and Fast Fuse (129026)

Click here to order your Stampin’ Up! Products online 24/7! (US only)

Hostess code BRXTH4XS

Weekly Deals (Special ends Monday, June 30th 2014 at 11:50 p.m. (MT)
Something for Baby Treat Sack

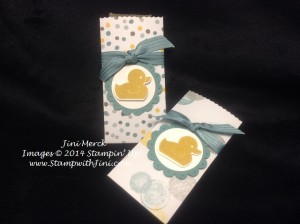
Are you ready for my first video tutorial using the NEW 2014-2015 Annual Catalog items? Well it’s here and in it I’ll be sharing with you the cute little treat sack that they showed us how to make during the Catalog Premiere along with the set I won during prize patrol. They are quick and easy to make.

Something for Baby Treat Sack

This little project uses one of our NEW Bundles from the Catalog – Something for Baby (page 74) and the coordinating Baby’s First Framelits (136790/136791). I love the bundles we offer, since not only do you save 15%, but it makes cutting things out a snap for this project!

And this little treat sack is created using just one piece of 4 1/2″ x 6 1/2″ Designer Series Paper from the Moonlight Designer Series Paper Stack (133701). How great is that just pull one from the stack? No waste and tons of patterns to choose from since we have two new stacks to choose from in the new catalog!

Want to see how I did it? Well here is my Something for Baby Treat Sack Video Tutorial

While I’ve made this little treat sack with a baby theme in mind – I think it is a great little item for all kinds of occasions.

What do you think? easy?

Thanks for taking the time to leave me comments. They are really encouraging to me.

Supplies:

Stamp Set: Something for Baby (134027/134030)

Inks: Hello Honey (133643)

Paper: Moonlight Designer Series Paper Stack (133701),  Lost Lagoon (133679), and Whisper White Card Stock (100730)

Accessories: Baby’s First Framelits (133735),  Lost Lagoon Stitched Satin Ribbon (133672), 1 3/8″ Circle Punch (119860), 1 3/4″ Scallop Circle Punch (119854), Stampin’ Trimmer (126889) and Rotary Addition (129407),  Small Scallop Stampin’ Trimmer Rotary Cutting Blade (129410), Simply Scored Scoring Tool (122334), Paper-Piercing Tool (126189) and Stampin’ Pierce Mat (126199)

Click here to order your Stampin’ Up! Products online 24/7! (US only)

Hostess code 2JBGG6Z4

Weekly Deals (Special ends Monday, June 9th 2014 at 11:50 p.m. (MT)
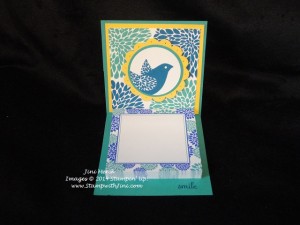
Betsy’s Blossoms Pop Up Post It Note Holder

Yesterday I held my annual Retirement Party and I gave everyone a little gift who attended, a little Pop Up Post It Note Holder that I made using the Betsy’s Blossoms Stamp Set. They were such a hit I thought that today I would share with you how I made them.

Pop Up Post it Note Holder Besty Blossoms

They are so easy to make and I really love the way the top pops up and is displayed when you set them on your desk. And can you see the little sentiment? It’s from the Fabulous Phrases Stamp Set (128577/120501) which is retiring. This set gives you so many choices to choose from to create just the right phrase that you’re looking for.

Betsy’s Blossoms is one of the fun sets that is retiring from the 2013 Catalog on June 4th. I’m going to miss this set with it’s bold images. If you’d like to see all the items on the Retirement List CLICK HERE.

Stop back by tomorrow and I’ll share the make ‘n take everyone made.

Retirement Party Giveaways Image

Winners were announced at yesterday’s party and those who were not able to attend will be contacted by email later today! Thank you to all those who participated and Congratulations to all those who won!!

And remember today is the last day to take advantage of the current Weekly Deals

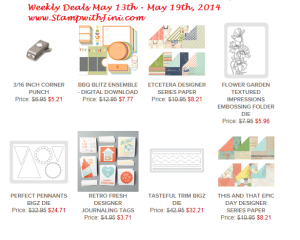
Weekly Deals May 13

Supplies:

Stamp Set: Betsy’s Blossoms (126006/131955),  Fabulous Phrases (128577/120501)

Inks: Bermuda Bay (131171), and Pacific Point (126951)

Paper: Bermuda Bay (131197), and Pacific Point (111350), Daffodil Delight (119683), and Whisper White Card stock (100730)

Accessories: Circle Collection Framelits (130911),  1 ¾” Circle Punch (119850),  1 ¾” Scallop Circle Punch (119854), Simply Scored Scoring Tool (122334)

Click here to order your Stampin’ Up! Products online 24/7! (US only)

Hostess code WXAUDJ3F

Love You To the Moon

Today’s card is one I made to send a friend that is having a rough time lately and I wanted to let her know that she always is a ray of sunshine in my life not matter how rough things get.

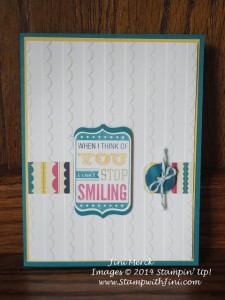
Love You to the Moon

I used our retiring Designer Series Paper, Gingham Garden (129310) to determine which colors I went with – that is one of the great things about Designer Series Paper, it helps you choose colors easily!

And this paper coordinates with our Scallops Embossing Folder (132971) from the Occasions Catalog. Don’t you love the way Stampin’ Up! products work together whether they are new or retiring?

Speaking of retiring my Retirement Party is this Sunday, and if you live locally I hope you’ll stop in and enjoy the fun. You can click HERE for more details. Please RSVP so that I’ll have enough goodies for everyone!

As promised I’ve got another Retirement Party Giveaway for you today – well really I’ve got two:

Retirement Image Giveaway #3

First, you can check out my YouTube Channel to see Retirement Party Giveaway #3 and just follow the instructions in my video to enter.

If you want to know how to enter Retirement Party Giveaway #4? Well it’s a Pinterest challenge – and it’s easy to do. Just follow me on Pinterest (Jini Merck) and pin my Retirement Party Giveaway #4 banner below that I made in My Digital Studio.

Retirement Image Giveaway #4

Then leave me a comment below so that I know you’ve done it and your name will be entered in to my drawing for a Big Shot item!

Simple right? And remember you’ll want to do participate now since entries end tomorrow May 17th at midnight.

Supplies:

Stamp Set: Love You to the Moon (133140/133143)

Paper: Gingham Garden Designer Series Paper (129310), Island Indigo (122923), So Saffron (105118), and Whisper White Card Stock (100730)

Accessories: Chalk Talk Framelits (129983), Corner Rounder Punch (119871), Stampin’ Write Markers, Regals Designer Buttons (130029),  Island Indigo Baker’s Twine (125575), and Scallops Embossing Folder (132971)

Click here to order your Stampin’ Up! Products online 24/7! (US only)

Hostess code WXAUDJ3F

RETIREMENT STAMP LIST (Pdf)

RETIREMENT ACCESSORY LIST (pdf)

Retirement Party – FREE Event

Weekly Deals (Special ends Monday, May 19th 2014 at 11:50 p.m. (MT)
Retirement Party Giveaways Image