Peachy Keen Kiss Treat Tent Video Tutorial

This cute little treat is one that I made as a gift for those of you who came to my Occasions Catalog Bash. It was quick and easy to make and since it contains chocolate kisses who can resist, right?

Peachy Keen Kiss Treat Tents (1)

So here is my how to Peachy Keen Kiss Treat Tent Video Tutorial as promised – although maybe it’s a little late? With all the excitement of Leadership I can’t remember. LOL

Easy, peasy right? And since I used the Fresh Prints Designer Series Paper Stack I had 4 sheets of this design, so I could make a bunch of them. Don’t you love the Paper Stacks? With all the wonderful patterns there are lots to choose from!

I made so many of these little Peach Keen Kiss Treats that I even took some to leadership with me last week and used them as my 3D swaps. They seemed to be a hit with my fellow demonstrators there.

Stop by tomorrow when I’ll be sharing with you a card that I created for my second Shoebox Swap at Leadership.
Peachy Keen Kiss Treat Tents (2)
Supplies: 

Stamp Set: Peachy Keen (133110/133113)

Inks: Real Red (126949)

Paper: Fresh Prints Designer Series Paper Stack (132996), Coastal Cabana (131297), Real Red (102482), and Whisper White (100730)

Accessories: Modern Label Punch (119849), Simply Scored Tool (1022334), Snail Adhesive (104332), Multipurpose Adhesive (110755), Sticky Strip (104294), and Stampin’ Dimensionals (104430)

Click here to order your Stampin’ Up! Products online 24/7! (US only)

Hostess code 4V3FQSB9

Clearance Rack Blitz (while supplies last)

Weekly Deals (Special ends January 20, 2014 at 11:50 p.m. (MT) 

Leadership Survival Kit

Well Leadership is just one more day away and I’m here in Houston ready to go. I flew in yesterday and spent the day with my sister and husband before heading out the door early this morning. Today starts the festivities and yippie today is a full day of Shoebox Swaps and Stamping!

I’m so excited to be at Leadership this year and the fact that I made it out of Atlanta without any weather problems. (It was a nippy 9 degrees out with a pretty hefty wind, but it could have been much worse.) I spoke to quite of few delayed flyers from this past weekend’s weather.

Well today’s project is one that I made for my roomie, Kathleen. I wanted to make something special from my friend and came up with this little survival kit for her using the Retro Fresh Designer Series Paper from the NEW Occasions Catalog. I just love the bold patterns and colors you find in this package of paper.

Leadership Survival Kit (1)

My little survival kit includes some of the essentials I thought anyone would need, notice the chocolate, which of course is definitely essential to any event!

Here are some of the items that I included. First a notepad and pen for jotting down great tips and project ideas.

Leadership Survival Kit pad & pen

A little package of Kleenex.

Leadership Survival Kit kleenex

A pack of gum to keep us fresh and smiling.

Leadership Survival Kit gum

Post it Notes because who can’t use them – right? Just take a look at my catalog – LOL.

Leadership Survival Kit post it note

Hand sanitizer because we’re doing a lot with our hands. Chap stick because we’re talking and sharing a lot.
Leadership Survival Kit chap stick & hand sanitizer

A clip to hold all those extra things that are loose in our new Leadership bags and finally tags for the Leadership bag which will all look alike when we’re all together during the next few days.

Leadership Survival Kit name tags

Supplies:

Stamp Set: Notable Alphabet (132047)
Inks: Soft Suede (126978)
Paper: Retro Fresh Designer Series Paper (132993), Tangerine Tango, So Saffron, Baked Brown Sugar, Coastal Cabana, Very Vanilla
Accessories: 1 ¼” Circle Punch, 1 3/8″ Circle Punch, Decorative Label Punch, Bracket Label Punch, Full Wood Mount Stamp Cases, Soft Suede 3/8″ Taffeta Ribbon, and Basic Rhinestones Jewel Accents
Click here to order your Stampin’ Up! Products online 24/7! (US only)

Hostess code 4V3FQSB9

Clearance Rack Blitz (while supplies last)

Weekly Deals (Special ends January 13, 2014 at 11:50 p.m. (MT)

People Like You

Wow – Can you believe it is the last day of the year already? If you’re like me you are shaking your head wondering what happened to 2013. One of my favorite things about New Years Eve is looking back at the current year and looking forward to next. I can remember listening to the radio (yes – I’m that old, no iPods or iTunes – LOL) and hearing the run down of the years weekly top hits. Now I enjoy all those shows they put together of the top years events. How about you is there something special you enjoy doing to review your year and count your blessings?

So since today is New Years Eve I am going to share with you some of my favorites from this past year and a sneak peek of our 2014 Occasions Catalog. Are you ready?

The introduction of our Envelope Punch Board and the fun cards you can make with it! Here is my Remembering Your Birthday file folder card that I made and shared with you back in November. I really love this Eastern Elegance Designer Series Paper and the colors in it.

File Folder Card #3

And these great little Luau Sea Glass Jars I made for my daughter’s graduation party to decorate the tables –

Luau Sea Glass Jar

along with her party invites – I just LOVE this punch art hula girl, she is too stinking cute! I enjoyed the time together with my friend Cindy punching and assembling while visiting.

Punch Art Luau Invite (1)

My first ever – video tutorial that I shared with you to show you our new Core’dinations cardstock.

Just Thinking

And my first trip to Leadership in Orlando with my stamping friends – what fun we had. I’ve got lots of great memories from our girl time together! I’m really looking forward to attending Leadership next month in Houston and making new memories.

Leadership 2013 Group Lunch

And now for the looking forward to 2014  and a sneak peek from the Occasions Catalog-

People like you make it possible for me to be a Stampin’ Up! demonstrator, and I want you to know what a blessing I consider each and everyone of you. I love what I do and being able to share my love of stamping with you on my blog and in my classes, stamp camps, and events is a big part of what makes stamping so special for me – So thank you. Know that I’ll look forward to stamping with you in 2014!

People Like You

This card is one that I received from my friend Janie using the NEW People Like You single stamp and Fresh Prints Designer Series Paper Stack from the NEW Occasions Catalog that goes live on January 3rd!

Janie is part of my team, the Blue Mountain Stampers –  and part of what is great about being a Stampin’ Up! demonstrator is that we get to see and order product 30 days before the catalogs go live – of course getting a discount is great too. This past weekend I held an all day team event to play and stamp together and even though Janie wasn’t able to join us, she has been playing with her new goodies and shared this wonderful card with me. Yippie!

I really love the image and sentiment in the People Like You stamp set, it’s just lovely isn’t it? So I thought it was a fitting sentiment for my sneak peek.

Ocassions Catalog Bash-005 Banner

Oooooo – and you are going to love all the new goodies in this new Occasions Catalog – I can’t wait to share them with you during my Free event on January 5th! If you haven’t RSVP’d yet, that’s ok there is still time – take a few minutes and let me know so that I’ve got enough supplies for everyone to stamp. And of course feel free to include a friend or two in the fun! Click HERE for my Calendar of Events and all the details for my Occasions Catalog Bash.

NEW WEEKLY DEALS BEGIN TODAY!

Who hoo! a great way to end the year – check out this weeks selection of great deals!

Weekly Deals 12 31 image

Click here to order your Stampin’ Up! Products online 24/7! (US only)

Use Hostess Code UHRUCJ9X and get a special Class from me for FREE!

Clearance Rack Blitz (while supplies last)

Weekly Deals (Special ends January 6, 2014 at 11:50 p.m. (MT)

Festive Flurry Ornament Kit (while supplies last)

Sassy Birthday Bow Tie

Here is a fun birthday card that I made for my friend that uses our Birthday Basics Designer Series Paper and the Gift Bow Bigz Die. This card was fun and quick to make since it uses our Gift Bow Bigz Die (129977).

Sassy Birthday Bow Tie

I love the quirky font  used for our Sassy Salutations stamp set (132070/126707) and thought this was a perfect set for this card.  I call this a “bow tie” bow and since my friend’s birthday is New Years Day I thought it would be a great card for her, but I also think it is a great guys card too with a couple of color changes. What do you think?

This card not only uses the Gift Bow Die from the Holiday Catalog, it also uses the Stylish Stripes Embossing Folder too. Did you know that these two great items in the Holiday Catalog are only available for a few more days? Yikes – so if you haven’t gotten your favorites, you’ll want to get them now. So why not check out the Holiday Catalog one last time along with our Weekly Deals and Clearance Rack Blitz going on right now?

On a budget and want to see the Holiday Carry Over List? Click HERE to see what will still be available through May 2014 so you can plan your purchases.

Ready to see how this cute little bow is made? Well since today is already the 30th this is the last of my video tutorials for 2013. Can you believe 2014 is just a couple of days away! Check it out – and leave me a comment, you’ll make my day a better one! So here is my Sassy Birthday Bow Tie Video Tutorial.

Supplies:

Stamp Set: Sassy Salutations stamp set (132070/126707)

Inks: Basic Gray Classic Ink (126981)

Paper: Birthday Basics Designer Series Paper (130145), Crisp Cantaloupe (130021), Bermuda Bay (131197), and Basic Gray Card Stock(121044)

Accessories: Gift Bow Bigz Die (129977),  Stylish Stripes Embossing Folder (132174), Big Shot (113439), Bone Folder (102300), Glue Dots (103683)

Click here to order your Stampin’ Up! Products online 24/7! (US only)

Use Hostess Code UHRUCJ9X and get a special Class from me for FREE!

Clearance Rack Blitz (while supplies last)

Weekly Deals (Special ends December 30, 2013 at 11:50 p.m. (MT)

Festive Flurry Ornament Kit (while supplies last)

Are You Planning on Coming?

Ocassions Catalog Bash-005 Banner

Join the fun and pick up your FREE Occasions Catalog!

RSVP today so I’ll have enough goodies for everyone.

Best of Sale-a-bration Pop Up Gift Card Holder

Tuesday I showed you my Warmth & Wonder Pop Up Gift Card Holder and told you I would share how to make them today. So without further delay here is today’s project – my Best of Sale-a-bration Pop Up Gift Card Holder.

Pop Up Gift Card Holder

I created this gift card holder for an up coming birthday of a friend. Here is the inside view.

Pop Up Gift Card Holder (giftcard inside pocket)

I used the Remembering Your Birthday Stamp Set for the greeting.

Pop Up Gift Card Holder (inside)

Ready to see how I made this great little gift card holder? Movement cards are a lot of fun and this one is so easy to make –

Here is my Pop Up Gift Card Holder Video Tutorial

So what do you think? Why not leave me a comment and let me know – I’d love hearing from you. Sometimes I feel like I’m all alone out here in cyber space LOL

Want a printable PDF tutorial too? Click HERE for my Best of Sale-a-bration Pop Up Gift Card Holder Tutorial with all the supplies and measurements you’ll need.

Supplies:

Stamp Set: Best of Sale-a-bration (134393) and Remembering Your Birthday (131347/131350)

Inks: Gumball Green Classic Ink (126861)

Paper: Birthday Basics Designer Series Paper (130145), Summer Starfruit (126839), Raspberry Ripple (126842), and Very Vanilla (101650)

Accessories:Envelope Punch Board (133774), Simply Scored Scoring Tool (122334), 1 3/8″ Circle Punch (119860), 1 3/4″ Scallop Circle Punch (119854), Paper-Piercing Tool (126189), Stampin’ Pierce Mat (126199), Stampin’ Sponges (104430), Bone Folder (102300), Sticky Strip (104294)

Click here to order your Stampin’ Up! Products online 24/7! (US only)

Use Hostess Code UHRUCJ9X and get a special Class from me for FREE!

Clearance Rack Blitz (while supplies last)

Weekly Deals (Special ends December 30, 2013 at 11:50 p.m. (MT)

Festive Flurry Ornament Kit (while supplies last)

You’re Invited to my Occasions Catalog Bash!

Ocassions Catalog Bash-005 Banner

Come join in the fun at this FREE event

Pick up your Occasions & Sale-a-bration Catalogs and stamp a fun project

When?

Sunday, January 5th

Drop in anytime between 1 p.m. and 3 p.m.

Where?

My Classroom

Contact me to RSVP today or by Saturday, January 4th at the latest, since I’ll need time to prepare projects and gifts!

CLICK HERE TO SEE MY FLYER with all the details or CLICK HERE for my CALENDAR OF EVENTS

Epic Day Flower Bow

As I’m winding down with my Christmas list of things to do, I’m beginning to work on projects for the upcoming birthdays in my family – We have quite a few of them the end of the year and early January. So today I thought I would share with you the little gift box I made to hold a little something special for my Aunt.

Epic Day Flower Bow

This little Kraft Gift Box is decorated using out Gift Bow Bigz L Die and the single stamp, A Gift for You.( Love the fact that this single stamp has a coordinating punch!) As you can tell I’m a huge fan of this Gift Bow Die – it’s a lot of fun to play with.

Here is a quick video tutorial showing you how I made the Epic Day Flower Bow:

There is still time to get the Gift Bow Die and A Gift for You Single Stamp if they are on your last minute wish list for yourself. The Holiday Catalog goes through January 2nd, 2014 and our Single Stamps list through January 31, 2014. And of course don’t forget our Weekly Deals that end tonight!

Want to know what is going to still be available after the Holiday Catalog ends? It may help you decide what you’ll want to order before the items are gone. Here is the Holiday Catalog items that will be available until June 1, 2014 that Stampin’ Up! just released.

  • Joyful Christmas (131802/131805)
  • Evergreen (127970/127973)
  • Greetings of the Season (128030/128033)
  • Christmas Collectibles (131772/131775)
  • Christmas Ornament Punch (132152)
  • Christmas Collectibles & Punch Bundle (133282/133283)
  • Very Merry Tags (130393/130402)
  • Tags 4 You (131820/131823)
  • Oh, Goodie! (131886/131889)
  • Festive Flurry (131778/131781)
  • Festive Flurry Framelits Dies (132193)
  • Festive Flurry Bundle (133284/133285)
  • Jewish Celebrations (128042/128045)
  • Christmas Messages (131790/131793)

Click HERE for a List with images

Supplies:

Stamp Set: A Gift for You Single Stamp (134765)

Inks: Old Olive Classic Ink (1269532)

Paper: Epic Day This & That Designer Series Paper (130814) and Whisper White (100730)

Accessories: Antique Brads (117273), Kraft Gift Boxes (124106), Gift Bow Bigz L Die (129977), Stampin’ Pierce Mat (126199), Paper-Piercing Tool (126189), Bone Folder (102300), Glue Dots (103683)

Click here to order your Stampin’ Up! Products online 24/7! (US only)

Use Hostess Code UHRUCJ9X and get a special Class from me for FREE!

Clearance Rack Blitz (while supplies last)

Weekly Deals (Special ends December 23, 2013 at 11:50 p.m. (MT)

Festive Flurry Ornament Kit (while supplies last)


A Perfect Blend

I love to get together with friends for a cup of coffee and so when I saw this Perfect Blend stamp set in the 2013 Catalog I couldn’t resist adding it to my ever growing coffee and tea themed items. I could easily see making all kinds of gifts and cards with this cute little set that has such great sentiments.

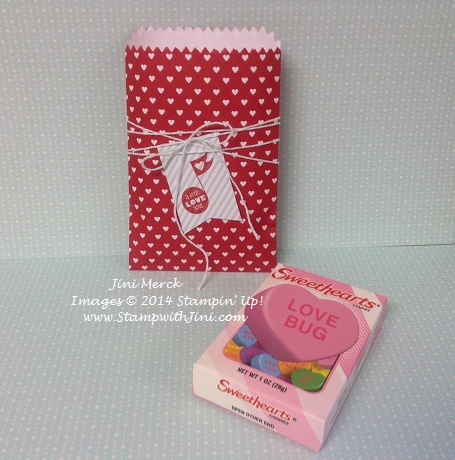
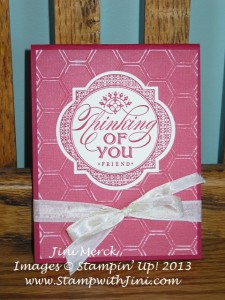
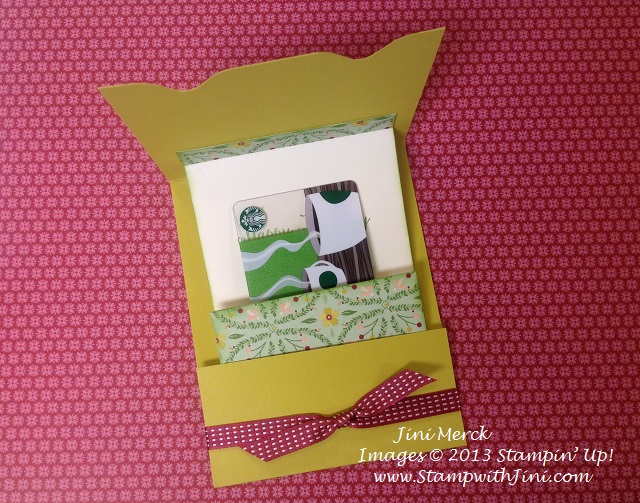
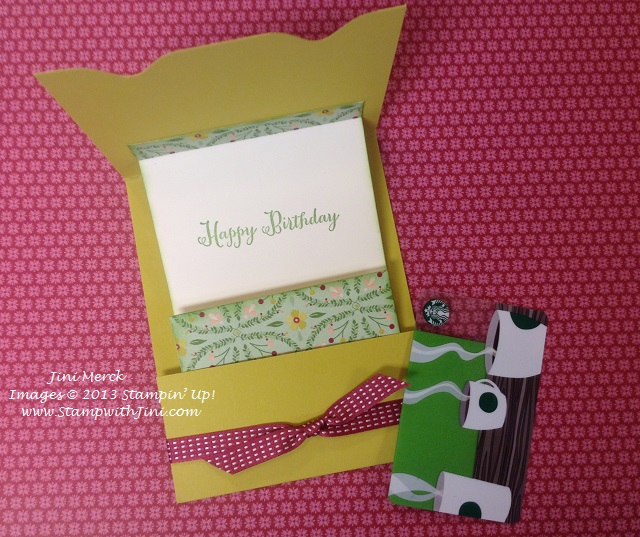
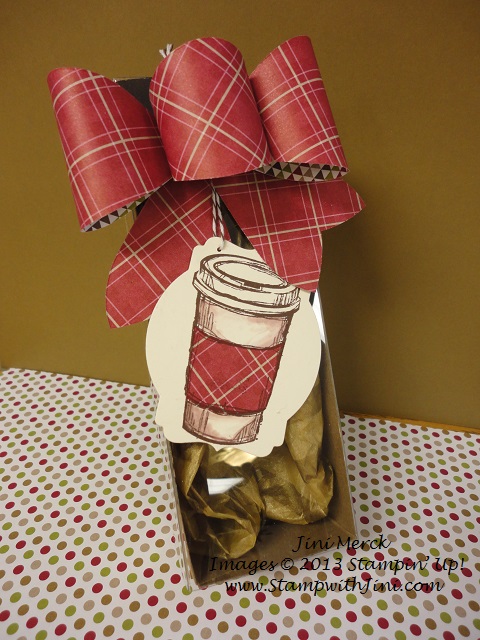
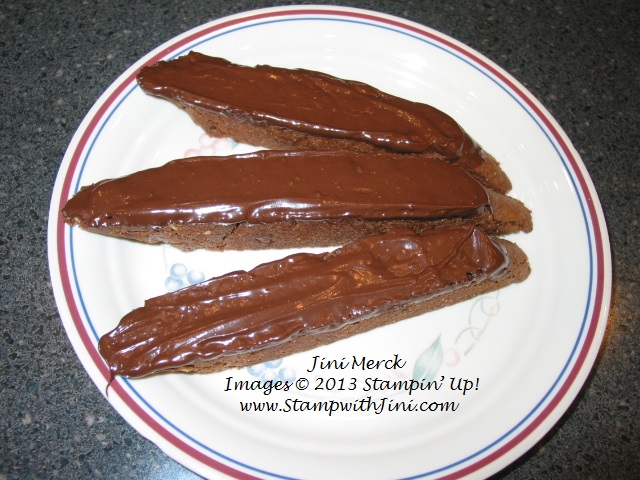
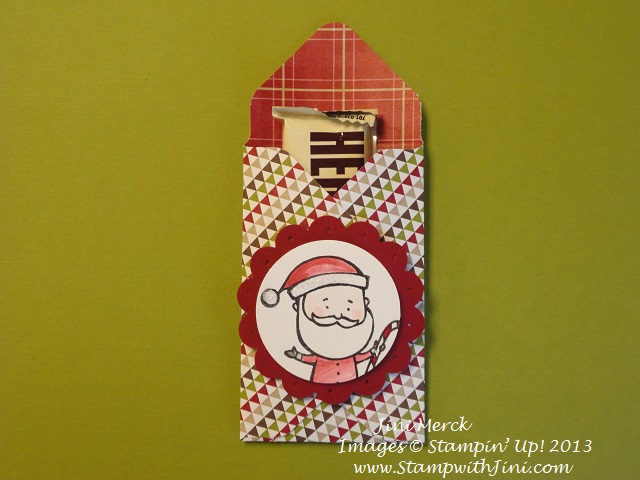
So today I thought I would share with you one of my projects that I made using this cute little Perfect Blend stamp set. It was a gift for a special friend that held two of my homemade and oh sooo decadent chocolate-almond biscotti – hopefully she took a few minutes to enjoy them over a relaxing cup of coffee, before getting back to the hustle and bustle of the holiday season.

Fancy Bubble Bow

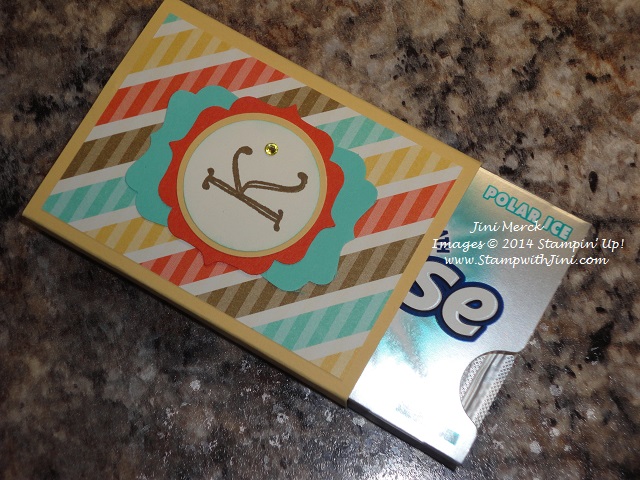
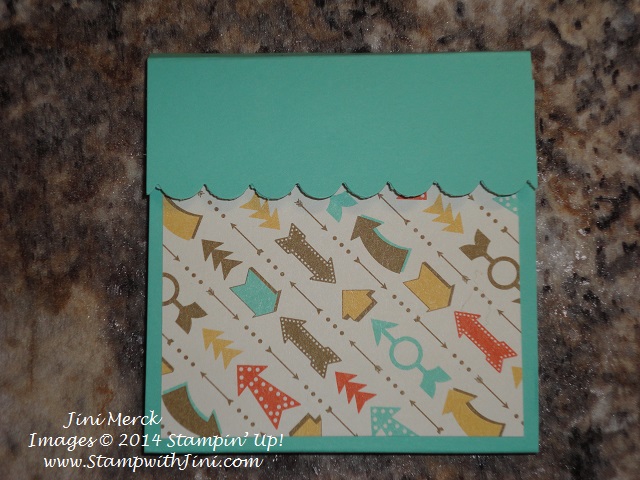
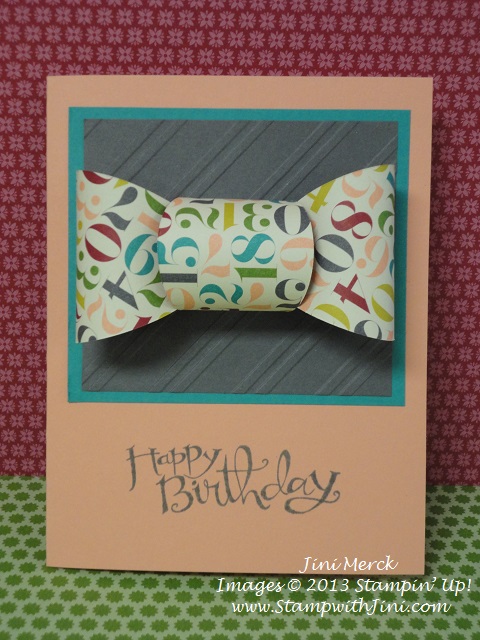
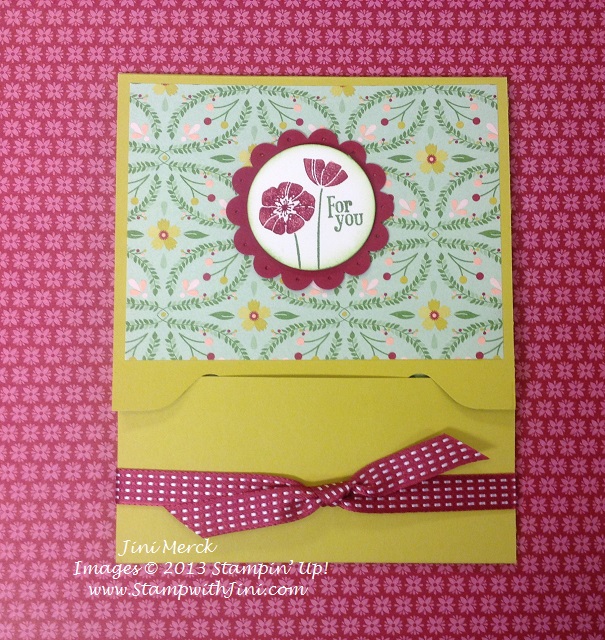
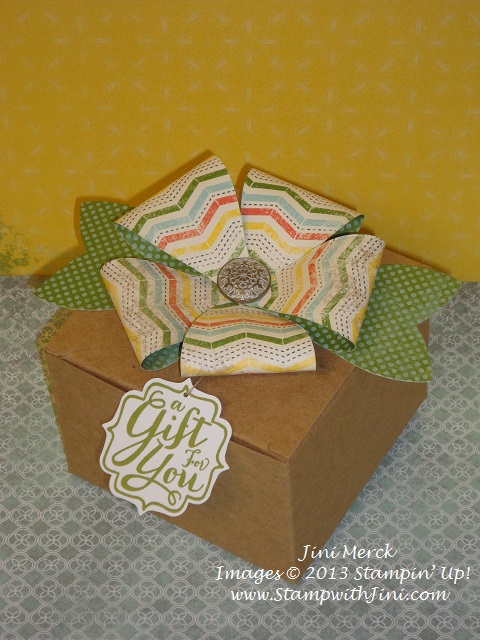
I made this gift box using one of our Tag a Bag Gift Boxes – these little boxes really makes things quick and easy. And I used our Season of Style Designer Series Paper since this pattern felt kind of coffee house-ish to me along with the Gift Bow Bigz L Die from the Holiday Catalog.

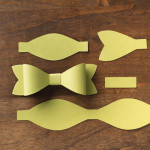
I made a quick video tutorial so you can see how I made this Fancy Bubble Bow below:

The Gift Bow die makes this Fancy Bubble Bow really so easy to make – And did you know that this great die is in the Holiday Catalog?

Gift Bow Die

Yikes – That means it is only available until January 2nd! So if you have been wanting one for yourself too, why not get one now before they’re gone?

I bet you’re wondering if I’m going to share the recipe, right?

This recipe was given to me by my friend Helen – so I call them Helen’s Chocolate-Almond Biscotti.

Helen’s Chocolate-Almond Biscotti

 ½ c. butter, softened

1 ¼ c. sugar

2 eggs

1 tsp. almond extract

2 ¼ c. flour

¼ c. cocoa

1 tsp. baking powder

¼ tsp. salt

1 c. almonds, sliced or chopped

Preheat oven to 350 degrees. Beat buter and sugar in large bowl until blended. Add eggs and almond extract; beat until smooth. Stir together flour, cocoa, baking powder and salt; gradually add to butter mixture, beating until smooth. Dough will be thick. Stir in almonds with wooden spoon.

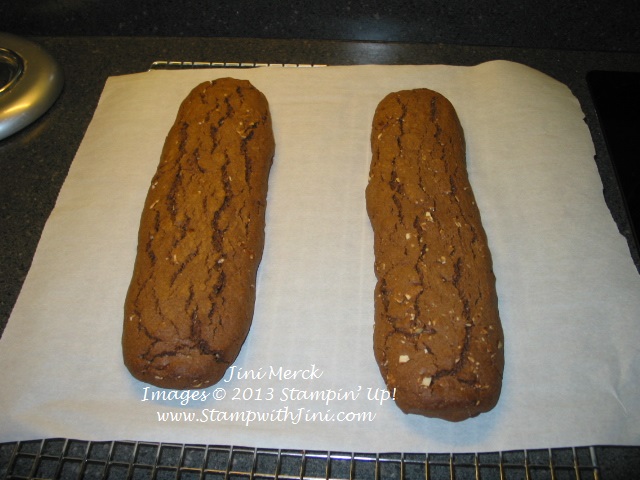
Divide dough in half. With lightly floured hands shape each half into a rectangular log about 2 inches in diameter and 11 inches long; place on cookie sheet lined with parchment paper at least 2 inches apart.

Helen's Chocolate-Almond Biscotti (1)

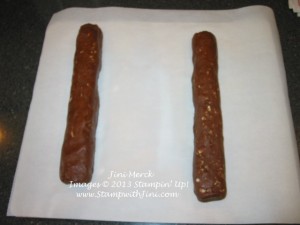
Bake 30 minutes or until logs are set. Remove from oven, cool on cookie sheet 15 minutes.

Helen's Chocolate-Almond Biscotti

Using a serrated knife, cut logs diagonally, using a sawing motion, into ½ inch slices. Arrange slices, cut sides down, close together on cookie sheet.

Bake 8 to 9 minutes. Turn slices over; bake an addition 8 to 9 minutes. Remove from cookie sheet; leave on parchment paper and cool.

Drizzle with glaze or dip ends into glaze.

Helen’s Chocolate Glaze

Place 1 c. semi-sweet chocolate chips and 1 tablespoon shortening into small microwaveable bowl. Microwave at High 1 to 1 ½ minutes or until smooth when stirred. Drizzle or dip.

I’ve even experimented with the recipe a bit and came up with my own version for those allergic to nuts by just substituting a couple things. I thought they were pretty good too, so here you go.

Double Chocolate – Orange Biscotti

Substitute Orange Extract for Almond and Mini Chocolate Chips for almonds.

Helen's Chocolate-Almond Biscotti (2)

These biscotti are a little extra work – but oooh, sooo worth it when you sit down with your cup of coffee and start to dunk! Even Larry loves them and he doesn’t wait for the coffee!!

Hmmmm…I think it is time for a cup of coffee. How about you?

Supplies:

Stamp Set: Perfect Blend (130745/131392)

Inks: Chocolate Chip Classic Ink (126979)

Paper: Season of Style Designer Series Paper (132340) and Very Vanilla Card Stock (101650)

Accessories: Tag a Bag Gift Boxes (130927), Big Shot (113439), Gift Bow Bigz L Die (129977), Deco Labels Collection Framelits (130102), Paper Snips (103579), Bone Folder (102300), Glue Dots (103683)

Click here to order your Stampin’ Up! Products online 24/7! (US only)

Use Hostess Code UHRUCJ9X and get a special Class from me for FREE!

Clearance Rack Blitz (while supplies last)

Weekly Deals (Special ends December 23, 2013 at 11:50 p.m. (MT)

Festive Flurry Ornament Kit (while supplies last)

Need Gift Ideas Image

Bombs Away Birthday

Today’s project is a quick and easy gift card holder using the Bombs Away Birthday Photopolymer Stamp Set (133411).

Bombs Away Birthday Gift Card Holder

Would you believe that the trim I used for this project is from the Witches’ Brew Designer Series Paper pack in the Holiday Catalog? Well it is – I’ve made several non-holiday specific items using the patterns in this package.

How’d I make this gift card holder? Well it was easy – I took a piece of Real Red Card Stock that measured 6″ x 7 3/4″ and scored it at 3 1/4″ and 6 1/2″ and then folded it to make my basic holder. I added a strip of my Witches’ Brew Designer Series Paper that measured 6″ x 3/4″ to the top flap. Stamped the sentiment in VersaMark and used Black Embossing Powder on the bottom flap. (Make sure you fold it first so that you know which flap is which – LOL.)

For the Belly Band I stamped my “Happy Birthday bomb” in Real Red on Very Vanilla card stock and cut it out using the Deco Labels Collection Framelits. I also ran a piece of Basic Black card stock through the Big Shot at the same time using the next largest Deco Labels Collection Framelits die.

I cut a piece of the same Witches’ Brew DSP 1″ x 7″ I used for the trim and adhered one end to the Basic Black Deco Label on top side. Closed my gift card holder and just wrapped it around, lightly scoring it with my fingers as I went, until I got back to the Deco Label again. (Don’t make this too tight since you want to be able to slide it on and off the holder.) I adhered the second end and then placed my “Happy Birthday bomb” image on top to hide where the Designer Series Paper met.

Then all you need to do is add your gift card – How easy is that right?

Supplies:

Stamp Set: Bombs Away Birthday Photopolymer (133411)

Inks: Real Red Classic Ink (126949) and Versa Mark (102283)

Paper: Witches’ Brew Designer Series Paper (132185), Real Red (102482), Basic Black (121045), and Very Vanilla Card Stock (101650)

Accessories: Black Embossing Powder (10913), Heat Tool (1298053), Simply Scored Scoring Tool (122334), Big Shot (113439) and Deco Labels Collection Framelits (130102)

Click here to order your Stampin’ Up! Products online 24/7! (US only)

Use Hostess Code UHRUCJ9X and get a special Class from me for FREE!

Clearance Rack Blitz (while supplies last)

Weekly Deals (Special ends December 23, 2013 at 11:50 p.m. (MT)

Festive Flurry Ornament Kit (while supplies last)

Christmas Candy Bar Holder Video Tutorial

Need a quick and easy little treat to hand out for family and friends this holiday season? Why not try my Color Me Christmas Candy Bar Holder? I’ve made this cute little Color Me Christmas Candy Bar Holder for my husband and his coworkers as a little something special to brighten their day at work. I figured what’s better than chocolate right?

DSC00243

And since I was using the Santa image from the Color Me Christmas Stamp Set I chose to use Cookies ‘n’ Crème miniature candy bars to fill them with (get it – cookies – Santa, I wonder if my husband will pick up on that?)

These little treats are so easy to make and you can get 4 of them from one piece of Season of Style Designer Series Paper, so with one package of Designer Series Paper you can make 48 of them. Whoo hoo – Lots of treats for everyone!

Want to see how I made them? Why not watch my Christmas Candy Bar Video Tutorial – then leave me a comment and let me know what you plan on doing with your Christmas Candy Bar Holders.

Supplies:

Stamp Set: Color Me Christmas (131742/131745)

Inks: StazOn Jet Black Ink Pad (101406), Cherry Cobbler Classic Stampin’ Pad (126966)

Paper: Season of Style Designer Series Paper (132340), Cherry Cobbler (119685), and Whisper White Card Stock (100730)

Accessories: Envelope Punch Board (133774), 2 3/8″ Scallop Circle Punch (118874), 1 ¾” Circle Punch (119850), Blender Pen (102845), Dazzling Details (124117), Paper Piercing Tool (126189) and Stampin’ Pierce Mat (126199), Real Red (100052) and Basic Black Stampin’ Write Marker (100082), Snail Adhesive (104332), and Stampin’ Dimensionals (104430)

Click here to order your Stampin’ Up! Products online 24/7! (US only)

Use Hostess Code UHRUCJ9X and get a special Class from me for FREE!

Clearance Rack Blitz (while supplies last)

Weekly Deals (Special ends December 16, 2013 at 11:50 p.m. (MT)

Festive Flurry Ornament Kit (while supplies last)


Warmth & Wonder Bottled Treats

Remember on Wednesday when I told you about the sugar scrub I made for my daughter’s girlfriends at college? Well she also needed some quick gifts for the guys – and since we figured you can never go wrong with candy for those men in our lives I went back to my ever growing stash of Starbucks Mocha Frappuccino bottles and grabbed two of the larger size bottles – LOL.

Here is what I came up with for her guy friends – I kept them simple since after all they are guys. And since this was final week I knew the sugar rush would come in handy during those all night study sessions!

Warmth & Wonder Bottled Treats

This first bottle is filled with Christmas Candy Corn and I used the Warmth & Wonder Hostess Set (131880/131883) from the Holiday Catalog stamped in Baked Brown Sugar Classic Ink. I just love this elegant little deer image and since it fits into our 1 3/4″ Circle Punch it’s great for all kinds of quick gifts and projects.

I first wrapped my bottle using a 9″ long piece of Season of Style Designer Series paper that I cut 2″ wide. I used a piece of Sticky Strip to attach this to the bottle. Punched a 1 3/4″ circle of Designer Series Paper and attached that with Glue Dots. (I didn’t wrap the side of the lid with Designer Series Paper this time since the mocha’s brown lid coordinated with my project.) I adhered my image and layered it onto my 2 3/8″ Scallop Circle Punch Baked Brown Sugar piece and quickly pieced some holes in the scallops using my Paper-Piercing Tool and Stampin’ Pierce Mat and finally I added a couple of Dimensionals to the back so that it would stay really well on the slick glass surface.  Voila! all done with gift number one and onto the next one.

A Gift for You Bottled Treats

I wanted them basically the same but different so this second bottle uses the single stamp A Gift For You stamped in Cherry Cobbler and punched out using its coordinating punch, the Label Bracket. Easy pease – after I decorated it I just filled the bottle with some spice gum drops. Twenty minutes later she was set to hit the road!

Supplies:

Stamp Set: Warmth & Wonder Hostess Set (131880/131883) and A Gift for You Single Stamp (134765)

Inks: Baked Brown Sugar (131174) and Cherry Cobbler (126966)

Paper: Season of Style Designer Series Paper (132340), Baked Brown Sugar (131296), and Whisper White Card Stock (100730)

Accessories: Paper-Piercing Tool (126189) and Stampin’ Pierce Mat (126199), 2 3/8″ Scallop Circle Punch (118874), 1 3/4″ Circle Punch (119850), Label Bracket Punch (132153), Sticky Strip (104294), Glue Dots (103683), and Stampin’ Dimensionals (104430)

Click here to order your Stampin’ Up! Products online 24/7! (US only)

Use Hostess Code UHRUCJ9X and get a special Class from me for FREE!

TWO NEW COUNTLESS SAYINGS PHOTOPOLYMER SETS

Check out these two new Countless Sayings Photopolymer stamp sets just introduced yesterday –  I think your going to love the fun fonts in these two sets.

Countless Sayings 1 Photopolymer Stamp Set (item 135892)

countless Says 1 image

Countless Sayings 2 Photopolymer Stamp Set (item 135893)

Countless Says 2 image

Want to see the flyer with all the details? Click on the flyer image below for your copy.

Countless Sayings flyer image

Clearance Rack Blitz (while supplies last)

Weekly Deals (Special ends December 16, 2013 at 11:50 p.m. (MT)

Festive Flurry Ornament Kit (while supplies last)