The Final Thank You Thursday!

I’ve got some fun last minute Halloween projects that I made and want to share with you today. This first one is a home décor item that I made using our Witches’ Brew Designer Washi Tape.

Witches' Brew Designer Washi Tape pumpkins (1)

Don’t you love these fake pumpkins that have available the last few years? I’ve done all kinds of things with them, including having the kids carve a pumpkin that will last forever. For this project I simply cut off the top, added the Witches’ Brew Designer Washi Tape (132156)  in a pattern that made me happy, placed a piece of green foam for flowers and added the mums and leaves. Quick and easy-peasy.

This second project includes some real pumpkins that Larry brought home to sit on my kitchen counter for a pop of fall color.

Witches' Brew Designer Washi Tape pumpkins (2)

Sorry about the photos – it’s another rainy day here in North Georgia which can make taking pictures tricky.

I love making little treats for family and friends

Halloween envelope gum holder (2)

so here is a great little project that holds a pack of gum.

Halloween envelope gum holder (1)

Halloween Candy Bar Slider – surprise!

And last but not least I wanted to share a picture that my daughter sent me when she found her little Halloween Candy Bar Slider tucked into her dresser drawer at college – the timing was perfect since they had just had a dorm Halloween event where she dressed up as I Dream of Jeannie and passed out candy. (Seriously – thus the weird eye make up.) She’s such a hoot!

Kaitlin with Halloween Candy Bar Slider

If you missed my post on my Halloween Candy Bar Sliders and video tutorial on how to make them CLICK HERE to see more about my Halloween Candy Bar Slider Video Tutorial.

Final Thank You Thursday!

Stampin’ Up! is wrapping up it’s October’s Thank You Thursday with a final 24 Hour sale on it’s Chevron Ribbon. A great way to wrap things up don’t you think?

Available are 5 great colors –

Basic Black 3/4″ Chevron Ribbon #130010

Chevron Basic Black Ribbon

Calypso Coral 3/4″ Chevron Ribbon #130018

Calypso Coral Chevron Ribbon

Crushed Curry 3/4″ Chevron Ribbon #130019

Chevron Crushed Curry Ribbon

Island Indigo 3/4″ Chevron Ribbon #131151

Chevron Island Indigo Ribbon

Smoky Slate 3/4″ Chevron Ribbon #131152

Chevron Smoky Slate Ribbon

Place your order with me today before these great deals are gone and don’t forget to check out our wonderful Weekly Deals and Clearance Rack items that are available too.

Click here to order your Stampin’ Up! Products online 24/7! (US only)

When you place an order with me today you’ll get FREE shipping! Want to place your order online? Use Hostess Code 7QBVKVTN when placing your order online so that I know you want the FREE shipping.)

The fine print: Place an order with me today by email or online and I will send you a coupon for the amount of shipping to be used on your next order in November. FREE Shipping special expires at 9 p.m. (ET) Thursday, October 31st and is only offered through Stamp with Jini.


Halloween Candy Bar Sliders

Mwa ha ha ha……. Check out these cute Halloween Candy Bar Sliders that I created for my family along with my latest video tutorial.

Halloween Candy Bar Slider

Each of these fun treats contain a chocolate bar – a favorite with my little ghosts and goblins. And I used our Witches’ Brew Designer Series Paper from the Holiday Catalog to create the front panel. The Witches’ Brew Designer Series Paper has some bold fun patterns to work with.

Want to know how I made these little Halloween Candy Bar Sliders? Well I’ve created a video tutorial to show you how – they are quick and simple to make once you know the trick!

Supplies:

Stamps: Delightful Dozen (128547/122652)

Paper: Witches’ Brew Designer Series Paper (132185), Summer Starfruit (126839), Basic Black (121045), and Whisper White Card Stock (100730)

Accessories: Basic Black (100082) and Pumpkin Pie (105115) Stampin’ Write Markers, Modern Label Punch (119849), Owl Builder Punch (118074), Extra Large Oval Punch (119859), and ½” Circle Punch (119869), and Summer Starfruit 3/8″ Stitched Satin Ribbon (126846)

Click here to order your Stampin’ Up! Products online 24/7! (US only)

Mystery Hostess Code RUG6FXNY

Pumpkin Pie Goodie Gear Simply Created Kits

They’re not just for Halloween! Our Goodie Gear Simply Created Kits are a great bargain – you’ll get all kinds of goodies in this kit. Not only will you be able to make 10 quick and easy goodie bags, but you’ll have plenty of goodies left over to use in other ways too! I was pleasantly surprised by just how much you get in this kit when I opened it!

Pumpkin Pie Goodie Gear Halloween

Here is a picture of my first goodie bag, basically following the suggested idea from the Holiday Catalog (on page 32) – and using only what was included in the kit. Quick and easy to do.

I used Bermuda Bay Classic Ink to stamp the sentiment using the coordinating stamp set Oh, Goodie (131886/131889) onto the precut banners included. Used the Pumpkin Pie stickers to make a “v” across the tag, and attached the sentiment. Filled the bag with some yummy candy corn M&Ms and finally I used the Bermuda Bay Baker’s Twine to tie a bow. How much easier can that get right?

And here is my “stepped” up version

Pumpkin Pie Goodie Gear Fall (1)

For this one I used some fall peanut butter M&Ms to jump start my color pallet.  I still followed the same basic design, but I added a little texture to the tag using my Chevron Embossing Folder. Added a strip of Cajun Craze card stock beneath the Pumpkin Pie sticker and snipped the ends to create the same shape as the banner. I stamped the sentiment in Cajun Craze Classic Ink. Don’t you love that everything is pre cut for you in this kit? Added one of our pre cut leaves from the Thankful Tablescape Simply Create Kit (133463) and finished it off with our yummy Summer Starfruit 3/8″ Stitched Satin Ribbon (126846) to add a little sophistication.

Which one do you like the best? Both were a hit in my house. And yes, believe it or not I made it past my husband and son with the chocolate  – LOL. Good thing I almost got the goodie bags done before they found me!

Supplies:

Stamp Set: Oh, Goodie! (131886/131889)

Inks: Bermuda Bay (131171) and Cajun Craze Classic Pads (126965)

Paper: Cajun Craze card Stock (119684)

Accessories: Pumpkin Pie Goodie Gear Simply Created Kit (132792), Thankful Tablescape Simply Created Kit (133463), Summer Starfruit 3/8″ Stitched Satin Ribbon (126846), and Chevron Embossing Folder (127749)

Click here to order your Stampin’ Up! Products online 24/7! (US only)

Mystery Hostess Code RUG6FXNY good through Saturday, November 2nd.

Weekly Deals Banner Image

See our Weekly Deals HERE Get them before they’re gone because Tuesday starts a new Weekly Deal!

Want to learn more about stamping? Why not sign up for my FREE Newsletter and Class Information. (Just look for the sign up box above on the right or click HERE). Sign up and get a FREE Pinwheel Tutorial just for joining. Then you’ll get my FREE emails with great information on what is going on with Stamp with Jini along with helpful hints and tips.

Frankenstein Post it Note Holder

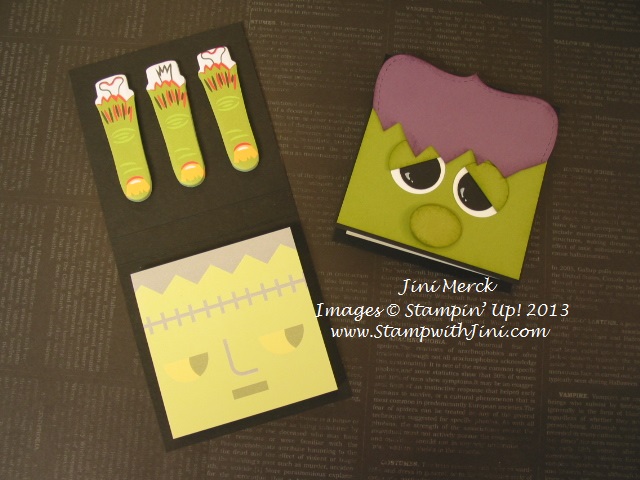
Well I’m back after a short break with family, and I’ve got a great project and video tutorial to share with you, my Frankenstein Post it Note Holder.

Frankenstein Post it Note Holder

I think this Frankenstein Post it Note Holder  really turned out too stinking cute. And I’m happy to say that my daughter and suitemate seemed tickled with their little Halloween surprise – Kaitlin especially loved the page post it notes and thought they were pretty creepy. LOL.

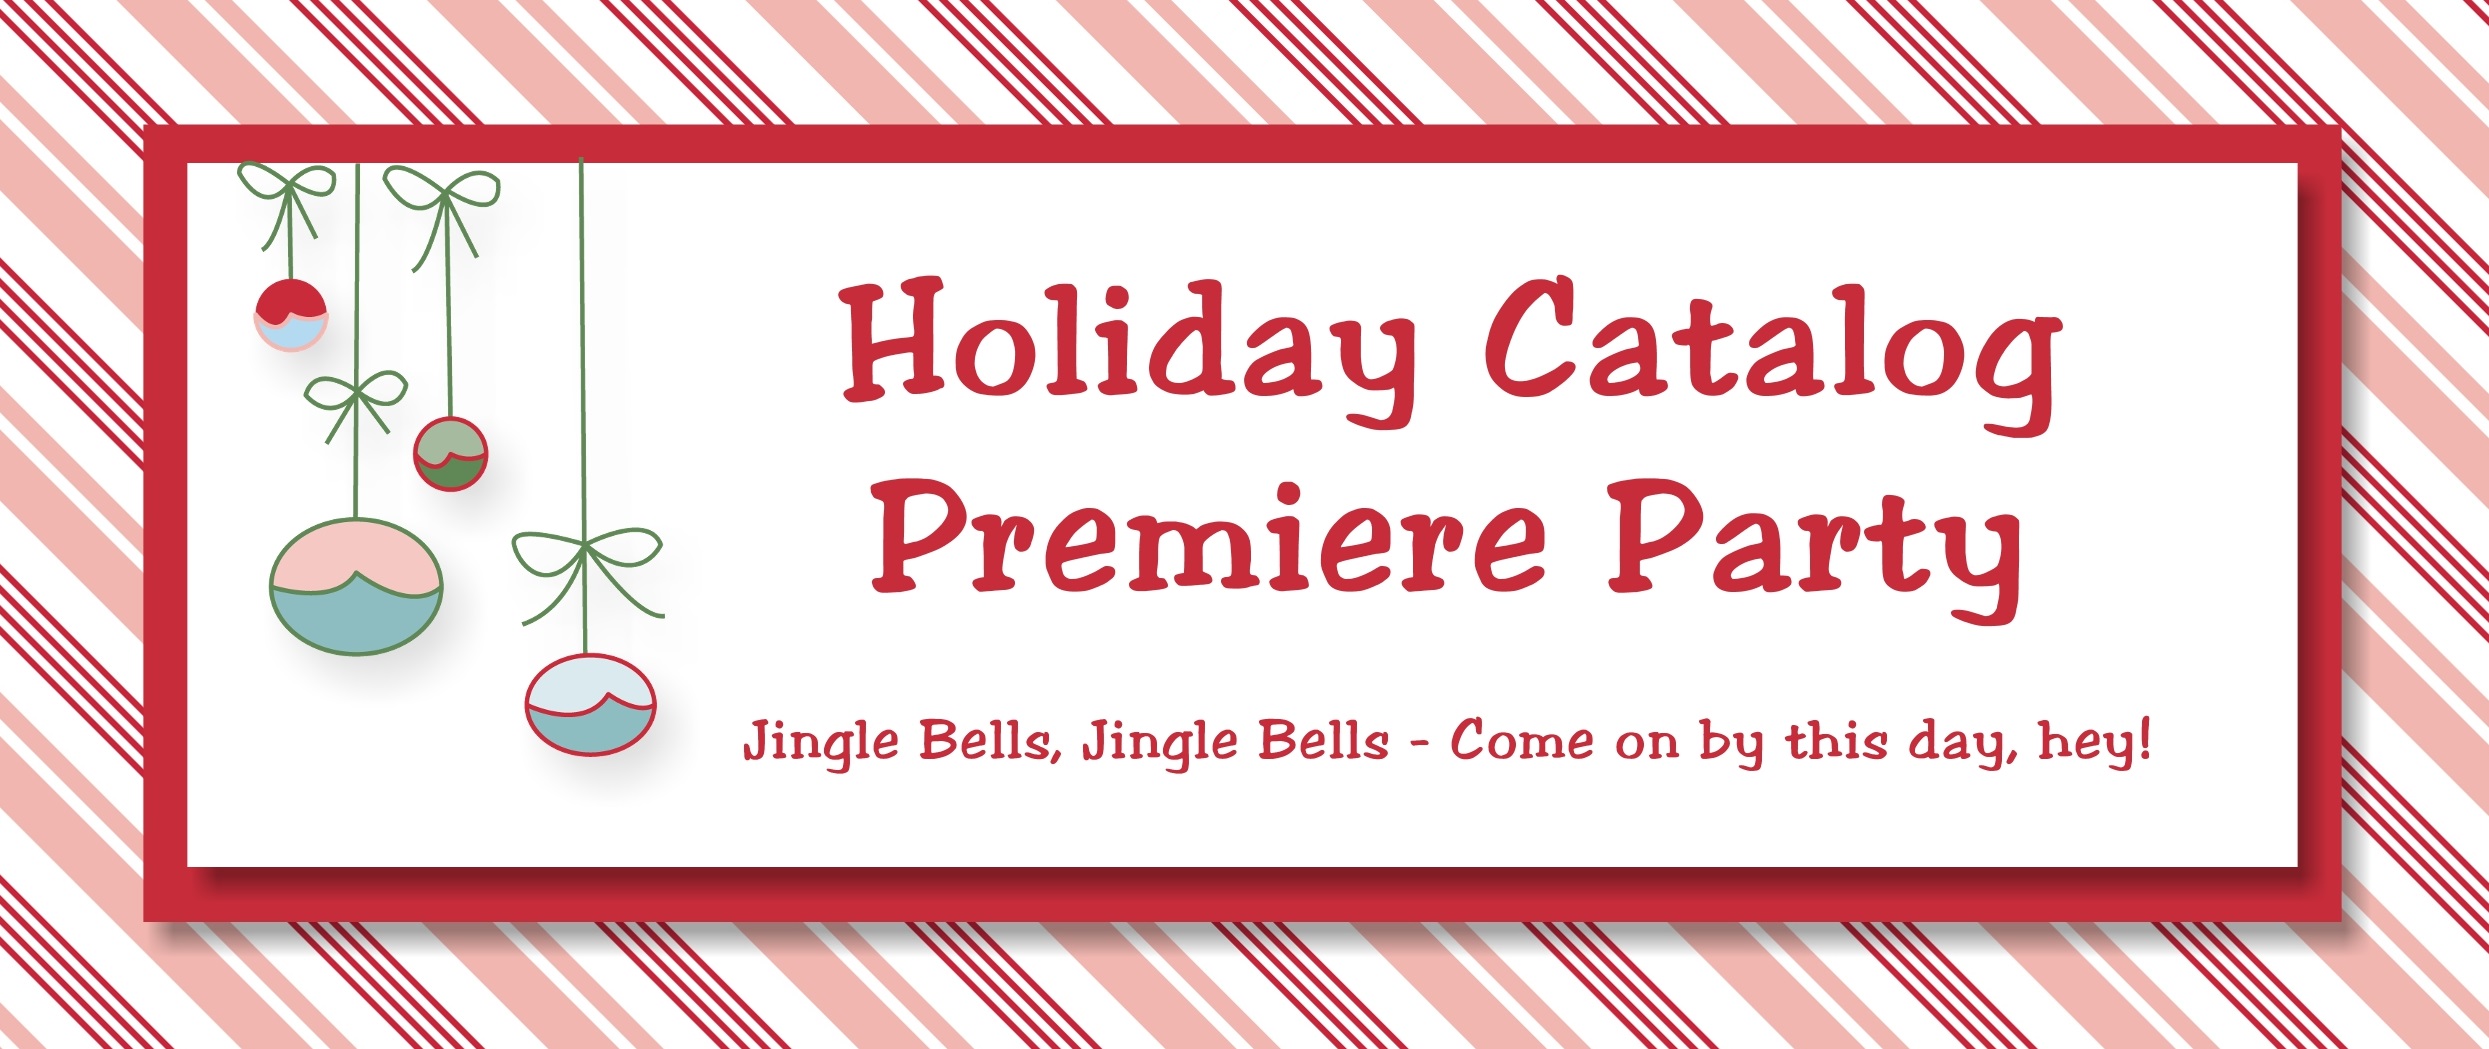
You’ll want to keep reading after the Frankenstein Post it Note Holder supply list below, since there have been a lot of things going on while I haven’t posted the last few days. And for those of you who haven’t kept up with me on facebook I wanted to make sure you had all the up to date Stampin’ Up! news.

Supplies:

Inks: Old Olive (126953) and Perfect Plum (126963)

Paper: Old Olive (100702), Perfect Plum (101889), Whisper White (100730), and Basic Black (121045)

Accessories: Small Oval Punch (120908), ¾” Circle Punch (119873), 1″ Circle Punch (119868), White Stampin’ Chalk Marker (132133), Top Note Die (113463), Stampin’ Sponges (101610), and post it notes from your local store

Click here to order your Stampin’ Up! Products online 24/7! (US only)

Mystery Hostess Code

Use Mystery Hostess Code RUG6FXNY when placing your order and your name will be entered into my Mystery Hostess Drawing. This Mystery Hostess Code RUG6FXNY will be good through Saturday, November 2nd. The number of hostess will depend on the total sales and I’ll be drawing a hostess for every $150 in sales.

New Weekly Deals

Weekly Deals Banner Image

These deals start Tuesdays and end on Monday – if you haven’t already checked out this week’s deals why not click HERE.

 Join for $25 – only 3 days left

Join for 25 image

When you join today, you can choose from our Weekly Deals or any other current product for your starter kit!

Ends: Monday, October 21st, 2013

The specially priced starter kit includes:

  • $26.95 worth of Stampin’ Up! product (must be more than $25, but not more than $26.95 before tax)
  • Free Shipping (you only pay sales tax!)

Business Pack, includes:

  • A box of annual catalogs, pack of Holiday Catalogs, Getting Started DVD, Starter Kit Business Pack (order form, customer postcards, etc.
  • Two FREE months of the Demonstrator Business Web Site (DBWS)
  • You’ll receive 30% instant income on your first order of $150 or more and be eligible for hostess benefits (when placed in the first 45 days after joining)

AND – First Workshop Perk:

  • When you place your first workshop order of $150 or more within 30 days of your start date, you can
  • Choose any stamp set from the 2013-2014 Annual Catalog (redeemable with your first demonstrator order in December) This perk is only for those of you who sign up between now and October 21st – don’t miss out on this opportunity!

When you join with me, you’ll get to be part of my team, The Blue Mountain Stampers and all the perks…

Click HERE to find out more and join before the October 21st deadline.

Got questions? Contact me at [email protected]

New Improvements to the Online Store!

Have you been to my Online Store lately? If so you may have noticed a few new improvements designed to make your online shopping experience better.

Guest Checkout:  You no longer have to commit to creating an account. You can now check out as a guest. You’ll still be required to select a demonstrator, but you’ll be able to decide whether or not to pass on your contact information to me or not.  But if you do choose to select passing your information on to me – I’ll happily mail you a 2013-2014 Annual Catalog FREE of charge!

NEW Shopping Bag Features!

  • Now you can easily save your shopping bags contents!
  • When you add items to your bag, you can choose to go directly to the bag or continue shopping.
  • You’ll see a progress bar to guide you through the ordering process
  • More images to enjoy – Additional product images are bigger and easier to view
  • Enhanced sorting – You can sort merchandise based on newest or oldest. A real plus when shopping for the latest My Digital Studio downloads!

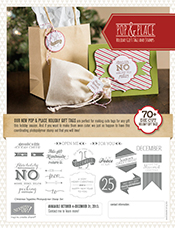
New Photopolymer Stamp Set

Endless Wishes Photopolymer banner image

The Endless Wishes Photopolymer Stamp set  (133455) is now available and contains 19 great stamps. Only available in Photopolymer this set is just $13.95 and a must have for this holiday season. So if you haven’t tried our Photopolymer Stamps yet – what are you waiting for?

Endless Wishes Photopolymer Stamp Set flyer image

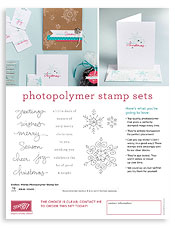
Click HERE for a PDF flyer with all the details and images

 5 NEW Digital Downloads!

MDS Hooray for Tags Designer template

You’re going to love this week’s new additions – Click HERE to see them all

Click here to order your Stampin’ Up! Products online 24/7! (US only)


Christmas Collectibles Treat Tent

Yesterday I promised you that I would share my video tutorial for my Christmas Collectibles Treat Tent. This cute little tent was my little treat for those of you who attended my Holiday Catalog Premiere Party.

Christmas Collectibles Treat Tent

These little treat tents are fun and sooo easy to make – I think you’re going to enjoy making them for family and friends this holiday season. After all who doesn’t like a little surprise?

So here is my latest video tutorial – Christmas Collectibles Treat Tent

Stop by tomorrow when I’ll be sharing the card that everyone made during the event.

Supplies:

Stamp Set: Christmas Collectibles (131772/131775) and Teeny Tiny Wishes (128748/127802)

Card Stock: Winter Frost Specialty Designer Series Paper (132341), Bermuda Bay (131197) and Whisper White Card Stock (100730)

Ink: Bermuda Bay Classic Stampin’ Pad (131171)

Accessories: Silver 1/8″ Ribbon (132137), Ornament Punch (132152), Modern Label Punch (119849), and Word Window Punch (119857)

Click here to order your Stampin’ Up! Products online 24/7! (US only)

Mystery Hostess Code

Use Mystery Hostess Code RUG6FXNY when placing your order online and your name will be entered into my Mystery Hostess Drawing. This Mystery Hostess Code RUG6FXNY will be good through Saturday, November 2nd. The number of hostess will depend on the total sales and I’ll be drawing a hostess for every $150 in sales.

SURPRISE – WEEKLY DEALS!

Weekly Deals Banner Image

Stampin’ Up! loves to surprise and delight you  – so it’s in that same spirit that they are giving us another surprise that I think you’ll enjoy. Starting today, they will be offering a weekly deal in the online store that will change every Tuesday.

Please note that these weekly deals will be offered only while supplies last! So go ahead and place your order online right away using the Mystery Hostess Code RUG6FXNY so you won’t miss out on them AND you’ll get a chance to be a winner too. The discount will appear in your shopping bag when you check out.

For those of you who are watching for our Thursday Blog One Day Sale items – they will be listed in the same location – under weekly deals, but will only be available for the 24 hour period.

Click HERE to see this week’s Weekly Deals

Pop & Place Holiday Gift Tags Introduced

pop and place

Just introduced to make your holiday gift giving quick and easy is our new Pop & Place Holiday Gift Tags. What is this? Well it is a book of 70+ tags in five designers that have been created from existing punches and die shapes. These tags coordinate with the Season of Style products in the Holiday Catalog and are great for making quick and easy tags by themselves or even combined with items you already have.

You can purchase these items individually or in 2 different money saving bundles  –

  • Pop & Place Holiday Gift Tags Book (134975)
  • Christmas Tagables Photopolymer Stamp Set (134623)
  • Pop & Place Holiday Gift Tags Bundles (135921): includes Pop & Place Holiday Gift Tags Book,Christmas Tagables Photopolymer Stamp Set
  • Pop & Place Holiday Gift Tags Starter Bundle (135290) includes: Pop & Place Holiday Gift Tags Book, Christmas Tagables Photopolymer Stamp Set, Soft Suede Classic Stampin’ Spot, and Clear Block C

PopandPlace_flyerTH_Demo_US

Click HERE for a printable PDF flyer

Paper Pumpkin Banner

Don’t forget – Time is running out to sign up for Paper Pumpkin this month. You have to sign up by midnight tonight (October 10th) so you won’t miss out on any more kits.

Remember each month’s kit is only available for a month at a time; go to www.paperpumkin.com to sign up.

It’s soooo easy:

  1. Simply sign up now by visiting www.mypaperpumpkin.com
  2. Click Get It or Join Here
  3. Complete the online form
  4. List me, (Jini Merck, Clarkesville, GA) as your demonstrator during the ordering process
  5. Then sit back and relax and wait for you kit to arrive at your door each month.

After you complete your registration, you’ll receive a confirmation email

  1. Please forward the email to me.
  2. I’ll verify you are on the list and then send you a Thank You gift for choosing me as your Demonstrator.

Click here to order your Stampin’ Up! Products online 24/7! (US only)

Photo Clothes Line

Here is my final project that I created for my daughter’s dorm room, a Photo Clothes Line using  Dyed Clothes Pins – I wanted to have a way for her to hang pictures of friends and family easily. Especially since nothing seems to be sticking to her dorm walls I was able to hang this project up easily with push pins.

Photo Clothes Line (1)

First I created three different photo clothes lines for her to hang photos and such from using these cute little Floral Frames Framelits. (Framelits aren’t really designed to cut anything other than paper, but I decided to take the risk and give it a try and it worked).

Then for a touch of the whimsical I added butterflies using the Beautiful Butterflies Bigz Die. I simply used my Crop-a-Dile to punch some holes and added some silver wire that I could bend and shape the way I wanted across her wall. It wasn’t the floral wire that I have used in the past, but since I couldn’t find any last minute on the way to Milledgeville, I figured this would have to do in a pinch. I’m not really happy with the wire so I’ll replace it the next time I visit with the floral wire I found afterwards.

Here is a closer photo of part of the photo clothes line hopefully you can see the butterflies better. The room is really narrow so it was tough to get a shot straight on of the entire thing.

Photo Clothes Line (2)

Finally I used the Dyed Clothes Pins I made to hang the photos that I attached to my coordinating photo mats. Kaitlin seems to be happy with the look and final splash of color to her room.

And of course Dad wanted to make sure his baby girl had a picture or two of him – lol. So here is one of them he chose from this spring in her graduation dress on with Larry’s other baby, his 1969 Cutlass. (Poor guy, he’s not missing her at all, ya right – he keeps asking me if she has called. I know he is counting down till fall break!)

Does this dress look familiar? It should, it is just like the one on the cover of our catalog – just in Calypso Coral. Something Kaitlin rolled her eyes at when I pointed it out to her.

Photo Clothes Line Close up

Want to learn how I created the matching color clothes pins? Why not check out my latest video, Dying Clothes Pins.

Did you like this video? Why not leave me a comment? And if you’d like to be the first to know about my latest videos why not sign up for my YouTube Channel HERE. And if you haven’t already why not sign up for my FREE Newsletter where I’ll be sending you helpful tips and hints, and videos along with my information monthly.

This last photo is of her seating area and the finished French memo boards I showed you in an earlier post. She now has lots of different places to tuck her mementos and items she wants to save.

French Memo Board in Dorm room

Kaitlin seemed very pleased when she got back to her dorm room and found I had spent some time cleaning, organizing and hanging up things while she was at class. I know she is really spoiled, right? But between her finishing up the season with Drum Corp, her heavy class load, and chest pain I felt I could spoil her a little. Even her suite mate thought that it was pretty cool of her mom to do that for her (Whew right, didn’t want to embarrass the kid!)

Supplies:

Paper: Regals Designer Series Paper Stack (130139), Polka Dot Parade Designer Series Paper (126902), Island Indigo Card Stock (122923), and Rich Razzleberry Card Stock (115316)

Accessories: Island Indigo Classic Stampin’ Refill (122932), Rich Razzleberry Classic Stampin’ Refill (115664) and Mini Clothes Pins

Click here to order your Stampin’ Up! Products online 24/7! (US only)

Use Mystery Hostess Code 64XT62GT when placing your order and your name will be entered into my Mystery Hostess Drawing. This Mystery Hostess Code 64XT62GT will be good through Saturday, October 5th. The number of hostess will depend on the total sales and I’ll be drawing a hostess for every $150 in sales.

Click Here to learn more about using the Hostess Code

Modern Medley Dry Erase Calendar

Last Friday I told you I would show you another project that I made for Kaitlin’s dorm room message center – well here is the Modern Medley Dry Erase Calendar along with the magnetic board to complete her college message center.

MDS Dry Erase Calendar

I really like the way this turned out. I used My Digital Studio to create the calendar you see. I just love the way that you are able to use a built in template and easily customize it the way you want. I even used the matching digital version of our Rich Razzleberry Designer Series Paper for the blocks on the calendar. I just changed the opacity so it gave her a hint of the color, and added special things to the days that she already knew about to save her time.

Kaitlin can easily change out the calendar each month by opening the flap on the back of the frame and inserting the new month – quick and easy for her versus the original dry erase board she wanted at the local big box store that she would have to write everything in on herself. With her busy schedule she needs easy and since it coordinated with her other items  – she loved it!

Here is a view of her dorm room wall with her message center completed above her desk. The paint on the wall was giving (our approved for use) command hooks fits and nothing would stick, so we got creative with some matching Rich Razzleberry ¼” Stiched Grosgrain Ribbon (item 126876) and thumb tacks to hang them with.

Message Center in dorm room

Later this week, I’ll show you the final project that I did for her room along with a video too – so watch for that. Mean while you can click HERE, HERE and HERE to see the other projects I made for her dorm room.

Supplies:

Paper: Modern Medley Designer Series Paper (126926), Regals Designer Series Paper Stack (130139), Island Indigo Card Stock (122923), Basic Black Card Stock (121045), and Rich Razzleberry Card Stock (115316)

Accessories: My Digital Studio (130647/130646), Basic Black 1/8″ Taffeta Ribbon (119261) and Typeset Alphabet Bigz Die (127553), 11 x 14 frame from my local big box store

Click here to order your Stampin’ Up! Products online 24/7! (US only)

Use Mystery Hostess Code 64XT62GT when placing your order and your name will be entered into my Mystery Hostess Drawing. This Mystery Hostess Code 64XT62GT will be good through Saturday, October 5th. The number of hostess will depend on the total sales and I’ll be drawing a hostess for every $150 in sales.

Click Here to learn more about using the Hostess Code

Holiday Catalog Premiere Party Rescheduled

Christmas Open House Banner Rescheduled

‘Tis the Season to mix and mingle – Christmas bells will soon jingle!
The holidays will be here before you know it –

So why not come and enjoy some fun during my FREE Holiday Catalog Event?
Get inspired and start your holiday projects!

Click HERE to see my flyer with all the details

Whether you’re new to stamping, a seasoned pro or just curious –

Everyone’s Welcome!
The more the merrier, right? So bring a friend along too.

Sunday, October 6th
Stop in anytime between 2 p.m. and 4 p.m.
An RSVP by Friday, October 4th is required to attend this event so that I can have enough goodies and supplies on hand for everyone.

Look forward to seeing you there! Did I mention this was a FREE event?

Click HERE to see my entire Calendar of Events

On a personal note – I want to thank everyone who sent their prayers, thoughts, and get well wishes to my husband who had an ATV accident on the way to the barn Friday night. It was something he does all the time, but for some reason this time the quick chore didn’t end well. Larry ended up being thrown from the ATV, bending like a pretzel, and hitting his head. Thankfully after a quite a few tests and a full check up in the ER he was sent home with a mild concussion. He is a bit bruised and sore but otherwise doing well so far. We feel blessed since he was extremely lucky and it wasn’t worse.

Here is a picture of the fort he tangled with – I think he is planning to walk to the barn for a while.

015

Modern Medley Colored Cork Board

Great news – my videos are back. After a break due to camera problems I think I’ve finally got it figured out. So here is my latest project that I’ve been wanting to share with you.

adding color to corkboards-001

I created this Colored Cork Board as part of my daughter’s message center for above her dorm room desk. When I started this project I figured I’d just use the cork board as it was but then I really wasn’t happy with the look – so after a little experimenting I came up with this technique for Adding Color to Cork Boards. It’s a lot of fun – so why not check it?

I finished up my Modern Medley Cork Board by decorating it and then added some push pins to hang things with. I made these push pins using some of our Modern Medley Designer Series Paper that I added to our little Bottle Caps (from the Spring Catalog) that I had laying around my studio. Then I just topped the Designer Series Paper with a little of our Crystal Effects allowed them to dry and Voila’ – A cork board that I’m my daughter is tickled with.

Here is a close up of the focal point.

Cork Board closeup

Do you like it? Why not leave me a comment and let me know what you think of my latest video and camera. I’m happy with it and still have some learning to do, but I think it has a little better sound quality. How about you?

If you like this project – Why not sign up for my monthly Newsletter where you’ll get tips and projects monthly delivered directly to your inbox along with my class event schedule. Or you can sign up for my Blog News and get my blog posts delivered right in your email as soon as they post. Want to get both? That’s great – just sign up for both. It’s free so why not? Click HERE to sign up today and get a FREE Pinwheel Tutorial!

Want to see the coordinating Dry Erase Board I made click here. Then  check back next week when I’ll be showing you all the finished projects in her dorm.

Supplies:

Paper: Modern Medley Designer Series Paper (126926), Island Indigo (122923), Rich Razzleberry (115316) and Basic Black Card Stock (121045)

Accessories: Island Indigo Classic Ink Refill (122932), Stampin’ Spritzer (126185), Big Shot (113439), Typeset Alphabet Bigz Dies (127553), Frame and Cork Board

Click here to order your Stampin’ Up! Products online 24/7! (US only)

Use Mystery Hostess Code WSCBPMPF when placing your order and your name will be entered into my Mystery Hostess Drawing. This Mystery Hostess Code WSCBPMPF will be good through Saturday, September 14th. The number of hostess will depend on the total sales and I’ll be drawing a hostess for every $150 in sales.

Click Here to learn more about using the Hostess Code

Holiday Catalog Premiere Party

Holiday Catalog Premiere Party Banner

Click HERE to see my flyer with all the details

NEW Items Added to Clearance Rack

Clearance Rack

Great news – lots of new items have been added to the Clearance Rack as of yesterday. Shop today and get some wonderful deals on some great items. If you are a Big Shot lover there are even some don’t want to miss dies available!

Magnetic Platform Now Available to Order

magnetic platform

Magnetic Platform Item #130658

The new Magnetic Platform for the Big Shot is finally available again. Whoo hoo! All backorders have been filled at this time and the order number has been turned back on. So why not order yours today along with your Clearance Rack items?

Click here to order your Stampin’ Up! Products online 24/7! (US only)

French Bulletin Board

Here is my latest project that I’ve been working on for my daughter’s dorm room now that we know the space that we are working with. I thought this Musical French Bulletin Board would be great for her to tuck things into quickly and it was a lot of fun to make.

The fabric is some that I had laying around the house from a project I didn’t get around to. I’ve got quite a few of those (but don’t tell my hubby that is what all those boxes are in my office Oh, wait he has his own stack- lol).

French Memo Board wo buttons

Anyhow, once I got the Tempting Turquoise Ribbon on the board I thought it needed something more – so I decided on some Rich Razzleberry Buttons that I had in the drawer.

French Memo Board w buttons

I just love the way that I can use my Stampin’ Up! products in other ways – they aren’t just for card making! And I think Kaitlin will be happy when she sees all three of the boards that I made together. They are sure to give her dorm room a nice pop of color on the wall above the futon.

Free MDS Calendar for your Desktop

MDS Old School September Wallpaper

It’s another great week for new downloads-pocket cards, a retro school kit, a FREE September desktop wallpaper, a traveling gift tag, and four downloads from traditional products. Be sure to check them out and get in on the fun today.

Want to learn more about My Digital Studio? Why not check out my Introduction to My Digital Studio Class HERE.

Click here to order your Stampin’ Up! Products online 24/7! (US only)

Hostess Code TQWHSYW3 – You’ll receive a FREE Washi Tape 5 Ways Class Tutorial (a value of $14.95).  It’s my gift to you! And since Washi Tape is so much fun – you’re going to love this FREE Class!

Modern Medley Dry Erase Board

Today I thought I would show you a dry erase board project that I made for my daughter’s dorm door using the Modern Medley Designer Series Paper. I thought this would be a fun way for her friends to leave her notes when they needed to and she was out.

Modern Melody Dry Erase Board

Kaitlin is a music major and so I wanted to not only tie in her interest but also her dorm room color scheme. So to create this dry erase board I used our Modern Medley Designer Series Paper along with our great Regals Color Collections Designer Series Paper Stacks. Added some of our great letters from the Typeset Alphabet Die and voila’!

We got to meet up with Kaitlin this weekend for her Drum Core performance at the Southern Showdown. A few of her old high school friends went along with us, so before I packed the dry erase board into her box, I had them leave some messages on it for her – It worked great and I thought that the messages from her friends would be a nice surprise when she opened the box.

A few of her friends also helped me pick out the final element that you see at the bottom– a greeting from one of our retired stamp sets, Music Speaks. I just loved the sentiment “Music speaks the beauty words cannot express!” Originally I had wanted to put “notes” on the Decorative Label Punch. Get it? Music Major – notes?

I made several different versions of the Decorative Labels that she can swap out since I couldn’t decide which one I liked best. (I just tucked them in the back after adding a little of our Multipurpose Liquid Glue (item 110755) and allowing it to dry so that it was like a post it note.

Kaitlin CV Southern Showdown

It was great seeing her for a couple of hours and Larry and I were really proud of her. CV not only placed first in this competition, but in the Southern Region and broke their own record for highest score. A big deal if your familiar with marching.

Supplies:

Paper:  Modern Medley Designer Series Paper (item 126926), Regals Collection Designer Series Paper Stack (item 130139), Rich Razzleberry, Island Indigo and Basic Black

Accessories: Decorative Label Punch (item 120907), Stampin’ Write Markers, Typeset Alphabet Dies (item 127553) and Basic Black 1/8″ Taffeta Ribbon (item 119261)

Click here to order your Stampin’ Up! Products online 24/7! (US only)

Hostess Code  Hostess Code TQWHSYW3

Another Thank You Photopolymer banner

Another Thank You Photopolymer Stamp Set

Here is a great new stamp set, Another Thank You (item 133454) now available in our Photopolymer that has just been released.

Another Thank You Photopolymer Flyer Image

Click HERE to see the printable flyer with all the details.

Click here to order your Stampin’ Up! Products online 24/7! (US only)

Hostess Code TQWHSYW3 – You’ll receive a FREE Washi Tape 5 Ways Class Tutorial (a value of $14.95).  It’s my gift to you! And since Washi Tape is so much fun – you’re going to love this FREE Class!

Click Here to learn more about using the Hostess Code

Paper Pumpkin Promotion Image

Paper Pumpkin Special Offer

Don’t miss out there are only two weeks left – Now until August 31, 2013

When you use the promotion code PUMPKINDEAL to join Paper Pumpkin before August 31, 2013, you’ll pay only $10 a month* for the first two months.
– the shipping’s included!

Here is the Fine Print:

  • For new subscribers only.
  • Promotion applies only to the first two months of a new subscription. After receiving two month’s worth, the price for each month’s kit will go to the regular price: $19.95.
  • You need to visit mypaperpumpkin.com to join.
  • You must click “Add Promo Code” and then enter the promo code PUMPKINDEAL in the “Promo Code” field when you sign to take advantage of this promotion.
  • You must join by Saturday, August 31, 2013; 11:50 PM (MT).

Click here to Start your Paper Pumpkin Subscription 24/7 (US only)