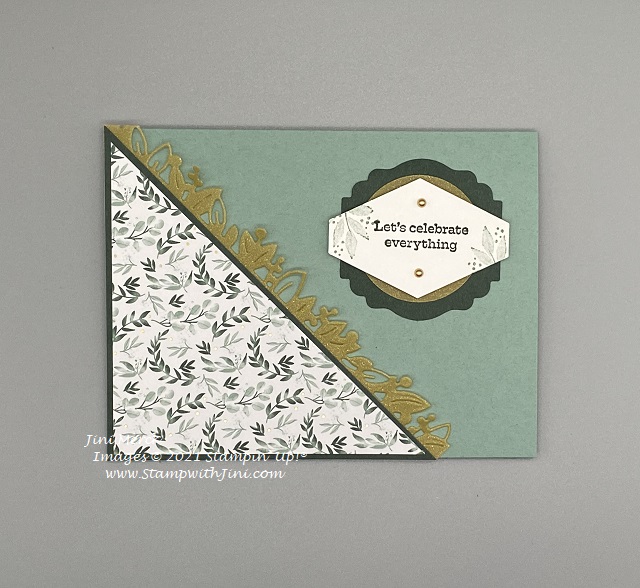
Yesterday I shared with you a fun One Sheet Wonder Template using the Ever Eden Specialty Designer Series Paper and as promised here is the Lay Out #2 Card Tutorial.
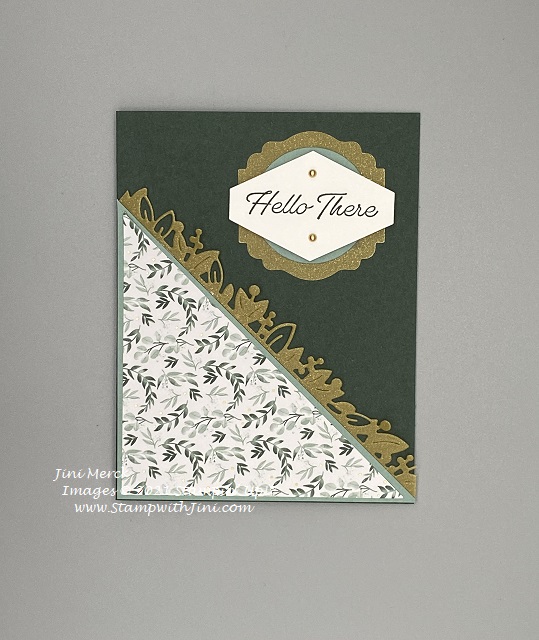
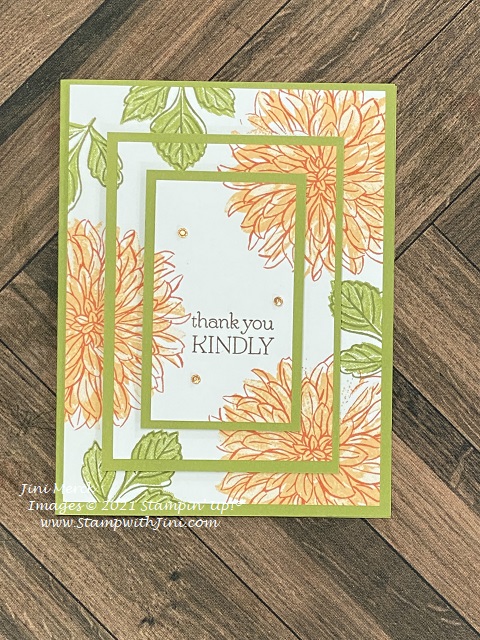
A portrait layout with rich Gold Shimmer Vellum. I love the translucent look of this vellum, it is simply gorgeous. But it is part of the Retirement List so it’s while supplies last so you’ll want to stock up on this elegant crafting option.
This card is quick and easy and if you follow my One Sheet Wonder 6×6 Cutting Guide Template #1 Video Tutorial. You can see it HERE.
One Sheet Wonder Eden’s Garden Lay Out #2 Video Tutorial
One Sheet Wonder Template #1 – Eden’s Garden Lay Out #2 Card Tutorial PDF
Enjoy!
And then stop back by tomorrow for Lay Out #3 and another fun tutorial using this One Sheet Wonder Template!
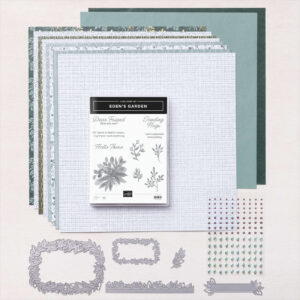
Supplies:
Stamp Set: Eden’s Garden (*157823)
Inks: Evening Evergreen (155576/155577) and Soft Succulent Classic Ink (155778/155779)
Paper: Ever Eden Specialty Designer Series paper (*159996), Ever Eden 12×12 Cotton Paper (*159997),Gold Shimmer Paper (Retiring 156471), Evening Evergreen (155574), Soft Succulent (155776), and Basic White Card stock (159276)
Accessories: Eden Dies (157831), Tailored Tag (145667) and Label Me Lovely Punches (151296), Layering Circle Dies (151770), Metallic Pearls (14622), and Take Your Pick Tool (144107)
*Eden’s Garden Collection (160849)

Click here to order your Stampin’ Up! Products online 24/7! (US only)
Shop at my Online Store and use Host Code TUK3SXFD and receive a FREE Gift
Click Here to learn more about using the Hostess Code If you order Online make sure your profile information is up to date and you’ve allowed me to send you your free gift.
If your Online order is $150 or more make sure not to use the host code so that you can take advantage of the Host Benefits yourself – No worries, I’ll still send you your free gift. It’s my way of saying thank you for choosing me as your demonstrator!