Punch Art Scarecrow Tutorial

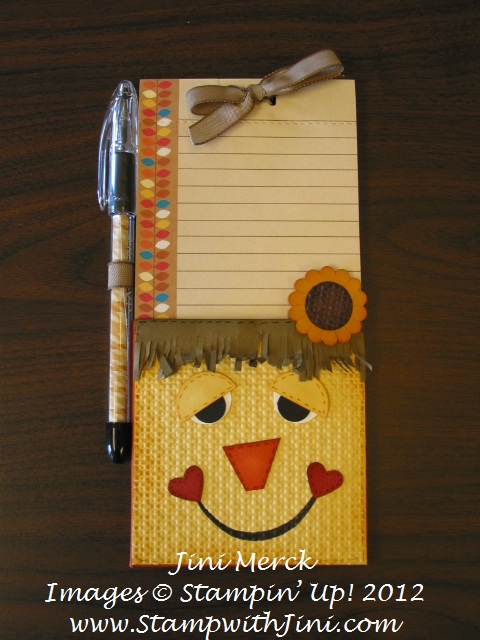
Wednesday I had my TEAM meeting and we made this little Punch Art Scarecrow Notepad together.

As I mentioned yesterday I received this scarecrow punch art swap at the Chattanooga Regional which was the inspiration for this project and I just tweaked the idea a bit to suit my style. You can click HERE to see my earlier post.

I loved the way this little guy turned out and so did my TEAM members. We had a lot of fun putting these Punch Art Scarecrow Notepads together. I like to make little gifts like this and thought this made a great project to give someone this fall who may not celebrate Halloween.

What do you think? Why not leave me a comment and let me know what you think. I love receiving feedback from you and it makes my day to know you’ve read my post. Sometimes I wonder if I’m the only one out there. Ever feel like that? I’ll try and respond to you when you leave comments too.

So……without further ado…. here is the promised tutorial for my Punch Art Scarecrow.

 Scarecrow Punch Art Tutorial

Supplies:

So Saffron card stock

Soft Suede card stock

Riding Hood Red card stock

Tangerine Tango card stock

Whisper White card stock

Basic Black card stock and Stampin’ Write Marker

More Mustard Classic Ink and Stampin’ Write Marker

Cherry Cobbler Classic Ink and Stampin’ Write Marker

Cajun Craze Classic Ink and Stampin’ Write Marker

Early Espresso Classic Ink and Stampin’ Write Marker

Stampin’ Sponges or Sponge Daubers

Small Heart Punch

½” Circle Punch

¾” Circle Punch

1″ Circle Punch

Big Shot

Square Lattice Embossing Folder

Paper Snips

Bone Folder

Multipurpose Liquid Glue

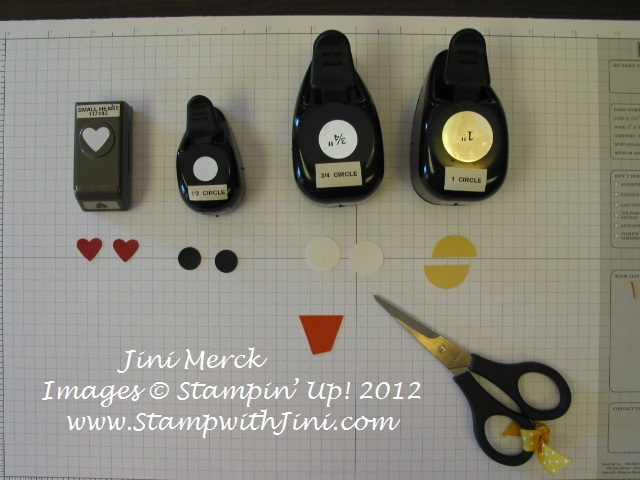
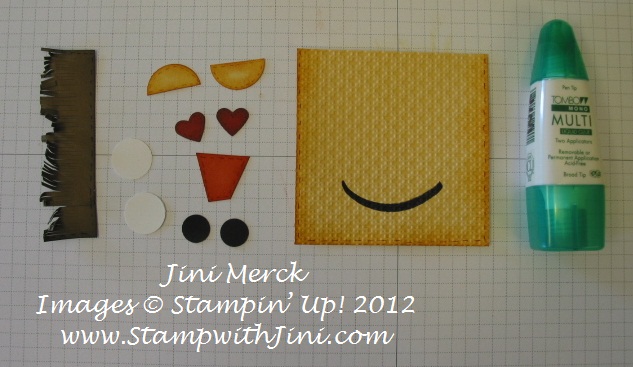
Start by punching out the following pieces –

Riding Hood Red CS and the Small Heart Punch – 2 hearts

Basic Black CS and the ½” Circle Punch – 2 circles

Whisper White CS and the ¾” Circle Punch – 2 circles

So Saffron CS and the 1″ Circle Punch – 1 circle, cut in half with the Paper Snips

Then take a piece of Tangerine Tango CS that is 1″ wide and cut a triangle shape, Cut off the one pointed end to create the nose.

You should now have what looks like this and you are ready to begin. 
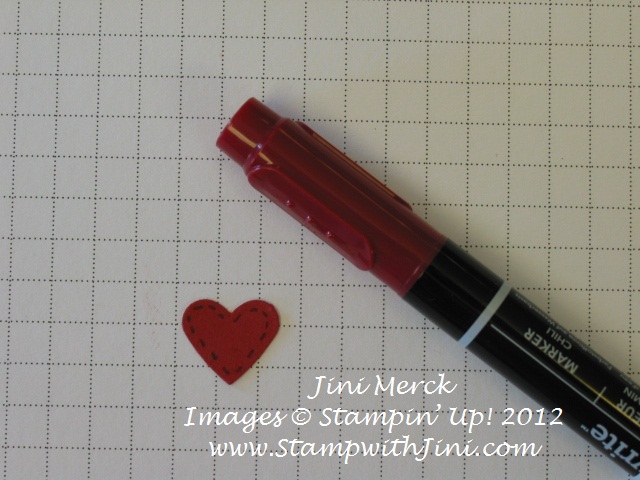
Using the Cherry Cobbler Marker Add Faux Stitching around the outside of both hearts.

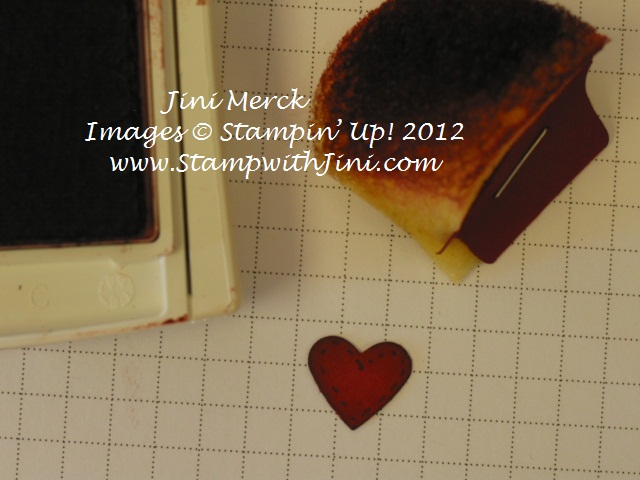
Then sponge both of the hearts with Cherry Cobbler Classic Ink. Set aside for later.

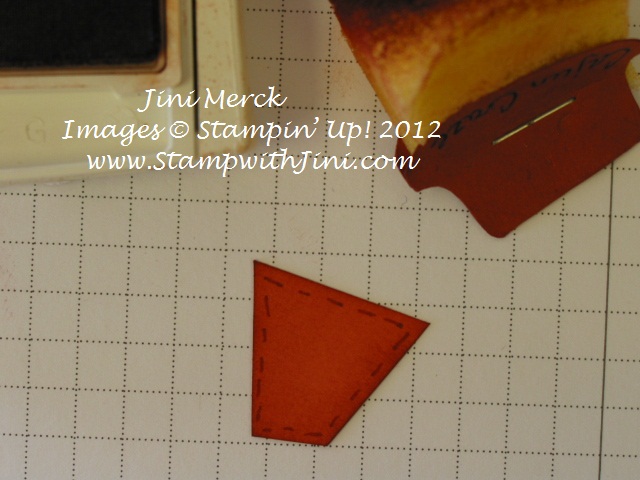
Next add Faux Stitching to your Tangerine Tango triangle with a Cajun Craze Stampin’ Write Marker. 
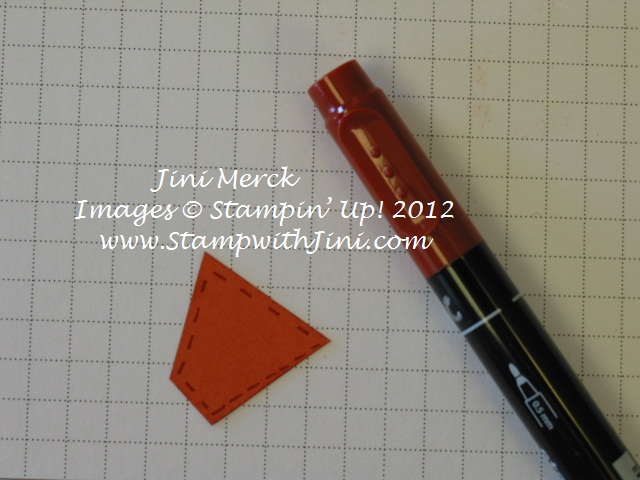
And Sponge the edges using Cajun Craze Classic Ink and set aside for later.

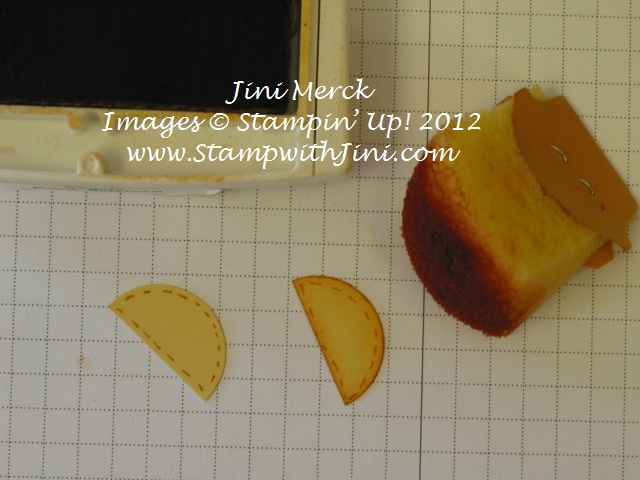
Create more Faux Stitching on the two half circles with the More Mustard Stampin’ Write Marker, 
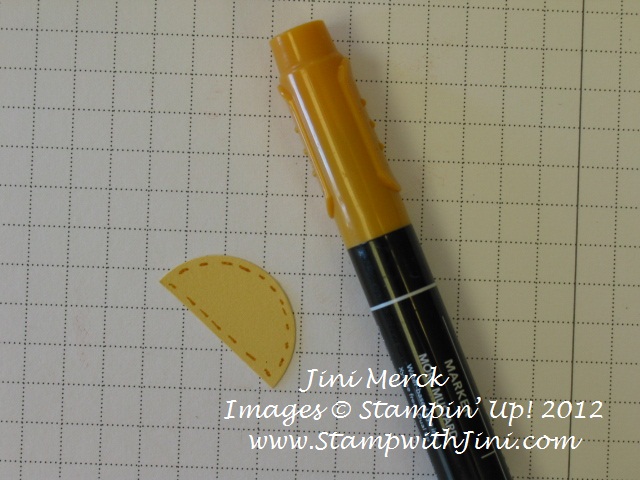
Sponge the outside edges using More Mustard Classic Ink and set aside for later. 
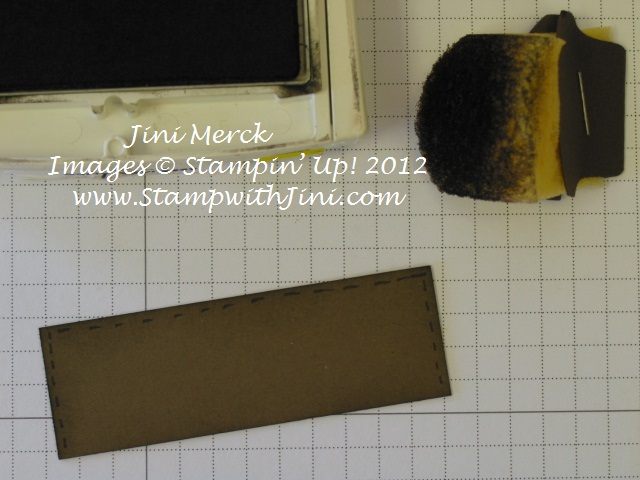
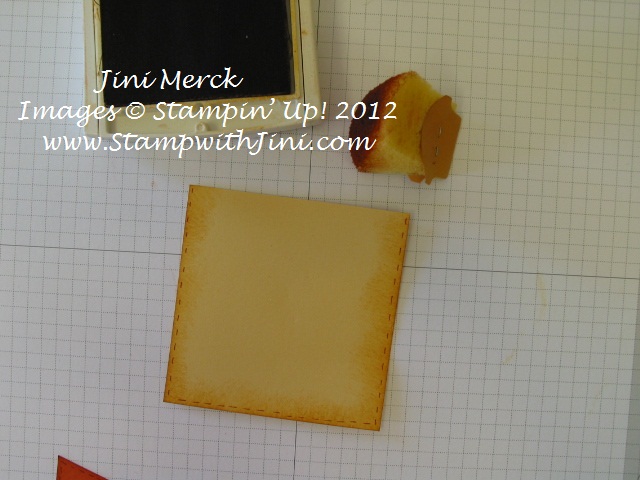
Now take a 3 ½” x 1″ piece of Soft Suede CS and add Faux Stitch using an Early Espresso Stampin’ Write Marker on both short sides and one of the long sides. 
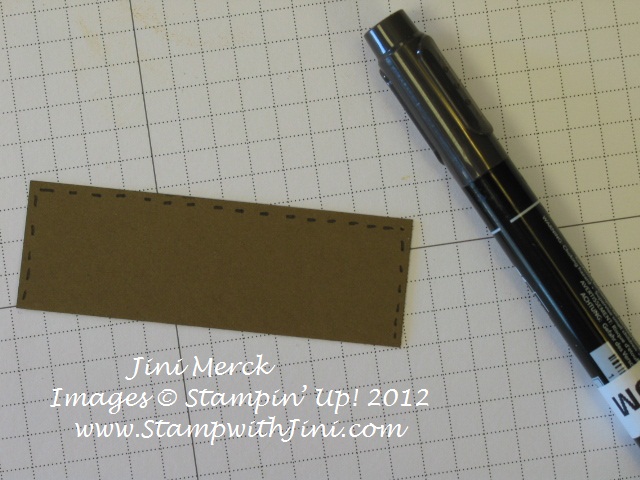
Sponge all four sides on the front and then flip it over and sponge the bottom long edge on the back. 
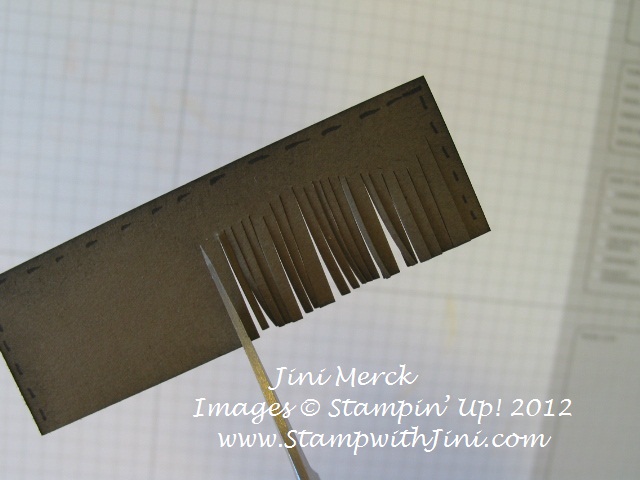
Next take your Paper Snips and cut a fringe on the bottom edge of your Soft Suede CS piece.
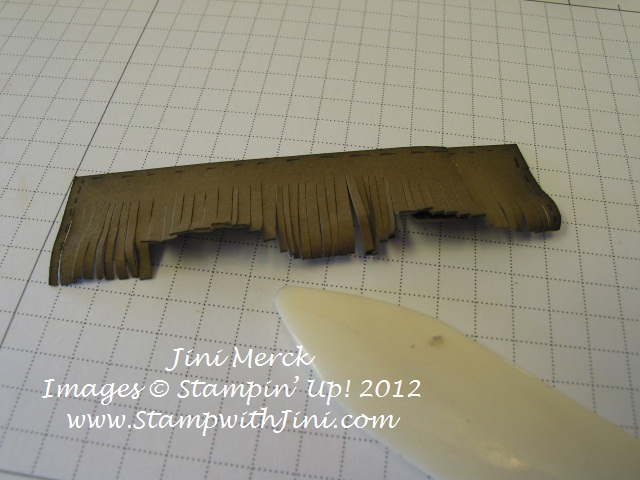
Next add some texture by curling the fringe you just created with your Bone Folder, alternating front and back curls. 
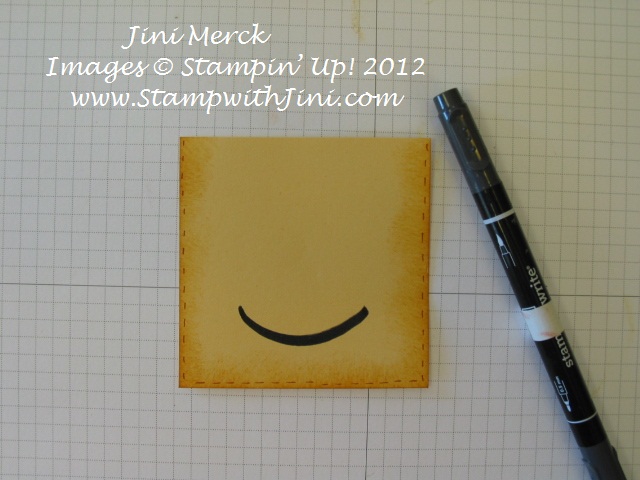
Using a More Mustard Stampin’ Write Marker create Faux Stitching around 3 sides of your 3 ½” x 3 ½” So Saffron piece of CS. 
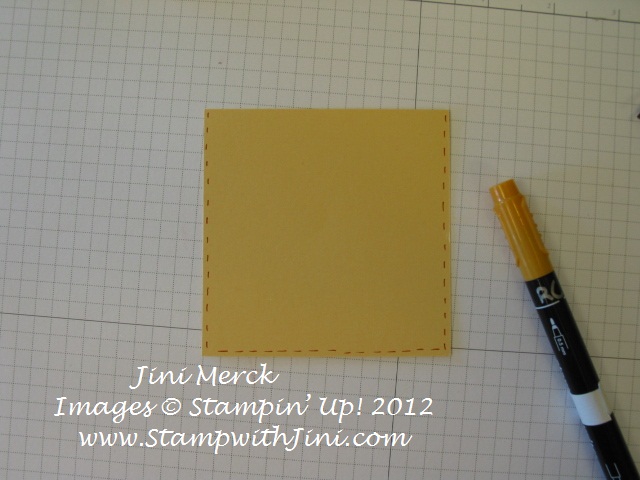
Sponge the edges on the same three sides using More Mustard Classic Ink.

Next give your little guy a smile with a Basic Black Stampin’ Write Marker. I used the flare tip end. (Here is a Tip – Not comfortable free handing this part? Use the edge of a glass or any round shaped item as a guide.) Look you can see his little face already starting to take shape. 
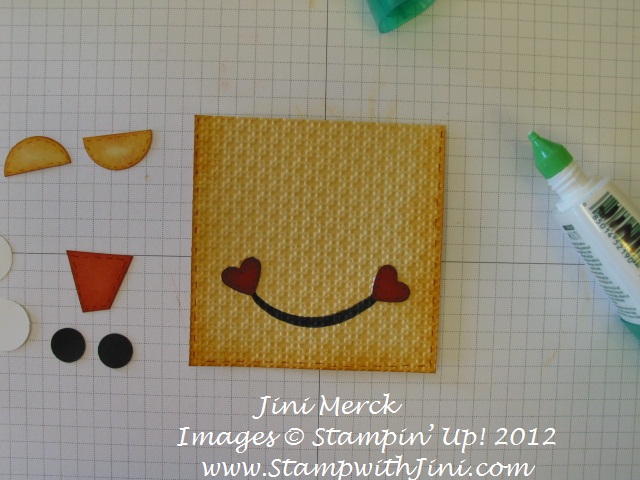
Run this piece through the Big Shot using your Square Lattice Embossing Folder.

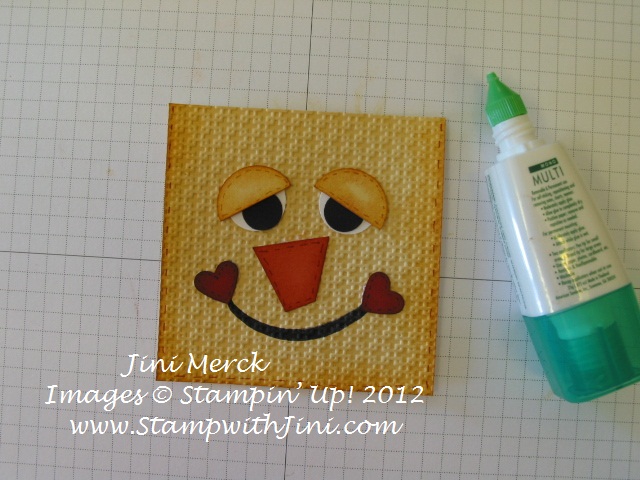
Now you’re ready to assemble and you should have what looks like the photo below.

Add a smile to this little guys face by adhering the 2 small hearts to either side of the smile you drew. 
Next add the ¾” Whisper White circles. 
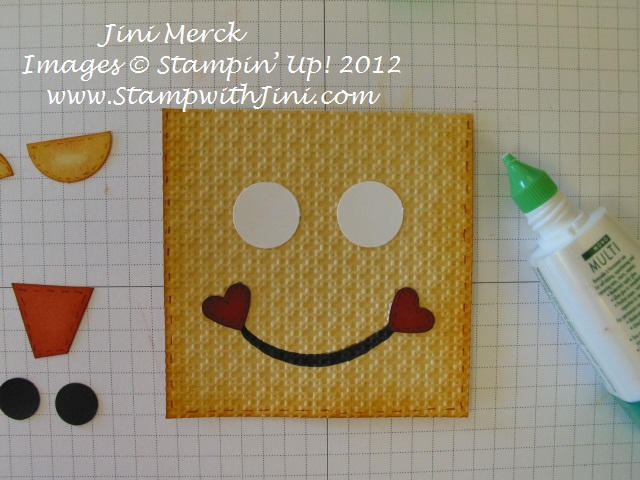
(Just a tip – when using Multipurpose Liquid Adhesive I like to place the glue on the bigger piece of card stock versus the smaller piece that I am gluing on. It is easy to reposition the piece once it is placed onto the project and I seem to stay a little cleaner too!)

And then the ½” Basic Black circle – look mom I can see! 
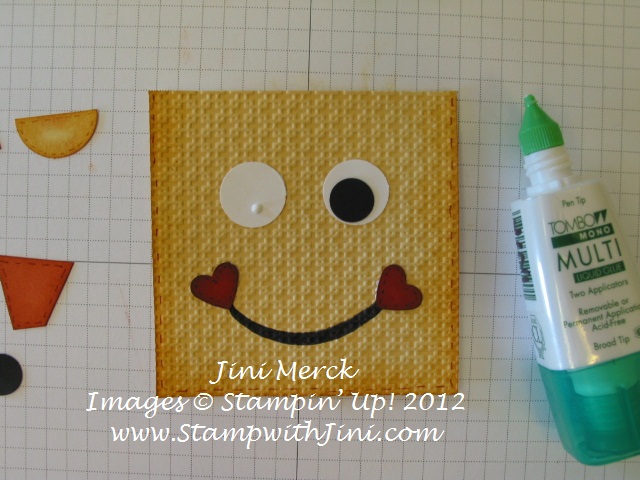
Next add his little Eye lids to make him look a little sleepy and give him some personality. After all guarding those sunflowers is hard work! 
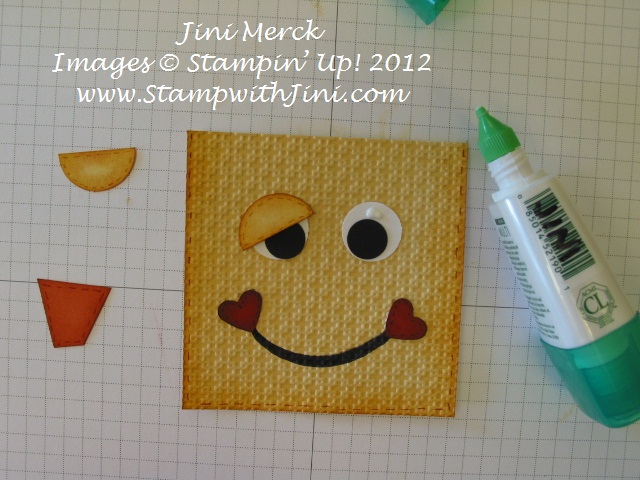
And finally add his little nose so he can smell the sunflowers.

Attach the piece of fringed Soft Suede CS and Voila’ hair!  Here’s your little guy – you’re almost done. 
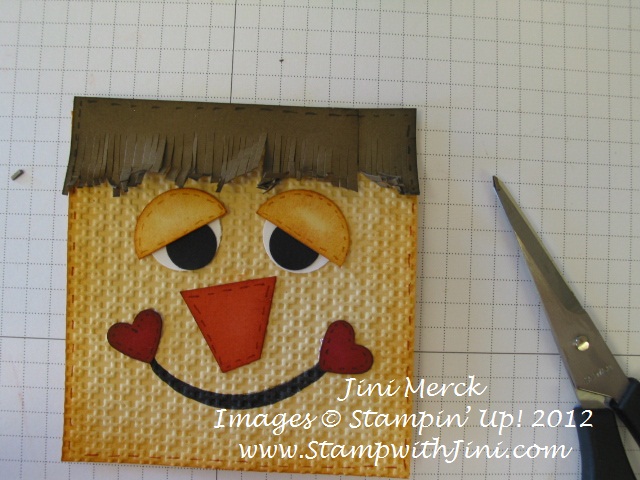
Finally take your Paper Snips and cut at different angles chunks out of his hair. That sponging on the back of the piece earlier is now starting to show a bit. Its ok you’re adding to his personality.  You can also fold, bend and crumple it a bit to add a little height and disarray to his do – After all whose hair looks great after standing in the field all day? 
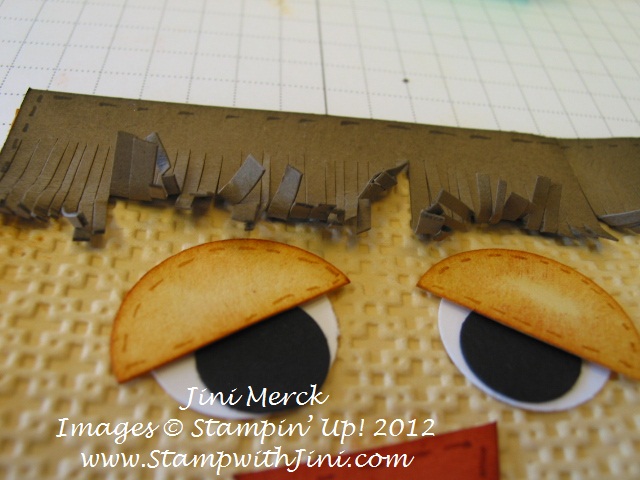
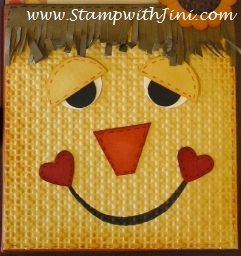
Voila’ you’re finished and isn’t this little guy adorable?  Go ahead and attach his little face onto your project!
Click here to order your Stampin’ Up! Products online 24/7! (US only)

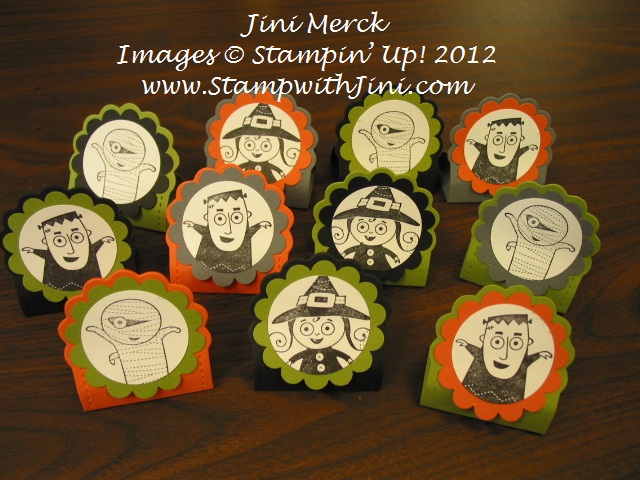
Googly Ghouls Treats

I love making cute little treat items to give out to family and friends; so when I saw the Googly Ghouls stamp set in the Christmas Catalog it seemed like a great choice for one of my Chattanooga Regional swaps. You can make quick and easy treat items with the Googly Ghouls images. This treat happens to be made with our Two Tags die and holds a chocolate nugget. Isn’t it cute? Which Googly Ghouls image is your favorite?

Want to add alittle Googlies to your Googly Ghouls images? Why not try our self adhesive Googlies at only $2.50 for a package of 50 they’re a deal!

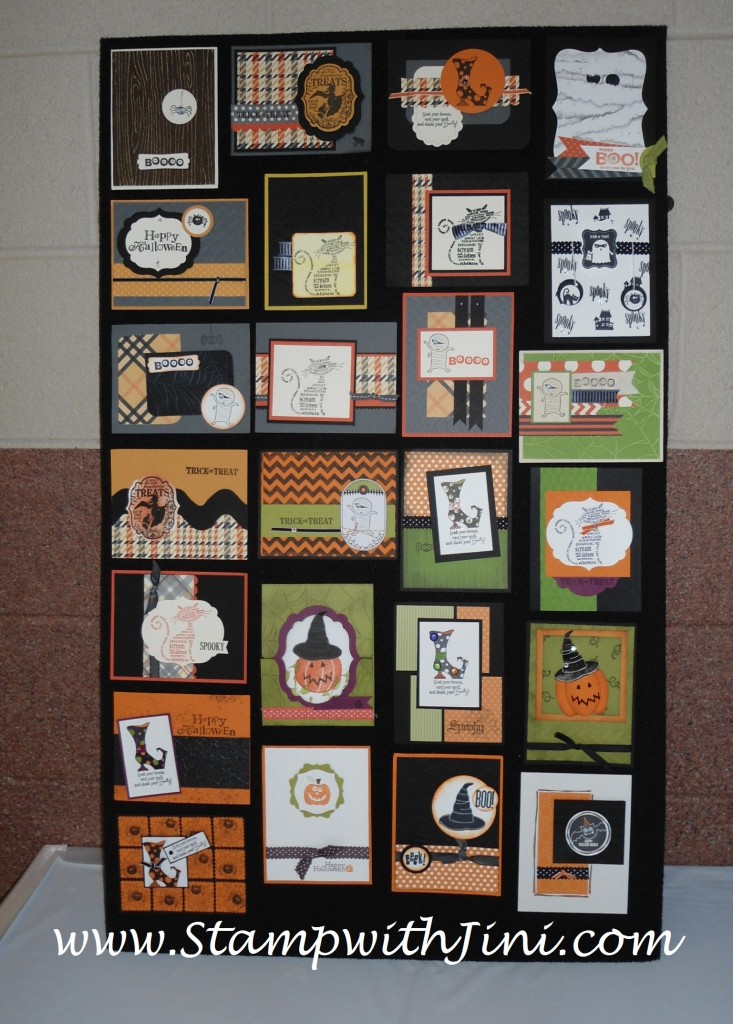
Part of what I love about Stampin’ Up! events is all the wonderful idea boards they share with us and Regional is no exception. Check out this Halloween themed board.

Supplies:

Stamp Set: Googly Ghouls

Inks: Basic Black

Paper: Old Olive, Tangerine Tango, Basic Gray and Basic Black

Accessories: Big Shot, Two Tags Die, Scallop Circle Punch and 1 3/8″ Circle Punch, Sticky Strip and Simply Score Board

Click here to order your Stampin’ Up! Products online 24/7! (US only)
Just Believe

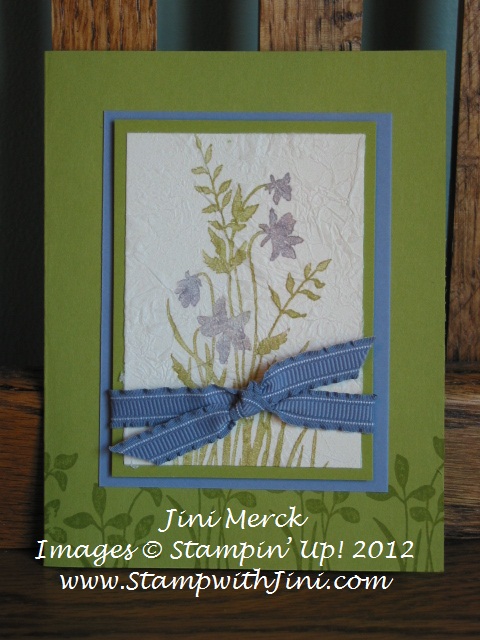
I simply love this Just Believe image it makes me think of the meadows of my childhood that were filled with the beautiful little violets in the spring. So when I saw the Just Believe stamp set I thought it would be wonderful with the Faux Silk technique that I used here on my Chattanooga Swaps last weekend. What do you think?

Supplies:

Stamp Set: Just Believe

Inks: Lucky Limeade

Paper: Wisteria Wonder and Lucky Limeade

Accessories: Wisteria Wonder 3/8″ Ruffled Ribbon, 2011-2013 In Color Stampin’ Write Markers

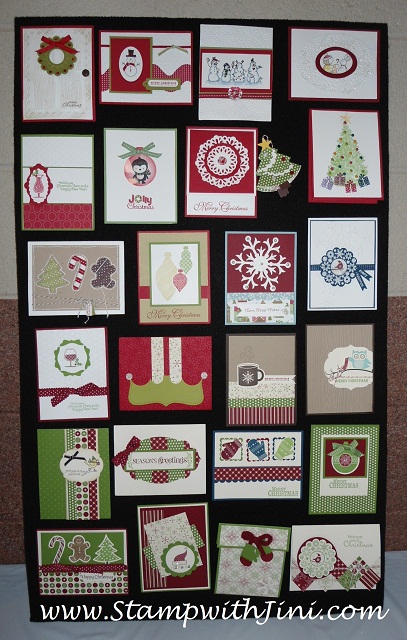
Check out this great display board of holiday cards from the Chattanooga Regional.

Click here to order your Stampin’ Up! Products online 24/7! (US only)
Chattanooga Regional Creative Challenge- What a Thrill

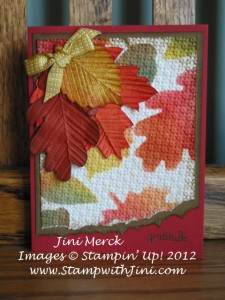
After a wonderfully energizing day at Regional that included meeting new stamping friends and seeing old ones,  swapping cards, learning new tips and ideas, prize patrol, great giveaways, and of course spending time stamping I was shocked and honored to learn that my Festive Fall Fun swap card was one of the 2 Creative Challenge winners chosen by the Stampin’ Up! staff to be featured as a  winner at the Chattanooga Regional.

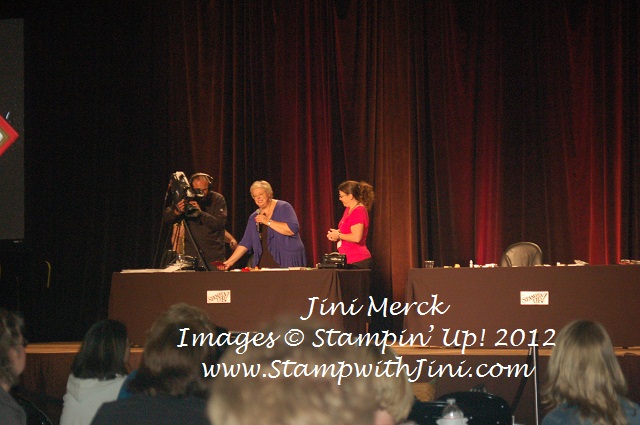
I have to tell you I couldn’t believe it as my name was called and my card was shown on the two huge screens. Mine was just one of two cards chosen from the demonstrators there! My ears roared while my team encouraged me to get out of my seat and up onto the stage. And since Bonnie Thurber was describing the other persons’ card as mine while I approached the stage, the only thing going through my mind as my friends cheered me on was that the lovely Christmas card Bonnie was describing wasn’t mine.

I can’t tell you how thrilled I was to receive a hug and generous gift, a shopping spree, that was presented to me by the director of Demonstrator training, Bonnie Thurber. Even now I sit here looking at the delightful card they gave me and shake my head because it doesn’t seem real.  What a thrill it was to be chosen. And of course now I can order all those wonderful items on my wish list from the Holiday Catalog with my shopping spree! Yippee!

Would you like a chance to join in all the Stampin’ Up! fun? If you love to stamp why not join my team! You can click HERE for more details on the benefit of becoming a Stampin’ Up! Demonstrator.

Are you asking how you can learn how you can learn this technique and make this card too? Now you can! I can teach you how in my Festive Fall Fun Stamp Camp. Why not sign up today and learn how to make this winning card along with the other fun projects at my upcoming October event, Festive Fall Fun Stamp Camp. Click HERE to see my Calandar of Events and all the details.

I bet you’d like to see that lovely Christmas card I mentioned earler. I’m sorry to say I don’t remember the name of my fellow demonstrator who also received this honor and was with me up on stage since I was so stunned. If you do, let me know so I can give her credit for her card that she created with the Come to Bethlehem stamp set. Isn’t it lovely?

Click here to order your Stampin’ Up! Products online 24/7! (US only)
More Regional Swaps

Got Milk?

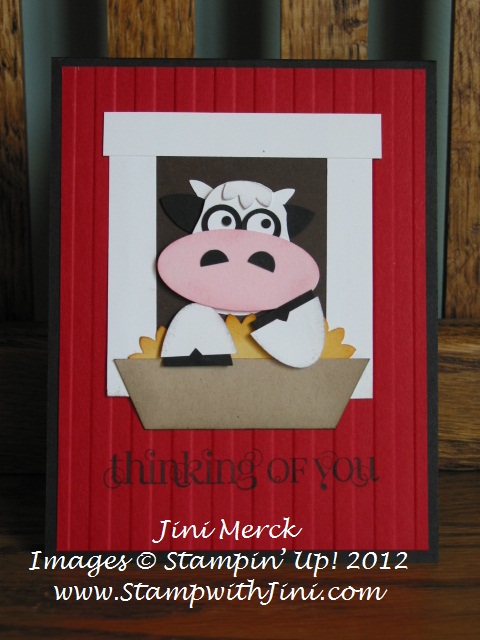
Regional attendees seem to really like my Got Milk? Card. You can click HERE to see how to make this cute little feller.

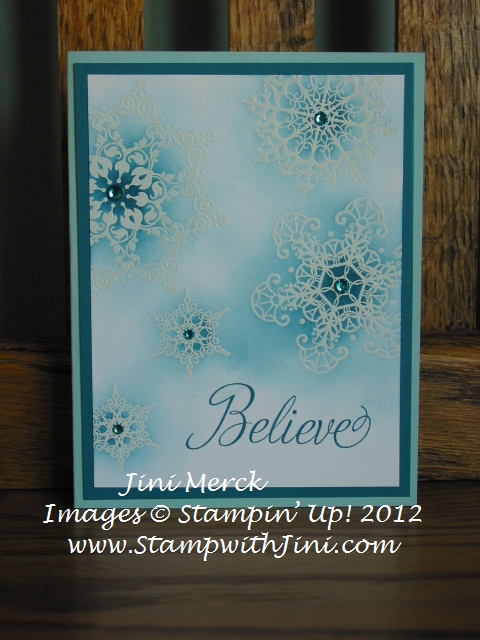
Also a favorite was the Snowflake Soiree card that is part of my Christmas Stamp-a-Stack coming up soon. There is still time to sign up for my Stamp-a-Stack and get a head start on your Christmas cards. Just Click HERE for my Calendar of Events and pick a day that works best for you.


Click here to order your Stampin’ Up! Products online 24/7! (US only)
 

Fall Foliage Regional Swap

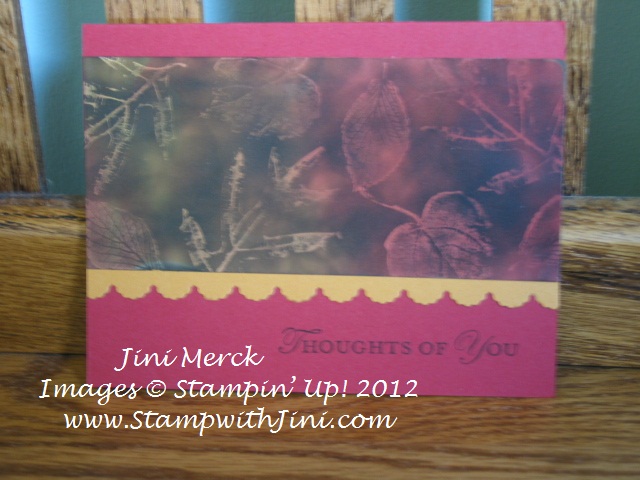
I promised you before I left I would show you the regional swaps that I made and took with me to the Chattanooga Regional. So I thought I would start by sharing with you my Fall Foliage swap. I love the way that this card turned out. Here in North Georgia the fall foliage is already starting to turn so it seemed fitting. I really love the way that this card turned out.

Techniques are always fun to learn and do. Do you like to learn techniques? If so, maybe one of my clubs might be something that interests you, just contact me for more details – Or if you don’t live local how about joining my Virtual Club? You can click HERE for more details on my Virtual Club.

Click here to order your Stampin’ Up! Products online 24/7! (US only)
Gift Bags for Regionals

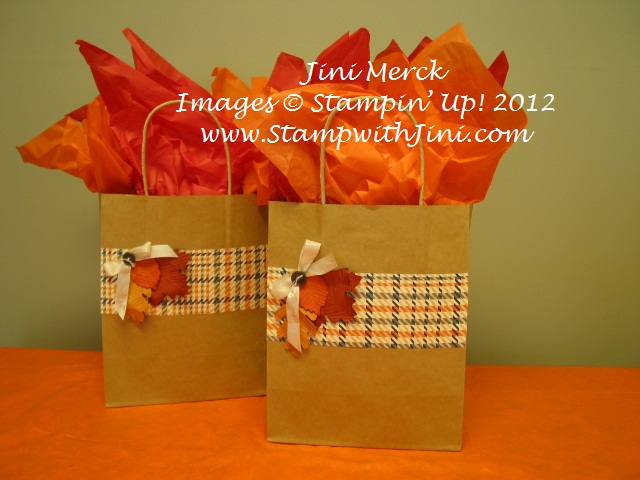
Yesterday I showed you my Tic Tac Regional goodie for my room mates. You can click HERE to see that post. Well I was having so much fun making Regional roomie gift items for my TEAM that I thought I would make a cute bag to hold everything for them. So here is what I came up with.

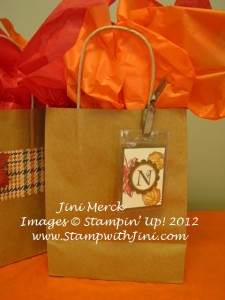
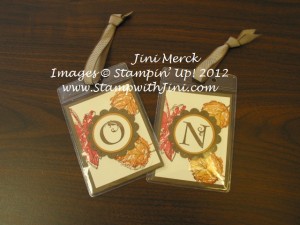
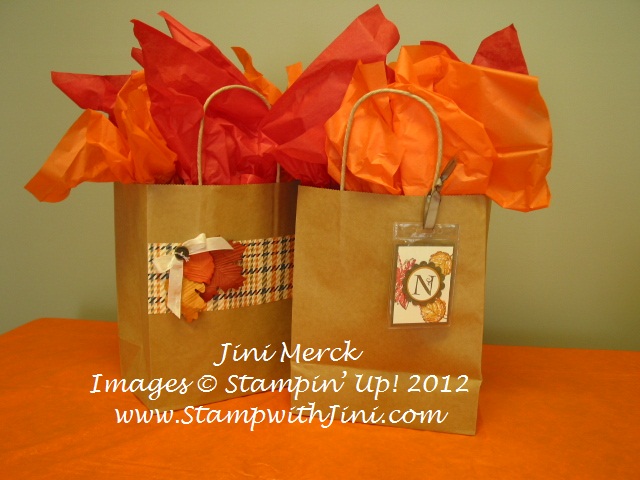
Now, I thought I was being smart by just varying the tissue paper in the two gift bags. However, I quickly realized that since I personalized the notebooks with their initials I wasn’t going to remember which bag was which. My CRS, as my kids call it, was kicking in big time. Sooo.. I got to thinking about bag tags making it easy to identify their individual gifts. Voila! I found my extra stash of name tags that I’ve used before (when I made tags for my daughter’s birthday gift of luggage this past spring) and came up with these cute little fall themed tags for the bags.

My TEAM loved them and quickly moved them to their bags they were taking to the Regional that held their swaps.

Here is a close up of the tags. What do you think?

Here are the finished bags with tags – front and back.

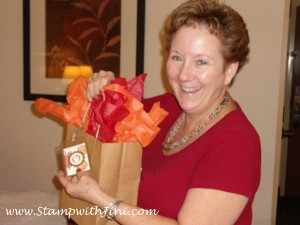
and here is my TEAM member Janie getting her bag

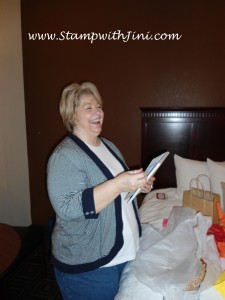
and my downline Cindy opening her notebook when we arrived in Chattanooga at our hotel Friday night.

I’ve got such a great TEAM and we have such fun stamping together! The fellowship of stamping is one of the best parts that I love about the Stampin’ Up! experience.

Have you ever thought about becoming a Stampin’ Up! Demonstrator? Would you like  to learn more about it? Click HERE for more information about joining my TEAM. Not sure, but you’d like to see what it is all about, why not join us at one of my TEAM meetings. Contact me today for more information.

Click here to order your Stampin’ Up! Products online 24/7! (US only)
Regional Goodies!

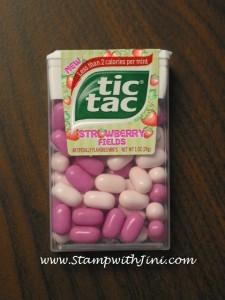
I love to make little goodie items and so when I saw these cute little strawberry tic tacs  in the checkout line last week I impulsively bought them. Don’t they sound yummy?

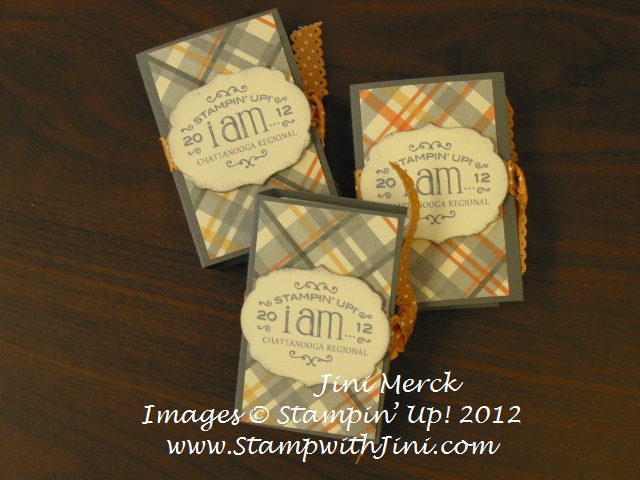
When I got them home I thought my TEAM would enjoy them so I decorated them up a little bit with the same Desiger Series Paper, Howlstooth & Scaringbone from the Holiday Catalog that I used for my TEAM’s notebooks from yesterday’s post. You can click HERE to see that post.

Didn’t they turn out cute? I used the MDS2 to create the little Regional logo that I put on them. I love how easy it makes doing my projects and it make resizing the image for any project simple too. Want to learn more about our FREE MDS2 Trial?

Click HERE for more details about the MDS2 30 Day FREE Trial Offer.

Click here to order your Stampin’ Up! Products online 24/7! (US only)
Gifts for My Roomies at Regional…..

Well we’re back and we had such a blast at the Chattanooga Regional that I don’t know where to start. I’m just bubbling over with all the wonderful tips and information that were shared with us on Saturday that I’ll spend the next week sharing it all with you!

I’m going to start with my TEAM gifts first, since that is the beginning and hope you’ll come back each day as I share more of the Regional highlights with you.

As I mentioned before, this is the first Regional that my TEAM members have been able to attend, so I wanted to do something extra special for them as my roomie gifts. I myself like to take lots of notes for stamping projects and thought they would too, so I thought these notebooks would make a wonderful roomie gifts.

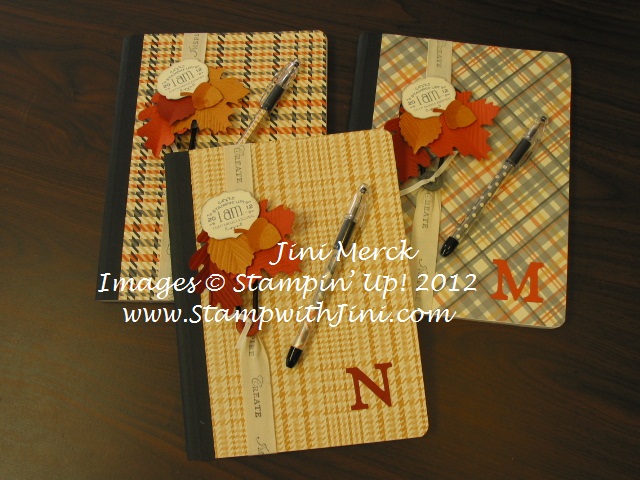
Here is a photo of all three of our books together.

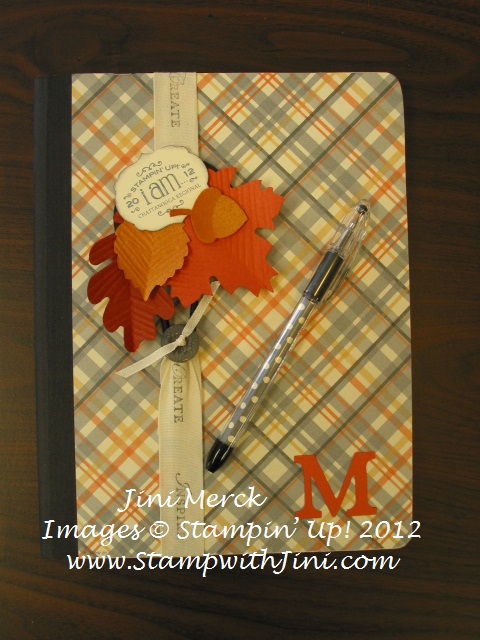
And here is a close up of just my notebook. Don’t you just love the Howlstooth & Scaringbone Designer Series Paper? It has such wonderful colors and patterns that it’s not just for Halloween! Why not get yours today Click HERE to see all our wonderful Holiday Catalog items.

Here is a close up of my notebook, I just love the softness of this pattern and I’m a “gray” person so I couldn’t resist using it for mine.

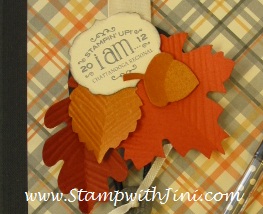
Now, how about a close up of the Chattanooga Regional bookmark that I made to go with it – What fun they are to make too! Did you notice the medallion I created? The bookmark medallion was made with our Demonstrator only MDS2 Download from our Convention this past summer. I just switch things up a bit and adapted it to our Chattanooga Regional. MDS2 is sooo easy to work with and a great for projects of all kinds. Want to learn a bit about MDS2, watch my calendar for my introduction to MDS2 classes coming soon.

Would you like to learn how to make your very own notebooks and bookmarks? If you want to learn how to make these for yourself, why not check out my Festive Fall Fun Stamp Camp by clicking HERE and signing up today to hold your spot!

Click here to order your Stampin’ Up! Products online 24/7! (US only)