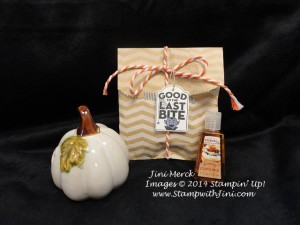
Spooky Spooky Designer Bag

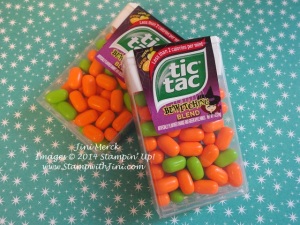
I recently ran across these fun little packs of tic tacs  for Halloween when I was shopping and just had to find a use for them.

Halloween tic tac image

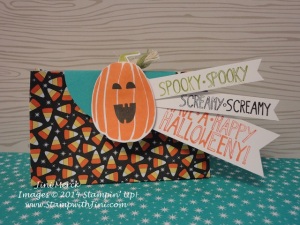
I love to find fun ways to give a little something to my friends, and these are great for both guys and gals, so I created this little gift bag using our Motley Monsters Designer Series Paper.

Fall Fest Halloween Designer Bag (2)

To create the focal point I used my Fall Fest Stamp set and the coordinating Fall Fun Framelits Dies (Bundle 137628). I find myself constantly reaching for this set since it contains such a variety of images for fall.

I added a little piece of Natural & Old Olive Two Tone Trim by the stem. Can you see it? It thought it added a nice little touch of texture. And I used the Halloween sentiment from the Mingle All the Way stamp set on little banners. I simply colored the different parts of the sentiment image using my Stampin’ Write Markers and did each banner separately.

And of course the tails were easy since I used my Hexagon Punch. (What did we ever do before this punch? LOL)

Would you like to know how I made this great little designer bag? Why not watch my Video Tutorial HERE and I quickly show you how.

Supplies:

Stamp Set: Fall Fest (135194) and Mingle All the Way (135770/135773)

Inks: Memento Tuxedo Black Pad (132708), and Tangerine Tango Classic Ink (126946)

Paper: Motley Monsters Designer Series Paper (135819), Bermuda Bay (1311997), and Whisper White Card Stock (100730) 

Accessories: Fun Fall Framelits Dies (135856), Natural & Old Olive Two-Tone Trim (135837), 2 1/2″ Circle Punch (120906), Handheld Stamper (135850) and Silver Mini Staples (135847), Brights Collection Stampin’ Write Markers (131259), Basic Black Stampin’ Write Marker (100082), Hexagon Punch (130919)

Click here to order your Stampin’ Up! Products online 24/7! (US only)

Hostess code T4TV6CAB

Place an Online order with me and use my Hostess Code T4TV6CAB  and I’ll send you a FREE Tutorial with instructions to create 4 fun projects using the Wonderful Wreath stamp set!

Stamp Stock & Save header

Stamp Stock & Save  printable Flyer (PDF)

Weekly Deals (Special ends Monday, October 6th, 2014 at 11:50 p.m. (MT)

PAPER PUMPKIN Subscription – it’s fun in a box that’s delivered right to your mailbox each month!

Header_Recruiting_demo_10_1-31_2014_US

Get wonderful product and Join the Blue Mountain Stampers!


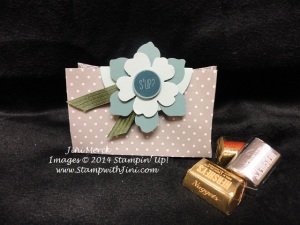
Hi There Designer Bag

Do you love the fun and colorful Designer Series Papers that Stampin’ Up! offers? I know that I find I use Designer Series Paper all the time to jump start my creative process – since Stampin’ Up! has coordinated the colors in each package for you it makes projects easier when you aren’t sure which way to go.

Today’s project is one that I made using our Color Collection Paper Stacks – specifically the Neutrals Collection. There are lots of sheets in this pack, so it is great for all kinds of projects – and this one uses just a quarter of the sheet. So you’ll get 4 little designer bags per sheet -Now you can make one for all your friends!  LOL.

Hi There Designer Bag

This project is one that my group, The Blue Mountain Stampers made last night during our monthly get together. Everyone seemed to have fun creating their own little bag – whether you want to place a gift card or just a little treat, the ideas are endless with this basic little designer bag. If joining our group sounds like fun and you’d like to know more about how you can join us, you can click HERE to learn more details or contact me at stampwithjini@gmail.com

I love the stamp set we used Hi There (134213/134216) is fun and trendy and has 4 great choices to choose from. You can find it on page 18 in the 2014 Annual Catalog.

Want to learn how to make one for yourself? Why not check out my latest video tutorial – Hi There Designer Bag

So what do you think? Why not leave me a comment and let me know what Designer Series Paper you want to use to make your little designer bag.

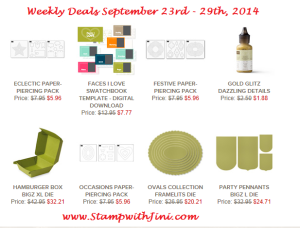
WEEKLY DEALS FOR SEPTEMBER 23RD

Weekly Deals September 23 2014

Supplies:

Stamp Set: Hi There (134213/134216)

Inks: Island Indigo Classic Ink Pad (126986)

Paper: Neutrals Collection Designer Series Paper Stack (130132), Lost Lagoon (133679), and Soft Sky (131203), and Pool Party Card Stock (122924)

Accessories: Mossy Meadow 3/8″ Stitched Satin Ribbon (133670), Fun Flower Punch (133785), Pansy Punch (130698), 2 ½” Circle Punch (120906), ¾” Circle Punch (119873), Handheld Stapler (135850) and Silver Mini Staples (135847), Simply Scored Scoring Tool (122334), Fast Fuse (129026), Stampin’ Dimensionals (104430), and Velcro dots

Click here to order your Stampin’ Up! Products online 24/7! (US only)

Hostess code HKNSYMNZ

Place an Online order with me and use my Hostess Code HKNSYMNZ and I’ll send you a FREE Tutorial with instructions to create 4 fun projects using the Wonderful Wreath stamp set!

Click Here to learn more about using the Hostess Code

Weekly Deals (Special ends Monday, September 29th, 2014 at 11:50 p.m. (MT)

PAPER PUMPKIN

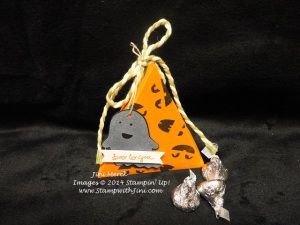
Fall Fest Triangle Box Tutorial

I’m loving our Fall Fest Stamp Set and the coordinating Fun Fall Framelit dies that you can find in our Holiday Catalog (Bundle 137628). I’ve been making all kinds of project with it that I can’t wait to share with you.

Here is the first project – it’s a Halloween Treat.

Fall Fest Triangle Box

Can you see the shimmer on the ghost? To create that effect I simply stamped in Whisper White Craft and then embossed the ghost image using our Dazzling Diamonds and Clear Embossing Powder. Simply mix them in equal parts, and emboss like normal. What a great effect this creates!

So quick and easy I thought you may want to make some of your own, so here is my latest video tutorial, the Fall Fest Triangle Box. Take a look and let me know what you think.

Love the sentiment? It is from our exclusive Good Greetings Hostess Set (135014/135017). Want a set of your own? You can earn this set by hosting a party with your friends AND it is in addition to your regular Hostess Benefits! But hurry you can only earn this set until October 31st – so why not contact me today to choose your party date. Click HERE to see our current promotions.

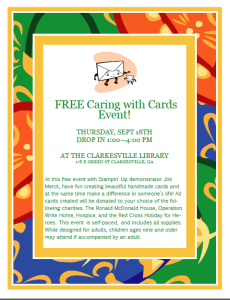
Today is my Caring with Cards Event at the Clarkesville Library – If you’re local I hope you’ll drop by and make a card to donate.

Caring with Cards Flyer image

Tootles!

Supplies:

Stamp Set: Fall Fest (135194) and Good Greetings (Hostess 135014/135017)

Inks: Memento Tuxedo Black Pad (132708), Whisper White Craft Pad (101731), and Tangelo Twist Classic Ink Pad (133646)

Paper: Tangelo Twist (113677), Basic Black (121045), and Whisper White Card Stock (100730)

Accessories: Fun Fall Framelit Dies (135856), Natural & Old Olive Trim (135837), 1/8″ Handheld Circle Punch (134365), ¼” Handheld Circle Punch (134364), Dazzling Diamonds (133751), Clear Embossing Powder (109130), Heat Tool (129053), and Linen Thread (104199)

Click here to order your Stampin’ Up! Products online 24/7! (US only)

Hostess code HKNSYMNZ

Weekly Deals (Special ends Monday, September 22nd, 2014 at 11:50 p.m. (MT)

PAPER PUMPKIN


Holiday Cheer

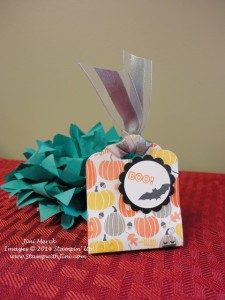
Our Project life products are not just for memory keeping. You can create all kinds of fun things – check out this great little treat I made using the Project Life Holiday Cheer stamp set (135188).

Holiday Cheer Halloween treat

This treat was quick and easy to make using our  Scalloped Tag Topper Punch (133324) and a strip of the Designer Series Paper, Motley Monsters (135819).

I bet you are wondering where the ribbon came from right? Well our Stampin’ Blendabilities Markers make coloring ribbons so easy – As you can see the Whisper White 5/8″ Organza Ribbon is perfect for this technique! Simply lay the ribbon out flat and run the color Blendabities of choice across the surface, flip it over and repeat until the ribbon is saturated. I used the side of my flair tip to do this. Cool right?

I think Larry’s coworkers will enjoy the little nugget it holds too –

Paper Pumpkin 50% Off Offer Expiring Today

Header_PP50percent_July1614

Today is the last day to

  • Subscribe in time to get the September kit. You’re in for a treat-it’s boo-tiful!
  • Get 50% off the first two months if you’re a new subscriber with the “HALFOFF2” promo code. Sign up at MyPaperPumpkin.com

Click here to learn more. Don’t miss out on all the Paper Pumpkin fun!

Supplies:

Stamp Set:  Holiday Cheer (135188)

Inks: Memento Tuxedo Black (132708) and Tangerine Tango (126946)

Paper: Motley Monsters Designer Series Paper (135819), Basic Black (121045), and Whisper White Card stock (110730)

Accessories: Whisper White 5/8″ Organza Ribbon (114319),  Scalloped Tag Topper Punch (133324), Smoky Slate Stampin’ Blendabilities Markers (131005)

Click here to order your Stampin’ Up! Products online 24/7! (US only)

Weekly Deals (Special ends Monday, September 8th, 2014 at 11:50 p.m. (MT)

Hot Diggity Dog!

Well today is going to be a baking marathon type day at my house. I’ve got two bags of bananas sitting on my counter top that I ran across last week on sale that are just calling my name. And it’s a good thing too since Larry just last night mentioned he was hunting for muffins in the freezer and couldn’t find any. LOL

I really enjoy my days holed up in my kitchen with the tunes cranked and the aromas filling the house. How about you, is baking one of the things you enjoy? Got a banana muffin recipe you love? Want to share it? Email me a copy (stampwithjini@gmail.com). I love trying new recipes out and someone else’s favorite it always fun to try!

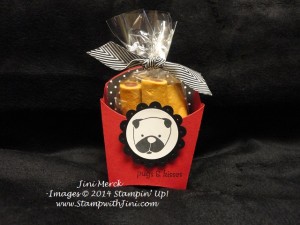
But before I get baking I wanted to share with you this cute little project that I made for the dog lovers in my life using the Hot Diggity Dog stamp set. This cute set was one that I had to have when I saw it since the images are cute and the sentiments are so much fun.

Hot Diggity Dog Fry Box

I’ve done my little Fry Box in Georgia bulldog colors for those UGA fans so this little guy seemed perfect for this project. Too cute, right?

I’m planning on making up a bunch of these for my friend’s pets for Christmas this year. Just a little something, something for the four footed family members. And wouldn’t it be a great little gift for someone who just adopted a new pet too?

I wanted to share with you my tip for creating the panel of color in the back of the Fry Box so I thought I’d put together a little video tutorial for you. Here is my Hot Diggity Dog Fry Box Video Tutorial. Why not check it out?

So what do you think? Fun? This Fry Box Die is great for all kinds of occasions – what would you use it for? Why not leave me a comment and let me know? And thanks in advance for taking the time to leave me a comment.

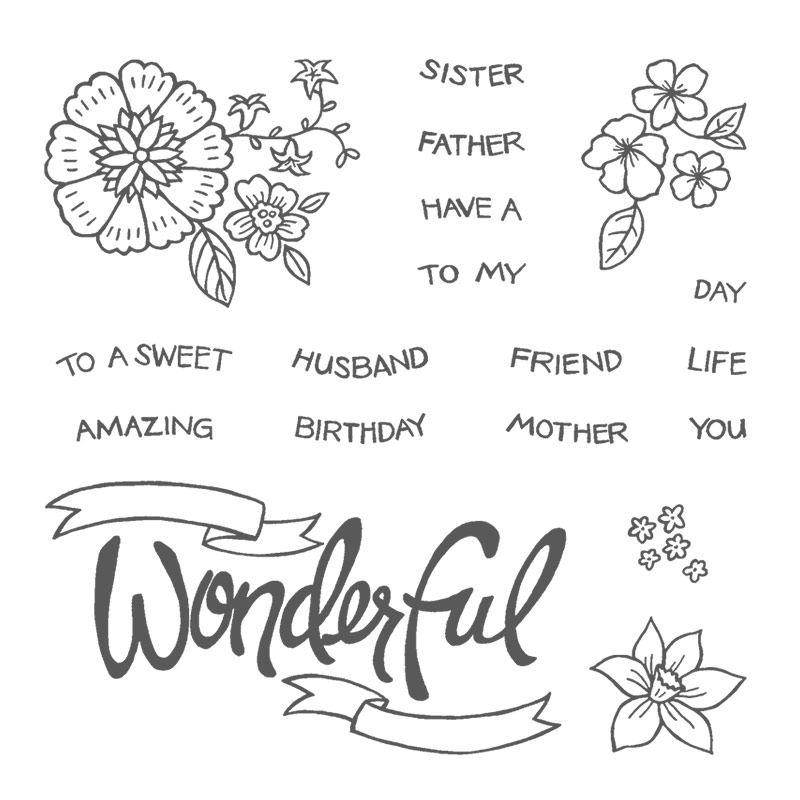
You’re Wonderful

Check out this fun new Photopolymer stamp set just released today

You're Wonderful set image

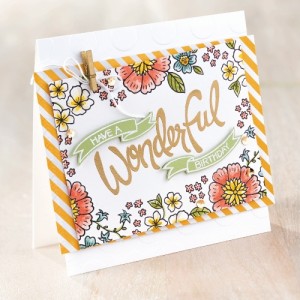
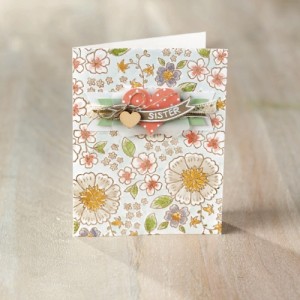
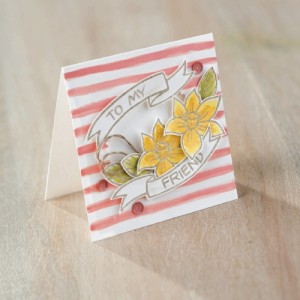
And how about these fun projects made with the set?

You're Wonderful image 1

You're Wonderful image 2

You're Wonderful image 3

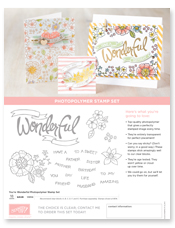
Want to learn more about the You’re Wonderful stamp set (139158)? Just click on the flyer below.

You're Wonderful flyer image

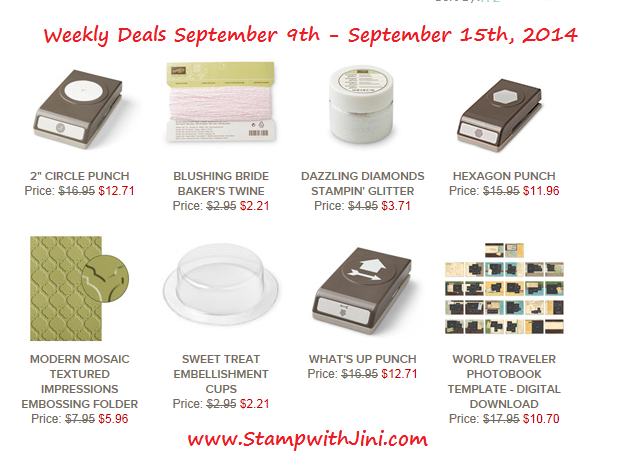
NEW Weekly Deals for September 9th

Weekly Deals September 9 2014

PAPER PUMPKIN PROMOTION ENDS TOMORROW

Header_PP50percent_July1614

Been wanting to give Paper Pumpkin a try? Don’t miss out on this great deal. Sign up today by clicking HERE.

Supplies:

Stamp Set: Hot Diggity Dog (134021/134024)

Inks: Memento Tuxedo Black Pad (132708)

Paper: Neutrals Collection Designer Series Paper Stack (130132), Real Red (102482), Basic Black (121045), and Whisper White card stock (100730)

Accessories: Fry Box Die (132966), 1 3/8″ Circle Punch (119850), 1 3/4″ Scallop Circle Punch (119854)Paper Piercer (126189) and Mat (126199), Fast Fuse Adhesive (129026), Basic Black Chevron Ribbon (130010), and 4″ x 6″ Cello Bag (102757)

Click here to order your Stampin’ Up! Products online 24/7! (US only)

Hostess code HKNSYMNZ

Beat the Heat with a Holiday Treat

That is just what we did on Sunday afternoon during my Holiday Catalog Premiere – we beat the heat and everyone was able to make two Holiday treats!

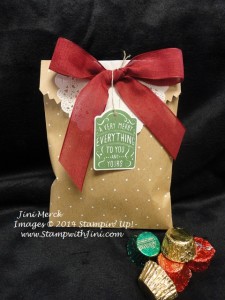
If you want some quick and easy holiday treats you’ll want to be sure to check out the Merry Everything Stamp Set (135068) and it’s coordinating punch, Note Tag (135860) from the Holiday Catalog found on page 13 – And you can even order a money saving bundle (137635/137636) and save 15% Off – sweet! (Remember the online ordering starts August 28th for items found in the Holiday Catalog, but you can contact me today to place your order if you prefer.)

Holiday Catalog Premiere Merry Everything Treat Bags (1)

This first treat was made for Halloween – I think any little gobblin would love to get this goodie bag.

And how about Christmas? Quick, easy, and elegant treats made with our Tea Lace Paper Doilies (129399) and our yummy NEW Cherry Cobbler 1″ Shear Linen Ribbon (135839) is great for anyone on your list who’ll be getting a little something.

Holiday Catalog Premiere Merry Everything Treat Bags (2)

Want to make a project like this with your friends? Why not be a Hostess?

Not only will you be able to get together with friends, you’ll get to have fun and make a project too. Better yet – if you have a long wish list earn some of those items for FREE! Contact me today for details and to choose your date or book party. And get a chance to earn a special Hostess Set in addition to your Hostess Benefits!

Want to see more from Sunday’s Holiday Catalog Premiere – stop back by tomorrow when I’ll be sharing more photos and another great project!

Supplies:

Stamp Set: Merry Everything (135068/135071)

Inks: Memento Tuxedo Black Pad (132708) and  Garden Green (126973)

Paper: Whisper White Card Stock (100730)

Accessories: Note Tag Punch (135860), Chevron (131370) and Polka Dot Tag a Bag Gift Bags (135503), All is Calm Designer Washi Tape (135844), White & Tangerine Tango Two Tone Trim (135838), Cherry Cobbler 1″ Shear Linen Ribbon (135839), Linen Thread (104199), 1/8″ Circle Handheld Punch (134365), Tea Lace Paper Doilies (129399), and Wisteria Wonder Stampin’ Blendabilities Markers (131002)

Supplies:

Click here to order your Stampin’ Up! Products online 24/7! (US only)

Hostess code WYRKXHUE

Click Here to learn more about using the Hostess Code

Weekly Deals (Special ends Monday, September 2nd, 2014 at 11:50 p.m. (MT)

Big Shot Buy a Bundle promo Image

BIG SHOT BUNDLES PROMOTION

Blendabilities image

Blendabilities are here – Click HERE to get yours today!

Check out my Blend with Friends event coming soon – click HERE for my complete Calendar of Events

Header_PP50percent_July1614

Subscribe to Paper Pumpkin and get 50% Off!


4th of July Work of Art

Were celebrating the 4th with a good old fashioned family cookout here in Clarkesville and it looks like the weather will be perfect for it. I’m really looking forward to seeing everyone again and getting to meet new family members too. Some we haven’t seen in years, along with marriages and babies. What fun.

And since it is the fourth of July I thought it would be fun to do a little something for the kids. So I’ve put together this fun bucket of items for each family.
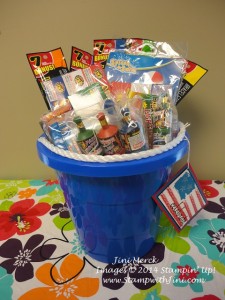
Work of Art 4th of July Bucket (2)

And created this cute little tag that I attached to it with our Metallic Silver Baker’s Twine (132142) that is part of our Weekly Deals this week.

What do you think? Cute? I’m hoping these will be a hit with everyone since it contains a little something fun for all ages that can be used all day and even until the fireworks!
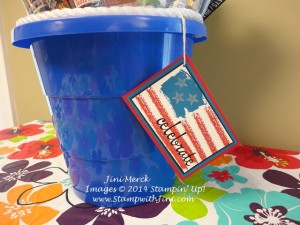
Work of Art 4th of July Bucket (1)

What’s inside? Well I’ve got some bubbles, a beach ball for the pool, bug boxes for catching the fire flies, glow sticks, sparklers, poppers, and other goodies for the evening.

I’ve got the one done – now just to put the others together. LOL Larry’s got a big family!

Home improvements – oh my!

Today I thought I would also share with you what I’ve been doing lately with my free time. I think I’ve shared with you I’ve had the home improvement bug this spring, my love of painting trim….. and so the projects continued.

Larry and I have “discussed” painting the stairs for years, or should I say I have. He just didn’t think it was necessary and I thought it would be a big help to protect the pressboard and make cleaning easier too.

Well on June 3rd I decided I’d jump in. I’ve never painted stairs so I was a bit intimidated, but after reading up on it I figured what the heck – it couldn’t be that hard, right?

I tried stain first at the suggestion of my sister, unfortunately it didn’t cover up all the spots that had been created from spills over the years. And apparently my brain wasn’t functioning well either, because I didn’t think of solid color stain that the gal at Home Depot had recommended before I started to kilz. Oh, well. I guess paint was meant to be.

So here is the first picture I took – Seems I always forget to take the before photo – caulked, Kilzed, and first coat of trim.
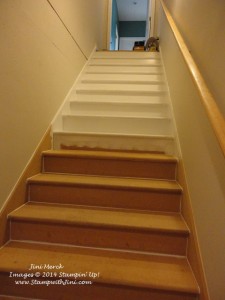
Stairs (2)

I know it looks a little strange with only part of the stairs done to this point, but I figured I wanted to see how it went. And I wanted to get the color on the tread to see how I liked the color we chose to go with the wood landing. LOL – Like I’d have a choice once I started.

The biggest challenge was making the stairs usable since my guys are always up and down them and of course my classroom is downstairs too. I sure didn’t want to go long without getting to stamp!
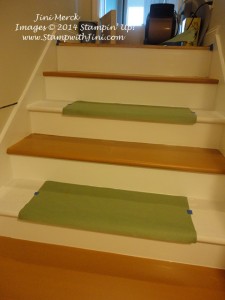
Stairs (3)

So I learned if I started first thing in the morning they’d be dry enough for everyone to go up and down when they got home and the trash and dirt from their shoes would not stick. (It seemed to rain a lot so going around wasn’t really an option Johnathan wanted to deal with.)  I also did every other step and added the green paper to keep things clean.

Here is the finished project now after I finished all the touch ups and door trim this week. Yea!
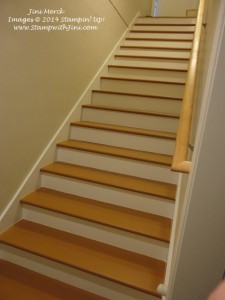
Stairs (4)

Painting the stairs really brightened up the space and I really love the look. They are so easy to clean now!

However, I am still thinking about stamping on the risers. I’ve had this great two step stamp set I’ve always wanted to use for that, but for now I’ve got other things on my list I want to do first.
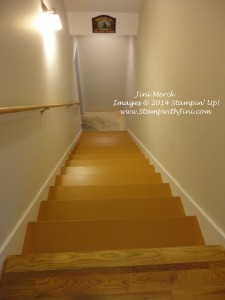
Stairs (1)

Everyone who has been to my classroom before noticed the new look immediately and made my day by commenting about how great they looked. Thanks guys!

Funny thing is my husband, Larry asked me what took me so long to paint the stairs! (He’s a hoot.) They don’t squeak any more which is the part he loves. Of course that means my “alarm system” for the kids is gone since I always knew when someone was coming up the stairs. I’m not sure what made them stop creaking and squeaking, but I’m glad my husband likes the end result too. Now I’ve just got to get him to put trim up where the concrete and sheet rock meets. That little space drives me nuts. After all who knows what can live in that space – eek!

Supplies:

Stamp Set: Work of Art (134111/134114),  Fabulous Four (134171/134174), and Something to Say (134177/134180)

Inks: Pacific Point (126951), Real Red (126949), Melallic Silver Encore Ink (132142), and VersaMark (102283)

Paper: Pacific Point (111350), Real Red (102482), Basic Black (121045), and Whisper White (100730)

Accessories: Silver Baker’s Twine (132976),  1/8″ Handheld Circle Punch (134365), Black Embossing Powder (109133), and Heat Tool (129053) 

Click here to order your Stampin’ Up! Products online 24/7! (US only)

Hostess code KGM3XHTJ

Weekly Deals (Special ends Monday, July 7th 2014 at 11:50 p.m. (MT)

Buy 3 get one Free DSP Sale Image

Get your favorites Designer Series Paper in July – Sale ends July 31, 2014 at 11:50 p.m. (MT)

Blendabilities are here – Click HERE to get yours today!

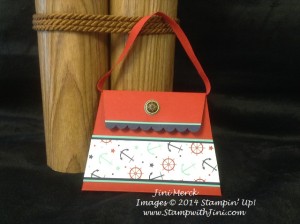
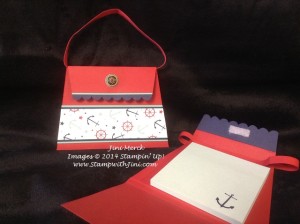
Beach Bag Post it Note Holder

Today’s project is the little gift everyone received who attended my Luau Catalog Launch Party – it was my was of saying thank you. After all I appreciate each and everyone of you!

Beach Bag Post It Note Holder Luau Catalog Launch Party 2014 (1)

I had a lot of fun making these little beach bags. As I mentioned yesterday I just love anything nautical and so the Maritime Designer Series Paper was perfect for this project.

Beach Bag Post It Note Holder Luau Catalog Launch Party 2014 (2)

My little Pool Party sticky notes came from my local dollar store. I squeeled when I found these little pads since they were just the right color LOL.

Do you ever see Stampin’ Up! colors while you are shopping and looking at things? My daughter is always rolling her eyes at me when I say it is such and such color.

The sticky notes are about 1/2 the thickness of the typical stack of post it notes – so you can just use 1/2 of pad of the name band ones if you’d like.

Want to know how I made these? Well here is my latest video tutorial for you so you can make them too. It’s a little longer than normal since I’ve got some helpful tips along the way.

Enjoy!

Beach Bag Post it Note Holders Video Tutorial:

Update: please note that the measurements shown on the Simply Scored Scoring Tool are correct – not what I’m saying. Measurements have been added to the description on the video and should be 3 1/4″, 3 1/2″, 6 3/4″ and 7″. Sorry 🙂

Stop back by tomorrow when I’ll be sharing some more pictures and another recipe from the Luau with you.

Supplies:

Stamp Set: Sea Street (133985/133988)

Inks: Night of Navy (126970)

Paper: Maritime Designer Series Paper (133696), Real Red (102482), Night of Navy (101889), and Coastal Cabana Card Stock (131297)

Accessories: Real Red 1/4″ Cotton Ribbon (134563),  Antique Brads (117273), 1/2″ Circle Punch (119869), Stampin’ Pierce Mat (126199) and Paper  Piercer (126189), Stampin’ Trimmer (126889), Simply Scored Scoring Tool (122334), Multipurpose Liquid Glue (110755), Sticky Strip (104294), and Fast Fuse (129026)

Click here to order your Stampin’ Up! Products online 24/7! (US only)

Hostess code BRXTH4XS

Weekly Deals (Special ends Monday, June 30th 2014 at 11:50 p.m. (MT)

Something for Baby Treat Sack

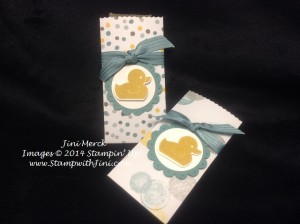
Are you ready for my first video tutorial using the NEW 2014-2015 Annual Catalog items? Well it’s here and in it I’ll be sharing with you the cute little treat sack that they showed us how to make during the Catalog Premiere along with the set I won during prize patrol. They are quick and easy to make.

Something for Baby Treat Sack

This little project uses one of our NEW Bundles from the Catalog – Something for Baby (page 74) and the coordinating Baby’s First Framelits (136790/136791). I love the bundles we offer, since not only do you save 15%, but it makes cutting things out a snap for this project!

And this little treat sack is created using just one piece of 4 1/2″ x 6 1/2″ Designer Series Paper from the Moonlight Designer Series Paper Stack (133701). How great is that just pull one from the stack? No waste and tons of patterns to choose from since we have two new stacks to choose from in the new catalog!

Want to see how I did it? Well here is my Something for Baby Treat Sack Video Tutorial

While I’ve made this little treat sack with a baby theme in mind – I think it is a great little item for all kinds of occasions.

What do you think? easy?

Thanks for taking the time to leave me comments. They are really encouraging to me.

Supplies:

Stamp Set: Something for Baby (134027/134030)

Inks: Hello Honey (133643)

Paper: Moonlight Designer Series Paper Stack (133701),  Lost Lagoon (133679), and Whisper White Card Stock (100730)

Accessories: Baby’s First Framelits (133735),  Lost Lagoon Stitched Satin Ribbon (133672), 1 3/8″ Circle Punch (119860), 1 3/4″ Scallop Circle Punch (119854), Stampin’ Trimmer (126889) and Rotary Addition (129407),  Small Scallop Stampin’ Trimmer Rotary Cutting Blade (129410), Simply Scored Scoring Tool (122334), Paper-Piercing Tool (126189) and Stampin’ Pierce Mat (126199)

Click here to order your Stampin’ Up! Products online 24/7! (US only)

Hostess code 2JBGG6Z4

Weekly Deals (Special ends Monday, June 9th 2014 at 11:50 p.m. (MT)

Peachy Keen & On Film Framelits

Did you know that the Occasions Catalog is ending on Sunday, June 1st? Well it does, and so today I thought share with you some projects that I made using the bundle (135224/135225) of products along with some of the other items you’ll find in the Occasions Catalog.

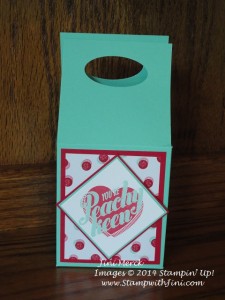
This first project is a 3d box that I made and filled with some chocolates for a friend as a thank you. The little gable box holds quite a bit of chocolate too which is always a plus when it comes to chocolate LOL.

Peachy Keen 3d

To create the focal point on this box I first stamped my heart image from the Peachy Keen stamp set (133110/133113)  in Real Red (126949) and then used my VersaMark Pad (102283) and the Pool Party Embossing Powder (129398). The polka dot pattern came from the Fresh Prints Designer Series Paper Stack (132996).

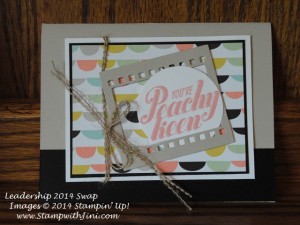
This next card is one of my Shoebox Swaps

Peachy Keen  Leadership swap

I really love the little bow we made using the 1 1/4″ Burlap Ribbon (132140). All I did was cut one end to expose the thread and pulled a couple off to use for this project. Cool, huh?

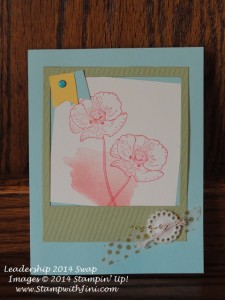
And this last card was also made with the On Film Framelits (132969) along with the Happy Watercolor stamp set (133188/133191). I stamped my image onto Very Vanilla Card Stock (101650) and placed my photo frame cut from Pear Pizzazz card stock (131201) on top. Added a bit of our Watercolor Wonder Designer Washi Tape (133000), a Very Vintage Designer Button (129327) and a piece of Gold Bakers Twine (132975) that I placed through the button and tied a knot in.

Happy Watercolor Leadership swap

I really love the little pop of color that our Brights Candy Dots (130931) added the Banner Punch (133519) pieces too.

Stop by tomorrow when I’ll be sharing some cards made with the Hello, Sailor stamp set.

Click here to order your Stampin’ Up! Products online 24/7! (US only) 

Hostess code 2JBGG6Z4

Click Here to learn more about using the Hostess Code

RETIREMENT STAMP LIST (Pdf)

RETIREMENT ACCESSORY LIST (pdf)

Weekly Deals (Special ends Monday, June 2nd 2014 at 11:50 p.m. (MT)