Last Minute Gifts – Musical Notebooks

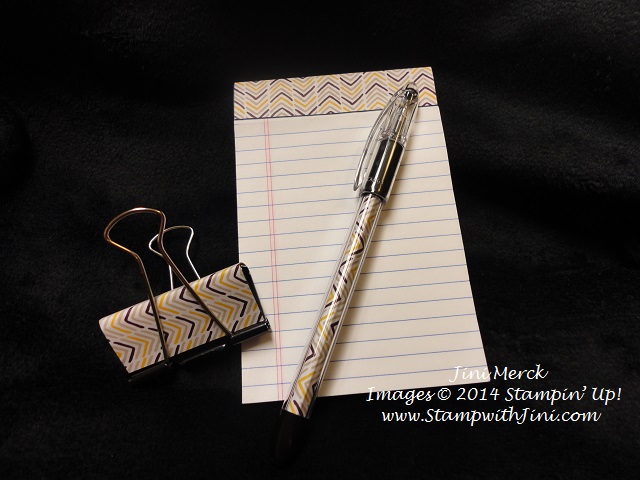
Today’s project is a quick one I whipped up for two of my daughter’s friends who just graduated with their Music Therapy degrees. Are you noticing a theme in my house? This note books are quick and easy to make with just a few supplies.

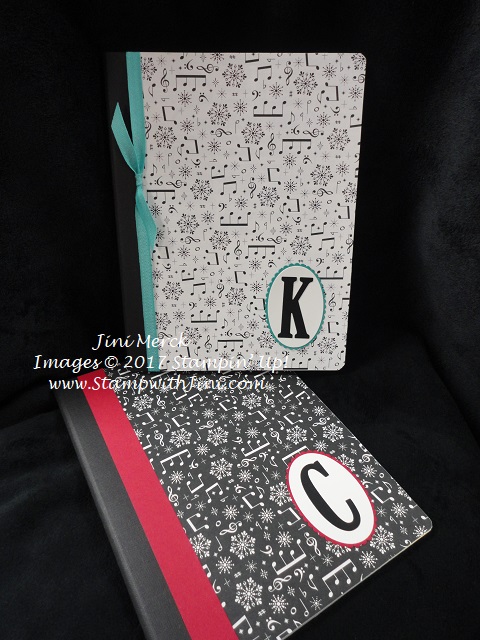
I really like the way they turned out and hope they will too.

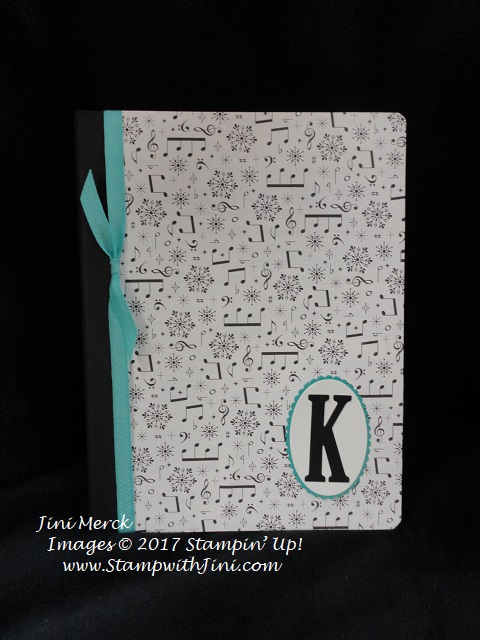
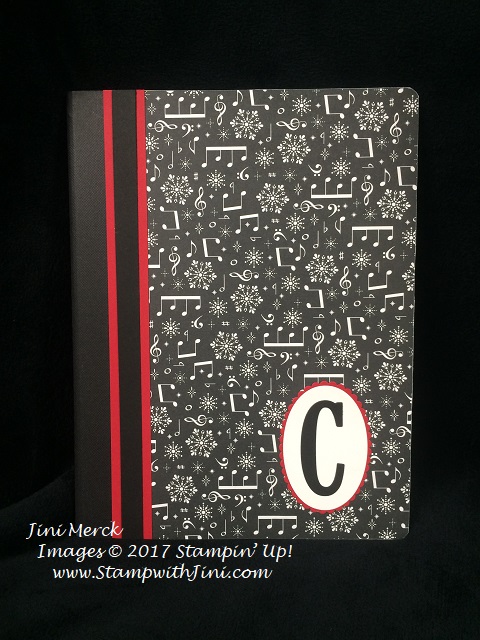
How did I make them? First I chose the Designer Series Paper I wanted. You need two sheets to do these composition note books.

I measured and cut my Designer Series Paper, added my favorite adhesive, Tear & Tape and adhered. Yep – It’s just that quick and easy to do! Then I finished decorating as desired.

Supplies:

Paper: Merry Music Specialty Designer Series Paper (144623), Basic Black (121045), Real Red (102482), Bermuda Bay (13197) and Whisper White Card Stock (100730)

Accessories: Layering Ovals Framelits Dies (141706) and Large Letter Framelits Dies (141712), and Bermuda Ab Mini Chevron Ribbon (144198)

Click here to order your Stampin’ Up! Products online 24/7! (US only)

Shop at my Online Store in December and use Hostess Code ANN4HBHX place a $25 order and receive a FREE gift from me!

Click Here to learn more about using the Hostess Code If you order Online make sure your profile information is up to date and you’ve allowed me to contact you so I can mail you your FREE gift!

Sign up for my FREE Newsletter My Newsletters include stamping tips, ideas and updates on what is happening with me! You’ll also receive a FREE Class Tutorial using the 2017-2019 In Colors when you sign up!

Cookie Cutter “Bling”

Today’s little project brings me back to my childhood and the magic of crafting.

cookie-cutter-earings-2

Remember that first experience with Shrinky Dink? The magic of watching through the oven door and seeing them curl up, worried that they would touch? And then the delight when they uncurled again? What fun my big sister and I had with our first package of plastic sheets.

If you’ve never used Shrinky Dink its a lot of fun – So why not give it a try!

The Cookie Cutter Christmas stamp set is perfect for this project! Fast, fun and trendy earrings for the holidays! What could be better? And they are a delight to make too since they bring out the child in all of us! Simply follow the directions on the package – and voila! It’s magic!

I’ve simply place a little 3″ x 3″ topper on my earrings to make them a little extra special.

Supplies:

Stamp Set: Cookie Cutter Christmas (*142043)

Inks: Basic Black Archival Ink (140931)

Paper: Candy Cane Lane Designer Series Paper (141981) Real Red (102482), Crumb Cake (120953),  and Whisper White (100730)

Accessories: Cookie Cutter Builder Punch (*140396), 1/8″ Handheld Circle Punch (134365)

Non Stampin’ Up! products: Shrinky Dinks and Red, yellow, and Black Sharpies Markers

 *Bundle 143493 Save 10% when you buy the bundle of stamps and punch

Click here to order your Stampin’ Up! Products online 24/7! (US only)

Use Hostess Code M7RQC4NE and receive a FREE gift from me when you place a minimum order of $50

It’s my way of saying thank you for choosing me as your Demonstrator!!!

Oh, What Fun Mini Treat Bag

This quick and easy back is great for a quick little gift for neighbors and friends. It will hold those small items, gift cards, or a bit of chocolate and since it is made with our Mini Treat Bag Thinlits Dies (137547). And  it’s so easy to make at least 24 of these with just one package of our Designer Series Paper!

Oh What Fun Mini Treat Bag

Super cute and already includes your gift tag! Just watch which way you place your dies onto your Designer Series Paper when you run them through the Big Shot so that the pattern is going the same directions. (Ask me how I know LOL!)

How’d I make the tags? Well, I used the Oh, What Fun stamp set (140386) and stamped it twice once using Cherry Cobbler for the main image and then again on Smoky Slate in Mossy Meadow for the fussy cut banner. I love our Banner Triple Punch because it makes these banners easy and they look great every time! A great addition to your stamping supplies.

Finally a little Clothes Pin and a scrap of Designer Series Paper and your done – quick and easy!

Check out my complete supply list below and then stop back by tomorrow for a quick and easy last minute gift card holder!

Supplies:

Stamp Set: Oh, What Fun (140386)

Inks: Cherry Cobbler (126966) and Mossy Meadow Classic Ink (133645)

Paper: Merry Moments Designer Series Paper (138450), Smoky Slate (131202), Mossy Meadow (133676) and Whisper White card stock (10730)

Accessories: Mini Treat Bag Thinlits Dies (137547), Ornate Tag Topper Punch (137416), Banner Triple Punch (138292), 2 3/8″ Scallop Circle Punch (118874), 2″ Circle Punch (133782), Clothes Pins (133764) and Old Olive Bakers Twine (134579)

Click here to order your Stampin’ Up! Products online 24/7! (US only)

Use Hostess code RZHPTPGT

Weeky Deals December 15th 2015

Weekly Deals (Special ends Monday, December 21st, 2015 at 11:50 p.m. (MT)

Sign up for my FREE Newsletters to receive stamping tips, ideas, and updates on what is happening with Stamp with Jini. You’ll receive a FREE Pinwheel Tutorial when you do

Quick & Easy Merry Moments Curvy Keepsake Box

Here is a great little item that you can whip up quickly with some Merry Moments Designer Series Paper to add a touch of holiday spirit to a little something for that special someone.

Merry Moments Curvy Keepsake Box

This little box is fun and easy to make and the Real Red Pom Pom Trim adds a bit of whimsy to it. Add some chocolate nuggets with belly bands, kisses or what ever little item you’d like to put inside!

And here are a couple more cards that I received in swaps at On Stage in Tampa – fun quick cards for last minute needs.

Snowman OnStage Tampa swap 2015

Carol used the Your Presents stamp set (139803/139806) and our Bow Builder Punch (137414) to create this clean and simple card.

Your Presents On Stage Tampa swap 2015

Stop back by tomorrow when I’ll be sharing with you another quick and easy idea – See you  then.

Need help finding a holiday gift? Let me help I’ve got great items on hand that will make a wonderful holiday gift for child or adult! Contact me today! Call 706 754-7124 or email me at [email protected]

Supplies:

Stamp Set: Oh, What Fun (140386)

Inks: Cherry Cobbler Classic Ink (126966)

Paper: Merry Moments Designer Series Paper (138450), Real Red Pom Pom Trim (139617), Old Olive Baker’s Twine (134579), Real Red (102482) and Crumb Cake card stock (102953)

Accessories: Curvy Keepsake Box Thinlits Die (135853), and 1/8″ Circle Handheld Punch (134365)

Click here to order your Stampin’ Up! Products online 24/7! (US only)

Use Hostess code RZHPTPGT

Weeky Deals December 15th 2015

Weekly Deals (Special ends Monday, December 21st, 2015 at 11:50 p.m. (MT)

Holiday Gift Guide pdf image

Another Thank You & New Endless Birthday Wishes Photopolymer Set

Have you tried our Photopolymer stamps? Well if you haven’t yet, you should give them a try they are so easy to work with. They are really sticky, so just place them on your block and go. And Stampin’ Up! has stepped up our Photopolymer line by including them in the NEW 2014 Catalog. There are a lot of new sets too, yipppie!

And now not only can you find Another Thank You (136835) in the 2014 Catalog (available June 2nd), but they come in our Clear Mount Stamp Cases just like our other sets and have a wonderful new scent too – Chocolate! Gone is that chemical smell of Photopolymers. No airing out your sets – Yippie!

I showed you a gift that I gave for  graduation the other day for one of the twins and today’s project is the gift set I made with Another Thank You for the other twin.

Another Thank You note card set  In Color (3)

These note cards are also done in the NEW 2014-2016 In Colors that will be available on June 2nd. Along with a little note pad, pen, and clip using the yummy NEW Moonlight Designer Series Paper Stacks (133701).

Moonlight note pad and pen (4)

Although the gifts used a different stamp set I did end up packaging them the same way.

Would you believe this plastic bag is from some Playtex bras that my Aunt bought while she was visiting! LOL. Shhhh……Don’t tell the boys! Recycle and Reuse – think out of the box and you’ll be amazed what you can come up with. These little plastic bags were perfect for this set of note cards and stationary items.

DSC01518

Leave a comment and I’ll email you a PDF to make this great set of gift cards for FREE! It’s my way of saying thank you to you for following my blog!

NEW Endless Birthday Wishes

You’re going to LOVE this new Photopolymer Stamp Set, Endless Birthday Wishes (137553)! And I think it won’t last long  with all the great choices that this set allows you! The sentiments are done in a great font and are fun and trendy.

EndlessBirthdayWishes

Check out some great projects and the flyer HERE

Endless Birthday Wishes Photopolymer flyer image

It’s another Giveaway!

Retirement Image Giveaway #2

Leave me a comment below and get your name entered in my Retirement Party Giveaway #2 for a spool of retiring ribbon! And everyone is a winner with my FREE Tutorial! Then watch for my YouTube post for Retirement Party Giveaway #3 tomorrow!!

Click here to order your Stampin’ Up! Products online 24/7! (US only)

Hostess code WXAUDJ3F

RETIREMENT STAMP LIST (Pdf)

RETIREMENT ACCESSORY LIST (pdf)

Retirement Party Banner Image

RSVP today for Sunday! Retirement Party – FREE Event

Weekly Deals (Special ends Monday, May 19th 2014 at 11:50 p.m. (MT)

NEW CLASS BEING OFFERED

Personalized Notepad Holder Class

Have fun learning how to make these Personalized Notepad Holders. You’ll create two of these during the class and have supplies to make more to take home!

Personalized Notepad HolderThursday, May 16th at 10 a.m. or 7 p.m.

Class Fee is $30; Prepay by April 23rd to hold your spot

Bring a friend not already on my mailing list and get a free gift!

Click HERE for flyer

Click HERE for my Calendar of Events and more details

 Don’t want to mail a check? Click on the button to pay for your class fee and select your choice of day and time.

Choose a Class Time


Nugget Turkey

Hi everyone today I thought I would share a fun project with you… a Nugget Turkey. I think they are so stinking cute! And they’re are so much fun to make with a few simple supplies. Of course anything with chocolate around my house is a hit – how about yours?

Nugget Turkey

To bring a Thanksgiving smile to your loved ones faces you’ll need to gather the following supplies to make your Nugget Turkey.

More Mustard DSP (I used the polka dot print from the Regals DSP Stack: 1″ x 3″ and some for punching

Chocolate Chip and Pumpkin Pie CS: for punching

Pumpkin Pie CS: 3/8″ x 3/8″

1 3/4″ Scallop Circle Punch

1″ Circle Punch

Googlies (from the Holiday Catalog – they are self stick! Isnt that great!)

Glue Dots

Multipurpose Liquid Glue

Paper Snips

Hershey’s Nuggets (which ever type floats your boat – not sure? Taste test them after all Thanksgiving is calorie free, right?)

Here’s how you do it –

1. Punch out 3 coordinating tail feathers from you More Mustard DSP and Chocolate Chip and Pumpkin Pie CS using the 1 3/4″ Scallop Circle Punch.
2. Punch 1″ Circle from Chocolate Chip CS. You should have the following pieces and are ready to assemble.

3. Wrap the 1″ x 3″ strip of DSP around your Nugget, and stick the end down using a Glue Dot. (Taste a piece of chocolate to make sure it’s good.)

4. Trim away the bottom 5 scallops from the first tail feather using your Paper Snips.

Nugget Turkey

6. Line up and adhere the first feather on top of the More Mustard DSP feather and trim away 4 scallops. (Why not try and different flavor Nugget, you want to make sure you’re using the right one, right?)

6. Line up and adhere the two layers of feathers on top of the Chocolate Chip CS feather and trim anything off the bottom that shows. (Hmm… Did you say Chocolate Chip – maybe you should check out those Nuggest again?)

turkey nugget

7. Attach feathers to the back of the Nugget using a Glue Dot or two.

8. Fold the 3/8″ x 3/8″ piece of Pumpkin Pie CS in half to create the beak and attach this to the 1″ Chocolate Chip Circle using Multipurpose Liquid Glue. Allow to dry.

9. Attach your Googlies to give the little guy eyes – after all aren’t they too cute wiggling around like that? (Oops.. better try another one of those nuggets before you’re done. Want to make sure you tried all the flavors right?)

10. Attach your head of your turkey to the front of your Nugget using a Glue Dot and you’re finished.

Isn’t he cute? Why not make another one – after all there is still chocolate left right?

I hope you enjoyed this little tutorial for my little Nugget Turkey.

Click here to order your Stampin’ Up! Products online 24/7! (US only)