Wow, the last couple of weeks have been crazy around here with band camp. I’m the secretary of the boosters club so there is a lot of startup stuff that happens. But I’m back now and school doesn’t start for a few days.
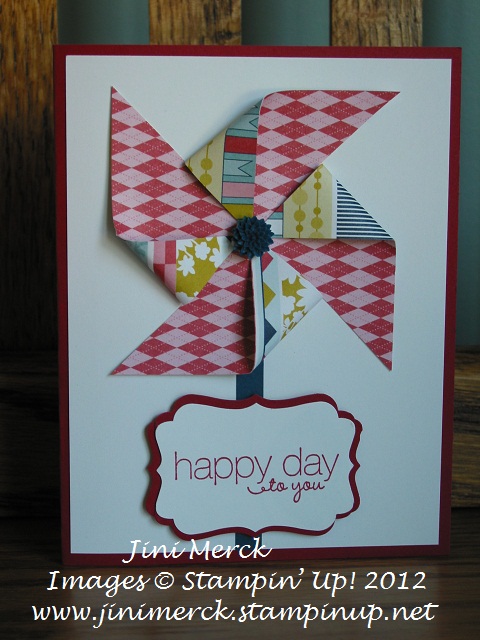
 Today I wanted to share with you this little Pinwheel card I made recently. Isn’t it cute? Pinwheels are all the rage right now it seems. I made this card for my last TEAM meeting. Everyone loved the NEW In Color Dahlias that we used for the centers of our pinwheels. The girls had so much fun making them that I thought I would offer the FREE Pinwheel tutorial to you – just for signing up for my email list! (That’s a $9.95 value for FREE) Interested? Click on my link below to sign up today.
Click HERE to sign up for my email list
and receive your FREE Pinwheel tutorial
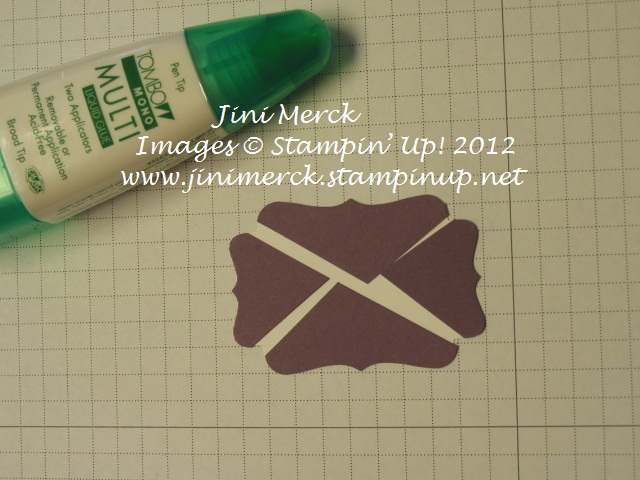
Wonder how I made the sentiment with the Decorative Label Punch? Here is quick shot of the punched piece after I cut it. 
And then adhere it to the back of the already stamped and punched sentiment piece. I like to use our Multipurpose Adhesive to do this since I can move it around after I turn it over and get the pieces right where I want them. 
How quick and easy is that! Do you like to learn new tips and techniques? Why not join my Virtual Club. You can click HERE for more information.
Come back tomorrow, I’ll be posting some of the cards that I received during swaps at convention.
Supplies:
Stamp Set: Friendly Phrases
Inks: Raspberry Ripple
Paper: Patio Party Designer Series Paper, Raspberry Ripple, Midnight Muse and Whisper White
Accessories: In Color Dahlias, Decorative Label Punch
Click here to order your Stampin’ Up! Products online 24/7! (US only)


