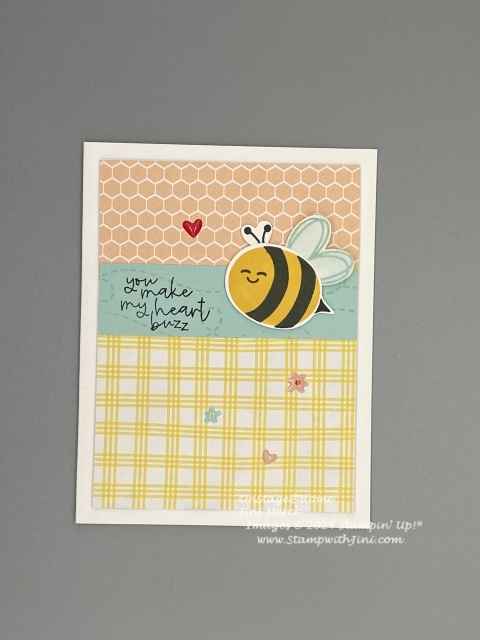
Yesterday I shared a card that we made during an OnStage@Home event. So today I thought I’d share the other card we made with a quick little water color technique.
I loved punches when I first started to stamp they always made me feel successful since I didn’t have to stamp the entire card without any mistakes. How about you? Do you love them too? While I eventually build my collection to include dies and the machine I still love the ease and portability of a punch!
Here is a quick video for you showing how we made this card and of course a PDF too.
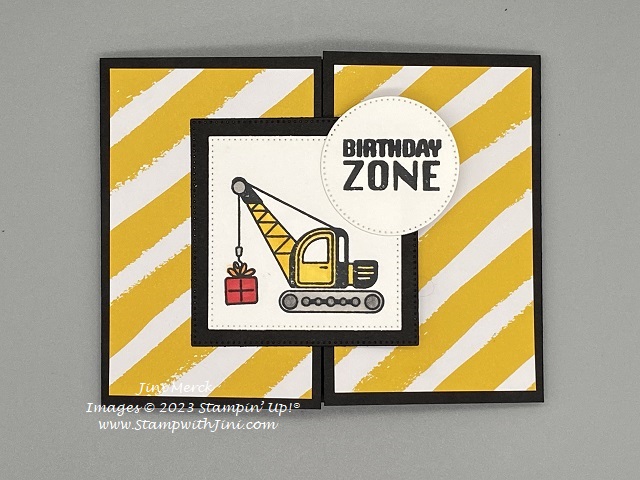
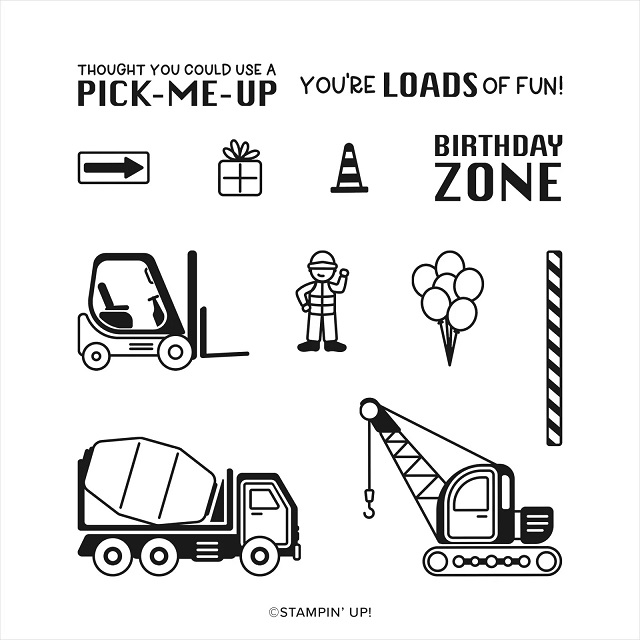
It’s Friday and that means another tutorial, so today it is a quick and easy fun fold called the Gate Fold.
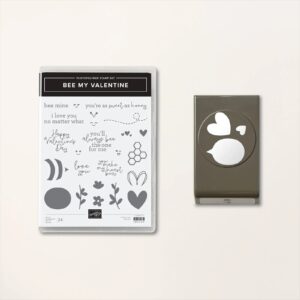
Open the two sides just like a gate and you’ll have a lovely little spot to put your sentiment and signature panel. I just love this set with it’s bold images that are so easy to color, and with my guys it works perfectly for all kinds of projects too!
As you can see from the set, there are all kinds of occasions you can use this stamp set for. I’ve shared several tutorials with you over the last few months using this set and today here is another one for you that is bright and cheerful with it’s bold stripes found in our Regals Designer Series Paper (161642).
Construction Zone Gate Fold Birthday Card Tutorial PDF
On a personal note I hope you’ll have a wonderful and safe Christmas filled with joy and love.
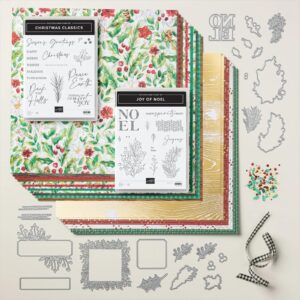
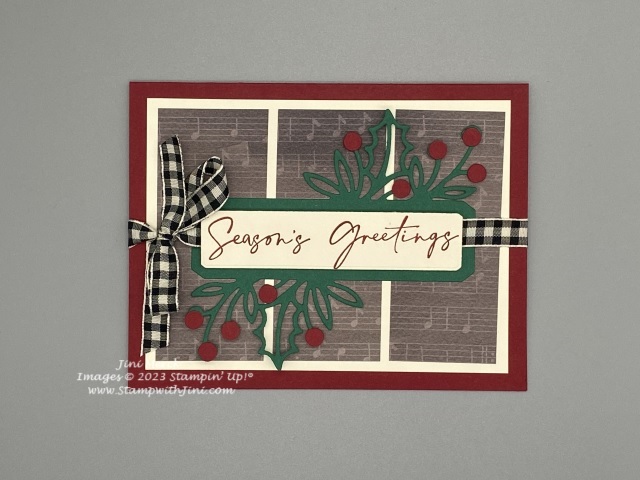
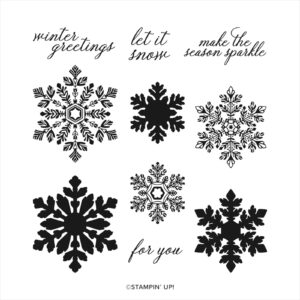
Why not send a little sparkle this holiday season with this quick and easy holiday card using the Christmas Classics Bundle (161977) that is retiring on January 3rd?
Quick and easy it’s a great card to make and send to family and friends this holiday season. or why not change out the sentiment and make it a birthday or thank you card?
Here is my video tutorial for you
along with the PDF that includes YouTube Link, measurements, supply list and instructions.
And while you’re shopping don’t forget that Stampin’ Up! products make wonderful gifts for the holiday season. I know my husband loves it when I make it easy with my list. Don’t forget to give them my Online Store Link making it easy!
And if you are looking for a easy last minute gift our Kit Collection or Paper Pumpkin Subscriptions are great for crafters of all ages too!
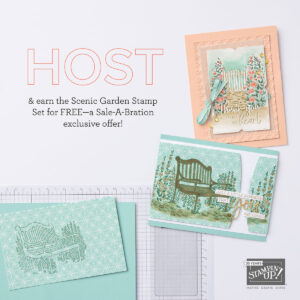
Shop at my Online Store and use Host Code GXUTXA33 with a product order of $50 or more and receive a FREE Gift from me, my Meandering Meadow Card Class including 2 fun folds!
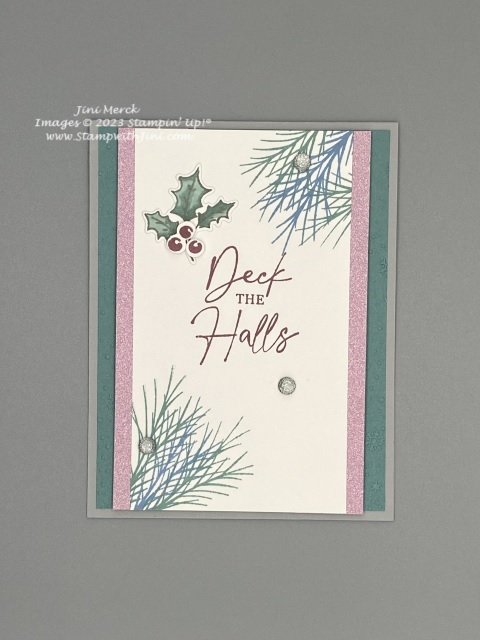
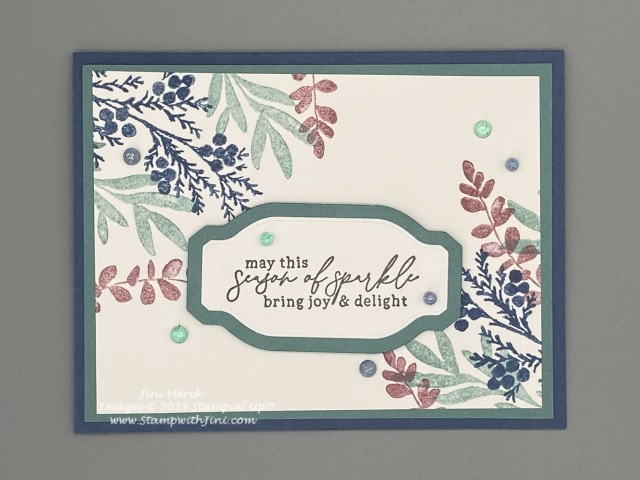
Today’s card is done in the soft colors of Lost Lagoon, Moody Mauve and Misty Moonlight giving it a soft winter feel.
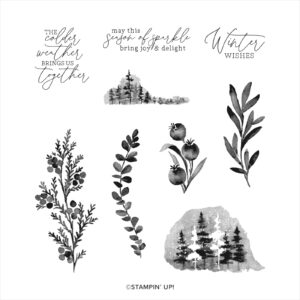
I’ve used the Magical Meadow Stamp Set (Retiring 162134) that will be retiring and is only available while supplies last along with the Something Fancy Dies (160424) from the Annual Catalog. You might already have this set of label dies since it is a great staple that you’ll use over and over again.
the Magical Meadow stamp set is a beautiful set with DisInkTive ™ images and wonderful winter sentiments. It is part of the Winter Meadow Suite of Products (162150) and while the stamp set and dies are on the retirement list some of the accessories are not, so you can get additional accessories like the paper in the future. Remember, if a suite or bundle is sold out you can always purchase things separately.
Here is a video tutorial for you and PDF with the complete supply list, YouTube Link, and measurements with instructions for recreating this card.
And of course if you want to see all the retiring products why not stop by my Online Store. I’ve also done a video showing you how I marked them in my catalog.
Enjoy!
Then stop back by each day this week for more fun tutorials using products from the Mini.
Shop at my Online Store and use Host Code GXUTXA33 with a product order of $50 or more and receive a FREE Gift from me, my Meandering Meadow Card Class including 2 fun folds!
Shop at my Online Store and use Host Code GXUTXA33 with a product order of $50 or more and receive a FREE Gift from me, my Meandering Meadow Card Class including 2 fun folds!
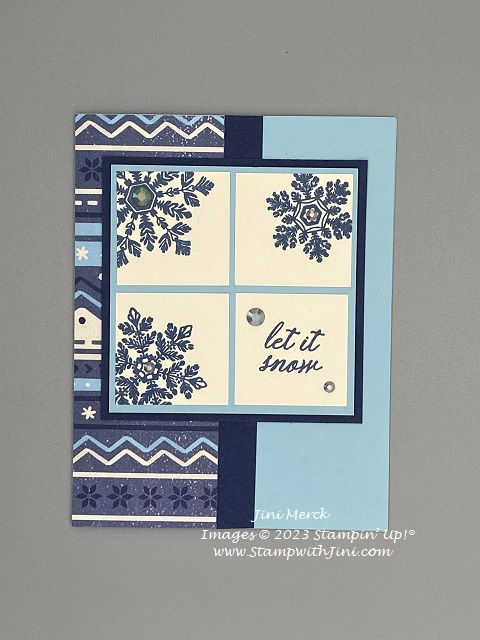
Today’s card is quick and easy and contains a bit of shine too making it perfect for the holiday season.
This type of card is a favorite layout of mine since its great for making in large quantities as it’s a quick and easy layout. I’m using the Sparkling Snowflakes stamp set (162158) which is using a favorite winter image of mine – snowflakes! I can’t seem to resist a snowflake set lol.
I’ve teamed this image up with the lovely winter pattern from the Beary Christmas Designer Series Paper (162015) as it reminds me of those warm winter sweaters I had as a child and it’s got shades of blue too!
Check out this quick and easy card in my Video Tutorial
And of course if you want to make one too here is my PDF with the video link, complete supply list, measurements and step by step instructions. Making it easy to create when you are ready.
Shop at my Online Store and use Host Code GXUTXA33 with a product order of $50 or more and receive a FREE Gift from me, my Meandering Meadow Card Class including 2 fun folds!
Today is going to be short and sweet since I’m taking my computer back to Best Buys to finish things up, I’m hoping. You just don’t know how much you need something until it doesn’t work right. lol.
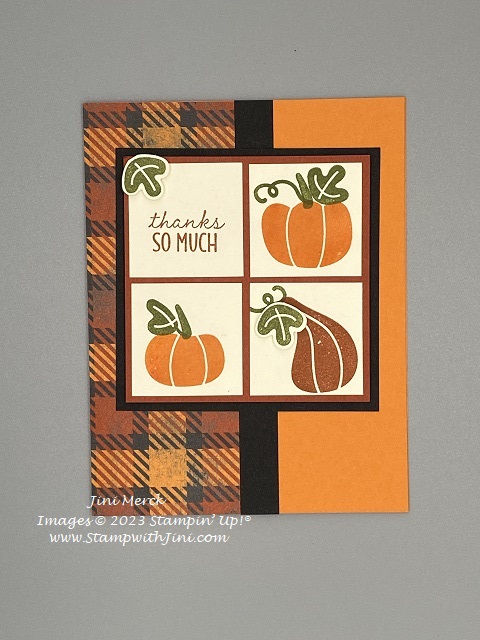
Today’s card was created with one of the NEW Mini Catalog Bundles, Pick of the Patch (162200) that will be available to order starting on September 6th when the September – December Mini goes LIVE. I couldn’t resist this fun little set that has these cute little pumpkin and gourd images perfect for fall and Halloween.
I’ve teamed up the set with the Them Bones Designer Series Paper (162215) that has this wonderfully warm plaid pattern done in rich warm tones for the season. I think you’ll really enjoy these patterns found in the paper which you focus on the Halloween side or the more neutral side like this one.
This card seemed to be a hit during the swap on Thursday evening. I have a quick video tutorial for you and PDF showing you how I created this card.
Enjoy and then stop back by next week when I’ll be sharing some of the swaps that I received in #BackStage Las Vegas with you!
If your a frequent customer of mine you should have already received your New Mini Annual Catalog.
Wondering How to Get YOUR Copy?
If you haven’t ordered in a while
Don’t have a demonstrator
Contact me at stampwithjini@gmail.com or give me a call. I’ll be happy to mail you one or if your local set one aside for pick up
And of course if you don’t want to wait until September 6th to order your Holiday Catalog products, why not join my Team? And as I am sure you can guess, being the first to see this new catalog or any of our new catalogs is a very exciting AND a huge perk of being a Demonstrator – after all who wouldn’t want to be first? Right! Add the fact that you’ll receive a discount on all these products and you can’t lose! If you feel this is a good time to join Stampin’ Up! and my team, the Blue Mountain Stampers, you too can be first too!
What are the Blue Mountain Stampers?
That’s the name of our stamping community. I enjoy welcoming new members to our group. We’re from all over. If you’re considering joining Stampin’ Up!, you may have questions about how I would support you as part of my team. I do offer a variety of ways to learn, grow and to have FUN as a Blue Mountain Stamper!
Exclusive Team Resource Page – videos, PDFs and more
Exclusive Face book Group – A great way to share and connect with other team members and share
Monthly Creative Challenges
Swapping Opportunities
Team Retreats
Meetings – both local and online/virtual
Monthly Crafting Day
Monthly Lunch & Learn
Recognition & Incentives
Training available for workshops, clubs, classes and more!
Additional support and business coaching available
We have a very active group that share and answer each other’s questions on our Exclusive Facebook group. If you’re looking for fun, a place to grow and share with others…You’ll fit right in!
Hobbyists are welcome!
Did you know? 90% of my Blue Mountain Stampers areHappy Shoppers – purchasing for themselves, (along with their family and friends.) That’s right…you can just get a discount on products you love!
We welcome the crafter who’s looking to be a “happy shopper” (and save money), as well as those of you that want to build a business (and make money).
Everyone is welcome after all there’s room for both and everyone in between.
And there is NO Obligation when you purchase your starter kit – Join the Blue Mountain Stampers and see what it’s all about!
Shop at my Online Store and use Host Code 3VEKEQFC with a product order of $50 or more and receive a FREE Gift from me, my Abundant Beauty Step it Up Card Class!
Don’t you love fun fold cards? I know I do and today’s tutorial is for a quick and easy fun fold that stands up for display using the Sale-a-bration stamp set Adorable Owls. This set is filled with fun images that are perfect for coloring with our Stampin’ Blends.
I’ve used the In Color, Fresh Freesia for this card and teamed it up with one of my favorite colors, Coastal Cabana giving it a soft springtime feel. And I’ve added another cute little image to the back signature panel too.
I just love the way he peeks out of the corner. How about you? Want to make one of these fun cards? Check out my quick Video Tutorial for this project. I’ve included a PDF for you to with all the measurements and supply list too.
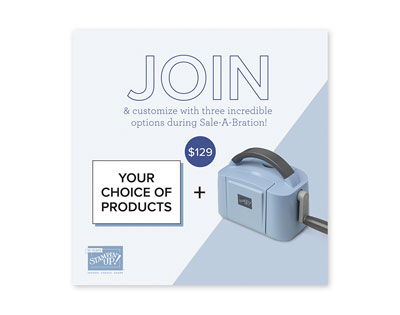
Did you know that Sale-a-bration ends in just 2 weeks? Great news that still means there is time to take advantage of the Sale-a-bration perks, but products are while supplies last. You have 3 ways to choose from too! Shop, Host, or Join.
You can do a Facebook or book party using a Host Code that I create for you. Click Here to learn more about my team.
Shop at my Online Store and use Host Code GK6V6HYCwith a product order of $30 or more and receive a FREE Gift, my Virtual Fun Fold Card Class using the Favored Floral Designer Series Paper
Click Here to learn more about using the Hostess Code If you order Online make sure your profile information is up to date and you’ve allowed me to send you your free gift.
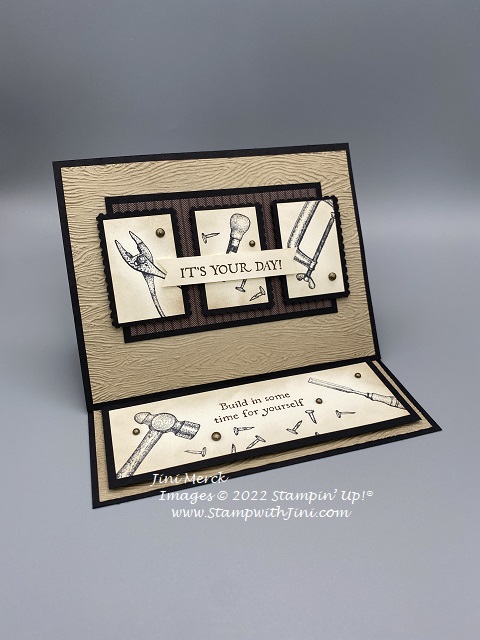
A couple of weeks ago I shared a great masculine card that I made for my guys. I decided to step it up a bit and so I made a fun fold card too that I’m going to share with you today.
Easel cards are so easy to do but they pack a wow factor and have the added bonus of being able to be displayed too.
And of course here is the PDF for you – print it and save since it has the YouTube Link on it along with the supply list and step by step instructions.
Shop at my Online Store and use Host Code JJGFFG4K with a product order of $30 or more and receive a FREE Gift, my Virtual Class using the Warm Welcome Bundle
Click Here to learn more about using the Hostess Code
If you order Online make sure your profile information is up to date and you’ve allowed me to send you your free gift.
If your Online order is $150 or more make sure not to use the host code so that you can take advantage of the Host Benefits yourself – No worries, I’ll still send you your free gift. It’s my way of saying thank you for choosing me as your demonstrator!
Want to create a big bold look for your next project? Why not try out this simple Color Blocking technique that I used for this card? It’s quick and simple to do but yet backs a wow too.
I’ve used the fun Celebrate Everything Designer Series Paper that you can earn when placing a qualifying order or gathering with friends. And got to say it’s a huge stack of paper that you’ll love using over and over again during your crafting since it covers not only the different fall and winter occasions but also has some basic patterns too!
Check out this card that I made highlight 2 of the patterns in this pack of paper.
Fun right? And the 6×6 2022 In Color Glimmer Paper adds a bit of shimmer and shine to this project. I just love this cute little 2 step stamp set, Nuts About Squirrels for projects and treats. Want to see how I made this fun card to send to friends and family this fall?
Nuts About Squirrels Color Blocking Card Tutorial PDF
Enjoy!
And then don’t forget to stop by my Online store to check out this fun little stamp set for your fall projects today.
Over the next 2 days I’ll be sharing tutorials for you to make 3 bright cheerful fall cards, so you’ll want to be sure to stop back by each day. Or better yet why not sign up HERE to receive my posts right in your email inbox so you don’t miss out!
Shop at my Online Store and use Host Code3QFXNM3Eand receive a FREE Gift
Click Here to learn more about using the Hostess Code If you order Online make sure your profile information is up to date and you’ve allowed me to send you your free gift.
Sign up HERE for my FREE Newsletter and Class Schedule or Get my Blog Posts delivered right to your inbox HERE and receive my FREE Cup of Tea Note Card Class