Petal Cone Valentine Treats

Do you like to give Valentine Treats? Our Petal Cone Die is so much fun to use – you can do all kinds of things with it. Of course, I love 3d items and the ability to create gifts and treats for those special people in my life.

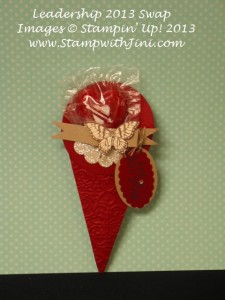
Here are two Valentine treats made with our Petal Cone Die (item 121810) that I received in swaps from Leadership earlier this month. Ann Marie made this first one – isn’t it fun?

Petal Cone Die Valentine Treat

And here is the second Petal Cone Die swap that I received. I love the banner with the butterfly – a nontraditional Valentine treat, since it could be used for any reason by just changing out the treat inside! Wedding, shower, birthday the choices are endless.

Petal Cone Die Valentine Treat

Which Petal Cone Die treat do you like best? Leave me a comment and let me know.

Click here to order your Stampin’ Up! Products online 24/7! (US only)

Leadership Gift

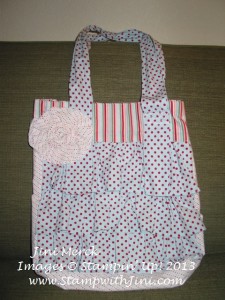
Are you still wondering what I was making in the picture I posted yesterday? Did you catch the hint about my swaps being in the fabric tote? And did you notice and recognize our Candy Cane Christmas Designer Fabric? Well I had the best time playing around with some of our wonderful fabric from the Clearance Rack over the weekend. I wanted to make something special to carry all those swaps around in this week at the Stampin’ Up! Leadership Conference and came up with the fabric tote that you saw in yesterday’s post. You can click Here to see that post.

First let me show you the purse that I fell in love with this summer and that inspired me to create this fabric tote.

ruffle purse

And here is the fabric tote I made for myself. I love pastels and spring colors so I thought this would be a lot of fun.

fabric tote

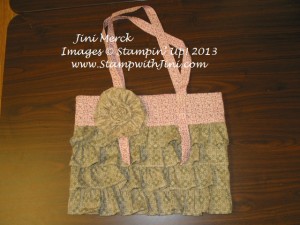
I loved the way my tote turned out so I thought it would make a great down line gift for my TEAM member Janie too. She loves the rich earthy colors in the Deck the Halls Designer fabric so I chose to make her tote out of it since it is also available on the Clearance Rack.

Here is Janie opening up her gift today after we got settled into her room. I’m pleased to say that she really seemed happy by my hand crafted fabric tote.

Deck the Halls Fabric Tote

This fabric tote is a smaller version of my tote but I really love the way it turned out. Now I just have to remember how I made it so I can make myself one – since I didn’t use a pattern that may be a challenge.

Deck the Halls Fabric Tote

Want to see all the other wonderful Designer Fabrics that Stampin’ Up! has to offer? Or some of the other wonderful items that are available on the Clearance rack? Click HERE to check it out – some of the items are up to 80% off!

Click here to order your Stampin’ Up! Products online 24/7! (US only)

Last Minute Christmas Gifts

We’ll its busy around the house today getting ready for Christmas but I wanted to share with you a few things quickly.

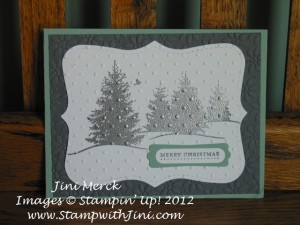
First I wanted to share a couple of the wonderful cards that my stamping friends have sent me. This first card is from Randy and uses one of our retired stamp sets Scenic Season which she embossed in Silver. Don’t you love the way that Stampin’ Up! items work together! It doesn’t matter if it has been retired for a while or brand new.

Scenic Season

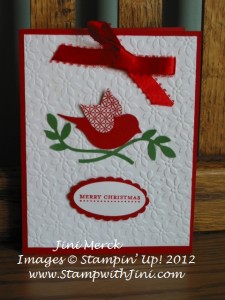
Mary made this card using the Bird Builder Punch

Bird Builder Punch

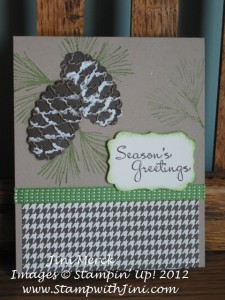
And this last card was made by Janie. I love the way that Janie used our Early Espresso Core’dinations paper from the Holiday Catalog. She ran the punched Scallop Oval pieces through the Big Shot first using the Fancy Fan Embossing Folder and then used our White Emboss Powder to add the “snow” on the cones. Isn’t it great a great technique?

Core'dination Pine Cones

All of them are so great that I’ve also posted some on my facebook page – so you can see more cards there. (Just type in Stamp with Jini and become my friend.)

And now for my gift items – Saturday I shared with you my Peppermint Stick Sugar Scrub gift item that I made for my family and friends. Today I thought I would share with you the matching bags I made to go along with them. I really like the way they turned out and using our wonderful Designer Rosette Die made the rosettes so quick and easy! If you missed my Peppermint Stick Sugar Scrub post you can click HERE to read more about it.


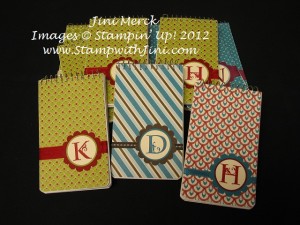
And last but not least my husband saw all the goodies I was making and decided that he wanted to give some to his co workers too. Of course I made chocolate tents for the guys and the ladies will receive these cute notepads.

Festival of Prints notepads

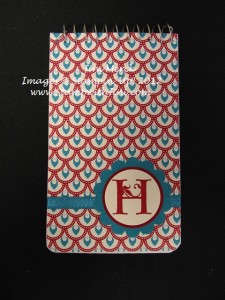
I used our Festival of Prints DSP Stack from the Holiday Catalog to cover them and then used our punches for focal point which includes their initial. I hope the ladies will enjoy them. Here’s a close up.

Festival of Prints notepad closeup

Did you notice something special about this little notepad? It contains a sneak peek of one of our FREE Sale-a-bration items! You’re going to love this ribbon from our Sycamore Street Ribbon and Button Pack!

Team Christmas Party and Gift Exchange

It’s been so crazy around here that I haven’t been able to post about my recent TEAM Christmas get together. I’m truly blessed to have such a wonderful down line and we have such a great time together – they are simply the best. So our Christmas party and gift exchange was no different.

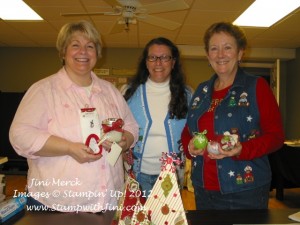
Here are the three of us together –

Christmas Party team photo 2012

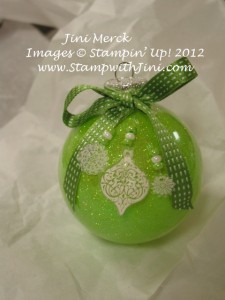
Now on to the wonderful gifts – this first photo is of one of the beautiful ornaments that Cindy made. Aren’t they beautiful? I especially love the way that Cindy decorated them using our Ornament Keepsakes Stamp Set, Holiday Ornament Framelits, and Shrinky Dinks®. Remember how much fun those were when we were kids? Cindy just celebrated her first anniversary as a Stampin’ Up! Demonstrator in November, but she has been stamping forever.

Cindy gift swap 2012 ornament

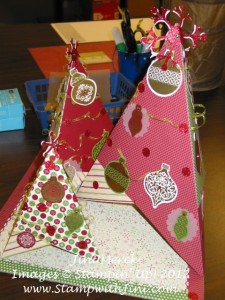
This second photo is of the gift that Janie created – don’t you just love it! Janie used our Be of Good Cheer Designer Series Paper to make these trees. What a beautiful table centerpiece this makes. I love the little bit of bling on top from the Real Red Glimmer Paper – Janie is always thinking out of the box so I always love seeing her creations.

Janie gift swap 2012 trees

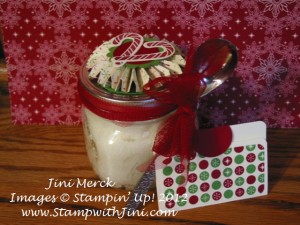
And here is a photo of my gift (shhh… don’t tell my family and friends since their getting these too). It is a peppermint stick sugar scrub that I made. I just love these homemade scrubs and even take them into the shower with me! Since I have such sensitive skin commercial products can be a problem, but these are great since they’re all natural!

Peppermint Stick sugar scrub gift exchange 2012

To decorate my peppermint stick sugar scrub I used the Scentsational Christmas Stamp Set. I just love this set with its coordinating Holiday Collection Framelits , and did you know they’re only available until January 3rd? So there is still time to get your own and if you want them both why not get the bundle discount.

Want to make some Peppermint Stick Sugar Scrub for yourself? Here is the recipe.

Peppermint Stick Sugar Scrub

2 cups sugar

2/3 cup extra light tasting olive oil

3 -4 drops peppermint essential oil (I got mine at the health food store)

Place the first two ingredients into a bowl and stir. Add 3-4 drops of essential oil. Mix well. Place into a jar or container that seals.

This recipe makes enough for a pint jar and this scrub can be used anywhere on your body. The peppermint is both refreshing and energizing.

Just moisten your hands, scoop out a spoon full and rub in a circular motion on your moistened skin. Rinse and enjoy. Be careful if you’re using this in the shower since the olive oil will make the floor slick. You’re going to love how soft this makes your skin feel! I use mine 2-3 times a week and the scrub should last for weeks and weeks if you are careful not to get water into it.

Want to join in the fun? Consider joining my team and becoming a Stampin Up Demonstrator?  If you have and are ready, why not join now?  Not only do you get $125 worth of products of your choice for just  $99 … If you have questions I’d love to speak with you about them meanwhile you can Click HERE for more information about becoming a Demonstrator.

Click here to order your Stampin’ Up! Products online 24/7! (US only)


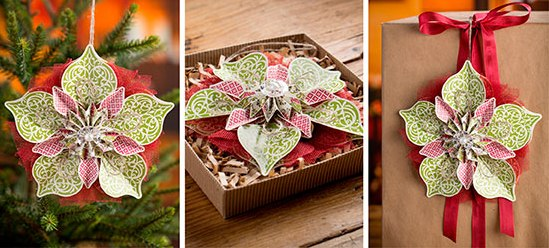
Get the Ornamental Elegance Kit–While Supplies Last!

ornament kit

The ornament on the cover of our holiday catalog is such a hit that Stampin’ Up! is  making it available to you–just in time to deck the halls with terrific trimmings you’ve made yourself! They’ve simplified this fun project so that you can quickly and easily achieve the same results.

In addition to the kit, all you need is a glue gun, scissors, and adhesive. (Our Anywhere Glue Sticks [104045] are perfect for assembly.) Want greeting or place cards to go with those ornaments? The Ornament Keepsakes Stamp Set (W 128048/C 128051) gives you perfect coordination. Fancy a little sparkle and shine? Sprinkle on our Dazzling Diamonds Stampin’ Glitter (102023)!

Take advantage of this amazing offer–just in time to create 10 heirloom ornaments–or stunning tags to attach to a special neighbor gift.

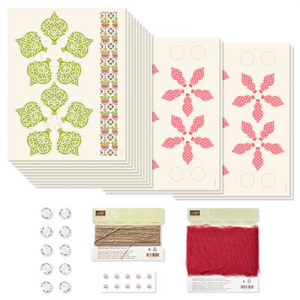
The Ornamental Elegance Kit (132832) is $14.95 and includes:

ornament kit

  • Die-Cut Cardstock Elements
  • Cherry Cobbler 3-1/2″ Scalloped Tulle Ribbon
  • Natural Linen Thread
  • Vintage Faceted Designer Buttons
  • Large Pearl Basic Jewels

Order these now so you will have plenty of time to make them for Christmas gifting–or for your family tree! Available while supplies last.

Click here to order your Stampin’ Up! Products online 24/7! (US only)

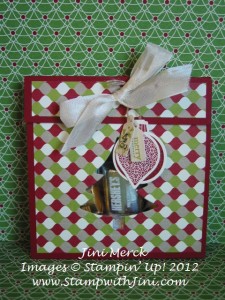
Festive Holiday Treat Kit Tutorial

Festive Holiday Treat Kit

As I mentioned in Wednesday’s post in honor of Black Friday and Cyber Monday I’m offering you my Festive Holiday Treat Kit when you place an order with me! (Click HERE to see post and details on how to earn your free kits!)  Don’t forget that my Online Extravaganza items are up to 50% off and can be included in your order too! (My Black Friday and Cyber Monday Promotion ends Monday at Midnight.)

Want Worry free shopping?  Place your order directly with me by phone (706 754-7124) or email ([email protected]) as soon as you finalize your list and I’ll take care of the details for you to make sure you get the best deals! But hurry and get it to me as soon as you can so you don’t miss the Online Extravaganza door busters!

Here is the Festive Holiday Treat Kit Tutorial that I promised on Wednesday so you can see just how fun these are to make.


Festive Holiday Treat Tutorial

Gather the following Supplies:

Simply Scored Tool

Festive Collection Framelits

Tiny Tags Stamp Set

Jewelry Tag

Ornament Keepsakes Stamp Set

Holiday Ornaments Framelits

Cherry Cobbler Classic Ink

Early Espresso Classic Ink

Lucky Limeade Classic ink

1/16″ Handheld Circle Punch

Crop-a-Dile

Candy of your choice


Here’s the Dimensions:

Cherry Cobbler CS: 4″ x 10″

Very Vanilla CS:  3″ x 4″

Festival of Prints DSP: 3 ¾” x 3 ¾” and 3 ¾” x ¾”

Very Vanilla ½” Seam Binding Ribbon: 12″

Linen Thread: 6″

4″ x 6″ Cello Bag


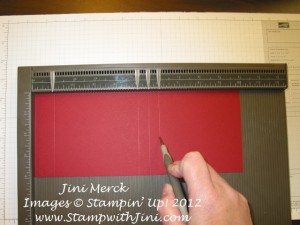
1. Lay the longest edge of the card stock against the top of your Simply Scored Tool and score at the 1″, 5″, 5 ½”, and 6″ marks. Fold on the score lines. (Use the 3 score lines to create a W shape.)
2. Take your Holiday Collection Framelits and center it about ½” up from the bottom of the DSP.  You can use a Post-it Note® to hold it in place. Run it though the Big Shot. Festive Holiday Treat Kit Tutorial
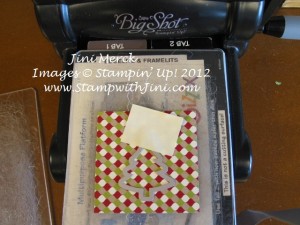
3. Attach the DSP to the CS with Snail. Festive Holiday Treat Kit Tutorial
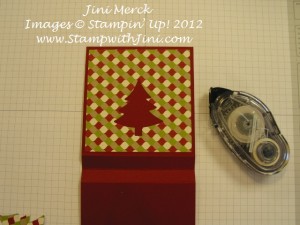
4. Place the Holiday Collection Framelits back in the same place and run it through the Big Shot to cut the CS. Festive Holiday Treat Kit Tutorial
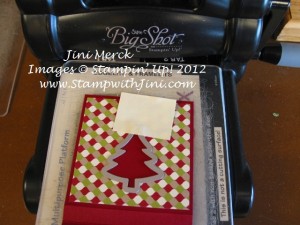
5. Attach the small piece of DSP to the CS to create the top flap. Festive Holiday Treat Kit Tutorial
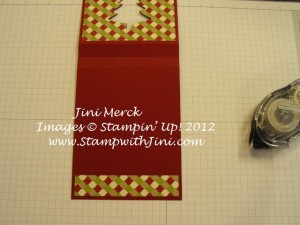
6. Take a small Cello Bag and trim it down to 4 ½”  using your Personal Paper Trimmer.

7. Place your treat into the Cello Bag. (I used 6 nuggets in mine. Your favoite candy is great. Of course it’s always a good idea to make sure it tastes good, right?)

8. Place the Cello Bag into your treat holder as shown lining the top of the Cello Bag right below the 1″ score line. Festive Holiday Treat Kit Tutorial
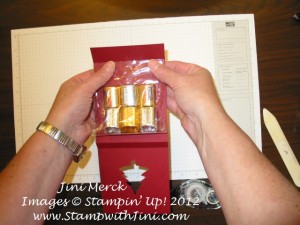
9. Bring the front up to cover the Cello Bag. Festive Holiday Treat Kit Tutorial
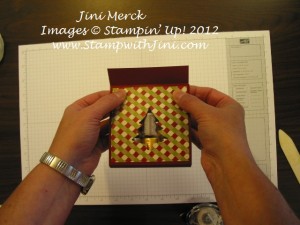
10. Fold the top down and using the Crop-a-dile punch two holes about 1″ apart and about 1 ½” from each side. Festive Holiday Treat Kit Tutorial
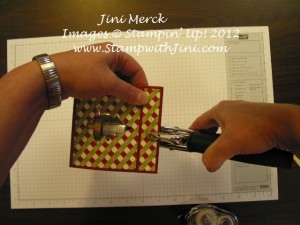
11. Thread 12″ of Ribbon through the two holes to hold everything together.  Set aside.
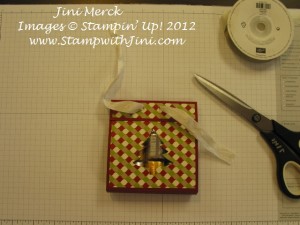
Festive Holiday Treat Kit Tutorial

12. Create your tags by stamping small images from the Ornament Keepsakes stamp set onto Very Vanilla CS (I used Cherry Cobbler) and cut them out using the coordinating Ornament Framelits.

13. Stamp tags using Tiny Tags stamp set (I used Lucky Limeade and Early Espresso) and punch out using TJewlery Tag Punch.

14. Punch holes in tags and ornament using 1/16″ Circle Punch.

15. Thread the Linen Thread through holes and tie ends into a knot.

16. Place finished tags onto ribbon and finish by tying ribbon into a bow.

You’re finished!

Your Festive Holiday Treat Kit will contain all the items that you will need to create this great little holiday gift along with a special Tutorial you’ll receive by email.

Your Festive Holiday Treat Kit includes:

  • Card Stock
  • Designer Series Paper
  • 4″ x 6″ Cello Bag
  • 12” Ribbon
  • 6” Linen Thread
  • Kits do not include candy
  • (*Kit colors and supplies may vary)

Remember Kits will be included with your order or if you live out of the area they will be mailed by USPS starting on December 5th.


Click here to order your Stampin’ Up! Products online 24/7! (US only)

Nugget Turkey

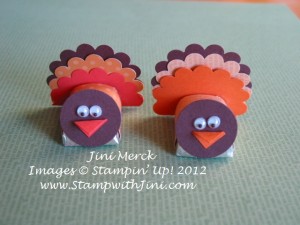
Hi everyone today I thought I would share a fun project with you… a Nugget Turkey. I think they are so stinking cute! And they’re are so much fun to make with a few simple supplies. Of course anything with chocolate around my house is a hit – how about yours?

Nugget Turkey

To bring a Thanksgiving smile to your loved ones faces you’ll need to gather the following supplies to make your Nugget Turkey.

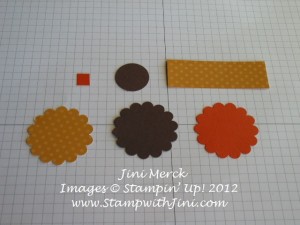
More Mustard DSP (I used the polka dot print from the Regals DSP Stack: 1″ x 3″ and some for punching

Chocolate Chip and Pumpkin Pie CS: for punching

Pumpkin Pie CS: 3/8″ x 3/8″

1 3/4″ Scallop Circle Punch

1″ Circle Punch

Googlies (from the Holiday Catalog – they are self stick! Isnt that great!)

Glue Dots

Multipurpose Liquid Glue

Paper Snips

Hershey’s Nuggets (which ever type floats your boat – not sure? Taste test them after all Thanksgiving is calorie free, right?)

Here’s how you do it –

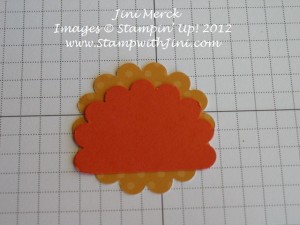
1. Punch out 3 coordinating tail feathers from you More Mustard DSP and Chocolate Chip and Pumpkin Pie CS using the 1 3/4″ Scallop Circle Punch.
2. Punch 1″ Circle from Chocolate Chip CS. You should have the following pieces and are ready to assemble.

3. Wrap the 1″ x 3″ strip of DSP around your Nugget, and stick the end down using a Glue Dot. (Taste a piece of chocolate to make sure it’s good.)

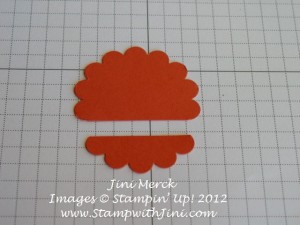
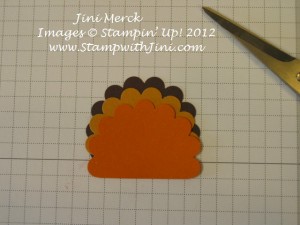
4. Trim away the bottom 5 scallops from the first tail feather using your Paper Snips.

Nugget Turkey

6. Line up and adhere the first feather on top of the More Mustard DSP feather and trim away 4 scallops. (Why not try and different flavor Nugget, you want to make sure you’re using the right one, right?)

6. Line up and adhere the two layers of feathers on top of the Chocolate Chip CS feather and trim anything off the bottom that shows. (Hmm… Did you say Chocolate Chip – maybe you should check out those Nuggest again?)

turkey nugget

7. Attach feathers to the back of the Nugget using a Glue Dot or two.

8. Fold the 3/8″ x 3/8″ piece of Pumpkin Pie CS in half to create the beak and attach this to the 1″ Chocolate Chip Circle using Multipurpose Liquid Glue. Allow to dry.

9. Attach your Googlies to give the little guy eyes – after all aren’t they too cute wiggling around like that? (Oops.. better try another one of those nuggets before you’re done. Want to make sure you tried all the flavors right?)

10. Attach your head of your turkey to the front of your Nugget using a Glue Dot and you’re finished.

Isn’t he cute? Why not make another one – after all there is still chocolate left right?

I hope you enjoyed this little tutorial for my little Nugget Turkey.

Click here to order your Stampin’ Up! Products online 24/7! (US only)
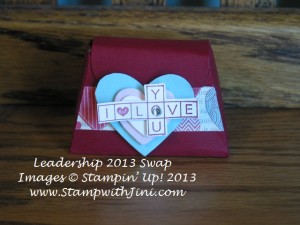
Blessing Mix Box

Turkey Day is this week – can you believe it? It’s really snuck up on me. Since I’ve wanted to share this great Blessing Mix Box with you that my friend JoAnn gave me recently I figured today would be a great day for it.

I don’t know about you but I love to give out little gifts to family and friends and so I am planning on making a bunch of these this week. JoAnn used our wonderful Kraft Gift Box (item #124106) which is currently on sale this week during our Online Extravaganza for just $2.07 for a package of 4 and our Brights Designer Buttons (#119747) also available during the Online Extravaganza for just $6.27.  So it’s a great time to get yours.

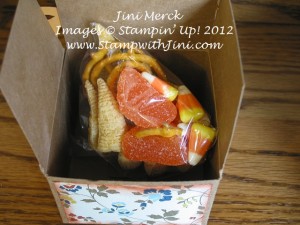
Inside JoAnn placed all the goodies described in the poem into one of our cello bags and tied it up with a ribbon.

Want to make some of these Blessing Mix Boxes for your family and friends? Here is the poem for you to use.

Blessing Mix

The Bugles are a symbol of the Cornucopia, a horn of plenty.

The Pretzels represent arms folding in Thanks & Prayer.

The Candy Corn reminds us that during the first winter, the pilgrims were allowed only five kernels of corn per day because the food was scarce.

The Fruit is a reminder that Thanksgiving is the celebration of the harvest.

The Peanuts represent seeds, the potential of the bounteous harvest of the next season if they are planted & well tended.

Have fun!

Supplies:

Stamp Set: French Foliage

Inks: Cajun Craze and Midnight Muse

Paper: Comfort Café DSP, and More Mustard, Summer Starfruit, Cajun Craze, and Very Vanilla

Accessories: Kraft Gift Box, Brights Designer Buttons, Early Espresso Baker’s Twine, and Stampin’ Sponge


Click here to order your Stampin’ Up! Products online 24/7! (US only)
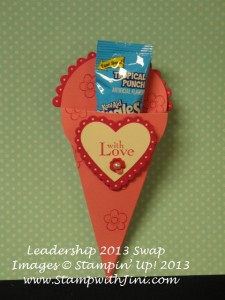
MDS Spooky Bingo Bits Treats

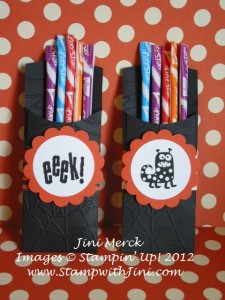
Need a quick and easy idea for Halloween treats? How about these great little treats made with our MDS Spooky Bingo Bits Download and the Petite Pocket die!

I received these quick and easy treats at the Chattanooga Regional last month from Joyce Fisher in a swap. Aren’t they fun and sooo quick and easy to make and of course who doesn’t like Pixie Sticks!  Crank up your computer and you can make scores of these little goodies.

Want to more about MDS? Why not check out our FREE 30 day MDS2 Trial version and see what it’s all about by clicking HERE. You can click HERE to see my upcoming Calendar of Events. I’ll be holding two MDS2 classes this fall to help you learn more about MDS2 and unlock all the fun!

Supplies:

Paper: Howlstooth & Scaringbone DSP, Basic Black, Tangerine Tango and Whisper White

Accessories: MDS, Spooky Bingo Bits Download, Big Shot, Petite Pocket Die, Spider Web Embossing Folder, 2 3/8″ Scallop Circle Punch, and 1 ¾” Circle Punch

Click here to order your Stampin’ Up! Products online 24/7! (US only)
Halloween Petite Purse

I love the Petite Purse Die and really like its versatility, so when I saw this cute little punch art cat purse I couldn’t resist. Isn’t it just too stinking cute!

What a great treat for your Halloween trick or treaters! One of the best things about the Petite Purse Die is you can fill it with sooo many great little goodies – Quick hide the chocolate from my husband – He’s always saying he’s “safety testing” it!

I’m sorry to say I can’t tell you who make this darling Halloween treat since the swapper didn’t include her information.

Supplies:

Paper: Howlstooth & Scaringbone DSP, Basic Black, Wild Wasabi, Basic Gray, and Pretty in Pink card stock

Accessories: Big Shot and Petite Purse Die

Click here to order your Stampin’ Up! Products online 24/7! (US only)