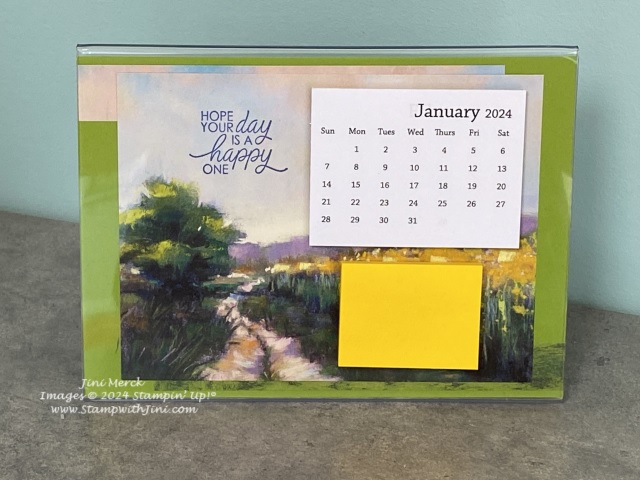
Do you like to have a calendar on hand, or like to create little decor items? If so this fun little Acrylic Desk Calendar might be just want you’d like. I created this little decor item for my Team Shoe Box Swap last month and it got buried under some other projects so I didn’t get to share it with you earlier. But good news, here it is today.
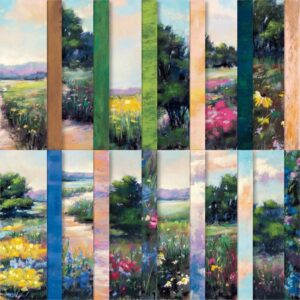
I just fell in love with the Meandering Meadow Designer Series Paper that is part of our Online Exclusive selection as it is filled with wonderful landscapes and rich color. This paper was painted by one of our Stampin’ Up! Artisans on small canvases and then made in to designer series paper. So you’ll have wonderful little work of arts when you get this paper!
I found the Acrylic frame at my local dollar store and so couldn’t wait to create with it. Want to see how I made it, so you can make one too?
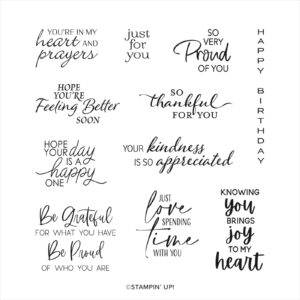
And if you love the project you may just want to get the stamp set too. It’s part of our carry over list and can be found in my Online Store. I just love the font used in this set that I used for this project and think it’s a great set for those cards we need to make too as it covers all kinds of occasions.
Enjoy! Stay dry and keep warm, it’s going to a crazy kind of weather weekend.
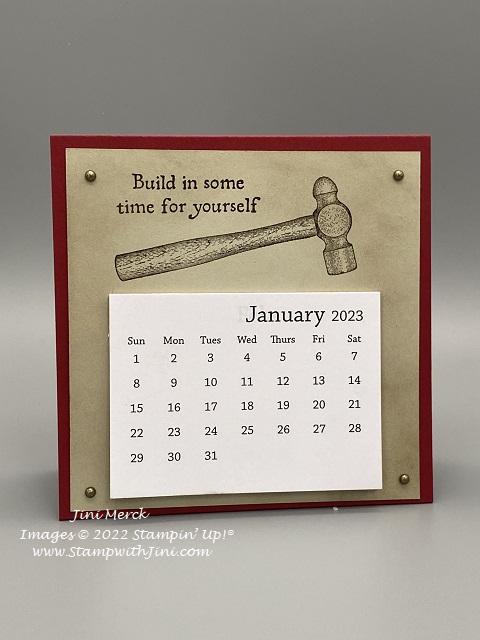
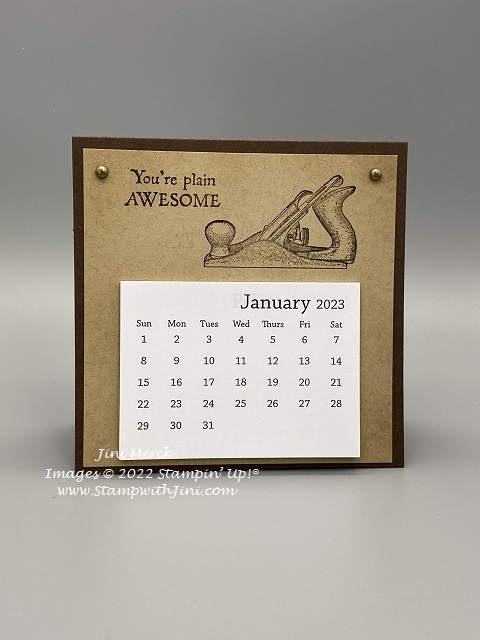
Today’s 3d Calendar Holder can also be used as a card. Great for the guys in our lives and perfect to display all year long, calendar cards pack a wow. And the Vintage Tool stamp set is soooo much fun to use, I couldn’t stop creating!
You’ll want to be sure to check out this fun stamp set
And of course here is the PDF for you – print it and save since it has the YouTube Link on it along with the supply list and step by step instructions.
I’ve shared quite a few tutorials with you here on my blog and great news – This stamp set is highlighted in my January Card Class. Already have this set? No problem, you can still get the class for free with a qualifying order of anything else on your shopping list. Got questions? Ask me about my free class option today so you don’t miss out!
Shop at my Online Store and use Host Code BZDBFMB9 with a product order of $30 or more and receive a FREE Gift, my Virtual Class using the Beautifully Happy stamp set
Click Here to learn more about using the Hostess Code If you order Online make sure your profile information is up to date and you’ve allowed me to send you your free gift.
If your Online order is $150 or more make sure not to use the host code so that you can take advantage of the Host Benefits yourself – No worries, I’ll still send you your free gift. It’s my way of saying thank you for choosing me as your demonstrator!
Sign up HERE for my FREE Newsletter and Class Schedule or Get my Blog Posts delivered right to your inbox HERE and receive my FREE Cup of Tea Note Card Class
I’ve shared a great masculine cards that I made for my guys last year and so today I found this fun little calendar that I created for my 3d swap at #OnStage in Jacksonville that got buried on my desk that I wanted to share with you.
This fun little Calendar Card sits up on your desk and you can add a simple signature panel to the back of it. It also fits into a standard Stampin’ Up! envelope making it a win, win!
A great card for our guys, right? Check out this quick little video I have whipped up for you too.
And of course here is the PDF for you – print it and save since it has the YouTube Link on it along with the supply list and step by step instructions.
Awesome Vintage Tool Calendar Card Tutorial printable PDF
I’m still catching up from my surgery from November so you’ll want to stop by and see the videos that got lost along with this one.
But if you love this set as much as I do watch for my January Card Class that will highlight this set and more Information coming soon!
Shop at my Online Store and use Host Code BZDBFMB9 with a product order of $30 or more and receive a FREE Gift, my Virtual Class using the Beautifully Happy stamp set
Click Here to learn more about using the Hostess Code If you order Online make sure your profile information is up to date and you’ve allowed me to send you your free gift.
If your Online order is $150 or more make sure not to use the host code so that you can take advantage of the Host Benefits yourself – No worries, I’ll still send you your free gift. It’s my way of saying thank you for choosing me as your demonstrator!
Sign up HERE for my FREE Newsletter and Class Schedule or Get my Blog Posts delivered right to your inbox HERE and receive my FREE Cup of Tea Note Card Class
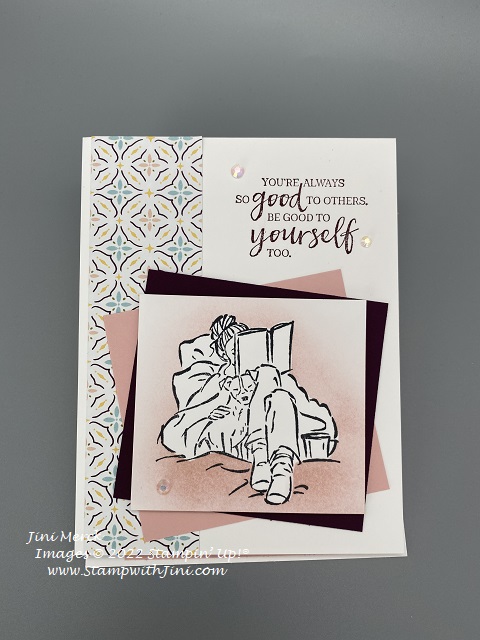
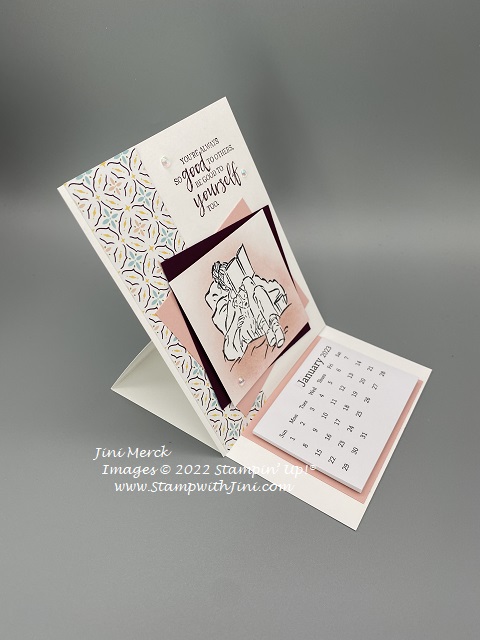
It’s another card made with the quick and easy masking technique and the In the Moment stamp set – once I started creating for my #OnStage swaps I couldn’t put this set down.
Easel cards are great to hold these little mini calendars since you can set it up on your desk and have not only the calendar to glance at but an image to remind someone that you are thinking of them too. And since Easel cards are so easy to create, you can make as many as you’d like too. Here is a side view for you.
Want to learn how to create your own easel card? I’ve got a Video Tutorial for you along with a PDF with the complete supply list, measurements and step by step instructions today.
And good news my PDFs always have the YouTube link for quick and easy reference so you can find it when you’re ready to create.
Shop at my Online Store and use Host Code JJGFFG4K with a product order of $30 or more and receive a FREE Gift, my Virtual Class using the Warm Welcome Bundle
Click Here to learn more about using the Hostess Code If you order Online make sure your profile information is up to date and you’ve allowed me to send you your free gift.
If your Online order is $150 or more make sure not to use the host code so that you can take advantage of the Host Benefits yourself – No worries, I’ll still send you your free gift. It’s my way of saying thank you for choosing me as your demonstrator!
Sign up HERE for my FREE Newsletter and Class Schedule or Get my Blog Posts delivered right to your inbox HERE and receive my FREE Cup of Tea Note Card Class
Shop at my Online Store and use Host
Code KTYQJ3TY
Click Here to learn more about using the Hostess Code If you order Online make sure your profile information is up to date and you’ve allowed me to contact you (If you chose no contact in the past you’ll need to call 1-800-Stamp Up to have them change your profile for you.)
Well I’m glad to see that whatever black out issue that was going on yesterday is now fixed – technology… some days it can be a frustrating thing in our lives, others a blessing.
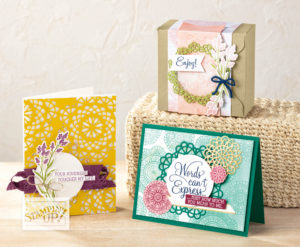
Well the good news is I can share more information about my upcoming Christmas Card Stamp-A-Stack with you. Last year this format was a big hit so we’ll be doing it again. And since I couldn’t make a choice between card designs you can choose from 6 instead of the 5 we had in the past.
What is a Stamp-A-Stack? It’s a class where you multiples of the same card so that you can get your Christmas cards done before the holiday rush since I’ve done all the designing and cutting for you!
Create 10 cards per set, choose from 6 different designs, and Make as many sets of 10 as you want!
Cards are clean and simple designs.
YOU choose which designs you make, and you have 6 to choose from!!!
Thursday, November 7th 10 am – 4 pm
OR
Saturday, November 9th 10 am – 4 pm
Work at your own pace. Everything is included except your favorite Adhesives.
Class Fee: $15 (per set of 10 cards)
Buy 4 sets and get the 5th set for FREE!!!
Choose as many sets as you want; there is no limit!
R.S.V.P and Prepay by Wednesday, October 23rd
to hold your spot
Don’t forget to tell me how many of each design option you want
I’m offering an upgrade option this year so you can have your own set of Stampin’ Blends to complete the class. As always, feel free to substitute another color if you need to. Simply email me your RSVP and let me know the changes along with your payment method.
Class Add On Stampin’ Blends Option:
• Option Card D Stampin’ Blends: Cost $10.50
Includes 2 Stampin’ Blends: Night of Navy Light and Seaside Spray Dark
• Option Card E Stampin’ Blends: Cost $21
Includes includes 4 Stampin’ Blends: Smoky Slate Light, Pumpkin Pie Dark; Pool Party Combo Pack
• Option Card F Stampin’ Blends: Cost $26.25
Includes 5 Stampin’ Blends: Cherry Cobbler Dark, Daffodil Delight and Pumpkin Pie Combo Packs
• I want it All (includes Stampin’ Blends for D, E, F): Cost $50
Includes 10 Stampin’ Blends: Smoky Slate and Night of Navy Light, Crumb Cake and Seaside Spray Dark Pumpkin Pie, Pool Party, and Daffodil Delight Combo Packs
Prepay by Wednesday, October 23rd to have your Stampin’ Blends for Class
Not local? Or want to stamp on your own schedule?See my Class to Go Kit OptionHEREon my Calendar of Events
Need Adhesive? No problem,
pick yours up at the class.
Shop at my Online Store and use Host
Code YS9WN2UA
Click Here to learn more about using the Hostess Code If you order Online make sure your profile
information is up to date and you’ve allowed me to contact you (If you chose no
contact in the past you’ll need to call 1-800-Stamp Up to have them change your
profile for you.)
I had some more calendars that I wanted to use so I made this bright and cheerful Bloom by Bloom Calendar Card to send out. I know it’s almost the end of January but I think they will still bring a smile to the recipients face.
I’ve created a PDF Tutorial for this card and if you would like to see my earlier video tutorial that I shared with you showing you how I made these calendar bases for my Forever Lovely Calendar Card CLICK HERE.
Just a note: the video has been notated that I said the wrong measurement for the base on the video, but please know that the PDF is correct. Sometimes my mouth gets ahead of my brain. Ever have that happen? lol. But know that you start with a standard card base that is 5 1/2″ x 8 1/2″.
If you loved the cute January Paper Pumpkin Kit – you won’t want to miss out on the February Kit. Why not sign up before February 10th so you are sure you get yours? Or you can purchase a PrePaid Subscription and earn FREE Sale-a-bration items when you do!
Shop
at my Online Store and use Host Code H3Z3YTVZ
Click Here to learn more about using the Hostess Code If you order Online make sure your profile
information is up to date and you’ve allowed me to contact you (If you chose no
contact in the past you’ll need to call 1-800-Stamp Up to have them change your
profile for you.)
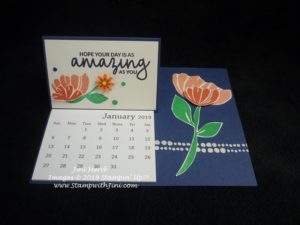
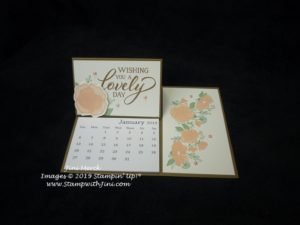
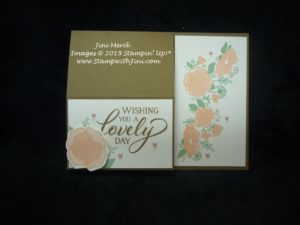
I created today’s projects for my January Thank You Cards. They are a bit different from what I usually do since they contain a little calendar but I really like the way they turned out and hope everyone who receives them will enjoy them.
They are so easy to make and even better they fold flat for mailing.
Want to learn how I made them? I’ve filmed a Tutorial for you today and also typed up a PDF to go along with it so you can make some too if you would like.
FOREVER LOVELY CALENDAR CARD VIDEO TUTORIAL
January Thank You Forever Lovely Calendar Card Tutorial PDF
Shop
at my Online Store and use Host Code FFCVWYHC
Click Here to learn more about using the Hostess Code If you order Online make sure your profile
information is up to date and you’ve allowed me to contact you (If you chose no
contact in the past you’ll need to call 1-800-Stamp Up to have them change your
profile for you.)
Need a quick and easy idea for Halloween treats? How about these great little treats made with our MDS Spooky Bingo BitsDownload and the Petite Pocket die!
I received these quick and easy treats at the Chattanooga Regional last month from Joyce Fisher in a swap. Aren’t they fun and sooo quick and easy to make and of course who doesn’t like Pixie Sticks! Crank up your computer and you can make scores of these little goodies.
Want to more about MDS? Why not check out our FREE 30 day MDS2 Trial version and see what it’s all about by clicking HERE. You can click HERE to see my upcoming Calendar of Events. I’ll be holding two MDS2 classes this fall to help you learn more about MDS2 and unlock all the fun!
Supplies:
Paper: Howlstooth & Scaringbone DSP, Basic Black, Tangerine Tango and Whisper White
Accessories: MDS, Spooky Bingo Bits Download, Big Shot, Petite Pocket Die, Spider Web Embossing Folder, 2 3/8″ Scallop Circle Punch, and 1 ¾” Circle Punch