Frankenstein Post it Note Holder

Well I’m back after a short break with family, and I’ve got a great project and video tutorial to share with you, my Frankenstein Post it Note Holder.

Frankenstein Post it Note Holder

I think this Frankenstein Post it Note Holder  really turned out too stinking cute. And I’m happy to say that my daughter and suitemate seemed tickled with their little Halloween surprise – Kaitlin especially loved the page post it notes and thought they were pretty creepy. LOL.

You’ll want to keep reading after the Frankenstein Post it Note Holder supply list below, since there have been a lot of things going on while I haven’t posted the last few days. And for those of you who haven’t kept up with me on facebook I wanted to make sure you had all the up to date Stampin’ Up! news.

Supplies:

Inks: Old Olive (126953) and Perfect Plum (126963)

Paper: Old Olive (100702), Perfect Plum (101889), Whisper White (100730), and Basic Black (121045)

Accessories: Small Oval Punch (120908), ¾” Circle Punch (119873), 1″ Circle Punch (119868), White Stampin’ Chalk Marker (132133), Top Note Die (113463), Stampin’ Sponges (101610), and post it notes from your local store

Click here to order your Stampin’ Up! Products online 24/7! (US only)

Mystery Hostess Code

Use Mystery Hostess Code RUG6FXNY when placing your order and your name will be entered into my Mystery Hostess Drawing. This Mystery Hostess Code RUG6FXNY will be good through Saturday, November 2nd. The number of hostess will depend on the total sales and I’ll be drawing a hostess for every $150 in sales.

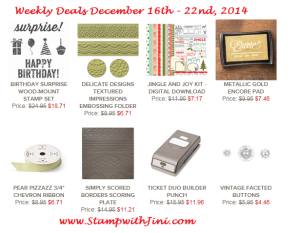
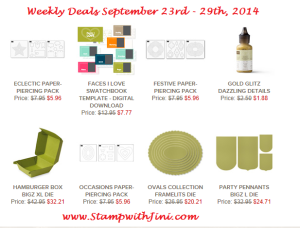
New Weekly Deals

Weekly Deals Banner Image

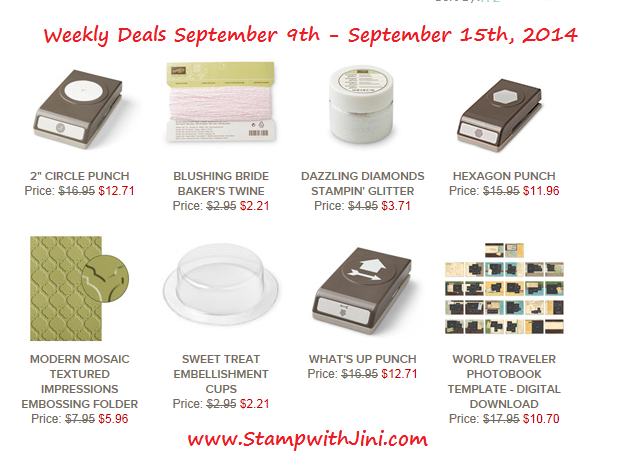
These deals start Tuesdays and end on Monday – if you haven’t already checked out this week’s deals why not click HERE.

 Join for $25 – only 3 days left

Join for 25 image

When you join today, you can choose from our Weekly Deals or any other current product for your starter kit!

Ends: Monday, October 21st, 2013

The specially priced starter kit includes:

  • $26.95 worth of Stampin’ Up! product (must be more than $25, but not more than $26.95 before tax)
  • Free Shipping (you only pay sales tax!)

Business Pack, includes:

  • A box of annual catalogs, pack of Holiday Catalogs, Getting Started DVD, Starter Kit Business Pack (order form, customer postcards, etc.
  • Two FREE months of the Demonstrator Business Web Site (DBWS)
  • You’ll receive 30% instant income on your first order of $150 or more and be eligible for hostess benefits (when placed in the first 45 days after joining)

AND – First Workshop Perk:

  • When you place your first workshop order of $150 or more within 30 days of your start date, you can
  • Choose any stamp set from the 2013-2014 Annual Catalog (redeemable with your first demonstrator order in December) This perk is only for those of you who sign up between now and October 21st – don’t miss out on this opportunity!

When you join with me, you’ll get to be part of my team, The Blue Mountain Stampers and all the perks…

Click HERE to find out more and join before the October 21st deadline.

Got questions? Contact me at [email protected]

New Improvements to the Online Store!

Have you been to my Online Store lately? If so you may have noticed a few new improvements designed to make your online shopping experience better.

Guest Checkout:  You no longer have to commit to creating an account. You can now check out as a guest. You’ll still be required to select a demonstrator, but you’ll be able to decide whether or not to pass on your contact information to me or not.  But if you do choose to select passing your information on to me – I’ll happily mail you a 2013-2014 Annual Catalog FREE of charge!

NEW Shopping Bag Features!

  • Now you can easily save your shopping bags contents!
  • When you add items to your bag, you can choose to go directly to the bag or continue shopping.
  • You’ll see a progress bar to guide you through the ordering process
  • More images to enjoy – Additional product images are bigger and easier to view
  • Enhanced sorting – You can sort merchandise based on newest or oldest. A real plus when shopping for the latest My Digital Studio downloads!

New Photopolymer Stamp Set

Endless Wishes Photopolymer banner image

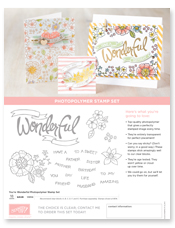
The Endless Wishes Photopolymer Stamp set  (133455) is now available and contains 19 great stamps. Only available in Photopolymer this set is just $13.95 and a must have for this holiday season. So if you haven’t tried our Photopolymer Stamps yet – what are you waiting for?

Endless Wishes Photopolymer Stamp Set flyer image

Click HERE for a PDF flyer with all the details and images

 5 NEW Digital Downloads!

MDS Hooray for Tags Designer template

You’re going to love this week’s new additions – Click HERE to see them all

Click here to order your Stampin’ Up! Products online 24/7! (US only)


Magnificent Maple Extended Flip Card

This past week a very special childhood friend of mine celebrated his 81st birthday and I wanted to make him a card he’d flip over – so I made this Magnificent Maple Extended Flip Card for him using our new Circle Card Thinlits Die and the Magnificent Maple single stamp from the Holiday Catalog.

Extended Flip Card front

I thought it would be fun to use the Circle Card Thinlits Die since it makes flip or swing cards so easy to make. And I couldn’t resist adding a bit of “bling” to make it extra special, since Dick has been like a second father to me over the years and always makes me smile. I love getting together with him and hearing his latest joke or funny story. I’m sorry to say it just doesn’t happen frequent enough now a days.

Extended Flip Card Open (1)

Because I wanted to have a little more room to sign this card I created this extended flip card. Want to know how I did it? I made a quick video to show you how – How to Make an Extended Flip Card.

And while I was at it I made a quick tutorial to show you how I created the extended flip card too. Hope you enjoy it!

Magnificent Maple Extended Flip Card Tutorial (PDF)

I think you’ll find these cards so much fun to make you’ll want both the Card Thinlits Dies. After all who can resist the Circle Card or Label Card Thinlits Dies and all the extra pieces they come with?

Circle Card Thinlits Die (133480)

Circle Card Thinlits Die image

Label Card Thinlits Die (133479)

Label Card Thinlits Die image

Supplies:

Stamp Set: Magnificent Maple (131868), Woodgrain Background (128763/127808), and Simply Sketched (Hostess Set 129669/129672)

Ink: VersaMark (102283), Early Espresso (126974), and Crushed Curry Classic Ink (131173)

Cardstock: Sweater Weather Designer Series Paper (132184), Champagne Glimmer Paper (127885), Early Espresso (119686), Very Vanilla (101650), and Tangerine Tango Card Stock (111349)

Accessories: Circle Card Thinlits Die (133480), Circle Collection Framelits (130911), Early Espresso Embossing Powder (128980), Gold & Silver Stampin’ Glitter (132205), Heat Tool (129053), 2 ½” Circle Punch (120906), and Stampin’ Sponges (101610)

Click here to order your Stampin’ Up! Products online 24/7! (US only)

Mystery Hostess Code

Use Mystery Hostess Code 64XT62GT when placing your order and your name will be entered into my Mystery Hostess Drawing. This Mystery Hostess Code 64XT62GT will be good through Saturday, October 5th. The number of hostess will depend on the total sales and I’ll be drawing a hostess for every $150 in sales.

Click Here to learn more about using the Hostess Code

Holiday Catalog Premiere Party

Christmas Open House Banner Rescheduled

Click HERE to see my flyer with all the details

Want to learn more about stamping? Why not sign up for my FREE Newsletter and Class Information. (Just look for the sign up box above on the right or click HERE). Sign up and get a FREE Pinwheel Tutorial just for joining. Then you’ll get my FREE emails with great information on what is going on with Stamp with Jini along with helpful hints and tips.

Modern Medley Colored Cork Board

Great news – my videos are back. After a break due to camera problems I think I’ve finally got it figured out. So here is my latest project that I’ve been wanting to share with you.

adding color to corkboards-001

I created this Colored Cork Board as part of my daughter’s message center for above her dorm room desk. When I started this project I figured I’d just use the cork board as it was but then I really wasn’t happy with the look – so after a little experimenting I came up with this technique for Adding Color to Cork Boards. It’s a lot of fun – so why not check it?

I finished up my Modern Medley Cork Board by decorating it and then added some push pins to hang things with. I made these push pins using some of our Modern Medley Designer Series Paper that I added to our little Bottle Caps (from the Spring Catalog) that I had laying around my studio. Then I just topped the Designer Series Paper with a little of our Crystal Effects allowed them to dry and Voila’ – A cork board that I’m my daughter is tickled with.

Here is a close up of the focal point.

Cork Board closeup

Do you like it? Why not leave me a comment and let me know what you think of my latest video and camera. I’m happy with it and still have some learning to do, but I think it has a little better sound quality. How about you?

If you like this project – Why not sign up for my monthly Newsletter where you’ll get tips and projects monthly delivered directly to your inbox along with my class event schedule. Or you can sign up for my Blog News and get my blog posts delivered right in your email as soon as they post. Want to get both? That’s great – just sign up for both. It’s free so why not? Click HERE to sign up today and get a FREE Pinwheel Tutorial!

Want to see the coordinating Dry Erase Board I made click here. Then  check back next week when I’ll be showing you all the finished projects in her dorm.

Supplies:

Paper: Modern Medley Designer Series Paper (126926), Island Indigo (122923), Rich Razzleberry (115316) and Basic Black Card Stock (121045)

Accessories: Island Indigo Classic Ink Refill (122932), Stampin’ Spritzer (126185), Big Shot (113439), Typeset Alphabet Bigz Dies (127553), Frame and Cork Board

Click here to order your Stampin’ Up! Products online 24/7! (US only)

Use Mystery Hostess Code WSCBPMPF when placing your order and your name will be entered into my Mystery Hostess Drawing. This Mystery Hostess Code WSCBPMPF will be good through Saturday, September 14th. The number of hostess will depend on the total sales and I’ll be drawing a hostess for every $150 in sales.

Click Here to learn more about using the Hostess Code

Holiday Catalog Premiere Party

Holiday Catalog Premiere Party Banner

Click HERE to see my flyer with all the details

NEW Items Added to Clearance Rack

Clearance Rack

Great news – lots of new items have been added to the Clearance Rack as of yesterday. Shop today and get some wonderful deals on some great items. If you are a Big Shot lover there are even some don’t want to miss dies available!

Magnetic Platform Now Available to Order

magnetic platform

Magnetic Platform Item #130658

The new Magnetic Platform for the Big Shot is finally available again. Whoo hoo! All backorders have been filled at this time and the order number has been turned back on. So why not order yours today along with your Clearance Rack items?

Click here to order your Stampin’ Up! Products online 24/7! (US only)

Creating Clouds with Stampin’ Spritzers Video Tutorial

Wow, has it already been a couple of days since I shared with you? Today’s card was so much fun creating that I wanted to share it and a the Creating Clouds with Stampin’ Spritzers video I made with you before time slipped away again from me today – lol.

This card is one of my favorites that I’ve made recently since it uses one of my favorite products – the Stampin’ Spritzer (item 126185). I just have so much fun with these things I don’t want to stamp once I start.

Sassy Salutations Creating Clouds Video

Check out my video Creating Clouds with Stampin’ Spritzers  to see how I did it.

Supplies:

Stamp Set: Sassy Salutations (item 132070/126707)

Inks: Island Indigo

Paper: Mellon Mambo, Island Indigo and Whisper White

Accessories: 2 3/8″ Scallop Circle Punch (item 118874), 1 3/4″ Scallop Circle Punch,  1 1/4″ Scallop Circle Punch, Stampin’ Spritzer (item 126185), Pool Party Refill (item ) and Coastal Cabana Refill (item ), Gingham Garden Designer Washi Tape (item 129314), Linen Thread (item 104199), and Beautiful Butterflies Die (item 114507)

Click here to order your Stampin’ Up! Products online 24/7! (US only)

Buy 3 Get 1 FREE!

  July DSP promotion                     

For a limited time when you buy 3 packs of Designer Series Paper you can get one for FREE! Promotion ends July 31st

By the Tide Tutorial

I fell in love with our Stampin’ Spritzers when they came out last summer. Have you had a chance to use them yet? If not you’ll want to check out this great project today using the By the Tide stamp set (item 129117/129120) from the Spring Catalog that uses our Stampin’ Spritzers.

By the Tide card

Stampin’ Spritzer  (item 126185) are inexpensive and soo much fun to use! And Stampin’ Spritzers just seemed like a perfect way to create a wonderful background for these water images. Watch my video to see how I created this card.

Although this project uses two of the colors that are currently on our Color Refresh Retirement List (River Rock and Not Quite Navy) there is still time to get yours. (Remember that when colors retired they tend to go quickly so don’t wait too long to place your order.)

Want a FREE PDF Tutorial with all the instructions and supplies used to make this card? Just click on the link below to get your printable Free PDF Tutorial now.

By the Tide – Fun with Stampin’ Spritzer Tutorial PDF

Did your eye spy the great Color Spritzer Stand that my son made for me? I love mine – it keeps everything so organized and easy to find. If you’d like one too click HERE to see more information.

color spritzer


Click here to order your Stampin’ Up! Products online 24/7! (US only)

Pinwheel Wishes Tutorial

Have you ever wondered what happens at one of my monthly Blue Mountain Stampers’ Meetings? Well I thought I would share with you one of the projects we made during my February TEAM meeting.

Pinwheel Wishes Card

I’ve had several of you ask me if I knew any tricks on how to make these cute little pinwheels using our NEW Pinwheel Sizzlits Die from the Spring Catalog. They are sooo stinking cute, but they are small so they can be a challenge to put together if you don’t know a few tricks.

Since I made about 100 of them for my Leadership swaps in January I had plenty of time to try out different methods of putting them together. Today I thought I’d share with you what method worked best for me so I put together a Tips for Quick & Easy Pinwheels Video Tutorial to show you what I learned.

Want to make one of your own Pinwheel Wishes card? Well you can, just click Here for a FREE PDF TUTORIAL with measurements and directions just for you. I hope you have as much fun making these cute little Pinwheels as I did.

Have you ever thought of becoming a Demonstrator? Want to join the fun and become part of my TEAM? Sale-a-bration is a great time to join since we have a special promotion going on right now. Why not click HERE to learn more about becoming a Demonstrator and becoming part of my Blue Mountain Stampers’ Team. Warning – the fun is contagious! Let me know if you have any questions ([email protected]) or would like answers to any questions you may have.

Don’t want to become a demonstrator? That’s ok you can join in all the fun during Sale-a-bration by hosting a party of your own! Or why not stop by for my FREE event Sale-a-bration Saturday on March 2nd! Click HERE to see my Calendar of Events for more information. Contact me today and we’ll find what works for you best.

Click here to order your Stampin’ Up! Products online 24/7! (US only)


Just Thinking Tutorial

Want to see what we did at my FREE Sale-a-bration Celebration Event? This past Sunday I was able to share the NEW Spring Catalog products and some of the things I brought back with me from Stampin’ Up! Leadership in Orlando.  What fun everyone had together – it’s one of my favorite parts of stamping.

First here are some pictures of my classroom and some of the displays.

Sale-a-bration Celebration Event classroom

Sale-a-bration Celebration Event Display

Of course there has to be chocolate – after all what would be stamping without chocolate?

Sale-a-bration Celebration Event snack area

Everyone seemed to have a great time with the two cards they were able to make.

Sale-a-bration Celebration Event group

Sale-a-bration Celebration Event Big Shot

Here is my favorite card that I created for the event using the Just Thinking Stamp from the Spring Catalog. Just Thinking was one of the stamps I just knew I wanted when I saw the Spring Catalog the first time!

Just Thinking

Since not everyone was able to come I thought I would share with you a tutorial on how my Just Thinking card was made, along with my very first video tutorial showing you how to use our Core’dinations Card Stock. I just love the Core’dinations Card Stock and think you will too – it’s a lot of fun to work with and very versatile. Better yet you’ll find three Core’dination Card Stock color choices Pool Party (item 129321), Primrose Petals (item 129322), and Real Red (item 129320) in the Spring Catalog on page 12.

Just Thinking Tutorial

Just Thinking

Supplies:

Raspberry Ripple Card Stock (item 126842 $6.95): 4 ¼” x 11″; scored at 5 ½” and folded

Primrose Petals Core’dinations Card Stock (item 129322 $6.95): 4″ x 5 1/4″

Very Vanilla Card Stock (item 101650 $8.50): 8 1/2″ x 3 ½”

5/8″ Very Vanilla Seam Binding (item 120999 $6.96): 20″

Honeycomb Embossing Folder (item 129378 $7.95)

Stampin’ Sanding Block (item 129367 $3.95)

Window Frames Collection Framelits Dies (item 129021 $26.96)

2 ½” Circle Punch (item 120906 $16.95)

Multipurpose Liquid Adhesive (item 110755 $3.95)

Dimensionals (item 104430 $3.95)

Instructions:

1. Prepare your Core’dinations Card Stock Layer as shown in the video.

2. Adhere the Primrose Petals Core’dinations Card Stock to your card front using Multipurpose Liquid Adhesive. (I like to use this adhesive on anything that has a heavy texture.)

3. Stamp two images onto Very Vanilla Card Stock using Raspberry Ripple Classic Ink.Just Thinking Tutorial

4.  Using the Window Frame Framelits Die and Big Shot cut out one of the images.

Just Thinking Tutorial

5. Adhere to the card front.

6. Punch the sentiment out of the second stamped image using the 2 ½” Circle Punch.

Just Thinking Tutorial

7. Adhere to the card front using Dimensionals.

8. Loop ribbon around the card front and tie into a bow. Trim ends.

That’s it – now you can send your card to someone you’re thinking about.

You can click here to download a PDF of my Justing Thinking Tutorial

Please leave me a comment and let me know what you think of today’s post. I’d love to know what you think of my first video so leave me a comment after you watch it. And don’t worry about the fact you need to use your email when you leave a comment – no one else will see it except me. My blog only asks for your name and email so it knows you’re a real person and not a robot spammer and I’ll only send you email if you have requested my Newsletter.

Click here to order your Stampin’ Up! Products online 24/7! (US only)

Last Minute Christmas Gifts

We’ll its busy around the house today getting ready for Christmas but I wanted to share with you a few things quickly.

First I wanted to share a couple of the wonderful cards that my stamping friends have sent me. This first card is from Randy and uses one of our retired stamp sets Scenic Season which she embossed in Silver. Don’t you love the way that Stampin’ Up! items work together! It doesn’t matter if it has been retired for a while or brand new.

Scenic Season

Mary made this card using the Bird Builder Punch

Bird Builder Punch

And this last card was made by Janie. I love the way that Janie used our Early Espresso Core’dinations paper from the Holiday Catalog. She ran the punched Scallop Oval pieces through the Big Shot first using the Fancy Fan Embossing Folder and then used our White Emboss Powder to add the “snow” on the cones. Isn’t it great a great technique?

Core'dination Pine Cones

All of them are so great that I’ve also posted some on my facebook page – so you can see more cards there. (Just type in Stamp with Jini and become my friend.)

And now for my gift items – Saturday I shared with you my Peppermint Stick Sugar Scrub gift item that I made for my family and friends. Today I thought I would share with you the matching bags I made to go along with them. I really like the way they turned out and using our wonderful Designer Rosette Die made the rosettes so quick and easy! If you missed my Peppermint Stick Sugar Scrub post you can click HERE to read more about it.


And last but not least my husband saw all the goodies I was making and decided that he wanted to give some to his co workers too. Of course I made chocolate tents for the guys and the ladies will receive these cute notepads.

Festival of Prints notepads

I used our Festival of Prints DSP Stack from the Holiday Catalog to cover them and then used our punches for focal point which includes their initial. I hope the ladies will enjoy them. Here’s a close up.

Festival of Prints notepad closeup

Did you notice something special about this little notepad? It contains a sneak peek of one of our FREE Sale-a-bration items! You’re going to love this ribbon from our Sycamore Street Ribbon and Button Pack!

Festive Holiday Treat Kit Tutorial

Festive Holiday Treat Kit

As I mentioned in Wednesday’s post in honor of Black Friday and Cyber Monday I’m offering you my Festive Holiday Treat Kit when you place an order with me! (Click HERE to see post and details on how to earn your free kits!)  Don’t forget that my Online Extravaganza items are up to 50% off and can be included in your order too! (My Black Friday and Cyber Monday Promotion ends Monday at Midnight.)

Want Worry free shopping?  Place your order directly with me by phone (706 754-7124) or email ([email protected]) as soon as you finalize your list and I’ll take care of the details for you to make sure you get the best deals! But hurry and get it to me as soon as you can so you don’t miss the Online Extravaganza door busters!

Here is the Festive Holiday Treat Kit Tutorial that I promised on Wednesday so you can see just how fun these are to make.


Festive Holiday Treat Tutorial

Gather the following Supplies:

Simply Scored Tool

Festive Collection Framelits

Tiny Tags Stamp Set

Jewelry Tag

Ornament Keepsakes Stamp Set

Holiday Ornaments Framelits

Cherry Cobbler Classic Ink

Early Espresso Classic Ink

Lucky Limeade Classic ink

1/16″ Handheld Circle Punch

Crop-a-Dile

Candy of your choice


Here’s the Dimensions:

Cherry Cobbler CS: 4″ x 10″

Very Vanilla CS:  3″ x 4″

Festival of Prints DSP: 3 ¾” x 3 ¾” and 3 ¾” x ¾”

Very Vanilla ½” Seam Binding Ribbon: 12″

Linen Thread: 6″

4″ x 6″ Cello Bag


1. Lay the longest edge of the card stock against the top of your Simply Scored Tool and score at the 1″, 5″, 5 ½”, and 6″ marks. Fold on the score lines. (Use the 3 score lines to create a W shape.)

2. Take your Holiday Collection Framelits and center it about ½” up from the bottom of the DSP.  You can use a Post-it Note® to hold it in place. Run it though the Big Shot. Festive Holiday Treat Kit Tutorial

3. Attach the DSP to the CS with Snail. Festive Holiday Treat Kit Tutorial

4. Place the Holiday Collection Framelits back in the same place and run it through the Big Shot to cut the CS. Festive Holiday Treat Kit Tutorial

5. Attach the small piece of DSP to the CS to create the top flap. Festive Holiday Treat Kit Tutorial

6. Take a small Cello Bag and trim it down to 4 ½”  using your Personal Paper Trimmer.

7. Place your treat into the Cello Bag. (I used 6 nuggets in mine. Your favoite candy is great. Of course it’s always a good idea to make sure it tastes good, right?)

8. Place the Cello Bag into your treat holder as shown lining the top of the Cello Bag right below the 1″ score line. Festive Holiday Treat Kit Tutorial

9. Bring the front up to cover the Cello Bag. Festive Holiday Treat Kit Tutorial

10. Fold the top down and using the Crop-a-dile punch two holes about 1″ apart and about 1 ½” from each side. Festive Holiday Treat Kit Tutorial

11. Thread 12″ of Ribbon through the two holes to hold everything together.  Set aside.

Festive Holiday Treat Kit Tutorial

12. Create your tags by stamping small images from the Ornament Keepsakes stamp set onto Very Vanilla CS (I used Cherry Cobbler) and cut them out using the coordinating Ornament Framelits.

13. Stamp tags using Tiny Tags stamp set (I used Lucky Limeade and Early Espresso) and punch out using TJewlery Tag Punch.

14. Punch holes in tags and ornament using 1/16″ Circle Punch.

15. Thread the Linen Thread through holes and tie ends into a knot.

16. Place finished tags onto ribbon and finish by tying ribbon into a bow.

You’re finished!

Your Festive Holiday Treat Kit will contain all the items that you will need to create this great little holiday gift along with a special Tutorial you’ll receive by email.

Your Festive Holiday Treat Kit includes:

  • Card Stock
  • Designer Series Paper
  • 4″ x 6″ Cello Bag
  • 12” Ribbon
  • 6” Linen Thread
  • Kits do not include candy
  • (*Kit colors and supplies may vary)

Remember Kits will be included with your order or if you live out of the area they will be mailed by USPS starting on December 5th.


Click here to order your Stampin’ Up! Products online 24/7! (US only)

Nugget Turkey

Hi everyone today I thought I would share a fun project with you… a Nugget Turkey. I think they are so stinking cute! And they’re are so much fun to make with a few simple supplies. Of course anything with chocolate around my house is a hit – how about yours?

Nugget Turkey

To bring a Thanksgiving smile to your loved ones faces you’ll need to gather the following supplies to make your Nugget Turkey.

More Mustard DSP (I used the polka dot print from the Regals DSP Stack: 1″ x 3″ and some for punching

Chocolate Chip and Pumpkin Pie CS: for punching

Pumpkin Pie CS: 3/8″ x 3/8″

1 3/4″ Scallop Circle Punch

1″ Circle Punch

Googlies (from the Holiday Catalog – they are self stick! Isnt that great!)

Glue Dots

Multipurpose Liquid Glue

Paper Snips

Hershey’s Nuggets (which ever type floats your boat – not sure? Taste test them after all Thanksgiving is calorie free, right?)

Here’s how you do it –

1. Punch out 3 coordinating tail feathers from you More Mustard DSP and Chocolate Chip and Pumpkin Pie CS using the 1 3/4″ Scallop Circle Punch.
2. Punch 1″ Circle from Chocolate Chip CS. You should have the following pieces and are ready to assemble.

3. Wrap the 1″ x 3″ strip of DSP around your Nugget, and stick the end down using a Glue Dot. (Taste a piece of chocolate to make sure it’s good.)

4. Trim away the bottom 5 scallops from the first tail feather using your Paper Snips.

Nugget Turkey

6. Line up and adhere the first feather on top of the More Mustard DSP feather and trim away 4 scallops. (Why not try and different flavor Nugget, you want to make sure you’re using the right one, right?)

6. Line up and adhere the two layers of feathers on top of the Chocolate Chip CS feather and trim anything off the bottom that shows. (Hmm… Did you say Chocolate Chip – maybe you should check out those Nuggest again?)

turkey nugget

7. Attach feathers to the back of the Nugget using a Glue Dot or two.

8. Fold the 3/8″ x 3/8″ piece of Pumpkin Pie CS in half to create the beak and attach this to the 1″ Chocolate Chip Circle using Multipurpose Liquid Glue. Allow to dry.

9. Attach your Googlies to give the little guy eyes – after all aren’t they too cute wiggling around like that? (Oops.. better try another one of those nuggets before you’re done. Want to make sure you tried all the flavors right?)

10. Attach your head of your turkey to the front of your Nugget using a Glue Dot and you’re finished.

Isn’t he cute? Why not make another one – after all there is still chocolate left right?

I hope you enjoyed this little tutorial for my little Nugget Turkey.

Click here to order your Stampin’ Up! Products online 24/7! (US only)