Hello Cupcake Mini Gable Box

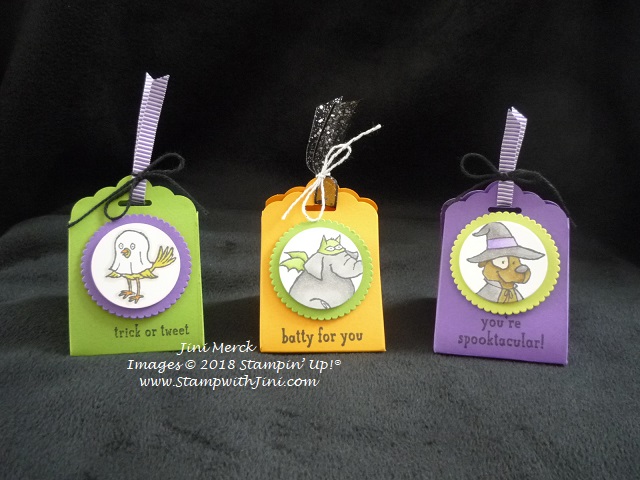
Today’s project is one I made for every last week for my 2019 Occasions Catalog Kick Off using the Sale-a-bration stamp set, Hello Cupcake.

The Lustrous White Mini Gable Boxes made this project quick and easy since all I had to do was decorate and assemble, the box was already to go with a lovely shimmery finish.

Everyone seemed to enjoy the little treat box they found at their seats when they arrived.

Did you know that the Hello Cupcake stamp set is FREE during Sale-a-bration when you place a qualifying order of $50 (before shipping and tax)? So when you order the supplies used to create this little box you’ll earn the stamp set. Yes, it’s that easy!

Want to learn how I made them? Here is a video tutorial for you.

Hello Cupcake Mini Gable Box Video Tutorial

And I’ve also got a written tutorial for you too with a complete supply list.

Hello Cupcake Gable Mini Box Tutorial (printable) PDF

Stop back by tomorrow and see one of the projects we made along with a tutorial for it too.

Enjoy!

Supplies:

Stamp Set: Hello Cupcake (Sale-a-bration 149714)

Inks: Powder Pink (147147), Coastal Cabana (147097), Soft Suede (147115), and Crumb Cake Classic Ink (147116)

Paper: Powder Pink (144244), Crumb Cake (120953), and Whisper White Card stock (100730)

Accessories: Lustrous White Mini Gable Boxes (146961) and Silver & Petal Pink Baker’s Twine (146288)

Click here to order your Stampin’ Up! Products online 24/7! (US only)

Shop at my Online Store and use Host Code FFCVWYHC

Click Here to learn more about using the Hostess Code If you order Online make sure your profile information is up to date and you’ve allowed me to contact you (If you chose no contact in the past you’ll need to call 1-800-Stamp Up to have them change your profile for you.)

Sign up for my FREE Newsletter My Newsletters include stamping tips, tutorials, ideas and Classes!

Rooted in Nature Faux Silk Tutorial

I started this project a while back and got side tracked. Does that ever happen to you? That being said, I’m not admitting to my stack of half finished projects  anything. LOL!

Well the good news is I finally finished it and love the way it turned out so I wanted to share it with you today.

What do you think? Can you see your favorite autumn photo in it? The color is a bit late here in this neck of the state so I haven’t gotten many pictures yet, but hope too still if the rain doesn’t wash things out.

This frame looks like it took along time and is complicated, but really isn’t difficult to do with a few basic supplies. The frame itself is one of those inexpensive $1 frames you can find at your local Walmart or craft store.

Here is a video tutorial for you showing you how I made it. This video is a bit longer than I normally do so I hope you enjoy it.

ROOTED IN NATURE FAUX SILK FRAME VIDEO TUTORIAL

And here is a companion PDF tutorial for you with a complete supply list that includes step by step directions on how I made the focal point.

Rooted in Nature Faux Silk Frame Tutorial PDF

Enjoy!

I’ve got one last tutorial for you this week, so make sure and stop back by tomorrow. And if you don’t want to miss one of my blog posts why not sign up and Get my Blog Posts delivered right to your inbox HERE

Supplies:

Stamp Set: Rooted in Nature (*146479/146482) and Timeless Textures (140514/140517)

Inks: Crushed Curry (147115), Cajun Craze (147085), Soft Suede (147087), and Merry Merlot (147112)

Paper: Cherry Cobbler (119685), Pumpkin Pie (105117), Poppy Parade (119793),  and Very Vanilla Card stock (101650)

Accessories: Nature’s Roots Framelits Dies (*146341), Big Shot Embossing Mats (146327), Bright Copper Shimmer Paint (147045), Stampin’ Spritzer (126185), 1 3/4″ Circle Punch (119850), 1″ Circle Punch (119868), and Stampin’ Sponges (141337)

Other: frame, white craft paint, rubbing alcohol, paint brush,  and white tissue paper

*Rooted in Nature Bundle 148352/148353

Click here to order your Stampin’ Up! Products online 24/7! (US only)

Shop at my Online Store and use Host Code SGA3ZW9U


Click Here to learn more about using the Hostess Code If you order Online make sure your profile information is up to date and you’ve allowed me to contact you

Sign up for my FREE Newsletter My Newsletters include stamping tips, tutorials, ideas and Classes!

Lemon Zest Treat Holders

I love lemon and so needless to say I find using the Lemon Zest Stamp Set a lot of fun to use. As I was wondering around my local Dollar Tree a couple of weeks ago I found this package of individual Lemonhead Candies, one of my favorites so I couldn’t resist picking up a couple of bags to use as treats.

This treat holder is quick and easy to make and folds flat when you don’t have the box inside so it’s great for travel too.

So not only did I create these for my October Card Class as a little treat, but they’ll be headed to Orlando with me next week as a swap during our OnStage Live event too.

Want to make some too? Here is a quick video tutorial for you.

Lemon Zest Treat Holder Tutorial

And of course I did a PDF for you too!

Lemon Zest Treat Holder (printable) PDF

Enjoy!


Supplies: 

Stamp Set: Lemon Zest (143805/143808)

Inks: Pineapple Punch (147141), Call Me Clover Classic Ink (147139), and Memento Tuxedo Black Ink (132708)

Paper: 2018 In Color Designer Series Paper Stack (146963), Lovely Lipstick (146970), and Whisper White Card stock (100730)

Accessories: Lemon Builder Punch (143712), 1 3/4″ Circle Punch (119850), Simply Scored Scoring Tool (122334) and Bone Folder (102300)


Click here to order your Stampin’ Up! Products online 24/7! (US only)

Shop at my Online Store and use Host Code SGA3ZW9U


Click Here to learn more about using the Hostess Code If you order Online make sure your profile information is up to date and you’ve allowed me to contact you


Trick or Tweet Treat Tents

Today’s treat holder is a quick and easy one that you can make last minute for your holiday treat giving and it holds what else, chocolate! So it will be a hit with your chocolate lovers.

This treat was made using the fun little animal image from the Trick or Tweet stamp set – my favorite for making all those fun Halloween treats! And perfect for these Halloween wrapped chocolate Kisses I found this fall.

Check out this video tutorial so you can make some too.

Trick or Tweet Treat Tent Video Tutorial

And of course I’ve whipped up a PDF with a complete supply list for you too!

Trick or Tweet Treat Tent Tutorial PDF


Enjoy! And then stop back by tomorrow when I’ll be sharing some birthday inspired cards with you.

Supplies: 

Stamp Set: Trick or Tweets (147725/147722)

Inks: Memento Tuxedo Black Ink Pad (132708)

Paper: Toil & Trouble Designer Series Paper (147531), Pumpkin Pie (105117),https://www.stampinup.com/ecweb/product/105117/pumpkin-pie-8-1-2-x-11-cardstock?dbwsdemoid=2048121 Gorgeous Grape (146987), and Whisper White Card stock (100730)

Accessories:   Layering Circles Framelits Dies (141705), Simply Scored Scoring Tool (122334), and Assorted Stampin’ Blends

Click here to order your Stampin’ Up! Products online 24/7! (US only)

Shop at my Online Store and use Host Code W2NX46E9


Click Here to learn more about using the Hostess Code If you order Online make sure your profile information is up to date and you’ve allowed me to contact you

Blue Mountain Stampers Team Time

Yesterday I shared my special team event project with you and so today I thought I’d share some of the wonderful projects my team brought to share at our October meeting. The share time covered everything from cards to 3ds.

This first little project holds a few mini candy bars and was made using the Festive Farmhouse Designer Series Paper (147820) and the Candy Cane Season (147692) and Cookie Cutter Christmas stamp sets (142043) with their coordinating punches.

It’s topped off with our Cherry Cobbler Double Stitched Ribbon (144117) and Festive Farmhouse Cotton Twine (147888).  Isn’t it adorable? I love the idea of combining the gingerbread cookie with the candy cane for this quick and easy treat.

And here is a beautiful box that was created with the Seasonal Layers Framelits Dies (143751). One of my favorites since it takes you through all 4 seasons.

And finally some bags and a box made with our Share What You Love Specialty Designer Series Paper (146926) and Nature’s Poem Designer Series Paper (146338).

And of course we didn’t forget the Cards – This first one was made with the Daisy Delight stamp set (143669).

And this last one using the Accented Blooms stamp set. I just love the fall colors that were used on this card so I’m including the supply list for you below.

As I said yesterday, I appreciate and I’m inspired by my team each and every day. I’ve got a great group of wonderful and talented stampers!

What are the Blue Mountain Stampers?

That’s the name of our stamping community. I enjoy welcoming new members to our group. We’re from all over. If you’re considering joining Stampin’ Up!, you may have questions about how I would support you as part of my team. I do offer a variety of ways to learn, grow and to have FUN as a Blue Mountain Stamper!

  • Exclusive Team Resource Page – videos, PDFs and more
  • Exclusive Face book Group – A great way to share and connect with other team members and share
  • Monthly Creative Challenges
  • Swapping Opportunities
  • Team Retreats
  • Meetings – both local and online/virtual
  • Monthly Crafting Day
  • Recognition & Incentives
  • Training available for workshops, clubs, classes and more!
  • Additional support and business coaching available

We have a very active group that share and answer each other’s questions on our Exclusive face book group.  If you’re looking for fun, a place to grow and share with others…You’ll fit right in!

Hobbyists are welcome!

  • Did you know?  90% of my Blue Mountain Stampers’ are Happy Shoppers – purchasing for themselves, (along with their family and friends.)  That’s right…you can just get a discount on products you love!
  • We welcome the hobbyist who’s looking to be a “happy shopper” (and save money), as well as those of you that want to build a business (and make money).
  • Everyone is welcome after all there’s room for both and everyone in between.

And there is NO Obligation when you purchase your starter kit – Join the Blue Mountain Stampers and see what it’s all about!

Supplies: 

Stamp Set: Accented Blooms (146678/146681) and Best Birds (141525)

Inks: Memento Tuxedo Black (132708/133456) and VersaMark (102283/102193)

Paper: Tranquil Tide (144246) and Whisper White Card stock (100730)

Accessories: Tranquil Tide 3/8″ Mini Ruffled Ribbon (146948), Stampin’ Write Markers, Clear Wink of Stella (141897), Tailored Tag Punch (145667), Softly Falling Embossing Folder (139672), and White Embossing Powder (109132)

Click here to order your Stampin’ Up! Products online 24/7! (US only)

Shop at my Online Store and use Host Code W2NX46E9


Click Here to learn more about using the Hostess Code If you order Online make sure your profile information is up to date and you’ve allowed me to contact you


Country Home Plastic Frame Post it Note Holder

Yesterday I shared with you a treat tent that I made as a special surprise for my Peak Princess Day. This event is a special one that I hold twice a year to pamper my team and I love that I can do that. So today I thought I’d share the project we made and I remembered to take pictures this time so I can share those too. LOL!

So here is my classroom set up and ready for everyone. We played Bingo, laughed, shared, had some goodies and stamped together.

I’ve got such a great team who inspires me every day! I feel truly blessed to have such a wonderful team.

Here’s the project we made.

It’s a quick and easy project using the Country Home Stamp set and a inexpensive plastic frame. I’ve designed this one to hold a small package of post it notes since I wanted to include the sentiment.

Everyone got to choose their images and colored the images with their choice of Stampin’ Blends.

I love seeing all the different color combinations they did.

And of course what is a party without a little something to nibble on?

I couldn’t resist making some Twinkie Torte when I found some Pumpkin Spice Twinkies on a shopping trip.  It’s a recipe I’ve had since I was in High School and one of my favorites. The cinnamon was a bit much in the Twinkies for me, but the torte was pretty good with this fall flavor twist. I’ve had some questions about it so here is the recipe so you can try it too. And I found a yummy recipe for Cheesy Spinach and Artichoke Pinwheels I couldn’t resist sharing with the team too. Tasty and sooooo easy to make – which is my kind of recipe.


Twinkie Torte

1 (12 oz.) pkg. chocolate chips

1/3 c. water

1/3 c. sugar

6 eggs, separated

2 c. whip cream or Cool Whip

9-10 Twinkies cut in half

Maraschino cherries

In saucepan, combine chips, water and sugar. Cook over low heat, stirring constantly until chips are melted. Remove from heat and add egg yolks one at a time, mixing well after each, and cool. Beat egg whites till stiff – gently fold into chocolate mixture. Place Twinkies, cream side up in 9×13 inch pan. Spread chocolate mixture over Twinkies. Top with whip cream and garnish with cherries. Refrigerate 12 hours before serving.

Enjoy!

Supplies:

 Stamp Set: Country Home (147678)

Inks: Memento Tuxedo Black Ink Pad (132708/133456)

Paper: Country Lane Designer Series paper (147804), Stampin’ Blends, and Whisper White Card stock (100730)

Accessories: Layering Ovals Framelits Dies (141706) and Detailed Trio Punch (146320)

Other: Plastic Frame

Click here to order your Stampin’ Up! Products online 24/7! (US only)

Shop at my Online Store and use Host Code W2NX46E9


Click Here to learn more about using the Hostess Code If you order Online make sure your profile information is up to date and you’ve allowed me to contact you

Falling for Leaves Treat Tent Video Tutorial

Today’s project that is a lot of fun to make since it includes a fast and easy technique that uses our Brusho Crystal Colors.

Shake and spritz and you’ve got a beautiful fall backdrop for your project! Got to love that and of course I can never resist using my Stampin’ Spritzers they are so much fun!

Want to see how their made so you can make some yourself? I’ve whipped up a quick video tutorial for you.

And how about a complete supply list with step by step directions too?

Falling for Leaves Treat Tent Video Tutorial PDF

Enjoy!


Supplies: 

Stamp Set: Falling for Leaves (*147680)

Inks: Merry Merlot Classic Ink (147112)

Paper: Joyous Noel 6×6 Glimmer Paper (147817), Merry Merlot (146979), and Shimmery White Card stock (101910)

Accessories: Brusho Crystal Colours (144101), Stampin’ Spritzers (126185), and Pretty Label Punch (143715)

*Falling for Leaves Bundle (147921)


Click here to order your Stampin’ Up! Products online 24/7! (US only)

Shop at my Online Store and use Host Code W2NX46E9


Click Here to learn more about using the Hostess Code If you order Online make sure your profile information is up to date and you’ve allowed me to contact you


Trick or Tweet Folding Box

I love these little folding boxes that I shared with you the other day – so this time I’ve created one using the Trick or Tweet stamp set. After all we need to scare up some chocolate, right? And I couldn’t resist this little guy – he just makes me smile.

When you open up the lid and you’ll get a Halloween greeting and

Chocolate of course, (although you could put all kinds of things inside since it’s a pretty roomy box  if your guys don’t love chocolate.) I found these Russel Stover Carmel Brownie pumpkins at my local Ingles and couldn’t resist pickup up a few as gifts family.

(Sorry I think my photos are a bit off, it’s another rainy day here in Georgia which doesn’t my photo I hoping it’s just my screen.)

I’ve created a PDF tutorial with a complete supply list for you and of course, you can see the video on how to create this Folding Box HERE.

Trick or Tweet Folding Box Tutorial PDF

With all this rain it’s a great time to get some crafting in! Or at least that is what I’m telling my husband today. LOL!

Enjoy!


Supplies: 

Stamp Set: Trick or Tweets (147725/147722)

Inks: Memento Tuxedo Black Ink Pad (132708)

Paper: Toil & Trouble Designer Series Paper (147531), Granny Apple Green (146990),  Gorgeous Grape (146987), and Whisper White Card stock (100730)

Accessories: Basic Brads (146930),  Layering Circles Framelits Dies (141705), Simply Scored Scoring Tool (122334), and Assorted Stampin’ Blends


Click here to order your Stampin’ Up! Products online 24/7! (US only)

Shop at my Online Store and use Host Code FZ3P6HGN


Click Here to learn more about using the Hostess Code If you order Online make sure your profile information is up to date and you’ve allowed me to contact you

Sign up HERE for my FREE Newsletter or Get my Blog Posts delivered right to your inbox HERE

How Do You Get a 2018 Holiday Catalog?

Don’t have a Demonstrator? Email me at StampwithJini@gmail.com include your name, address, and phone number and I’ll be happy to mail you one.

Trick or Tweet Treat Box

I love to make little treat items for family and friends and so when I saw the Trick or Tweets stamp set in the Holiday Catalog I knew it would be perfect for this year’s Halloween treats.

Check out this cute little box I made using the set

My fellow stamper, Pam gave this cute little box idea last spring and so I wanted to give it a try myself. Turns out these little boxes are sooooo easy to make, that they are kind of addictive once you get going.

Or at least I couldn’t stop – LOL!  The images and color combinations were just a lot of fun to play with once I got coloring with my Stampin’ Blends.

I thought you might like to try some too for your treats so I’ve whipped up a quick video tutorial.

Trick or Tweets Treat Boxes Video Tutorial –

And of course I’ve included a complete supply list on my PDF tutorial for you.

Why not leave me a comment and let me know which combination is your favorite?

Trick or Tweet Treat Box Tutorial PDF

And why not stop back by tomorrow when I’ll be sharing another fun little treat box with you?

Enjoy!


Supplies: 

Stamp Set: Trick or Tweets (147725/147722)

Inks: Memento Tuxedo Black Ink Pad (132708)

Paper: Pumpkin Pie (105117), Gorgeous Grape (146987), and Whisper White Card stock (100730)

Accessories: Black 3/8″ Glittered Organdy Ribbon (147897), Scallop Tag Topper Punch (133324), Layering Circles Framelits Dies (141705), Simply Scored Scoring Tool (122334), and Assorted Stampin’ Blends

Click here to order your Stampin’ Up! Products online 24/7! (US only)

Shop at my Online Store and use Host Code FZ3P6HGN


Click Here to learn more about using the Hostess Code If you order Online make sure your profile information is up to date and you’ve allowed me to contact you

Live local and want to stamp with me? Why not check out my upcoming Calendar of Events?

Take Your Pick Tool Box Tutorial

Have you seen the Take Your Pick Tool in the Holiday catalog on page 30? I’m so excited about this tool with all it’s features. I’m using it all the time!

Not only can you pick up small items with the Putty end, you have a spatula so you can  pick up adhered card stock layers, a paper piercer and stylus. As usual Stampin’ Up! has done it again – creating a high quality tool to make our paper crafting easier. What could be better?

A lovely box to hold it and keep everything together of course. I went looking for a way to keep all the pieces together and here is what I came up with.

These boxes are easy to make and will keep everything together for you in one place. I really like the way my first box turned out, so much so I decided to add a magnetic flap to it – so you’ve got two options when making your own.

Here is a video tutorial for you, the PDF so you can print your own Take Your Pick Tool label and a PDF tutorial with the complete supply list.

Take Your Pick Tool Box Tutorial –

And I’ve given you cutting measurements in the PF for both the magnetic flap I’ve shown you and the non magnetic flap. Making it easy to create the version you’d like for your space.

Take Your Pick Tool Box Tutorial PDF

Printable Take Your Pick Tool Label PDF

The printable label is in both Blackberry Bliss and Basic Black so you can choose. And there are two sizes too for the Layering Ovals Framelits Dies or Tailored Tag Punch. Simply print on Whisper White card stock.

Enjoy!

Supplies: 

Paper: Share What You Love Designer Series Paper (146926), Basic Black (121045) and Whisper White Card stock (100730)

Accessories: Take Your Pick Tool (144107), Simply Scored Scoring Tool (122334), Paper Snips (103579), and Tailored Tag Punch (145667)


Click here to order your Stampin’ Up! Products online 24/7! (US only)

Shop at my Online Store and use Host Code FZ3P6HGN


Click Here to learn more about using the Hostess Code If you order Online make sure your profile information is up to date and you’ve allowed me to contact you

Sign up for my FREE Newsletter My Newsletters include stamping tips, tutorials, ideas and Classes!