Easter Treat Tent Tutorial & More

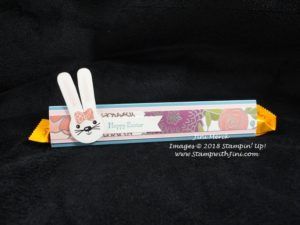
Today’s project is a quick and easy punch bunny treat that holds Lindt Lindor Chocolate bar.

Cute right? I love the way we can use the Cookie Cutter Builder Punch and coordinating stamp set to create this cute little bunny!

Here is a tutorial for you with the supply list so you can make your own little treats!

Punch Bunny Sweet Soiree Treat Tent Tutorial (printable) PDF

And you can click here to see my video tutorial on how to make my Painted with Love Treat Tent Tutorial from an earlier post.

Count Down for Sale-a-bration

We are just 2 days away from the end of Sale-a-bration! So I thought I’d share some wonderful swaps that I’ve received to inspire you using some of my favorite products from Sale-a-bration.

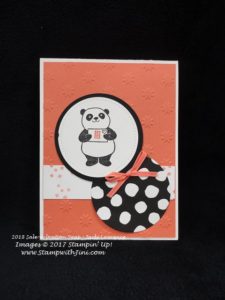
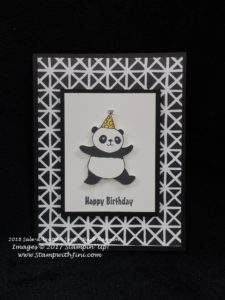
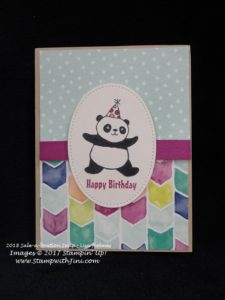
These first cards are made with the Party Pandas stamp set – one of our most popular Sale-a-bration choices.

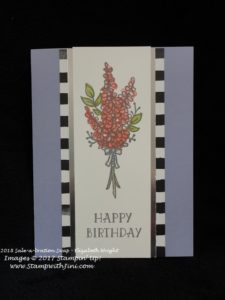
This next card is made with the Lots of Lavender stamp set.

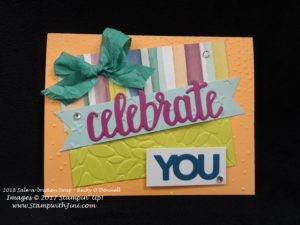
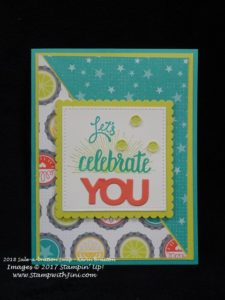
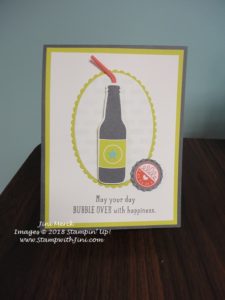
And these next two cards are made using our Celebrate You Thinlits Dies – one of our $100 choices

I love how this one uses our Sale-a-bration choices – Bubbles & Fizz Designer Series Paper

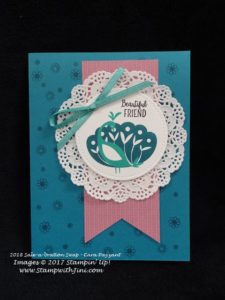
And finally – Beautiful Peacock done in Island Indigo and Bermuda Bay – yes you spotted our wonderful Shimmer Ribbon Pack. This ribbon is beautiful and comes in 3 widths as well as colors in this FREE Sale-a-bration option.

The good news is you still have time to earn your FREE Sale-a-bration items since Sale-a-bration ends on March 31st at 11:50 PM (MT). Want to place an order? Or got questions? Please feel free to contact me at [email protected] or stop by my Online Store.

Click here to order your Stampin’ Up! Products online 24/7! (US only)

Shop at my Online Store and use Host Code 36G9DRMX


Click Here to learn more about using the Hostess Code If you order Online make sure your profile information is up to date and you’ve allowed me to contact you so I can mail you your FREE gift!

Bubble Over & Team Fun

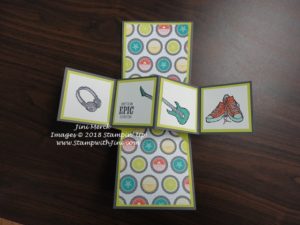
Last week I gathered with my fellow team members to share, learn and create – I really enjoy this time together and always learn something new. This month our newest team member offered to share a fun pop up card with us.

So while she shared the technique I designed the card – don’t you LOVE team work! Want to see what we came up with?

I am loving the Bubble Over bundle from the Occasions Catalog and the coordinating Bubble & Fizz Designer Series Paper from the Sale-a-bration offerings, so that’s what I started with. And since the brick wall in the background kind of made this feel like teenage grunge I also reached for the Epic Celebrations stamp set to decorate the inside.

So what do you think? Great for a teen’s special day? I just love the bold bright colors that our Stampin’ Blends give us. I thought it was a perfect coloring option to go with the bold patterns on the Bubble & Fizz Designer Series Paper.

Stop back by tomorrow when I’ll be sharing our team swaps with you along with a fun box too that was shared.

Supplies: 

Stamp Set: Bubble Over (145868) and Epic Celebrations (Sale-a-bration 147232/147236)

Inks: Memento tuxedo Black Ink (132708), Basic Gray Archival Ink (140932), and Pool Party Classic Ink (122924)

Paper: Bubbles & Fizz Designer Series Paper (Sale-a-bration 147244), Lemon Lime Twist (144245), Calypso Coral (122925), Basic Gray (121044), and Whisper White card stock (100730)

Accessories: Bottles & Bubbles Framelits Dies (145663), Pattern Party Decorative Mask (144103), Stampin’ Sponge (141337), Bermuda Bay (144600), Pool Party (144605),Calypso Coral (144045), and Smoky Slate Stampin’ Blends Combo Packs (145058) and Large Oval Framelits Dies (141706)

*Bubble Over Bundle 146082

Click here to order your Stampin’ Up! Products online 24/7! (US only)

Shop at my Online Store and use Host Code UCBWYB2B place a $75 order and receive a FREE gift!


Click Here to learn more about using the Hostess Code If you order Online make sure your profile information is up to date and you’ve allowed me to contact you so I can mail you your FREE gift!
Wondering How to Get YOUR Copy of the Occasions Catalog?

  • If you haven’t ordered in a while
  • Don’t have a demonstrator

Contact me at [email protected] or give me a call. I’ll be happy to mail you one or if your local set one aside for pick up


Click Here to learn more about using the Hostess Code If you order Online make sure your profile information is up to date and you’ve allowed me to contact you so I can mail you your FREE gift!
Sign up for my FREE Newsletter My Newsletters include stamping tips, ideas and updates on what is happening with me! You’ll also receive a FREE Class Tutorial using the 2017-2019 In Colors when you sign up!


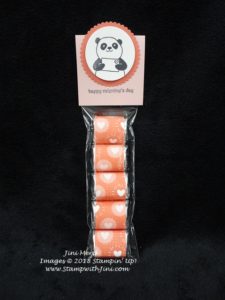
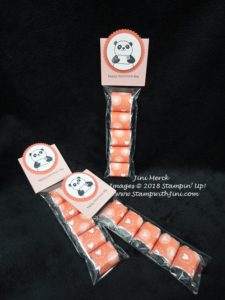
Party Pandas Valentine Nugget Treats

Want a quick and easy treat for Valentine’s Day? How about this chocolate filled treat made with the two of our Sale-a-bration items? Just one pack of the Bubbles & Fizz Designer Series Paper will make quite a few of these goodies. So why not grab a bag of Nuggets and get started?

Here are the instructions – the supply list is below for you.

  1. Cut 5 strips of Designer Series Paper 1″ x 3″ (make sure the pattern is going the direction you want. For mine I lined the hearts up along the top edge and cut 1″ strips that then I cut into 4 3 inch sections.)
  2. Using your Glue Dots add one to each end of the Designer Series Paper and place one against the Nugget and wrap the Designer Series Paper all the way around. The second Glue Dot will seal the other end down.
  3. Slide the nuggets into cello bag.
  4. Cut a piece of Blushing Bride Card stock 2 1/4″ x 4 1/2″; score at 2 1/4″
  5. Stamp your sentiment in Basic Black Archival Ink along the bottom of card stock.
  6. Fold the sentiment piece in half and slip over the top of the cello bag and staple. (Your scallop circle will hide the staple on the front.)
  7. Run a piece of Calypso Coral card stock through the Big Shot using the scallop circle Framelits die.
  8. Attach the scallop circle to the nugget topper, leaving it hang a bit above the top.
  9. Stamp your panda image onto Whisper White card stock using Basic Black Archival Ink.
  10. Color in heart using your Powder Pink Stampin’ Write Marker.
  11. Cut panda out using the circle Framelits die.
  12. Adhere the panda image to the scallop circle card stock using Stampin’ Dimensionals.

That’s it! Quick and easy – now you just need to share your treat!

Supplies: 

Stamp Set: Party Pandas (Sale-a-bration 147218/147221) and Teeny Tiny Wishes (128748/127802)

Inks: Basic Black Archival Ink (140931) and Powder Pink Stampin’ Write Marker (144033)

Paper: Bubbles & Fizz Designer Series Paper (Sale-a-bration 147244),   Blushing Bride (131198), Calypso Coral (122925) and Whisper White card stock (100730)

Accessories: 2″ x 8″ Cellophane Bags (141703), Layering Circles Framelits Dies (141705), and Stampin’ Dimensionals (104430)

Click here to order your Stampin’ Up! Products online 24/7! (US only)

Shop at my Online Store in January and use Host Code RQGVFRW6 place a $75 order and receive a FREE gift!

Wondering How to Get YOUR Copy of the Occasions & Sale-a-bration Catalogs?

  • If you haven’t ordered in a while
  • Don’t have a demonstrator

Contact me at [email protected] or give me a call. I’ll be happy to mail you one or if your local set one aside for pick up