Today I’m sharing a quick and simple technique to create a fun camera shutter look. This technique is sooo simple but is defiantly a wow technique that I’m sure you’ll want to give it a go too!
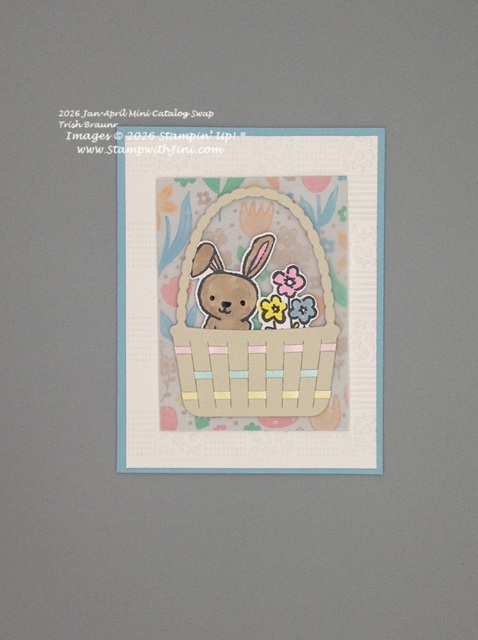
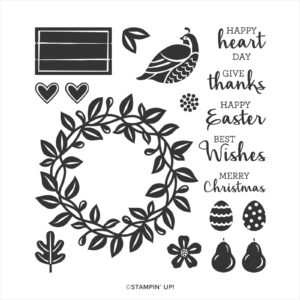
I’ve used the Easter Joy Suite (166954) to create this card as it is filled with all kinds of goodies for Easter crafting.
The Easter Joy Specialty Designer Series Paper (166939) is a thicker paper than our regular Designer Series Paper making it perfect for 3d projects too. And the colors are quite wonderful for spring. The package also contains 2 sheets of quick project options as you can see behind the stamp set above.
I’ve used the fun colorful pattern with carrots, eggs, and flowers and chose the coordinating Peach Pie card stock to create the card’s shutter effect with.
I’ve whipped up a video tutorial for you so you can see just how simple this technique is to create!
And of course here is a PDF for you that has the supply list, measurements, and even the link to the video. So why not give this easy little technique a try?
And remember if am Suite or Bundle is in back order you can order the items individually or ask for an email to let you know when the item is back in stock.
Love fun little techniques that step up your projects? How about an Embossing Folder technique that is quick and simple to do that has been used on this card?
Today’s card uses the Easter Basket Bundle (166947) to create this card. It also uses a technique of adding ink to the debossed side of the folder to add color.
How do you do that? It’s simple – you’ll want to use your Classic Ink pad or a brayer to add color to the inside of your embossing folder and then run it through your Stampin’ Cut & Emboss as normal. Clean up is easy simply run water over the inside and allow it to dry.
This creates a colorful background for your project. In addition to the All in a Row Embossing Folder (166989). This card also uses a watercolor wash for the bunny to create a soft feel. Simple stamping was used for the eggs and sentiment. And of course a bit of Bubble Bath Faux Linen Ribbon (167075) adds a bit of texture to the card and a fun detail.
So what do you think? Want to try this simple technique to add color to your embossing folders? While it can be a bit messy if you’re not careful it is a lot of fun!
While Easter is later this year, it will be here before we know it and if you’re looking for some fun new products to create with why not check out the Easter Joy Suite (166954).
This Suite is filled with wonderful products that will help you create cute little Easter cards and treats.
Check out today’s card that use the products found in this Suite.
Cute, right? I hope you can see all the lovely texture and details this card has. First the background is dry embossed using the All in a Row Embossing Folder (166989). Then the fun and colorful Easter Joy Specialty Designer Series Paper (166939) has been placed behind a piece of Vellum 12×12 Specialty Paper (Online Exclusive 167099) to give it a softer look and so the little bunny and basket looks like it just pops off the card. The basket has been cut out of Basic Beige card stock and strip of Pastels Shimmer Specialty Paper (167198) reminding me of my childhood basket. Finally Stampin’ Blends have been used to color the images.
Cute? I think so and who wouldn’t love receiving this little Easter card?
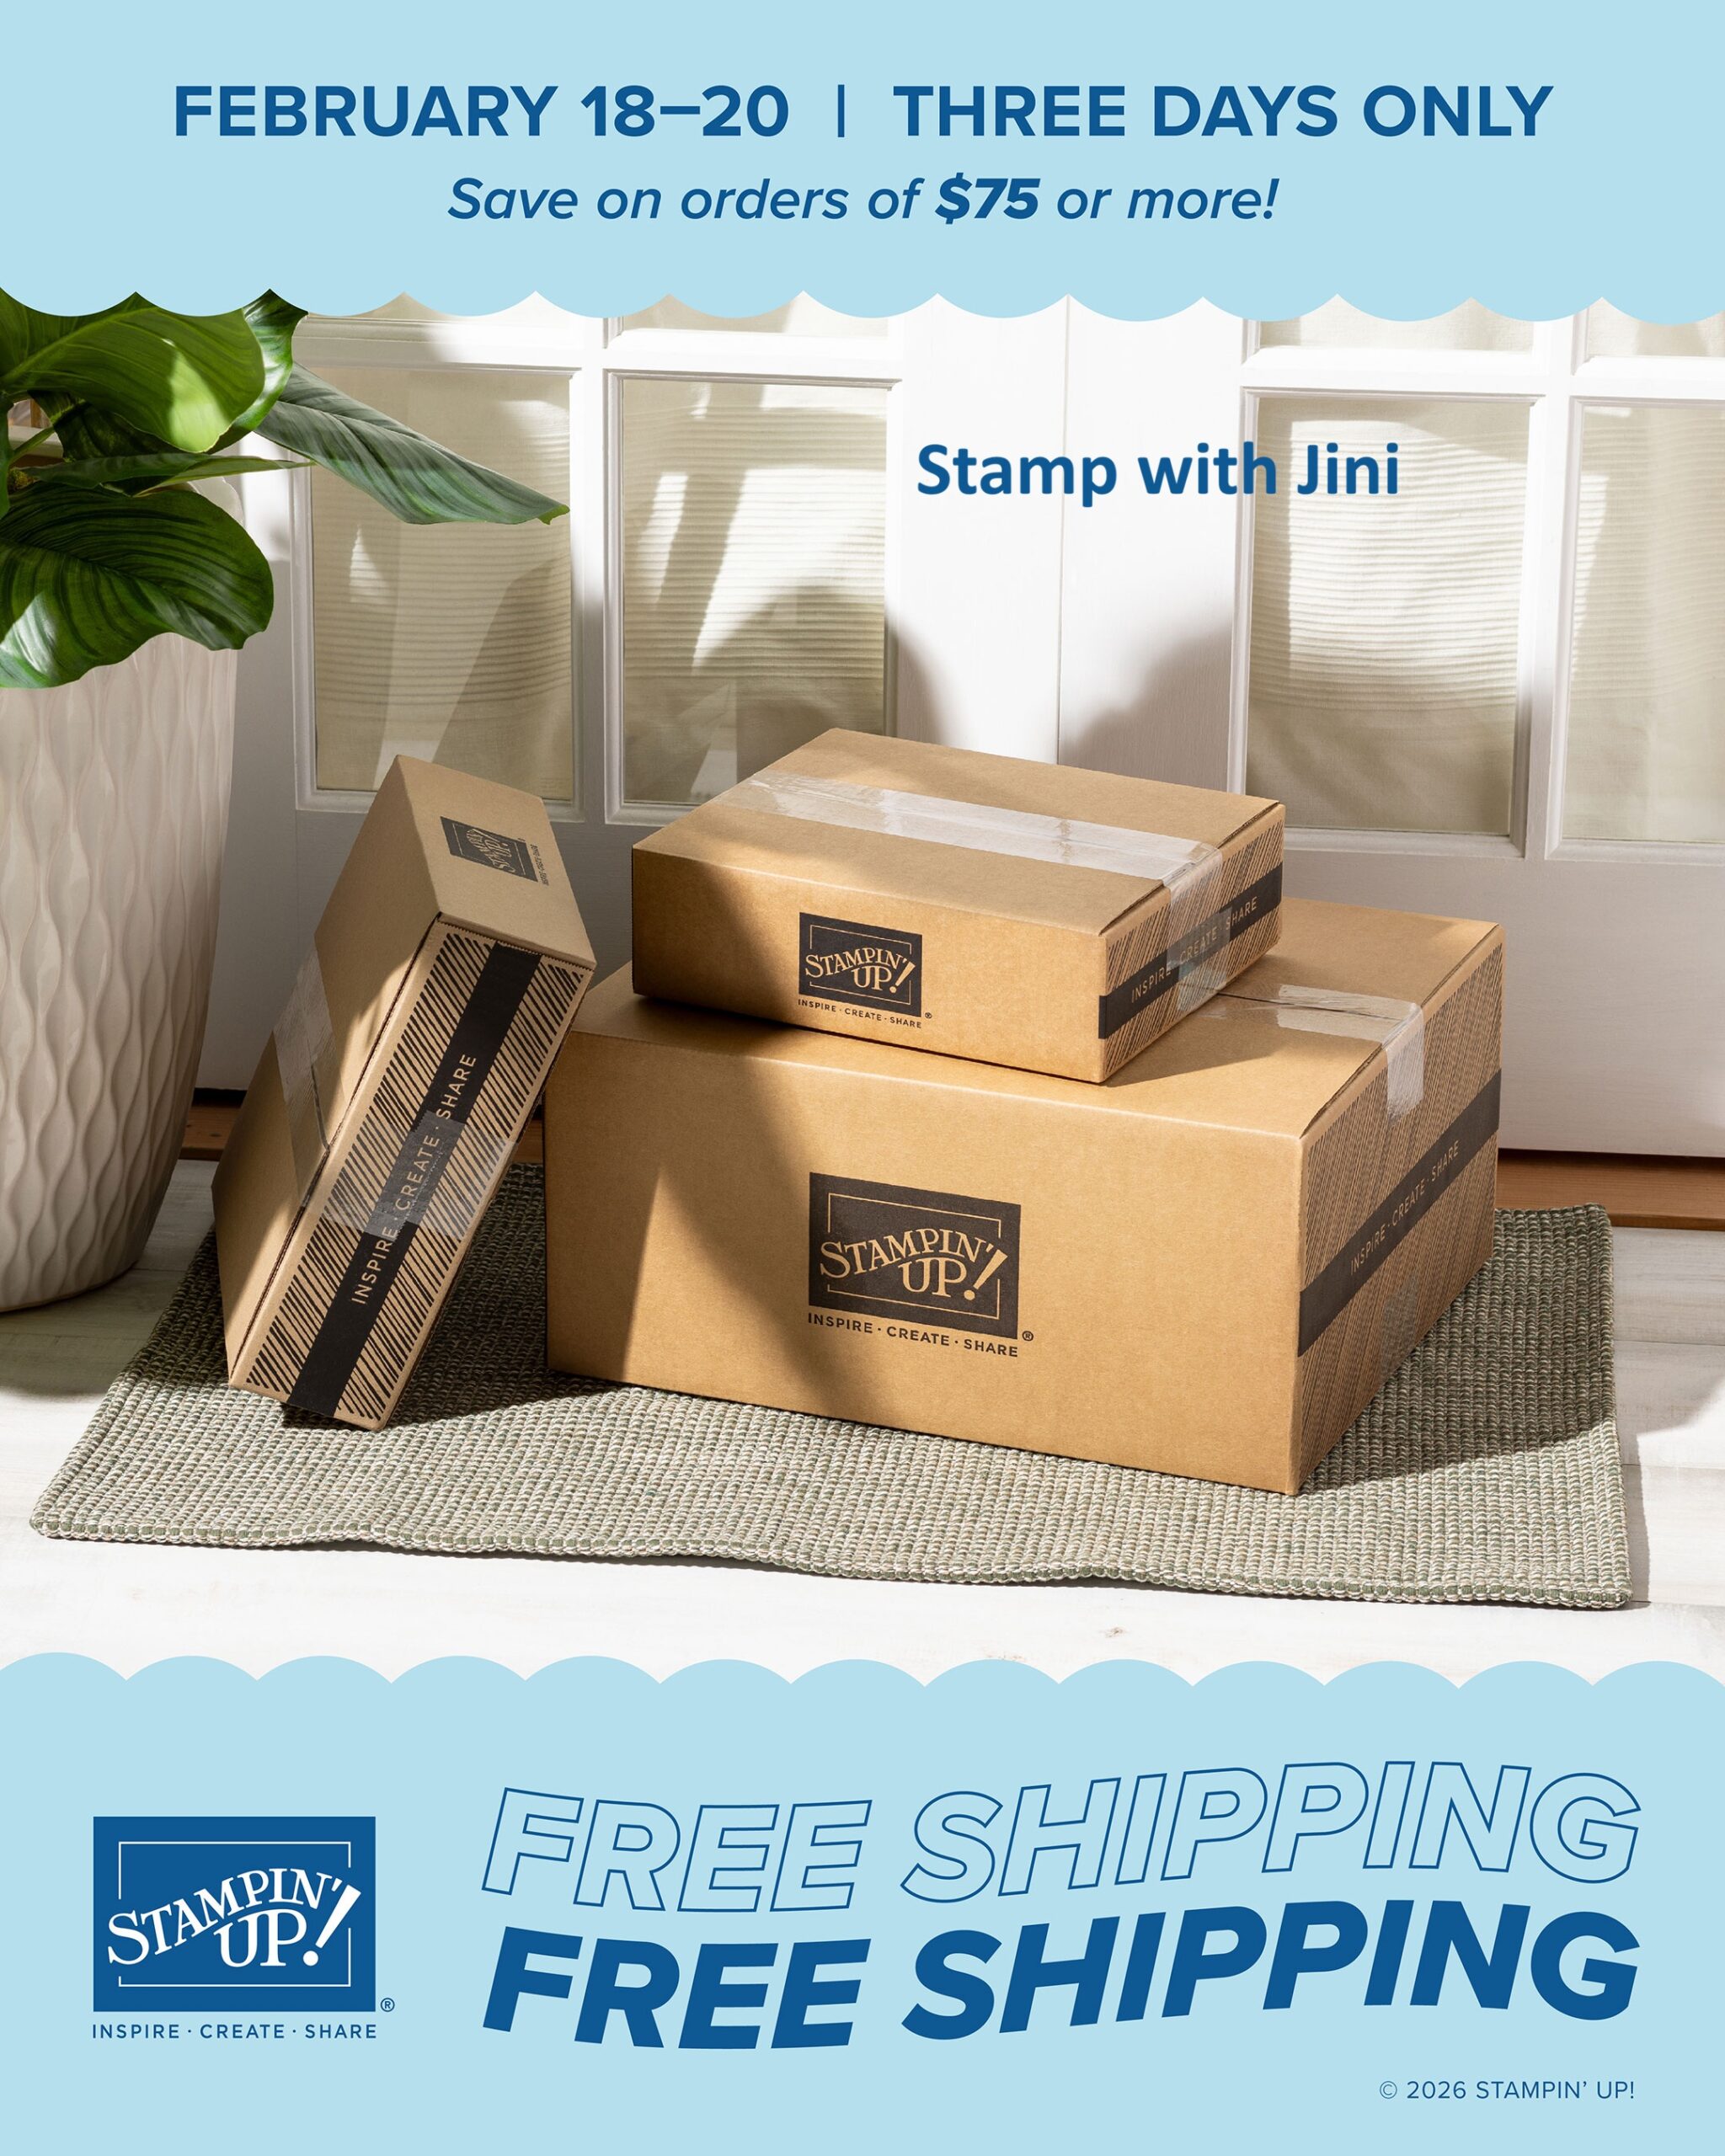
You can find this Suite and other products in my Online Store, so why not stop by and check it out today? And remember we have FREE Shipping too until Friday!
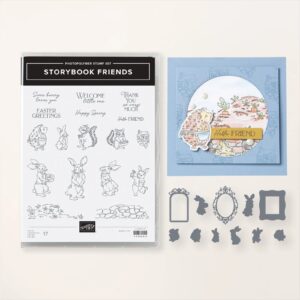
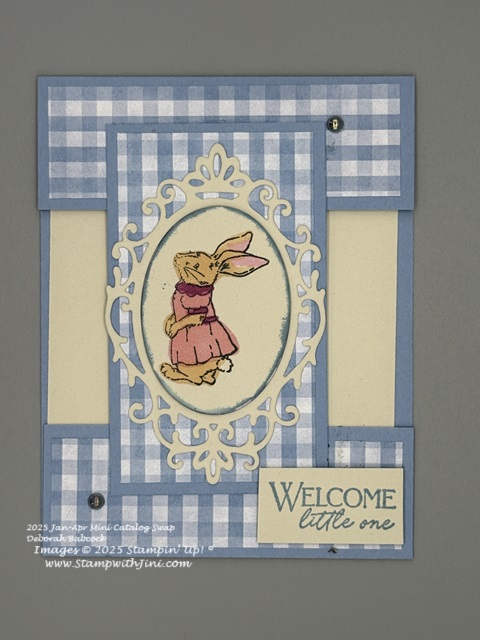
I love making little treats, it is what got me started in paper crafting as a child and came in so full bloom when my own children were young. So today I’ll be sharing with you a sweet little treat for Easter using the Storybook Friends Bundle (164675). I’ll be sharing these fun little treats with my fellow stampers at OnStage in Raleigh.
This bundle has some great images and sentiments so this treat can easily be used for different events, like a baby shower or spring.
Here is my video tutorial showing you how I created this treat be sure to check out the PDF below as it has everything you need to know to create this fun little treat including the YouTube link!
Shop at my Online Store and use March’s Host Code XF3VWS6Z with a product order of $60 or more and receive a FREE Gift from me; my Mixed Media Florals Fun Fold Card Class PDF and a supply kit to create the projects while supplies last. If you’re placing an order of $150 or more; no worries. Do not use my host code so you can get your benefits, you’ll still get my FREE gift
Looking for a fun suite of products that will take you back to your childhood and remind you of spring at the same time? Why not check out the Storybook Moments Suite Collection (164681). This suite includes wonderful images, fun papers, and includes the Storybook Friends Bundle (164675) that was used for today’s card.
Aren’t these little animals cute? They remind me of my son when he was little he loved reading about Peter and his adventures. I think it was Mr. McGregor’s garden that caught his attention at first in the video version since he loves anything to do with plants and working in the soil, always has.
Today’s card uses the baby sentiment, but this set contains some great all occasions sentiments along with Easter too making is a great set for spring.
The stamped image has been stamped and colored in Stampin’ Blends and the lovely detailed Dies have been used to frame it. And of course the Timeless Plaid 6×6 Designer Series Paper (164678) with it’s soft colors is perfect for this card don’t you think?
Why not stop by my Online Store and check out this suite for yourself and see what memories it stirs for you? Be sure to check out the Storybook Moments Designer Series Paper (164662) as it contains 2 sheets of some wonderful die cut designs for quick and easy cards too!
Shop at my Online Store and use January’s Host Code XSR6A9QU with a product order of $60 or more and receive a FREE Gift from me; my Friendly Seagulls Card Set Class PDF and a supply kit to create the projects while supplies last If you’re placing an order of $150 or more; no worries. Don’t use my host code so you can get your benefits, you’ll still get my FREE gift
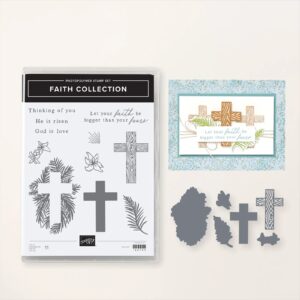
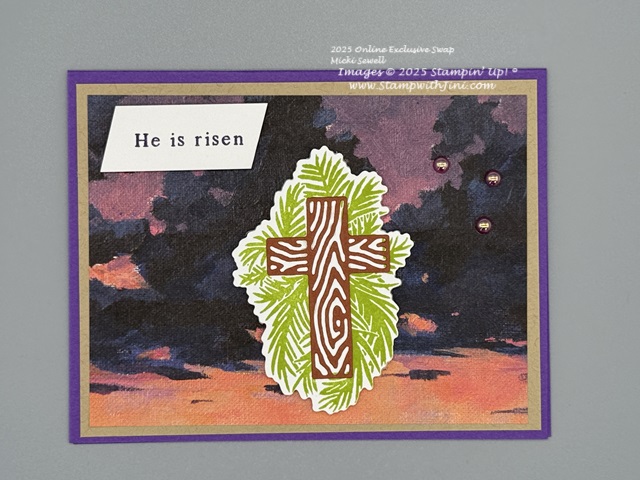
Did you know that we have a special selection of stamp sets, dies and more in the Online Store? These special products are released periodically and supplement our Annual and Mini Catalogs giving us new products every month of the year! Today’s card use the Faith Collection Bundle (Online Exclusives 164796) that is found there.
The cross has been die cut using Pecan pie and places on the stamped die cut image. The sky sets a beautiful sunrise backdrop and a few Adhesive Backed Trio Pearls (163319) add a bit of shine and texture.
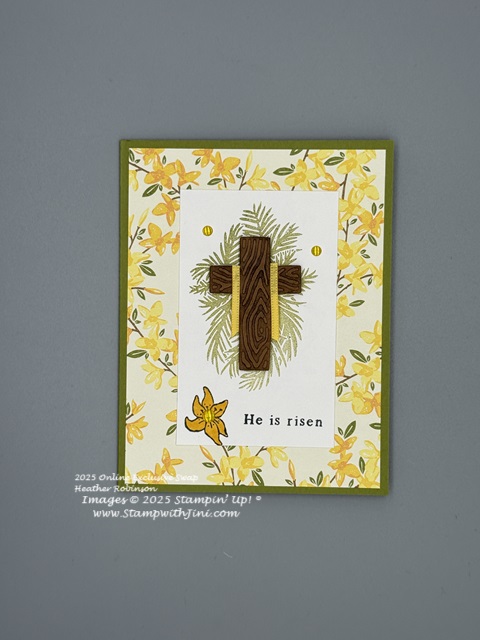
This next card uses the same images but has a less dramatic spring feel to it
with it’s softer color pallet. Done in Old Olive and Daffodil Delight it uses the Floral Delight Designer Series Paper (164700). Old Olive has been used for the palms and has been stamped off to create a lighter shade of green behind the cross. A bit of Daffodil Delight 1/8″ Satin Ribbon (164715) is draped across the cross that has been die cut in Pecan Pie and uses both the solid and detailed die. A bit of sponging on the detailed layer gives it more depth. And those cut little dots that add a bit of shine come from the Glossy Dots Assortment (158827).
Why not stop by my Online Store and see all the new January Online Exclusives today?
Shop at my Online Store and use January’s Host Code XSR6A9QU with a product order of $60 or more and receive a FREE Gift from me; my Friendly Seagulls Card Set Class PDF and a supply kit to create the projects while supplies last If you’re placing an order of $150 or more; no worries. Don’t use my host code so you can get your benefits, you’ll still get my FREE gift
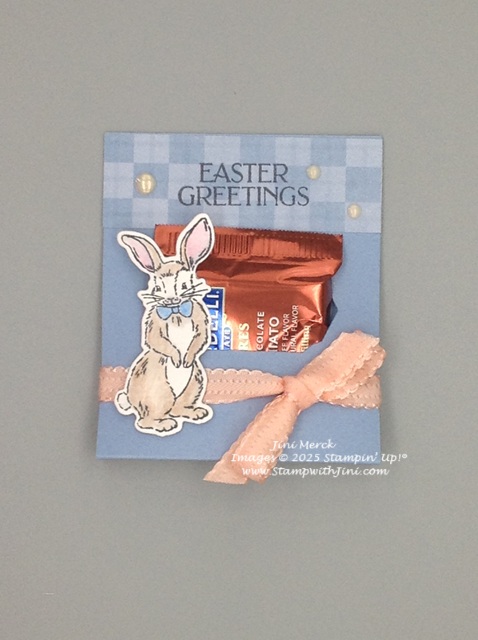
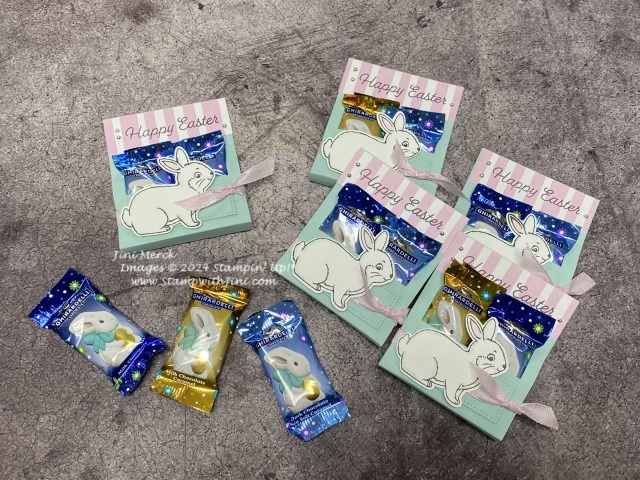
It’s Friday and that means I’ll be sharing another fun tutorial with you. I created this little treat for my team meeting this past week and wanted to share it with you too! This treat will hold those little Ghirardelli Chocolate Bunnies that you’ll find in the store right now. Or if you prefer the squares they will work too!
Check out my video tutorial below and then under that my PDF with a complete supply list, step by step instructions and the video link that you can print or save so you have everything in one place!
And on a personal note I’ll be sharing my Anniversary as a Stampin’ Up! Demonstrator tomorrow. I can’t believe it’s been 15 years already!!! So I wanted to say thank you to you for allowing me to stamp and share with you over the past 15 years! Not only do I get to do what I love, but I also get to meet wonderful people too. Who could ask for anything better?
And to celebrate I’ll be sharing tutorials with you for the next 5 days! So make sure to stop on by each day next week to check them out. And of course if you want to get my blog posts sent right to you inbox as a reminder, you can sign up to receive them and for my YouTube channel too. Use the buttons for them, or Click HERE for my Blog emails, simply scroll down to see the buttons. The choice is yours!
Shop at my Online Store and use Host Code CH3HXFEQ with a product order of $50 or more and receive a FREE Gift from me; my Perennial Lavender Card Class!
Sign up HERE for my FREE Newsletter and Class Schedule and receive my FREE 2023-2025 In Color Cottage Wreath Card Class OR Get my Blog Posts delivered right to your inbox HERE
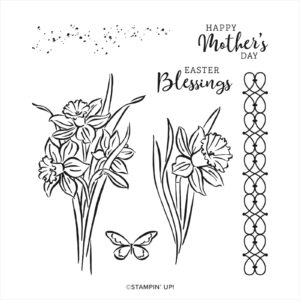
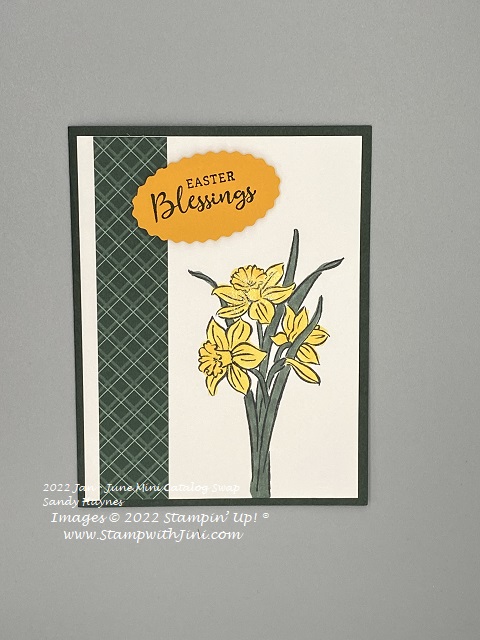
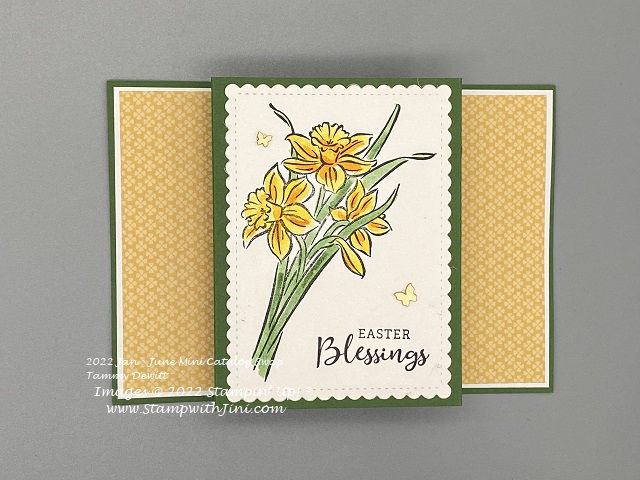
It’s spring and the sweet little daffodils are shinning their little faces up to the sun, that is when it isn’t raining. Daffodils always make me think of my childhood since my mother always had them on the table for Easter. Always one of the first pops of color in the garden that my mom loved to tend. So today I thought I’d share with you some cards that use the Daffodil Daydream (157786) stamp set and their coordinating Daffodil Dies (157794).
This first card teams up the images that have been colored with our Calypso Coral and Old Olive Stampin’ Blends
and highlighted with the beautifully versatile Scalloped Contour Dies (155560) done in our In colors Soft Succulent and Evening Evergreen. And this next card uses that same Evening Evergreen to create this lovely Easter card.
Shop at my Online Store and use Host Code C2T2FGZVwith a product order of $30 or more and receive a FREE Gift from me!
Click Here to learn more about using the Hostess Code If you order Online make sure your profile information is up to date and you’ve allowed me to send you your free gift.
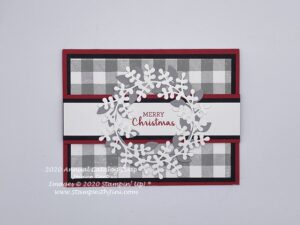
The Arrange the Wreath Bundle has options for multiple holidays making it a fun choice for your holiday stamping needs.
See what I mean lots of great images and sentiments and when you team it up with the Wreath Builder Dies you’ve got all kind of options. Check out this card using the bundle it’s got a great home spun feel to it, don’t you think?
The bundle has been teamed up with the Buffalo Check background stamp using the classic color combination of Basic Black, Real Red, and Smoky Slate.
So what do you think? Why not check it out? Change up the colors and you’ve got a layout that works for lots of occasions!
Shop at my Online Store and use Host Code RWCHMDKP
Click Here to learn more about using the Hostess Code If you order Online make sure your profile information is up to date and you’ve allowed me to send you your free gift, a FREE Class using the Tag Buffet Stamp Set found in the Mini Catalog.
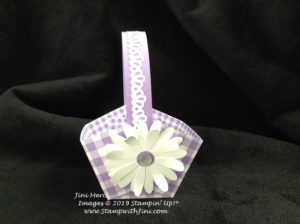
Today’s project is my take on a quick and easy basket. AND it’s perfect for spring, especially since it uses our lovely Gingham Gala Designer Series Paper!
I made this basket with a moving handle so it is more like a picnic basket than an Easter basket. Don’t you love the little bit of lace on the handle? I made this with our Decorative Ribbon Border Punch and it was so easy to do with just a small strip of Whisper White card stock.
Want to whip some of these up too? They are a nice size so add a little shredded paper and treat and you’re set to go. You can make a ton of these with just one stack of Gingham Gala Designer Series Paper and it comes in a variety of spring like colors so they are perfect for giving to others!
I hope you’ll enjoy making these cute little baskets too.
On a personal note I thought that I’d finally share the home improvement project that I was working on with you. I mentioned it a couple of weeks ago and then realized last night that I’d taken the pictures but didn’t share them. Sigh. Some days… lol Can you relate?
Any how here is what was keeping me busy – I still have a couple of finishing touch of things I need to do, but it’s all good.
I had a great time watching my son work on and build the cabinets and then watching the kitchen come together after dreaming about it for so long. I’m bias, but I think my son has done a great job. It turned out beautifully and I really like the look of the hickory. Johnathan did a beautiful job of choosing the grains so they look nice. I love doing projects like this together – great family time and memories being created in addition to a functional end result. You’ll get to see it yourself the next time to come to class, since this space is for our use and will make things easier than the old temporary kitchen set up.
Shop
at my Online Store and use Host Code 44SNJGKN
Click Here to learn more about using the Hostess Code If you order Online make sure your profile
information is up to date and you’ve allowed me to contact you (If you chose no
contact in the past you’ll need to call 1-800-Stamp Up to have them change your
profile for you.)