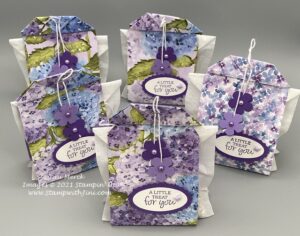
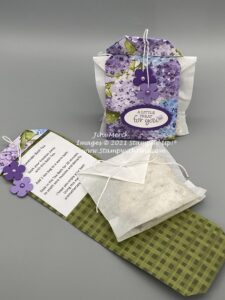
Oval Occasions Bath Tea Holder

I love to create homemade recipes for pampering myself at home, and last fall I found this fun Lavender Tub Tea that sooths the skin and creates a luxurious bath experience to go along with my sugar scrubs I’ve shared with you in the past. So I knew I wanted to whip some up to share with my Team for their day of pampering at my Peak Princess event. Here is what I came up with.

A quick and simple packaging idea to hold this special little tub tea bag. And while I was thinking lilacs instead of lavender when I designed it, don’t ask me why, I think the purples from the Hydrangea Hill Designer Series Paper goes lovely with the tea bags any how. And you can get a ton of holders out of just one package of paper, making it perfect for sharing with friends.
I’ve created a quick video for you so you can see how I made them.

Oval Occasions Bath Tea Holder Video Tutorial

And great news the tub tea is soooo easy to make with ingredients you may even have around the house. This herbal tea is packed with herbs, salts and other skin soothing treatments creating a luxurious bath when steeped. It’s a perfect way to warm up and relax during the cold winter months. When you’re done simply remove the tea bag – no messy clean up!

Lavender Oatmeal Tub Tea Recipe

2 cups Epson Salts

2 heaping Tablespoons Dried Lavender

15-20 drops Lavender Essential Oil

1 cup oatmeal

1 cup powdered milk

9 Extra Large (Size 4) tea filters

Grind the oatmeal in a food processor or blender to get a coarse powder.

Mix the Epson salts, dried lavender and essential oils in a large bowl and stir. Then add in the powdered milk and ground oatmeal. Mix well. Fill your tea bags with about 1/3-1/2 cup of mixture and seal as desired.

I did find that you want to make sure to place this little gift into a cello bag (102210) or Clear Envelope (102619) – It helps fragrance from the dried Lavender and Essential Oil last longer it also helps keep things cleaner too.

And of course it never hurts to have a printable PDF tutorial. This one not only includes a supply list and my step by step instructions. It also has the recipe and labels all in one handy document making it easy to reference again and again.

Oval Occasions Bath Tea Holder Tutorial & Recipe PDF

Wondering where I got the tea bags and lavender? I’ve added the links for the items I used for my gifts on the pdf for you in case you’re wondering where to find them.

Enjoy!

Supplies:

Stamp Set: Oval Occasions (154477)

Inks: Gorgeous Grape Classic Ink (147099/147164)

Paper: Hydrangea Hill Designer Series Paper (154570), Gorgeous Grape (146987), Highland Heather (146986), and Basic White Card stock (159276)

Accessories: Double Oval Punch (154242) and Small Bloom Punch (152316), Snail Mail Twine (154579), Butterfly Gems (152481), Pastel Pearls (154571)

Click here to order your Stampin’ Up! Products online 24/7! (US only)

Shop at my Online Store and use Host Code YUKYBZBG

Click Here to learn more about using the Hostess Code

?Peak Princess Fun & the Amazing Magnolia Lane Folding Album

Last weekend was my Peak Princess event. What’s that? Well it is a special afternoon of pampering for those Team members who have earned it. We enjoy the time together, food, played a game, and of course create a project.

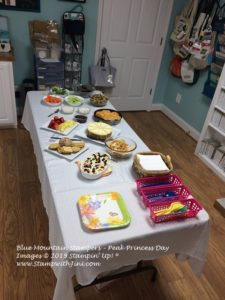
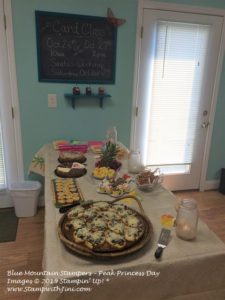
This event was extra special since it was our largest group yet due to everyone’s hard work – and I added a bit of a luau theme to the snack table to celebrate.

The hit of the snack table was the Artichoke & Mushroom Toast – not really Hawaiian fair, but since the Hawaiian pizza rolls I was planning on were a flop when I tried them, this worked out well since everyone seem to enjoy them.

Here is the recipe if you want to try them yourself. I found them really easy to do and prepped everything the day before and then assembled before the event.

Artichoke & Mushroom Toast

Taste of Home

  • 36 slices French bread baguette (1/2 inch thick)
  • 3 T. Olive Oil, divided
  • ½ lb. sliced fresh mushrooms
  • ½ lb. sliced baby portobello mushrooms
  • ½ tsp. Italian seasoning
  • 2 T. butter
  • 6 garlic cloves, minced
  • 1 jar (7.5 oz) marinated quartered artichoke hearts, drained
  • 1/3 c. mayonnaise
  • 1 T. Parmesan cheese, shredded
  • 2 c. Swiss cheese, shredded

Place bread on baking sheets; brush with 2 tablespoons oil. Broil 4-6 inches from heat for 1-2 minutes or until lightly toasted.

In a large skillet, sauté mushrooms with Italian seasoning in butter and remaining oil until tender. Add garlic; cook 1 minute longer. Remove from heat and set aside.

Place artichokes in a food processor; cover and process until finely chopped. Add mayonnaise and Parmesan cheese; cover and process until blended. Spread over toast slices; top with mushrooms and sprinkle with Swiss cheese.

Bake at 350 degrees for 4-6 minutes or until cheese is melted.

Yield 3 dozen

Print a copy here

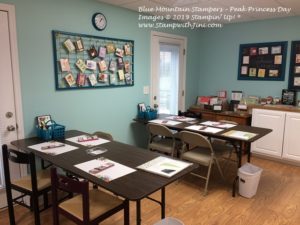
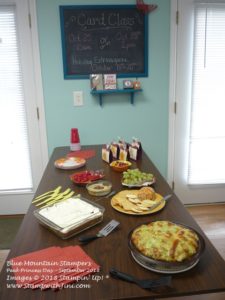
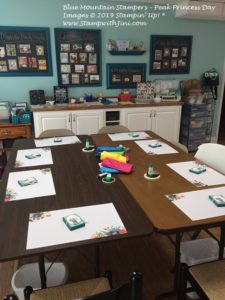
And here is the classroom waiting for everyone to arrive.

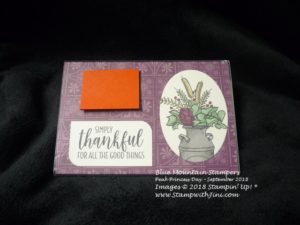
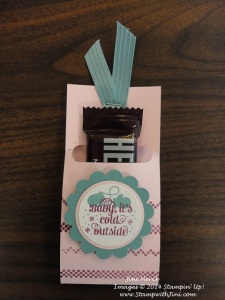
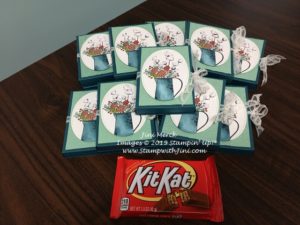
I shared the little Country Home Kit Kat Holders which were everyone’s “pillow gifts” on the table with you yesterday – I thought the thankful greeting was perfect to express my thanks to my team.

We enjoyed a game after everyone settled in –

Have you ever played the Right, Left Game? It’s so simple…. everyone starts with a package and then we passed our packages to the right or left depending on the Ink Pad story I read.

Lot’s of fun and laughter to go around!

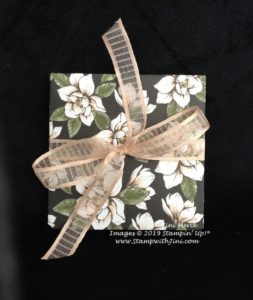
After we did a Make n Take and created these lovely Folding Albums. My friend, Marni gave me one of these little albums last spring in a swap and I loved it so much. I saved it since I knew it was the perfect project for the day. I simply put my own spin on it.

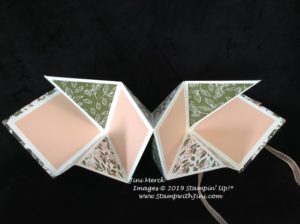
It wasn’t hard to choose the paper I wanted to use. The Magnolia Lane Designer Series Paper is so striking and you’ve got a ton of pattern choices in the package. Here is what the album looks like opened.

I’m looking forward to filling it with some photos!

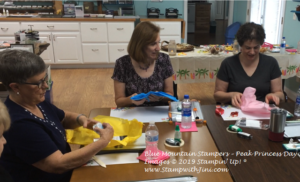
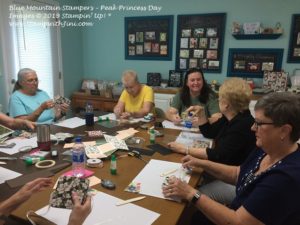
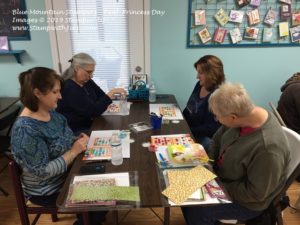
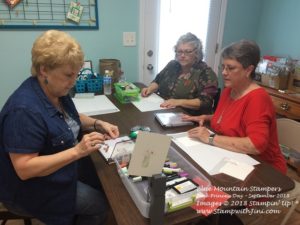
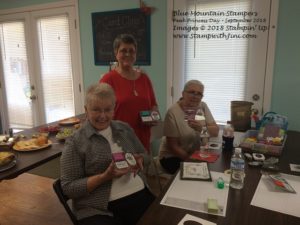
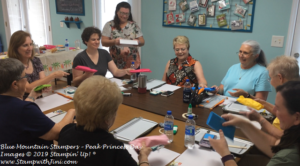
Here is the gang working on theirs

Want to see how I made this album? The Team enjoyed making them so much I thought you would too!

Amazing Magnolia Lane Folding Album Video Tutorial

Oh, I almost forgot the tag or chip board is simply the extra piece in our Specialty Designer Series Paper packs – How great is that? You can up cycle it!

So what do you think? Want to make one for yourself? I think they make great gifts and of course you could stamp on the inside diamonds if you prefer rather than use it as an photo album. I think there are endless ways to use this amazing album!

Here is a printable version with the complete supply list I used.

Amazing Magnolia Lane Folding Album Tutorial PDF

I am so humbled to have such a fantastic Team, they truly inspire me to want to be the best leader I can be.

Stop back by next week when I’ll be sharing some of the projects they made

Supplies:

Paper: Magnolia Lane Designer Series Paper (149484), Petal Pink 5/8″ Organdy Striped Ribbon (149985), and Whisper White Card stock (100730)

Accessories: Petal Pink 5/8″ Organdy Striped Ribbon (149441)

Adhesives: Snail (104332/104331), Tear & Tape (138995), and Multipurpose Liquid Adhesive (110755)

Click here to order your Stampin’ Up! Products online 24/7! (US only)

Shop at my Online Store and use Host Code H62N9P3Z

Click Here to learn more about using the Hostess Code If you order Online make sure your profile information is up to date and you’ve allowed me to contact you (If you chose no contact in the past you’ll need to call 1-800-Stamp Up to have them change your profile for you.)
Share What You Love Perpetual Calendar Card Book & More

Today’s project is one that we did as last Weekend’s Peak Princess event. What is that you ask? This event is a special one for those on my team who qualify for it. It’s an afternoon of pampering – filled with games, prizes, and a special project and best of all time together.

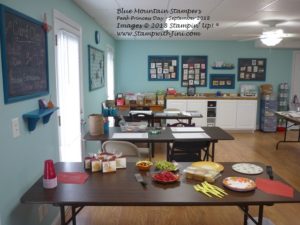
Want to see some photos? This first one is of the class room, ready to go – the little skinny notepads that I shared with you yesterday are at everyone’s seats.

And of course there has to be some goodies, right?

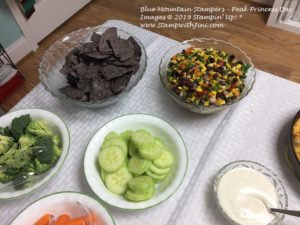
One of the dishes I served was a delicious Black Bean Salsa that Sara Douglas shared with us on her face book page, sorry I can’t find it again to link it for you. She gave approximate measurements since she doesn’t measure the chopped ingredients – so I’m giving you what I did below. You can tweak it to fit your tastes.

Black Bean Salsa

Sara Douglass, Stampin’ Up! CEO

2 cans of black beans, drained and rinsed

2 cans of corn, drained and rinsed

1 bunch green onion, chopped

½ purple onion, chopped

1-2 cups red, orange, yellow and green peppers, chopped

Cilantro, leaves pulled and chopped

2 tsp olive oil

2 tsp Apple Cider Vinegar

2 tsp. Lime juice

¼ tsp. Garlic powder, salt and pepper (to taste)

Mix and serve. This makes a big bowl, the picture below is just half of what it made. So if you want the recipe can be cut in half.

Serve with corn chips – I used blue ones.


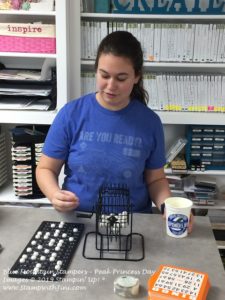
We played bingo – my daughter was home on break so she called Bingo for us (She thought it would be great practice for her upcoming band fundraiser too. Yes, believe it or not she is a Band Director. This is her second year of teaching now!)

Here are just a couple of the prize winners – we played 5 games

And of course we crafted together

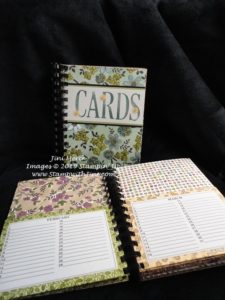
And this February’s project was such a hit I thought I’d share it with you today in case you’d like to make some too. It’s a book that holds your cards – it includes a perpetual calendar for you too. It’s a great item that I’ve been using myself for years!

I really love the Share What You Love Specialty Designer Series Paper and it’s beautiful pearl finish that some of the sheets have so I started there. I think the fact that this Designer Series Paper is a bit heavier will help it hold up for years to come.

Here is the video I did for you.

Share What You Love Perpetual Calendar Card Book Video Tutorial

I’ve also created a pdf for you with the step by step directions and supply list.

Share What You Love Perpetual Calendar Card Book PDF

And here is the link for the Calendar pages for you. I simply printed them off onto Whisper White card stock.

Perpetual Calendar Pages PDF

I think these are going to make great gifts, so I’ll be getting a few more packages of this DSP so I can start my holiday gifts now and earn FREE Sale-a-bration items too! This pack of Designer Series Paper has 24 sheets in it so you can make several per pack of DSP and then use the extra sheets to create cards to go with the book!

Love the project but don’t have a binding machine? That’s not a problem – check with your local Office Supply Store. They normally can bind things for you or allow you to use their machine when you purchase the combs from them.

Enjoy!

And if you think this might be something you may enjoy – why not consider joining my team? It’s a great time to join with the fantastic kit option and right now you have the ability to get the NEW coordinating products for Sale-a-bration (March promotion) in your starter kit too! Click HERE to learn more about the Blue Mountain Stampers and joining today!

Supplies:

Stamp Set: Letters for You (141968)

Inks: Tranquil Tide Classic Ink (147146/144091)

Paper: Share What You Love Specialty Designer Series Paper (146926), Basic Black (121045), Pear Pizzazz (131201), and Whisper White Card stock (100730)

Accessories: Share What You Love Artisan Pearls (146927), Bitty Blooms Punch Pack (148532), Simply Scored Scoring Tool (122334), Take Your Pick Tool (144107/150006), and Bone Folder (102300)

Click here to order your Stampin’ Up! Products online 24/7! (US only)

Shop at my Online Store and use Host Code BAMJPSMW

Click Here to learn more about using the Hostess Code If you order Online make sure your profile information is up to date and you’ve allowed me to contact you (If you chose no contact in the past you’ll need to call 1-800-Stamp Up to have them change your profile for you.)
Sign up for my FREE Newsletter My Newsletters include stamping tips, tutorials, ideas and Classes!

Country Home Plastic Frame Post it Note Holder

Yesterday I shared with you a treat tent that I made as a special surprise for my Peak Princess Day. This event is a special one that I hold twice a year to pamper my team and I love that I can do that. So today I thought I’d share the project we made and I remembered to take pictures this time so I can share those too. LOL!

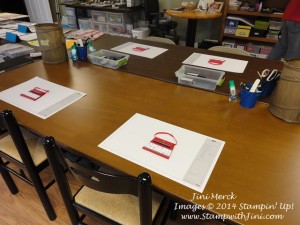
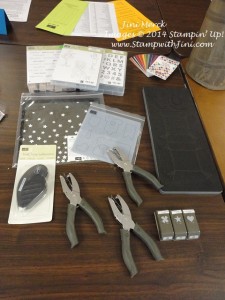
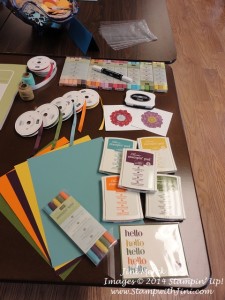
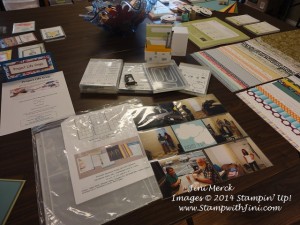
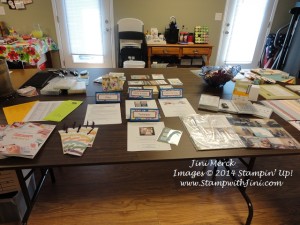
So here is my classroom set up and ready for everyone. We played Bingo, laughed, shared, had some goodies and stamped together.

I’ve got such a great team who inspires me every day! I feel truly blessed to have such a wonderful team.

Here’s the project we made.

It’s a quick and easy project using the Country Home Stamp set and a inexpensive plastic frame. I’ve designed this one to hold a small package of post it notes since I wanted to include the sentiment.

Everyone got to choose their images and colored the images with their choice of Stampin’ Blends.

I love seeing all the different color combinations they did.

And of course what is a party without a little something to nibble on?

I couldn’t resist making some Twinkie Torte when I found some Pumpkin Spice Twinkies on a shopping trip.  It’s a recipe I’ve had since I was in High School and one of my favorites. The cinnamon was a bit much in the Twinkies for me, but the torte was pretty good with this fall flavor twist. I’ve had some questions about it so here is the recipe so you can try it too. And I found a yummy recipe for Cheesy Spinach and Artichoke Pinwheels I couldn’t resist sharing with the team too. Tasty and sooooo easy to make – which is my kind of recipe.


Twinkie Torte

1 (12 oz.) pkg. chocolate chips

1/3 c. water

1/3 c. sugar

6 eggs, separated

2 c. whip cream or Cool Whip

9-10 Twinkies cut in half

Maraschino cherries

In saucepan, combine chips, water and sugar. Cook over low heat, stirring constantly until chips are melted. Remove from heat and add egg yolks one at a time, mixing well after each, and cool. Beat egg whites till stiff – gently fold into chocolate mixture. Place Twinkies, cream side up in 9×13 inch pan. Spread chocolate mixture over Twinkies. Top with whip cream and garnish with cherries. Refrigerate 12 hours before serving.

Enjoy!

Supplies:

 Stamp Set: Country Home (147678)

Inks: Memento Tuxedo Black Ink Pad (132708/133456)

Paper: Country Lane Designer Series paper (147804), Stampin’ Blends, and Whisper White Card stock (100730)

Accessories: Layering Ovals Framelits Dies (141706) and Detailed Trio Punch (146320)

Other: Plastic Frame

Click here to order your Stampin’ Up! Products online 24/7! (US only)

Shop at my Online Store and use Host Code W2NX46E9


Click Here to learn more about using the Hostess Code If you order Online make sure your profile information is up to date and you’ve allowed me to contact you

Cookie Cutter Christmas & Gingerbread Cookie Sugar Scrub

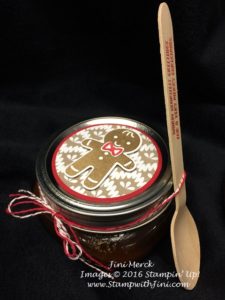
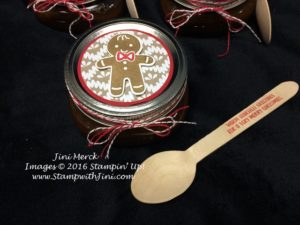
I love to make home made gifts and the Cookie Cutter Christmas bundle brought to mind the wonderful Gingerbread Cookie Sugar Scrub recipe I had. So here is what I whipped up for some family and friends.

I love the little wooden spoons I found since they can be stamped on.

Sugar scrubs are great for the winter and this one smells so yummy. My husband loves them for his hands and I actually use this scrub in the shower all over my body, hands, feet, legs, elbows – it is wonderful and moisturizes too. (Just make sure you are careful in the shower the scrub can make the floor slippery.)

I’m including the recipe below for you in case you’d like to make some last minute gifts too!


Gingerbread Cookie Sugar Scrub

1 c. brown sugar

1 c. sugar

1 c. vegetable oil

2 tsp. cinnamon

2 tsp. nutmeg

2 tsp. ginger

2 tsp. pumpkin pie spice

3 drops Vanilla extract

Mix well and place in a tightly sealed container such as a mason jar.

This keeps well in a cool place for weeks!

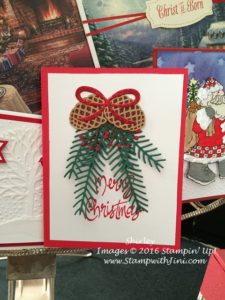
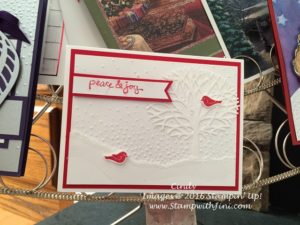
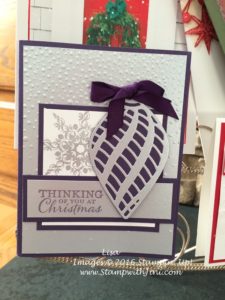
Today I also wanted to share some of the wonderful hand stamped cards that I’ve received for Christmas from friends – I can’t pick a favorite they are all so wonderful!

Supplies:

Stamp Set: Cookie Cutter Christmas (*142043)

Inks: Soft Suede (126978) and Real Red Classic Ink (126949)

Paper: Candy Cane Lane Designer Series Paper, Real Red (102482), and Whisper White Card stock (100730)

Accessories: Candy Cane Lane Baker’s Twine (141983) and Cookie Cutter Builder Punch (*140396)

*available in a bundle Item #143493


Click here to order your Stampin’ Up! Products online 24/7! (US only)

It’s simple simply shop at my Online Store and use Hostess Code U7AKSEJF when you order!!!

**For everyone who places an order (at least $25 in product) through my store you will receive 5 homemade cards in the mail!  If your order is over $50 in product then I will DOUBLE that and you will get 10 cards and an embellishment of your choice in the mail! You can choose from a package of Baker’s Twine, Pearls, Rhinestones or White Perfect Accents. If you don’t email me your choice I’ll choose one for you.
(I will mail your items to you the second week of January)

It’s my way of saying thank you for choosing me as your Demonstrator!!!

Click Here to learn more about using the Hostess Code If you order Online make sure your profile information is up to date and you’ve allowed me to contact you so I can mail you your FREE gift!
 

Customer Appreciation Day

Yesterday I held my first annual Customer Appreciation Day – and I think everyone enjoyed the pampering and projects.

First the food…..

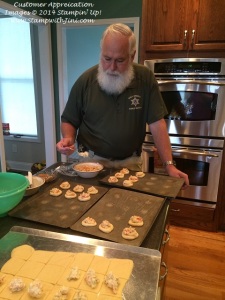
Larry helped me with the food. Here he is putting one of  the appetizers together. He’s a sweetheart – what can I say.

Customer Appreciation  (1)

He was on call for the weekend so he couldn’t join us, but I made a few extra so he could enjoy the goodies too! LOL

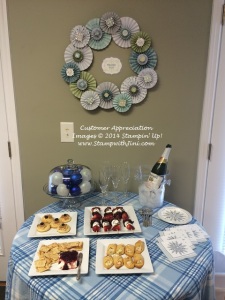
We played games, stamped, laughed, and enjoyed the time together! Here is a photo of my snack table all set up and ready.

Customer Appreciation  (2)

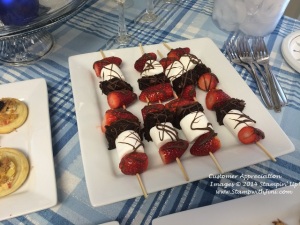
These strawberry brownie kabobs were a big hit (with my daughter Kaitlin)

Customer Appreciation Strawberry Brownie Kabobs

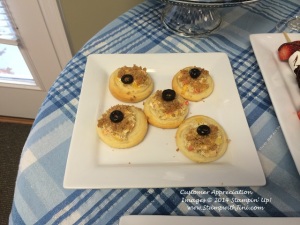
And here are the Cheesy Artichokes Crostinis….

Customer Appreciation  Cheesy Artichoke Crostini

They seemed to be a hit – so here is the recipe in case you’d like to make some for your own New Years Eve party.

CHEESY ARTICHOKE CROSTINI

1 pkg. (3 oz.) cream cheese, softened

1 tsp. spicy brown mustard

1/8 tsp. pepper

¼ c. red bell pepper, chopped fine

¼ c. Cheddar cheese, shredded

1 T. onion, chopped finely

1 jar (6 oz.) marinated artichoke hearts, drained, chopped

1 can (8 oz.) Crescent Recipe Creations® seamless dough sheet

2 T. unseasoned dry bread crumbs

2 tsp. olive oil

16 ripe olive slices

Preheat oven to 375 degrees.

In a small bowl, mix cream cheese, mustard and pepper. Stir in bell pepper, cheese, onion and artichokes until well blended.

Remove dough from can. Do Not unroll. Using a serrated knife, cut dough into 16 slices. Place slices cut side down on cookie sheet; flatten slightly. Use thumb to make slight indention in center of each slice. Place 1 heaping teaspoon of mixture into indention of each dough slice.

In a small bowl, mix bread crumbs and olive oil. Sprinkle over filling; top with olive slice.

Bake for 11 – 15 minutes or until golden brown. Serve warm.

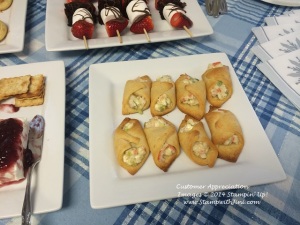
Customer Appreciation  Crab & Cream Cheese snacks

And of course the Crab & Cream Cheese Snacks – I’m going to have to make these again for my family this week. All of these goodies were so easy to make!

Now the projects….

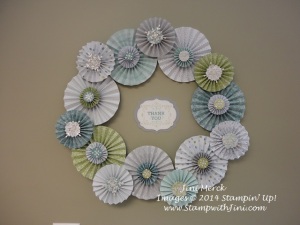
I love how the way my All is Calm wreath turned out. I wanted a winter themed wreath to use through the end of January so I used the snowflakes from the Snowflake Card Thinlit Die (135855) and Silver Glimmer Paper (135314) for the decorations in the center of my rosettes .

All is Calm Winter Wreath Customer Appreciation day

How’d I do it? Well I’ve used the gorgeous All is Calm Designer Series Paper (135823) and the Designer Rosette Bigz XL Die (125594) to create the 6″, 4″, and 2″, rosettes that make up this wreath. The die makes this quick and easy and the new Fast Fuse adhesive (129026) is great for putting them together.

And for the center, my thank you – I’ve used the Letterpress Winter stamp set (135143) that is part of the Year End Clearance going on right now. Stamped in Pear Pizzazz, Soft Sky and Lost Lagoon to coordinate with the wreath.

Everyone received this cute little goodie for attending – after all who can’t use a little chocolate, right?

Project Life Holiday Cheer Customer Appreication 3d

I really love the Project Life Holiday Cheer stamp set (135188). I originally purchased this for my memory keeping, but it is such a great size that I find I’m using it a ton in my stamping projects! The set it great for all kinds of projects!!

And since I’ve mentioned project life I wanted to share this fun and quick baby gift I made recently.

Project Life Customer Appreciation Day (1)

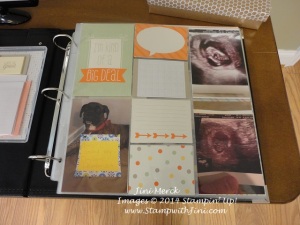
Yes, it’s a project life album for baby’s first year.  (We’ve got several family and friends who have welcomed bundles of joy into their lives the past week!).  I’ve used the Little Moments Project Life Card Collection (135299) and created pages for the first year.  I’ve also filled it with some photos to start off the new parents off on the right foot – All they have to do is slip in the photos and jot down their memories! Sooooo easy!!!

Project Life Customer Appreciation Day (3)

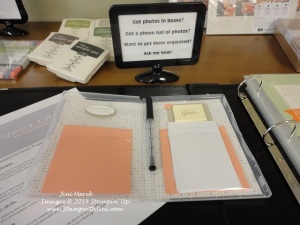
And for the new mom – I’ve made this great little Clear Mount Case (119105) that includes some Project Life Grid Cards (136528) and Journaling Pen (135304), along with some post it notes. When she is on the go, she can document those memories as she snaps photos on her phone.

Project Life Customer Appreciation Day (2)

Then all she has to do is  just slide them right into the book when she is ready – Quick and Easy! I’ve used the Project Life Remember This stamp set (135786) to decorate it and hidden some of the great little sayings under the cards.

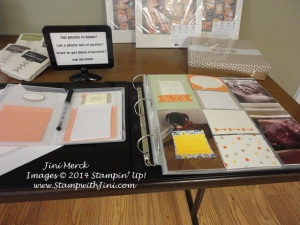
If you’ve got photos in boxes or on your phone that you’d like to organize why not contact me and I can show you how – Get together with family and friends and you can host a party, earn free merchandise and have fun together! And Hostesses will receive one of these special cases! Contact me today to choose a date that works for you.

Well this post is rather long – so I’ll save the rest of our projects for tomorrow. Stop back by then to see what we stamped during the Customer Appreciation Day.

Click here to order your Stampin’ Up! Products online 24/7! (US only)

Hostess code WXV6B23J

Dec Online order Free Tutorial

Place an Online order with me and use my Hostess Code WXV6B23J  and I’ll send you a FREE Tutorial with instructions to create fun projects

Click Here to learn more about using the Hostess Code
Weekly Deals (Special ends Monday, December 29th, 2014 at 11:50 p.m. (MT)

Year- End Closeouts (sale ends January 5th, 2015 or while supplies last)

paper pumpkin box image

Looking for that perfect gift for yourself or a friend, try a Paper Pumpkin Subscription. Add one to your next order, they count towards Hostess Rewards. Subscriptions are the best way to enjoy Paper Pumpkin. Click HERE for more details.

Fun Fall Tiny Treat Box

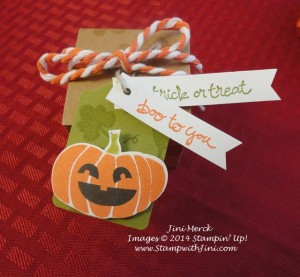
Check out this fun fall tiny treat that I made using the Fall Fest stamp set and the coordinating Fun Fall Framelits that are available as a Bundle (137628).

Fall Fest Tiny Treat Box

Too cute – And just the right size to brighten someone’s day by giving them a little something as a special treat.

How’d I do it? Before I put the box together. I added some interest  by stamping leaves in Versa Mark. To create a collage of leaves, I simply placed all the leaves on one block in random order. Easy peasy. I also stamped a piece of Old Olive card stock at the same time so it was ready for punching the tag.

Next, I stamped my pumpkin in Tangerine Tango and used my Blender Pen to remove the color from the stem and recolored it using the Old Olive Stampin’ Write Marker. (The Blender Pen is a trick that saves a bit of coloring.) After running it through my Big Shot I popped it up on my tag with a Dimensional.

I then Stamp my sentiments from the Good Greetings stamp set in Old Olive and Tangerine Tango on some scrap strips of Whisper White Card Stock that I had laying around and then punched the tails on them using the Hexagon Punch.

I used my handheld circle punch (loooove them!) so I could add a piece of Linen Thread which I tied onto the Whisper White & Tangerine Tango Two Tone Trim.

These Tiny Treat Boxes are designed to go with our 25 Days stamp set so you can make an easy advent calendar for Christmas – but what you can use them for, as you can see,  is really unlimited!

Why not check this and our other packaging options out? You’ll find them  on page 10 in the Holiday Catalog.

Feeling adventurous?

On a personal note. I thought I’d share one of my favorite new recipes from this summer. It is something that I concocted myself (which is a first),  after desperate pleas from my son that he was sick and tired of my tried and true fried squash recipe I’ve been using for years. (You see, we had a bumper crop of yellow squash  and I’d been trying all kinds of new recipes for a couple of weeks when he cracked LOL – Thus the squash overload.)

I was feeling adventurous and came up with this recipe, suprise it seemed to a big hit in the Merck household! And I got no complaints from my son! Enough said, right? So as we are cleaning up our garden this season I thought I would share it with you. I hope you’ll enjoy it too.

Jini’s Baked Summer Squash

2 tbsp. olive oil
½ – 1 tsp. garlic powder
¼ tsp. – ½ tsp. pepper (to taste)
½ – 1 tsp. sea salt
8 c. yellow summer squash

Mix first 4 ingredients well. Add summer squash and mix until evenly coated. Spread out squash on baking sheet.

Bake at 375 degrees for about 20 minutes until tender.
Serve immediately.

It also freezes well. If baked not quite as long before freezing it still has is crisp when reheated after freezing.

Supplies:

Stamp Set: Fall Fest (135194) and Good Greetings (135014/135017)

Inks: Versa Mark (102283), Old Olive (1269853), and Tangerine Tango (126946)

Paper: Old Olive (100702) and Whisper White card stock (100730)

Accessories: Tiny Treat Boxes (135829), Note Tag Punch (135860), White & Tangerine Tango Two Tone Trim (135838), 1/8″ Circle Handheld Punch (134365), Linen Thread (104199), Old Olive Stampin’ Write Marker (100079), Blender Pen (102845), and Hexagon Punch (130919)

Supplies:

Click here to order your Stampin’ Up! Products online 24/7! (US only)

Hostess code HKNSYMNZ

Weekly Deals (Special ends Monday, September 8th, 2014 at 11:50 p.m. (MT)

New Digital Downloads

PAPER PUMPKIN 50% OFF  (offer ends September 10th)

Patriotic Dotty Angles

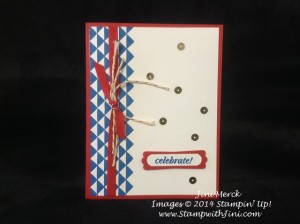
Fourth of July is Friday this week and so I’m thinking Red, White and Blue. How about you? So today’s card has a patriotic feel today.

Dotty Angles Coffee & Cards June 2014 (3)

This card can be easily made into any occasion since I’ve used the sentiment from the And Many More stamp set. And Many More is one of our new sets that contain 23 sentiments that work perfectly with our Word Window Punch.  What a great deal, right? And this one set covers pretty much any occasion you can think of through out the year!

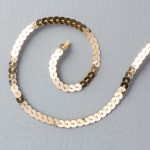
Did you notice the pop of gold on this card? Well it is our Gold Sequin Trim (132983).

Gold Sequin Trim

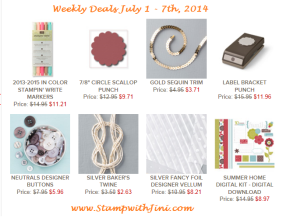
Just pull a few off the string and adhere. Sooo easy to do! And great news the Gold Sequin Trim is part of this week’s  Weekly Deals – so why not check it out along with the other items too?

NEW Weekly Deals start Today!

Weekly Deals July 1 2014

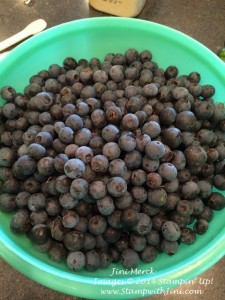
On a personal note – I’ve spent the day yesterday processing goodies from the garden and so I didn’t get to post. I got my first batch of summer squash in the freezer along with some other items I baked using the blueberries we picked.

blueberries

I’ve got three strainers this size and with all the rain we’ve had it has been tough to pick at times. A good problem to have for sure. LOL Unfortunately our blueberries are bursting from all the rain – they just don’t seem to be able to grow as fast as they need to, so they end up splitting which is kind of a bummer.

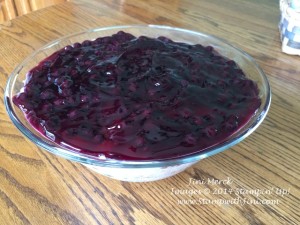
So as a special treat I’ve got another recipe for you Blueberry lovers. This one is a favorite of mine. Light and cool – give it a try and see what you think.  Why you could even put strawberries on the top for a red, white, blue look for the 4th!

Blueberries in the Snow recipe image

When put into a clear bowl – it is rather pretty. I’m sorry to say I had a hard time getting a good picture of that and this one was the best I could do. Hopefully you get the idea.

Blueberries in the Snow

½ c. sugar

½ c. milk

1 pkg. (8oz.) cream cheese, softened

1 ctn. (16 oz.) whipped topping

1 ½ c. fresh blueberries

1 lg. Angel Food Cake, prepared

1 can (21 oz.) Blueberry Pie Filling

Combine sugar, milk and cream cheese in a large bowl. Beat until blended. Fold in whipped topping and fresh blueberries. Crumble Angel Food cake into small pieces and add to cream mixture. Mix well and pour into a large bowl packing mixture down and spreading evenly. Pour blueberry pie filling on top and spread evenly. Cover and refrigerate for at least 3 hours before serving.

If you’d like to see more recipes that I’ve shared in the past? You can find them under the Categories section by scrolling down the right hand column of my blog. Just look for recipes and click.

Enjoy!

Supplies:

Stamp Set: Dotty Angles (133658) and  And Many More (134273/134276)

Inks: Pacific Point (126951)

Paper: Real Red (102482) and Whisper White card stock (100730)

Accessories: Gold Sequin Trim (132983), Gold Baker’s Twine (132975),  Real Red 1/4″ Cotton Ribbon (134563),  Modern Label Punch (119849), and Word Window Punch (119857)

Click here to order your Stampin’ Up! Products online 24/7! (US only)

Hostess code KGM3XHTJ

Click Here to learn more about using the Hostess Code
Weekly Deals (Special ends Monday, July 7th 2014 at 11:50 p.m. (MT)

New Digital Downloads

Flamingo Lingo SWAG Bag

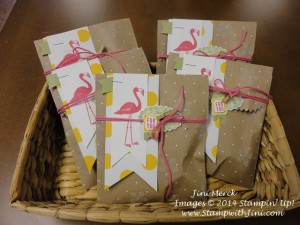
Today’s post wraps up the coverage of my Luau Catalog Launch Party last Saturday and this project is a little “SWAG” bag that I gave to those who attended.  It was just a little somethin’ somethin’ for everyone.

Luau Catalog Launch Party 2014 (1)

I think everyone enjoyed the new 2014-2016 In Color cards for their color rings and stamps that were included.

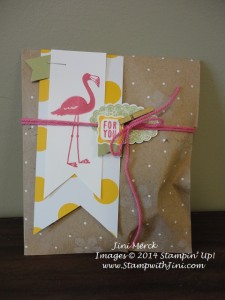
These little SWAG bags were so easy to make since I started with our new Polka Dot Tag a Bag Gift bags found on page 201 of the catalog. I simply stamped the flower image from the Flamingo Lingo stamp set onto the bag using my StazOn White Pad and then decorated.

Isn’t the little flamingo from the set precious? I stamped this little guy in Strawberry Slush so I could use our new yummy Thick Baker’s Twine.

Here is a close up of the little bag.

Luau Catalog Launch Party 2014 (2)

I just love using our new Thick Baker’s Twine that comes in all of the 2013-2015 In Colors!

And here are the last of the pictures of my classroom that I took while it was set up for the Luau Catalog Launch Party.

This first one is of the Make ‘n Take table. Ready for my guests to stamp.

Luau Catalog Launch Party 2014 (20)

Everyone had one of my little Beach Bag Post it Note Holders waiting for them. (You can see more about the Beach Bags HERE).

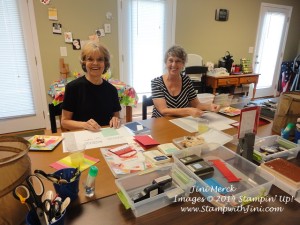
And here are a couple of the girls stamping their projects – we have such a good time together!

Luau Catalog Launch Party 2014 (12)

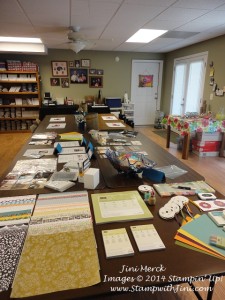
And the classroom itself

Luau Catalog Launch Party 2014 (11)

some close ups of the displays

Luau Catalog Launch Party 2014 (19) Luau Catalog Launch Party 2014 (17)

Project Life

Luau Catalog Launch Party 2014 (16)

My Classes and Club options (click here to see more about my club option)

Luau Catalog Launch Party 2014 (15)

My “Punch Bowl” – everyone could scoop to their hearts content.

Luau Catalog Launch Party 2014 (18)

And last but not least – my Caring with Cards station  where everyone was able to make a card to be donated to the cause of their choice – Hospice birthdays, Ronald McDonald House, Operation Write Home, and Holiday for Heros. My goal this year is 100 cards for each group!

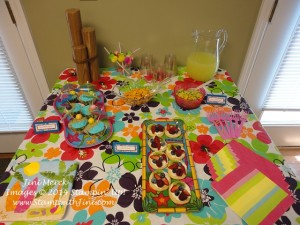
And of course the snack table

Luau Catalog Launch Party 2014 (4)

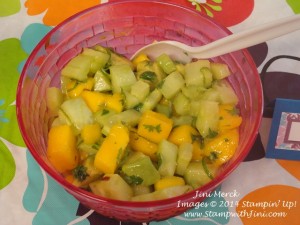
along with a picture of the Tropical Cucumber Salad which seemed to be a hit. It’s also the recipe that I’ll be sharing with you today since several of you asked me for it. It swap super easy to make.

Luau Catalog Launch Party 2014 (5)

Tropical Cucumber Salad

3 tsp. fish sauce

1 tsp. freshly grated lime zest, plus more for garnish

2 tbsp. lime juice

1 tbsp. canola oil

2 tsp. light brown sugar

1 tsp. rice vinegar

¼ tsp. crushed red pepper

1 medium English cucumber, cut into ¾” dice

1 avocado, cut into ¾” dice

1 mango, cut into ¾” dice

¼ c. chopped fresh cilantro

Whisk fish sauce to taste, lime zest, lime juice, oil, brown sugar, vinegar and crushed red pepper in a large bowl until combine. Add cucumber, avocado, mango, and cilantro. Gently toss to coat.

Cover and refrigerate up to one hour. Serve garnished with lime zest, if desired.

Supplies:

Stamp Set: Flamingo Lingo (134303/134306)

Inks: StazOn White Pad and refill (106960), Strawberry Slush (131178), Pear Pizzazz (131180), and Crushed Curry (131173)

Paper: Flowerpot Designer Series Paper (133698), Pear Pizzazz (131201), and Whisper White (100730)

Accessories: Polka Dot Tag a Bag Gift Bags (135503),  Strawberry Slush Thick Baker’s Twine (135637),  Mini Metalic Cothespins (133320), Petite Curly Label Punch (133519), Banner Punch (133519), and stapler

Click here to order your Stampin’ Up! Products online 24/7! (US only)

Hostess code BRXTH4XS
Weekly Deals June 24 2014

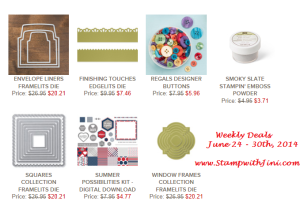
Weekly Deals (Special ends Monday, June 30th 2014 at 11:50 p.m. (MT)

Sea Street & Luau Launch Party

Saturday I held my annual Luau Catalog Launch Party. Everyone had a chance to see the new products, pick up a catalog,  and be treated by me!

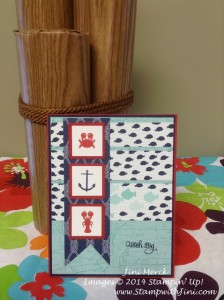
This year everyone was able to make this cute little card using the Sea Street stamp set (133985/133988) and our fun new Designer Series Paper, Maritime (133696).

Sea Street Luau Catalog Launch 2014 Make n Take

I really love this little set, it is great for all kinds of cards like this birthday card, and of course summer themed items, like my Luau Launch Party.  And for anyone who loves nautical items it’s a must have. (Ooops – that’s me!)

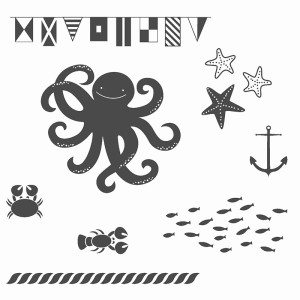
Check out all the great images in the set – don’t you just love this little octopus?

Sea Street

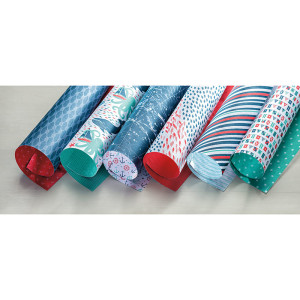
And what’s not to love in this fun coordinating paper?

Maritime DSP

Do you love Designer Series Paper? I know I do and I’m tickled to tell you that starting July 1st Stampin’ Up! will have a special promotion – Buy 3, Get 1 free! Whoo hoo! (I’ll be posting more details about the sale on Tuesday, July, 1st).

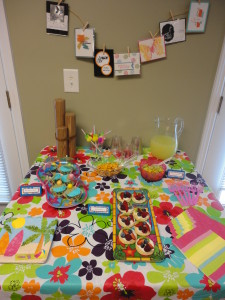
Of course one of the things I love to do is pamper my guest at these events, so I had a little snack table with Luau themed food.

Luau Catalog Launch Party 2014 (3)

Several of you had asked for the recipes on Saturday so I thought I would share them with you over the next few of days along with some of the other projects from the Luau.

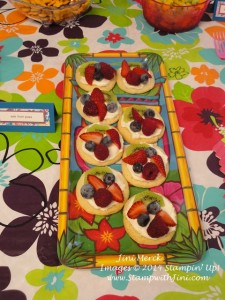
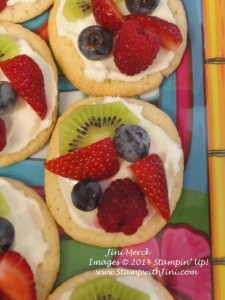
This first recipe is for these yummy little Mini Fruit Pizzas that I made using the fresh Blueberries from my yard.
Luau Catalog Launch Party 2014 (7)

They were a huge hit with my guys too – And since they were so quick and easy to make we’ll be adding them to our summer favorites! You can stop hovering now boys – LOL (You’ll be happy to know they had their own little pizza party after dinner Saturday night!)

Mini Fruit Pizzas

1 pkg. (18 oz./20 count) Refrigerated Sugar  Cookies

1 pkg. (8 oz.) Cream Cheese, softened

2 tbsp. frozen Limeade concentrate, thawed

½ c. powdered sugar

10 fresh strawberries, quartered

1 kiwi fruit, peeled, cut in half lengthwise, cut into 10 slices

½ c. fresh blueberries

½ c. fresh raspberries or blackberries

Bake cookies as directed on package. Cool 10 minutes or until completely cooled.

Meanwhile, in medium bowl, combine cream cheese, limeade concentrate and powdered sugar; beat until smooth.

Spread each cooled cookie with 1 tablespoon cream cheese mixture. Arrange fruit on top of each cookie.

Serve immediately, or cover and refrigerate up to 2 hours.

Makes 20

Luau Catalog Launch Party 2014 (6)

Stop by tomorrow when I’ll be sharing a new video tutorial with you for my cute little Beach Bag Post it Note Holder that everyone who attended received.

Supplies:

Stamp Set: Sea Street (133985/133988), World Map Background (130342/130345), and A Dozen Thoughts (131056/131059)

Inks: Real Red (126949), Night of Navy (126970), and Pool Party (126982)

Paper: Maritime Designer Series Paper (133696), Night of Navy (101889), Real Red (102482),Pool Party card (122924) and Whisper White stock (100730)

Accessories: 1″ Square Punch (124094) and Postage Stamp Punch (122344)


Click here to order your Stampin’ Up! Products online 24/7! (US only)

Hostess code BRXTH4XS

Weekly Deals (Special ends Monday, June 30th 2014 at 11:50 p.m. (MT)