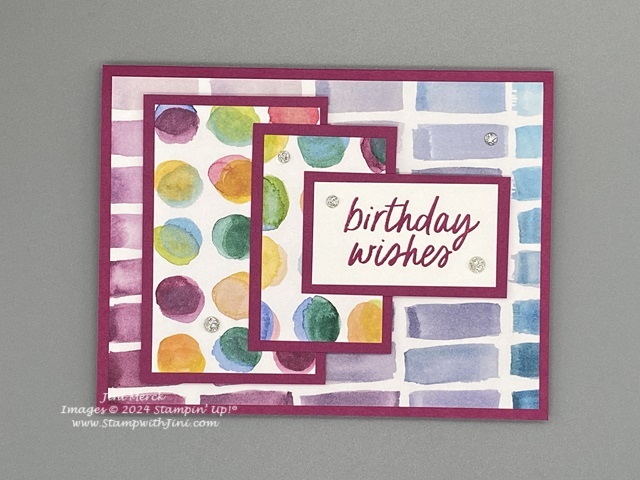
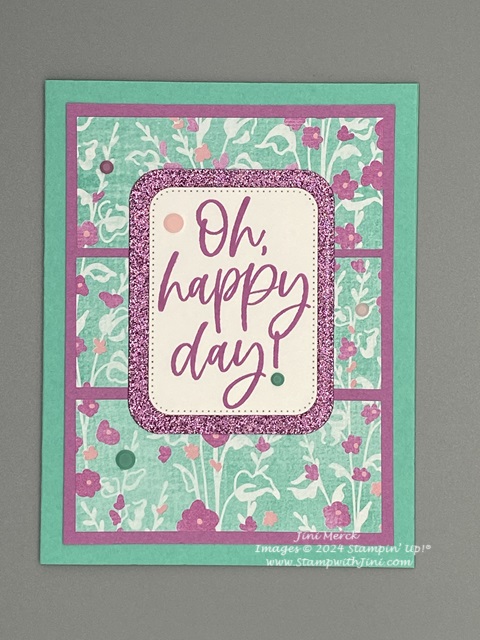
Today’s card uses the fun In Color Petunia Pop and our elegant Thoughtful Designs Specialty Paper along with a quick and simple technique.
After all this time of year we need thank you cards for all the special events happening. I’ve created some of these for my daughter who recently got married outdoors at a waterfall so I think they went well with the outdoor feel of the wedding.
Here is a quick video tutorial for you along with the PDF tutorial that has the link and measurements along with the full supply list.
Shop at my Online Store and place an order for $60 or more in product receive a FREE Gift from me; my Unbounded Beauty Card Class PDF and a supply kit to create the projects while supplies last.
and simple stamping along with our 2024-2026 In Colors to create a lovely spring thank you card.
I just love the images in this set as they already have built in shading and texture so they are great for simple stamping or even water coloring or blends. Check out today’s card
This card uses one of my Card Sketches that you can add to your collection of supplies. Simply print off the PDF and add it to a binder, create the card sketch and and it to your crate HERE or ring. The choice is yours
Shop at my Online Store and use March’s Host Code XF3VWS6Z with a product order of $60 or more and receive a FREE Gift from me; my Mixed Media Florals Fun Fold Card Class PDF and a supply kit to create the projects while supplies last. If you’re placing an order of $150 or more; no worries. Do not use my host code so you can get your benefits, you’ll still get my FREE gift
Bright and cheerful for a birthday, right? I’ve created a quick video tutorial for you so you can make one too.
And of course a PDF tutorial with the complete supply list and measurements to get you started. Did you know I even include the YouTube link for you? You’ll have everything in one place when you get ready to craft.
If you love this set of dies you’ll want to be sure to stop by my Online Store and check it out since it is on the Last Chance List it is while supplies last.
Enjoy! and don’t forget to stop by tomorrow for another fun tutorial using the Spotlight on Nature stamp set.
Shop at my Online Store and use April’s Host Code XF3VWS6Z with a product order of $60 or more and receive a FREE Gift from me; my Unbounded Beauty Card Class PDF and a supply kit to create the projects while supplies last. If you’re placing an order of $150 or more; no worries. Do not use my host code so you can get your benefits, you’ll still get my FREE gift
I’ve created a quick tutorial for you so you can learn how to create this card and use this fun technique along with a PDF tutorial too.
Thoughtful Wishes Thank You Card Tutorial – Multi Color Technique PDF
And if you have been following along with my Card Sketches and you’d like to create the Card Sketch I’ve used for the card to add to your creativity tools. Here is my Card Sketch #10
And the PDF with the measurements you can find others simply by clicking on Card Sketches in the category links
Shop at my Online Store and use April’s Host Code XF3VWS6Z with a product order of $60 or more and receive a FREE Gift from me; my Unbounded Beauty Card Class PDF and a supply kit to create the projects while supplies last. If you’re placing an order of $150 or more; no worries. Do not use my host code so you can get your benefits, you’ll still get my FREE gift
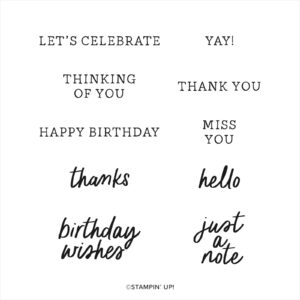
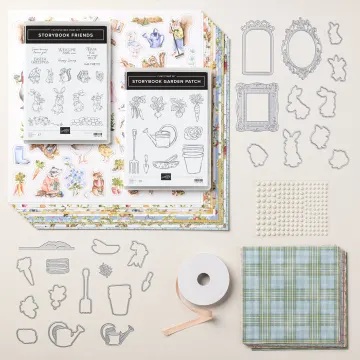
a great starter set since it has a variety of all occasion sentiments we need often through the year.
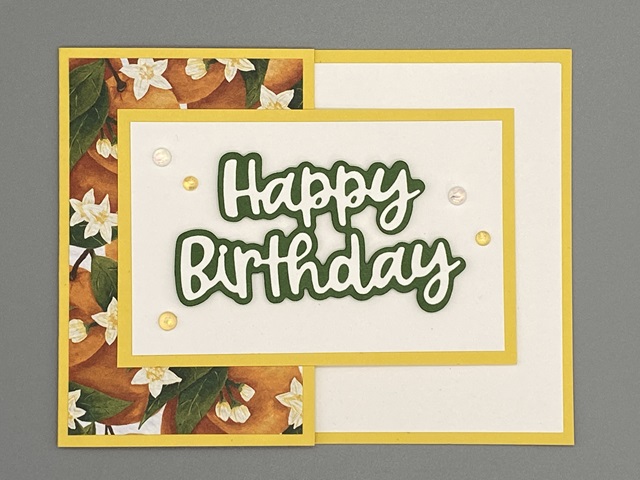
The card uses the bold Full of Life Designer Series Paper (163357) with its fun patterns and a card sketch too. I’ll share that information with you later for now here is the card.
Like it and what to see my tutorial? Check out the video along with my PDF sharing the full supply list and measurements.
And now for the Card Sketch, if you’ve been stamping with me for a while you’ll have seen me share these sketches before and the way I store them. If not you can learn about the crate I have on my desk here.
Check out the category on the side of my blog to see more of my sketches and PDFs to make your own. Whether you print them and keep them in a binder or on a ring or in this fun little crate. You’ll find inspiration when you create.
Shop at my Online Store and use March’s Host Code XF3VWS6Z with a product order of $60 or more and receive a FREE Gift from me; my Mixed Media Florals Fun Fold Card Class PDF and a supply kit to create the projects while supplies last. If you’re placing an order of $150 or more; no worries. Do not use my host code so you can get your benefits, you’ll still get my FREE gift
Today I’ll be sharing the first of my tutorials for the week. As I get ready for my daughter’s wedding I thought it would be fun to share a week of tutorials with you. So today’s card uses the Kindest Expressions stamp set (161415)
This set is one of my favorite sentiment sets since it has bold sentiments that make great focal points when teamed up with your favorite products like the Unbound Beauty Designer Series Paper (163372) that I used here.
This card is perfect for spring with its Petunia Pop and Summer Splash floral pattern and a bit of glitter.
Want to learn how I made this card? I’ve got a video for you and a PDF with measurements, supply list and more. Why not check it out?
Like the card and want to make one for yourself? Go ahead and print the PDF. You’ll have everything you need when you want to create including the video link.
If you haven’t seen these before they are a great way to inspire a card design and I’ve got some tools to help you create this tool for your use. Click on the Card Sketch Category in the side bar to see previous card sketches I’ve shared with you.
Enjoy. And then stop back by tomorrow for another fun tutorial!
Shop at my Online Store and use March’s Host Code XF3VWS6Z with a product order of $60 or more and receive a FREE Gift from me; my Mixed Media Florals Fun Fold Card Class PDF and a supply kit to create the projects while supplies last. If you’re placing an order of $150 or more; no worries. Do not use my host code so you can get your benefits, you’ll still get my FREE gift
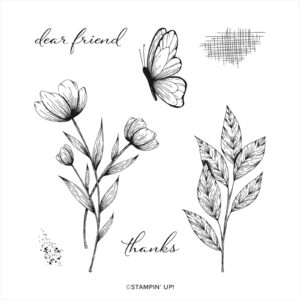
Our Translucent Florals Bundle (162253) creates lovely images easily with just one stamp that contains all the wonderful detail to give you this fun translucent look.
For today’s card I’ve combined the Bundle with the Spotlight on Nature Dies (163580) a great set of circles with it’s different details around each of the circle dies. Check out today’s card using our fresh colors Peach Pie and Azure Afternoon.
So what do you think? like the color combo of Peach Pie and Azure Afternoon? I think it’s a great one for spring, how about you?
If you’d like to make this card I’ve got a PDF tutorial and video tutorial for you today.
Shop at my Online Store and use March’s Host Code XF3VWS6Z with a product order of $60 or more and receive a FREE Gift from me; my Mixed Media Florals Fun Fold Card Class PDF and a supply kit to create the projects while supplies last. If you’re placing an order of $150 or more; no worries. Do not use my host code so you can get your benefits, you’ll still get my FREE gift
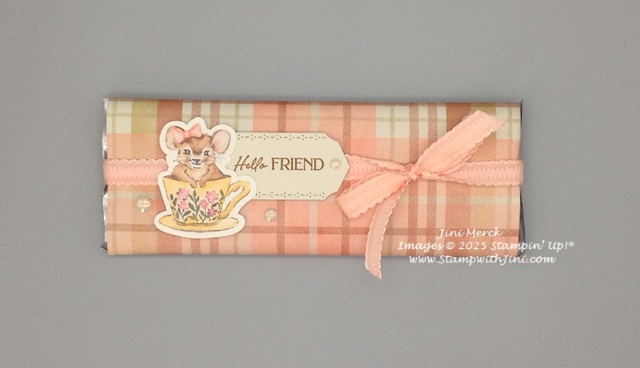
For today I’ve used the cute little mouse in a tea cup since my friend is a tea lover. After all who doesn’t love a little tea with something sweet? But with all the choices and the fact you can cut out the Designer Series Paper too with the coordinating dies, this pack of paper is sure to be used up quickly so you’ll want to be sure to get an extra pack!
Check out this quick little project.
Cute? I think it will bring a smile to my friends face how about you?
I’ve whipped up a quick little video tutorial and PDF for you too.
My PDF has the YouTube link in addition to the supply list, measurements and instructions. So go ahead print it out so you’re all set when you get ready to create!
Shop at my Online Store and use March’s Host Code XF3VWS6Z with a product order of $60 or more and receive a FREE Gift from me; my Mixed Media Florals Fun Fold Card Class PDF and a supply kit to create the projects while supplies last. If you’re placing an order of $150 or more; no worries. Do not use my host code so you can get your benefits, you’ll still get my FREE gift
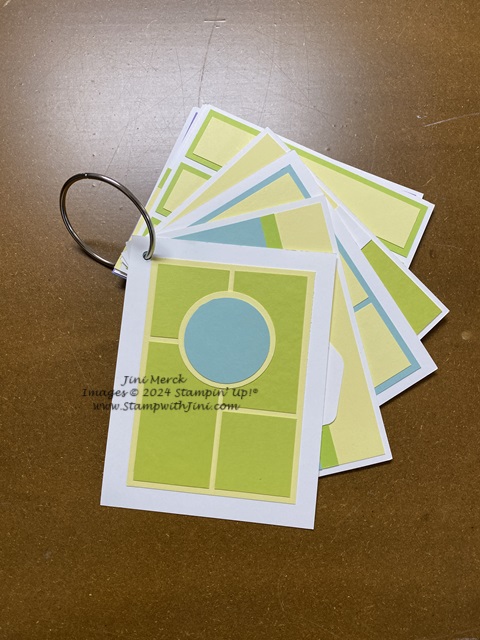
I’ve been sharing my card sketches with you over the past months and today I’m going to share one of the ways I store them on my desk with this cute little crate I decorated.
I’ve used a inexpensive wooden crate that I found at my local dollar store to decorate and have given you a PDF that even has the labels that you can die cut in both black and Blackberry Bliss so you can choose how you decorate your little crate. Simply print the PDF you want on Basic White Card stock and go!
These card sketches are great for inspiration and having them handy on my desk makes it easy to get started!
I’ve punched a hole on them and put them on a ring to keep them together so they sit up nicely in my wooden crate.
Want to see how I decorated this crate? I’ve got a PDF and video tutorial for you so you can make them too!
If you haven’t seen my past sketches, you can start by checking out my Darling Dinos You’re the Best Card & video tutorial from Wednesday this week or click on Sketches in my categories to see them. Then stay tuned as I’ll be sharing more with you in time.
I hope you’ll enjoy this little 3d project and crate a crate of your own. This fun little project can hold all kinds of things!
Enjoy! And don’t forget to stop back by next week when I’ll be sharing more fun projects with you. And of course if you would like to see my YouTube videos why not click on my YouTube channel and subscribe today?
Shop at my Online Store and use March’s Host Code XF3VWS6Z with a product order of $60 or more and receive a FREE Gift from me; my Mixed Media Florals Fun Fold Card Class PDF and a supply kit to create the projects while supplies last. If you’re placing an order of $150 or more; no worries. Do not use my host code so you can get your benefits, you’ll still get my FREE gift
Sign up HERE for my FREE Newsletter and Class Schedule and receive my FREE 2024-2025 In Color Spotlight on Nature Card Class OR Get my Blog Posts delivered right to your inbox HERE
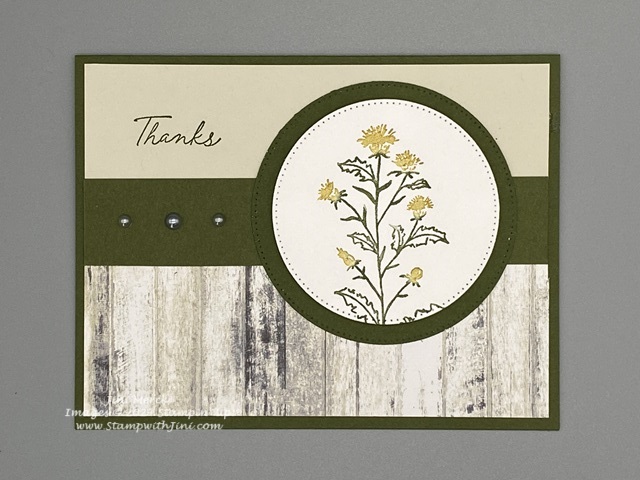
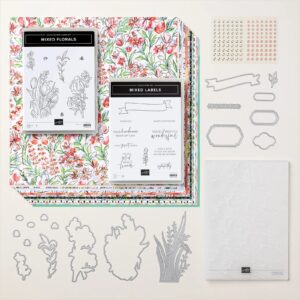
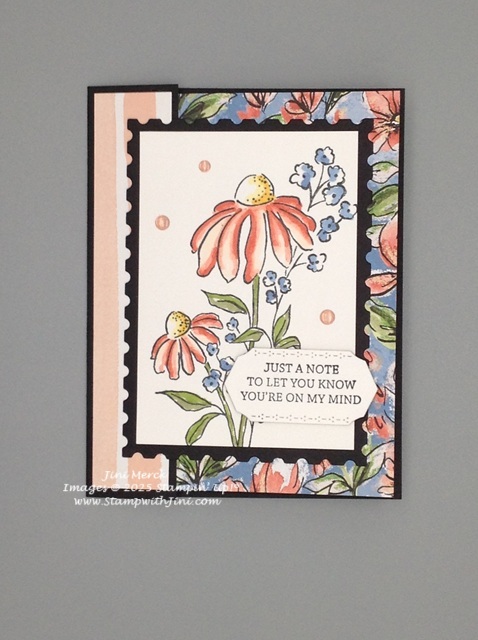
I’ve used my Stampin’ Blends to create a bold watercolor look that mimics the Designer Series Paper for the focal point. And don’t you just love the little stitched detail edging on the die cut sentiment piece that I created using the Mixed Labels Dies (Online Exclusive 164652)?
Check out this quick video I’ve made for you showing you how I created this card.
I’m also including a PDF with the complete supply list, step by step direction and the YouTube link so you have everything in one place when you get ready to create!
Did you know that when you take a class with me in person or online, you’ll have YouTube videos and supply lists like this to create with when you want to make another project at home? Why not join me for a class and learn new things and make new friends too?
Mean while enjoy! And stop back by tomorrow for another tutorial I’ll be sharing with you.
Shop at my Online Store and use March’s Host Code XF3VWS6Z with a product order of $60 or more and receive a FREE Gift from me; my Mixed Media Florals Fun Fold Card Class PDF and a supply kit to create the projects while supplies last. If you’re placing an order of $150 or more; no worries. Do not use my host code so you can get your benefits, you’ll still get my FREE gift