Healing Hugs Triple Stamping Tutorial

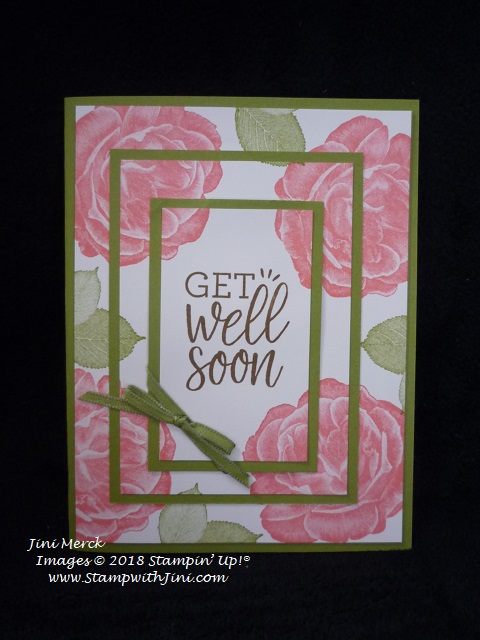
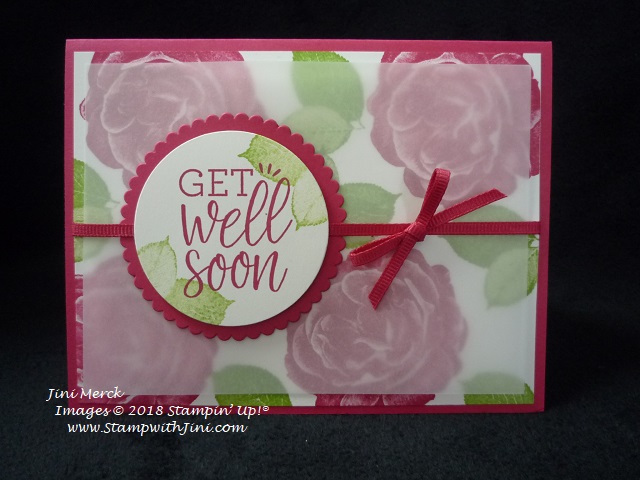
Today’s card uses the Healing Hugs stamp set that I shared with you in yesterday’s post. I really love this set with its realistic images – it stamps beautifully and makes get well cards sooo simple to create.

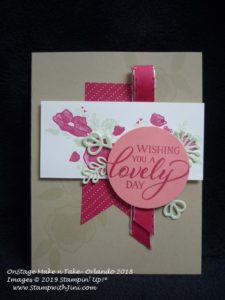
Today’s card is another card I designed for Sherrie’s Shoe box Swap at OnStage Live in Orlando. It uses a simple technique that packs a wow effect. And everyone will wonder how you did it!

Check out this quick video showing you how I made this card.

HEALING HUGS TRIPLE STAMPING VIDEO TUTORIAL

And of course what tutorial would be complete with out a PDF for you too?

HEALING HUGS TRIPLE STAMPING CARD TUTORIAL (printable) PDF

Wheew! It’s a crazy week and I’m learning so much – I can’t wait to share it with you!

Enjoy!

Supplies: 

Stamp Set: Healing Hugs (146527/146530)

Inks: Flirty Flamingo (147052), Old Olive (147090), and Soft Suede Classic Ink (147115)

Paper: Old Olive (146970) and Whisper White Card stock (100730)

Accessories: Old Olive 1/8″ Sheer Ribbon (144171)

Click here to order your Stampin’ Up! Products online 24/7! (US only)

Shop at my Online Store and use Host Code SGA3ZW9U


Click Here to learn more about using the Hostess Code If you order Online make sure your profile information is up to date and you’ve allowed me to contact you

Healing Hugs Get Well Card

Count down to OnStage Live I’m so excited – I’m getting ready to celebrate 30 years of Stampin’ Up! with my fellow demonstrators. I’ll have all kinds of wonderful project and goodies to share with you when I return!!! Meanwhile I’ve got some great posts lined up already sharing some of the projects I’ve made for this event that I hope you’ll enjoy.

Later today I’ll participating in Sherrie’s Shoe box Swap, an event that is all kinds of fun. I’m looking forward to seeing and stamping with some old friends while I’m there too. Any so today I thought I’d show you the card that I’ve designed as my project.

I really love the way this card turned out and think it will brighten the day of the recipient. I’m hoping everyone at the shoe box will feel the same way. How about you, what do you think?

I’ve got a quick video tutorial for you and a PDF also, so why not check them both out?

Healing Hugs Get Well Card Video Tutorial

Here is the PDF with all the measurements so you can make some too!

Healing Hugs Get Well Card (printable) PDF

Enjoy!

Stop back by tomorrow when I’ll be sharing another card that I made with this set .

Supplies: 

Stamp Set: Healing Hugs (146527/146530)

Inks: Lovely Lipstick (147140) and Granny Apple Green Classic Ink (147095)

Paper: Vellum  (101856), Lovely Lipstick (146970), and Whisper White Card stock (100730)

Accessories: Lovely Lipstick 1/8″ Grosgrain Ribbon (146952), Layering Circles Framelits Dies (141705)

Click here to order your Stampin’ Up! Products online 24/7! (US only)

Shop at my Online Store and use Host Code SGA3ZW9U


Click Here to learn more about using the Hostess Code If you order Online make sure your profile information is up to date and you’ve allowed me to contact you

Falling for Leaves Thank You Card Tutorial

It’s Monday and I’ve got a week filled with tutorials for you! Today’s card is a Thank You card that I make to send out to those of you who place an order – and today’s card is the one I designed for November’s orders using a  technique with our Embossing Paste.

I just fell in love with the Joyous Noel Glimmer Paper when I saw it so I thought I’d use the beautiful Merry Merlot Glimmer Paper for this month’s project. I teamed it up with some of our Shimmer Paste and our brick mask.

But since I wanted to add a bit more color I tinted the Shimmer Paste Crumb Cake. Check out this quick Video Tutorial showing you just how simple that is to do! And that means we have unlimited colors to choose from. Who doesn’t like that?

How to Create Tinted Shimmer Paste Video Tutorial

Want to see how I made this card? I’ve whipped up a quick video for you

Falling for Leaves Thank You Card Video Tutorial

And of course, for those of us who like documents here is a PDF too.

Falling For Leaves November Thank You Card (printable) PDF

Enjoy!

Here is an update about the Holiday Catalog:

Stampin’ Up! made an announcement on Saturday, November 3rd stating the following.

Since these products cannot be sent from the manufacturer in time for the holidays, these item numbers will not be reactivated.

147816: Joyous Noel Specialty Designer Series Paper
147890: Festive Farmhouse Elements
147811: Santa’s Workshop Enamel Elements

We apologize for any inconvenience this may cause you. In order to provide you with another holiday-themed option, we’ve decided to make our promotional Dashing Along Designer Series Paper (item 149903) available for sale at ($11.00). This beautiful, 12″ x 12″ traditional Christmas paper has a festive, eclectic feel and is perfect for layering. Coordinating colors are Cherry Cobbler, Garden Green, and Whisper White.

Though we don’t yet have a fulfillment date, all backorders for Joyous Noel Specialty Designer Series Paper, Festive Farmhouse Elements, and Santa’s Workshop Enamel Elements will be filled as soon as possible.


And here is a quick reminder – There are just a few days left to get your November Pamper Pumpkin Kit! If this month’s kit is as popular as last years kit you’ll definitely want one!

Supplies: 

Stamp Set: Falling for Leaves (*147680)

Inks: Merry Merlot Classic Ink (147112) and Crumb Cake Classic Ink Refill (121209)

Paper: Joyous Noel Glimmer Paper (147817), Old Olive (100531), Early Espresso (119686), Merry Merlot (146979) and Very Vanilla Card stock (101650)

Accessories: Detailed Leaves Thinlits Dies (*147921), Triple Banner Punch (138292), Pattern Party Decorative Masks (144103), Palette Knives (142808), Shimmery White Embossing Paste (145645), and  Silicone Craft Sheet (127853)

*Falling for leaves Bundle (147921)


Click here to order your Stampin’ Up! Products online 24/7! (US only)

Shop at my Online Store and use Host Code SGA3ZW9U


Click Here to learn more about using the Hostess Code If you order Online make sure your profile information is up to date and you’ve allowed me to contact you

#imbringingbirthdaysback with the Rooted in Nature Stamp Set

Today’s card is the one I designed for my November Birthday cards that I’ll be sending out today. This birthday card uses a fun technique that is one of my favorites to create fall colored leaves. It is called the Baby Wipe Technique.

This card layout is also one of my favorites since it is clean and simple but still packs a wow. And with the Baby Wipe Technique everyone will wonder how you created leaves with fall color too.

I’ve whipped up a quick tutorial so you can recreate the Baby Wipe Technique for your projects!

Baby Wipe Technique Video Tutorial

And if you want to make some of these cards here is my video showing you how the card is put together too.

Rooted in Nature Card Video Tutorial

Prefer a document? Here is a PDF containing all the measurements and step by step directions for putting your card together.

Rooted in Nature Birthday Card Tutorial (printable) PDF

I’ve got lots of tutorials coming up for you next week so make sure to stop on by and check them out.

Enjoy!

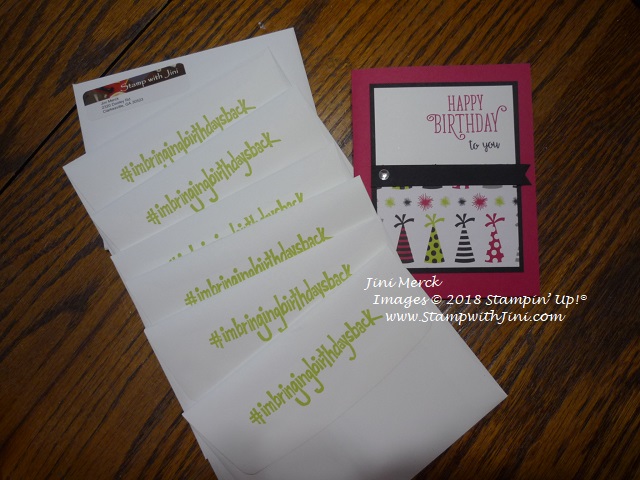
#imbringingbirthdaysback in 2019

And if you would like a birthday card too – I’m compiling my list now for 2019! So why not email me your name, address, and date of birth? No need for the year since we’re all 29!!!

Supplies: 

Stamp Set: Rooted in Nature (*146479/146482)

Inks: Cherry Cobbler Classic Ink & Reinker (147083/119788), Cajun Craze (119790) and Pumpkin Pie Classic Reinkers (105229)

Paper: Pumpkin Pie (105117), Cherry Cobbler (119685)  and Very Vanilla Card stock (101650)

Accessories: Clear Rhinestone Basic Jewels (144220)

Click here to order your Stampin’ Up! Products online 24/7! (US only)

Shop at my Online Store and use Host Code SGA3ZW9U


Click Here to learn more about using the Hostess Code If you order Online make sure your profile information is up to date and you’ve allowed me to contact you

Pleasant Pheasants

Have you seen the Pleasant Pheasants stamp set in the holiday catalog? My eye was immediately drawn to the beautiful pheasants and other fall images. Perfect to color or use with techniques like this card.

How was this technique done? You’ll need a large Clear Block, some Stampin’ Write Markers, and a Stampin’ Spritzer filled with water.

Scribble the color onto the Clear Block with the Stampin’ Write Markers, this card uses Soft Suede, Cajun Craze, and Crushed curry. Then spritz with the water and stamp onto the paper. You can leave the block in place for a few seconds to help the paper absorb the color. Then all you have to do is dry and use as desired. Yep, it’s that easy!

And did you know that Stampin’ Up! has given us an qucik and easy way to create? There is a special You Can Make It Bundle option (150097) which gives you what you need to get started, why not check it out HERE.

I’ve given you a complete supply list below. Why not try this technique yourself? It’s super easy and a lot of fun.

Supplies: 

Stamp Set: Pleasant Pheasants (147687/147684)

Inks: Cajun Craze  (147085) and Early Espresso Classic Ink (147114)

Paper: Cajun Craze (119684), Soft Suede (115318) and  Whisper White Card stock (100730)

Accessories: Soft Suede Dark Stampin’ Blends (146875), Stampin’ Write Markers, Corrugated Dynamic Embossing Folder (148026), 3/16″ Braided Linen Trim (147808), Pearl Basic Jewels (144219), Stampin’ Spritzer (126185), Banner Triple Punch (138292)

Click here to order your Stampin’ Up! Products online 24/7! (US only)

Shop at my Online Store and use Host Code W2NX46E9


Click Here to learn more about using the Hostess Code If you order Online make sure your profile information is up to date and you’ve allowed me to contact you

Painted Harvest Thank You Cards

Each month I stamp a special Thank You card for everyone who places an order with me and so today I thought I’d share the one I made for October.

This set is an oldie but goodie and I love the ease of working with these images. The set itself is a 2 Step set which means it gives you lots of options for color combinations. And this set is a bit special, since when you line of the mark that is shown to you on the sheet you get this beautiful image, turn it a bit and you’ll get a fuller flower. So much fun to play with and try different combinations!

The layout for this card was inspired by our Demonstrator Stampin’ Success Magazine that we get each quarter with tons of ideas and tips. I loved the color combination of the Grapefruit Grove and Petal Pink.

I’ve typed up a quick tutorial for you so you can make some too.

Painted Harvest Thank You Card PDF

If you have had problems getting a good image before with our larger stamps – here is a quick tip for you that I hope you’ll find helpful.

How to Get a Good Image with the Buffalo Check Stamp Video Tutorial

Enjoy!


Supplies: 

Stamp Set: Painted Harvest (144783) and Buffalo Check Background (147797/147794)

Inks: Soft Sea Foam (147102), So Saffron (147109), Petal Pink (147108), Grapefruit Grove (147142), Soft Suede (147115), and Pear Pizzazz Classic Ink (147104)

Paper: Whisper White Thick Card stock (140272) and Whisper White Card stock (100730)

Accessories: Whisper White Baker’s Twine (124262), Iridescent Sequin Assortment (144212), Take Your Pick Tool (144107) and Triple Banner Punch (138292)


Click here to order your Stampin’ Up! Products online 24/7! (US only)

Shop at my Online Store and use Host Code W2NX46E9


Click Here to learn more about using the Hostess Code If you order Online make sure your profile information is up to date and you’ve allowed me to contact you


Stampin’ Blends Holder

I’m loving my Stampin’ Blends and as my collection has grown I’ve needed to find a better way to hold them. And since I’m a very visual person I wanted to be able to see the colors easily too, rather than them laying in my drawer. Here is what I came up with after checking out my options.

Want to see how I made it? You’ll need just a couple of things: a package of our Acetate Card Boxes, Tear & Tape,  tag board (such as Designer Series Paper backing), and 12×12 Designer Series Paper of your choice

I will say I have a couple of things I would do differently. I used the white tag board from our Designer Series Paper. I found this was not stiff enough and would use our Glimmer Paper or Specialty Designer Series Paper backing the next time to give it more support. I would also add card stock strips to each layer so that see the color and so I know where to place my markers when I’m finished. (Since each shelf holds 3 combo sets I’d simply cut the 3 colors for each shelf and add them to the top of the heavy tag board to make them pretty!)

(I’ve given you the measurements I used for this project. Just know if you use the thicker tag board the measurements will change a bit so you’ll want to modify the measurements so that they work for you.)

Or if you make it like mine you could lay it on it’s side so the Blends stacked on each other which would help the sagging since the weight would be on the small edge of the Acetate Card Boxes.

Here is how I made mine:

  1. I cut the one flap end off of each box. I measured the box and cut my board backing. (4 1/2″ x 5 3/4″)

2. I repeated this for the number of boxes I wanted. I did the complete package so I had a bit of room to grow.

3. I added Tear & Tape to the tag board backing and then adhered them to each box.

4. I then assembled the boxes

5. Added Tear and Tape to the back side of the tag board backing and stacked them together

At this point I measured the tower of boxes.

5. Cut the tag board sides, and top and added more Tear and Tape. (7″ x 5 3/4″ for sides and 7″ x 4 1/2″ for back)

6. Cut another piece for the bottom and added it with Tear & Tape

So that now my tower looked like this

7.  I took some clear packing tape and taped the seams together on all the sides. This gave me some stability and finished the edges so they were clean.

8. I started to decorate my tower. (I chose some retired Island Indigo Designer Series Paper since it matches my crafting space and all of my storage items are that color at this point.)

9. I measured the back of the box with enough to wrap around it a bit. Adhered it to the back and sides and then the bottom and top of the tower. Trimmed the corners. Added some more Tear & Tape to the side flaps. ( 12″ x 6 1/4″)

10. And adhered things down.

11. Now that the back was done I could move on to the sides – Because I wanted the fewest seams to show I measured two side panels that would have a bit of over hang and wrap the side and top/bottom completely. (5 3/4″ x 12″ scored 1/2″ on one end)

12. So I added some tear and tape to the top section and started to wrap around my tower

scoring with my fingers as I went.

13. Then added a second piece. Adhering again only on the small flap that would be the bottom of my box.

At this point I could wrap the second piece around to make sure things lined up the way I wanted them too. Making sure that the seams were flat and the edges lined up.

14. Now I added more Tear and Tape along the edges where I wanted it and Multipurpose Liquid Glue on the center areas. Then I carefully adhered each side down starting the the bottom (since I wanted the top seam to look the best.)

15. Then I repeated the process for the top piece – added more adhesive  and began wrapping it.


Once everything was the way I wanted I wrapped a ribbon around the tower as a handle so that I could easily lift it to move the tower.

That’s it. I love the fact that this tower can be customized the way you want it – make it as tall or short as you’d like. Even make two 5 box towers and attach them to each other! The options are unlimited.

And a quick tip for you: Number your Stampin’ Blends – I’ve put a number on each cap with my Sharpie so that I can quickly see which ones go together. So for instance my Light & Dark Mango Melody has the number 26 on them. Mine happen to be in the order I got them – but you can number them any way you would like.


Supplies: 

Accessories: Acetate Card Boxes (1446258), Tear & Tape (138995), and  Multipurpose Liquid Glue (110755)


Click here to order your Stampin’ Up! Products online 24/7! (US only)

Shop at my Online Store and use Host Code W2NX46E9

#imbringingbirthdaysback with Falling for Leaves

Today’s card is one I made to send out for my October birthdays – the set just seemed to be a perfect choice with this beautiful maple leaf.

This stamp set as wonderful on its own, but also has a coordinating die set, Detailed Leaves Thinlits Dies which gives you even more options.

I’ve made a quick tutorial for you.

Falling for Leaves October Birthday PDF

If you’d like a birthday card from me too, why not email me your name, address and birthday and I’ll be happy to mail one to you!

Enjoy!

Supplies: 

Stamp Set: Falling for Leaves (147680) and Better Together (141733/141736)

Inks: Cajun Craze Classic Ink (147085) and Blackberry Bliss Classic Ink (147092)

Paper: Crumb Cake Card Stock (120953), Cajun Craze (119684), Blackberry Bliss (133675) and Whisper White Card stock (100730)

Accessories: Blender Pens (102845)

*Falling for Leaves Bundle (147921)

Click here to order your Stampin’ Up! Products online 24/7! (US only)

Shop at my Online Store and use Host Code W2NX46E9


Click Here to learn more about using the Hostess Code If you order Online make sure your profile information is up to date and you’ve allowed me to contact you

Trick or Tweet Folding Box

I love these little folding boxes that I shared with you the other day – so this time I’ve created one using the Trick or Tweet stamp set. After all we need to scare up some chocolate, right? And I couldn’t resist this little guy – he just makes me smile.

When you open up the lid and you’ll get a Halloween greeting and

Chocolate of course, (although you could put all kinds of things inside since it’s a pretty roomy box  if your guys don’t love chocolate.) I found these Russel Stover Carmel Brownie pumpkins at my local Ingles and couldn’t resist pickup up a few as gifts family.

(Sorry I think my photos are a bit off, it’s another rainy day here in Georgia which doesn’t my photo I hoping it’s just my screen.)

I’ve created a PDF tutorial with a complete supply list for you and of course, you can see the video on how to create this Folding Box HERE.

Trick or Tweet Folding Box Tutorial PDF

With all this rain it’s a great time to get some crafting in! Or at least that is what I’m telling my husband today. LOL!

Enjoy!


Supplies: 

Stamp Set: Trick or Tweets (147725/147722)

Inks: Memento Tuxedo Black Ink Pad (132708)

Paper: Toil & Trouble Designer Series Paper (147531), Granny Apple Green (146990),  Gorgeous Grape (146987), and Whisper White Card stock (100730)

Accessories: Basic Brads (146930),  Layering Circles Framelits Dies (141705), Simply Scored Scoring Tool (122334), and Assorted Stampin’ Blends


Click here to order your Stampin’ Up! Products online 24/7! (US only)

Shop at my Online Store and use Host Code FZ3P6HGN


Click Here to learn more about using the Hostess Code If you order Online make sure your profile information is up to date and you’ve allowed me to contact you

Sign up HERE for my FREE Newsletter or Get my Blog Posts delivered right to your inbox HERE

How Do You Get a 2018 Holiday Catalog?

Don’t have a Demonstrator? Email me at StampwithJini@gmail.com include your name, address, and phone number and I’ll be happy to mail you one.

Trick or Tweet Treat Box

I love to make little treat items for family and friends and so when I saw the Trick or Tweets stamp set in the Holiday Catalog I knew it would be perfect for this year’s Halloween treats.

Check out this cute little box I made using the set

My fellow stamper, Pam gave this cute little box idea last spring and so I wanted to give it a try myself. Turns out these little boxes are sooooo easy to make, that they are kind of addictive once you get going.

Or at least I couldn’t stop – LOL!  The images and color combinations were just a lot of fun to play with once I got coloring with my Stampin’ Blends.

I thought you might like to try some too for your treats so I’ve whipped up a quick video tutorial.

Trick or Tweets Treat Boxes Video Tutorial –

And of course I’ve included a complete supply list on my PDF tutorial for you.

Why not leave me a comment and let me know which combination is your favorite?

Trick or Tweet Treat Box Tutorial PDF

And why not stop back by tomorrow when I’ll be sharing another fun little treat box with you?

Enjoy!


Supplies: 

Stamp Set: Trick or Tweets (147725/147722)

Inks: Memento Tuxedo Black Ink Pad (132708)

Paper: Pumpkin Pie (105117), Gorgeous Grape (146987), and Whisper White Card stock (100730)

Accessories: Black 3/8″ Glittered Organdy Ribbon (147897), Scallop Tag Topper Punch (133324), Layering Circles Framelits Dies (141705), Simply Scored Scoring Tool (122334), and Assorted Stampin’ Blends

Click here to order your Stampin’ Up! Products online 24/7! (US only)

Shop at my Online Store and use Host Code FZ3P6HGN


Click Here to learn more about using the Hostess Code If you order Online make sure your profile information is up to date and you’ve allowed me to contact you

Live local and want to stamp with me? Why not check out my upcoming Calendar of Events?