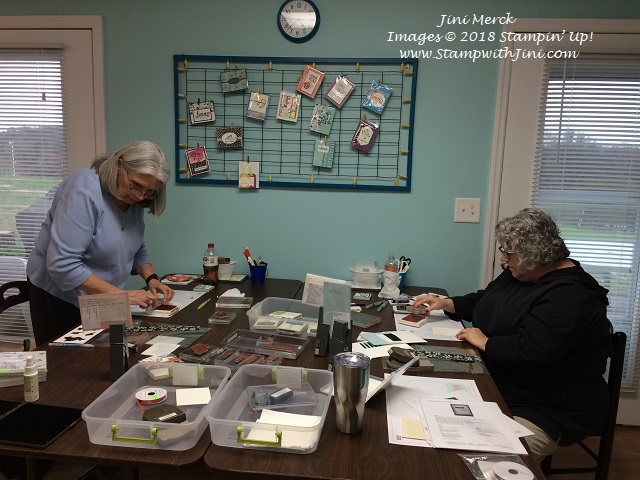
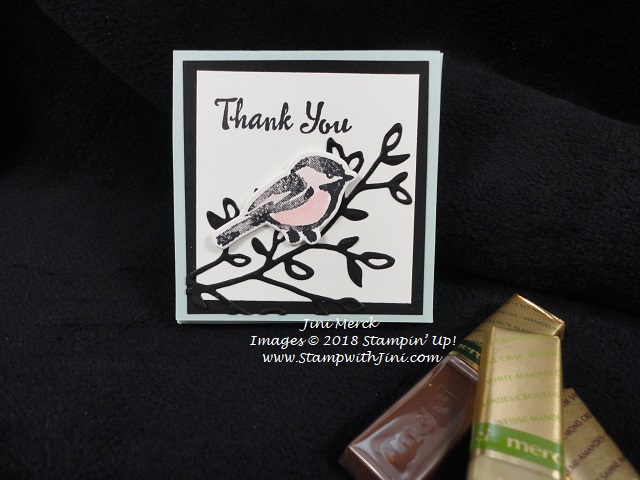
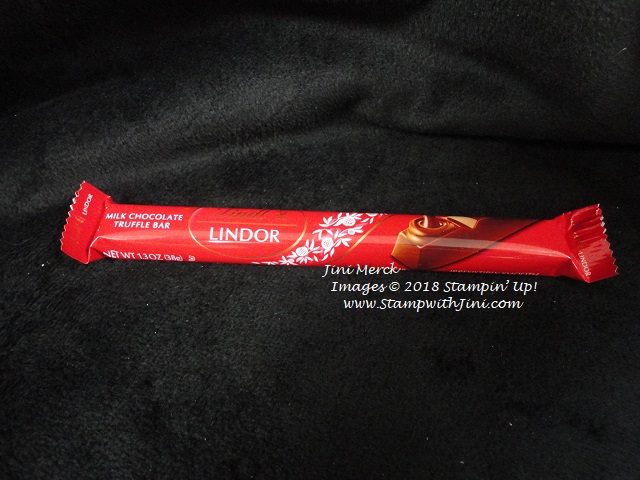
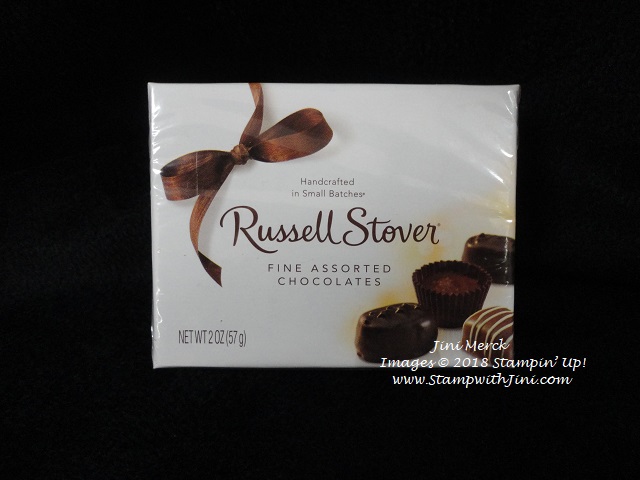
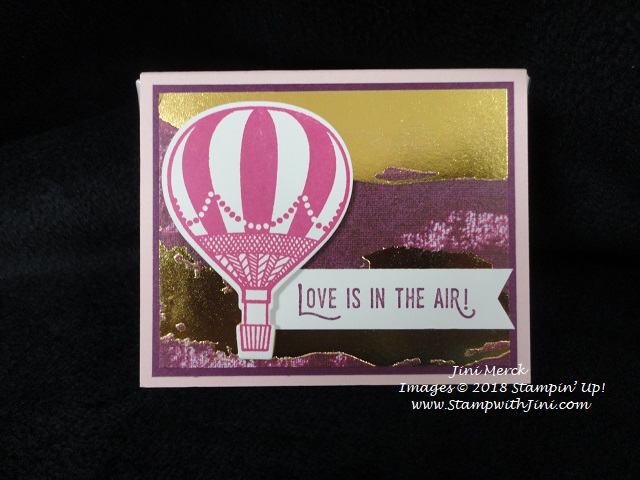
Recently I pampered my team with our Peak Princess event. I hold these events twice a year for those on my team who qualify by reaching certain goals. It’s a lot of fun and we always make special projects together.
Today’s project was a little gift that I gave everyone that coordinated with our projects that we made using the Petal Palette Bundle.
It was such a hit that I thought I’d share how to make them with you.
Petal Palette Merci Chocolate Box Video Tutorial
I’ve also create a companion PDF for you and the complete supply list below.
If you love this project you can earn the Petals and More Thinlits Dies (150048) for FREE during Sale-a-bration when you place a qualifying order. Check out our latest edition of FREE Sale-a-bration choices HERE.
Remember you’ll need to use the special Sale-a-bration item codes when you add these to your order.
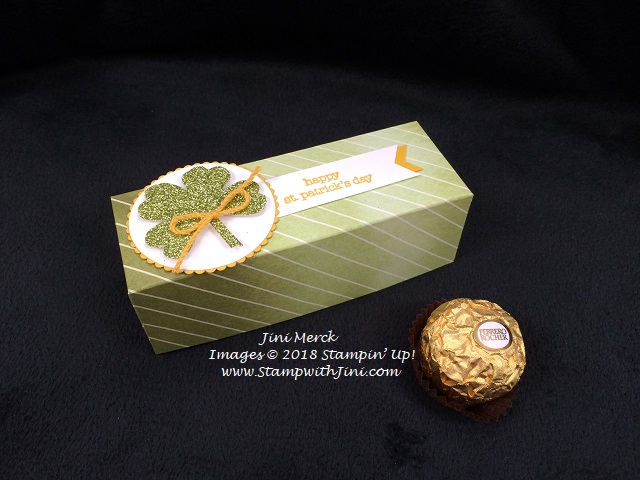
I recently attending a DIY Retreat and received these yummy little Ferrero Roche Chocolates at dinner. Of course everyone at the table was on a diet right now, so I ended up with a little pile of them. LOL! As I lined them up on my table they made me think of little pots of gold – so I couldn’t resist making a little box for them for St. Patrick’s Day!
Of course I couldn’t resist adding a little shine to this project, so I pulled out the fabulous Myths & Magic Glimmer Paper. The light green was perfect for this project!
These boxes are quick and easy to make so I whipped up a video tutorial for you in case you wanted to make some too!
So what do you think? Do you want to spread a little luck of the Irish and a little chocolate of course?!
If so I’ve also made a printable PDF tutorial with the supply list and measurements for you to go along with the video.
St. Patty’s Ferrero Roche Gift Box Video Tutorial (printable PDF)
Enjoy!
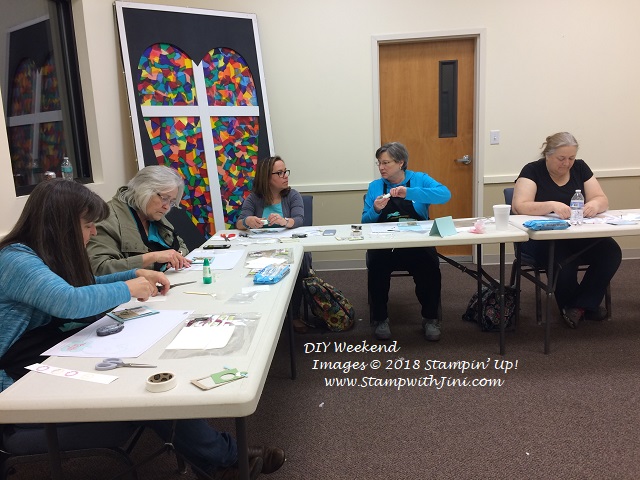
Salvation Army DIY Weekend
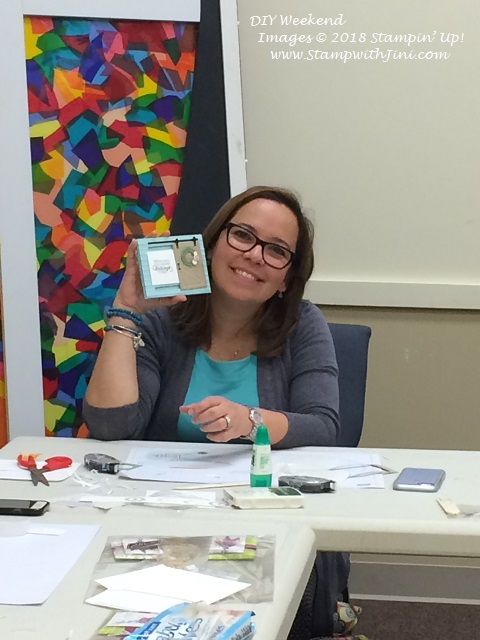
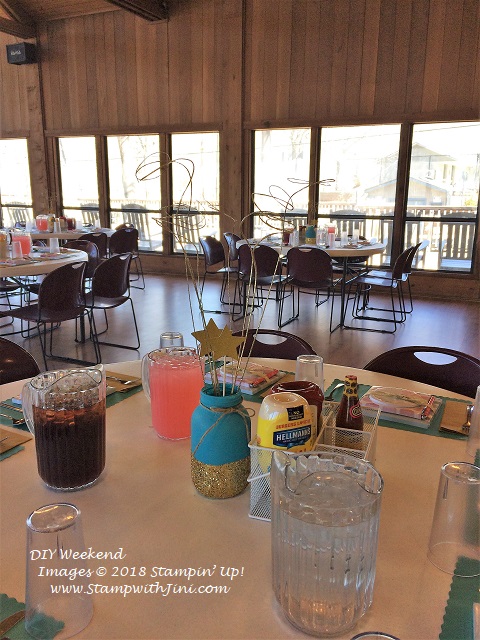
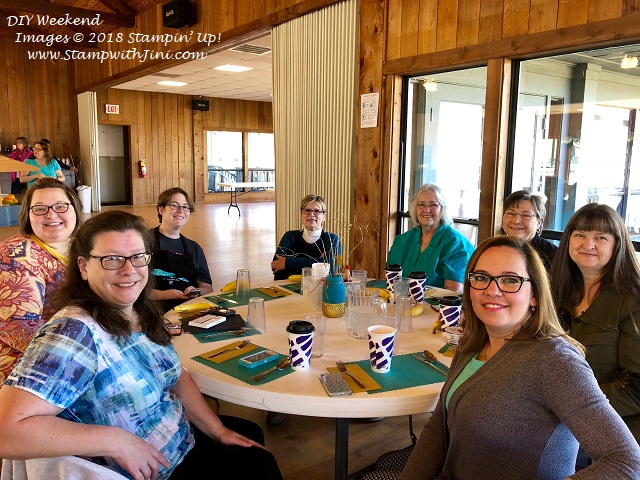
As I mentioned above I was at the DIY retreat when I was inspired by the chocolates so I thought I’d share some pictures with you of the event. It was a wonderfully uplifting weekend that started out a little soggy, but thankfully turned into a sunny event by the end.
I taught two groups the Barn Door Slider Card in Class
and we also made some Lots of Lavender Sachets that I shared with you HERE.
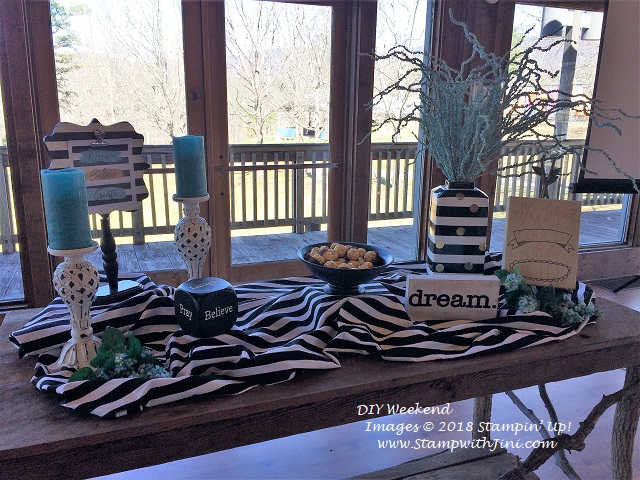
The dining hall was decorated lovely and the tables had coordinating theme center pieces.
The weekend was filled with good food, great fellowship, fun, and friends.
Along with some learning for me too.
What fun we had!
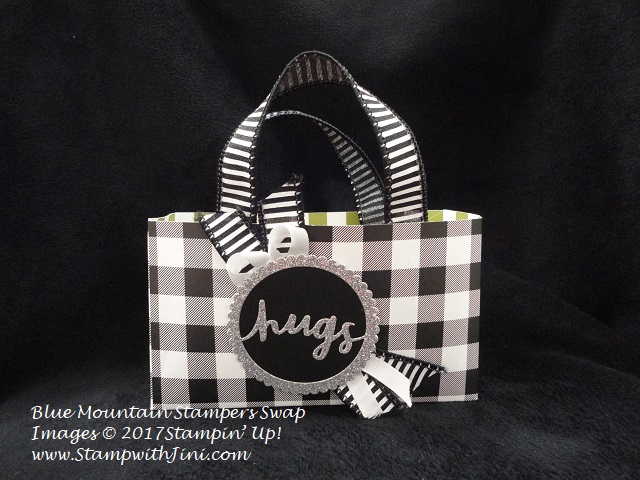
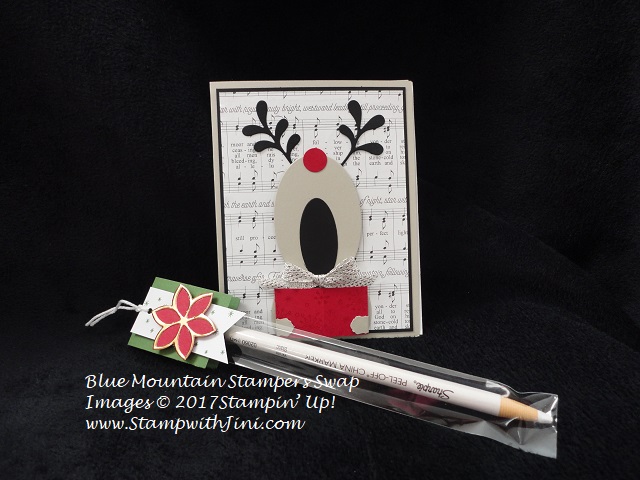
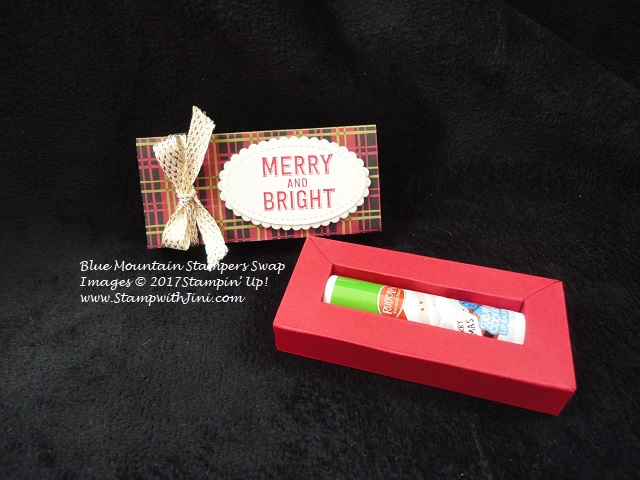
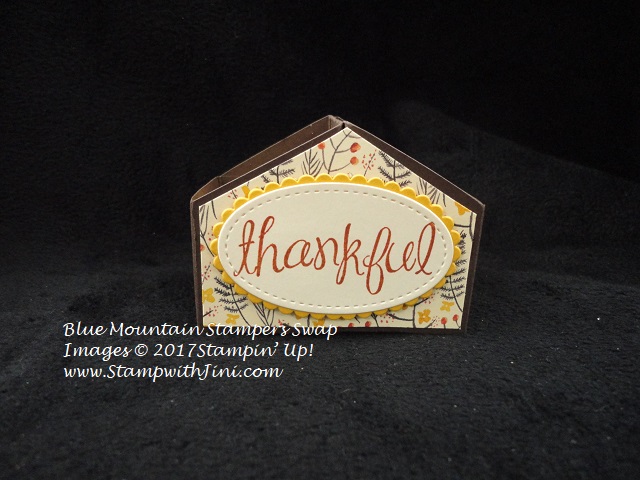
Well that’s it for today – stop back by tomorrow when I’ll be sharing some fun team swaps from this month’s meeting.
Supplies:
Stamp Set: Teeny Tiny Wishes (128748/127802)
Inks: Crushed Curry Classic Ink (131173)
Paper: Myths & Magic Glimmer Paper (145601), Delightful Daisy Designer Series Paper (144137), Old Olive (100702), Crushed Curry (131199), Whisper White Card Stock (100730)
Click Here to learn more about using the Hostess Code If you order Online make sure your profile information is up to date and you’ve allowed me to contact you so I can mail you your FREE gift!
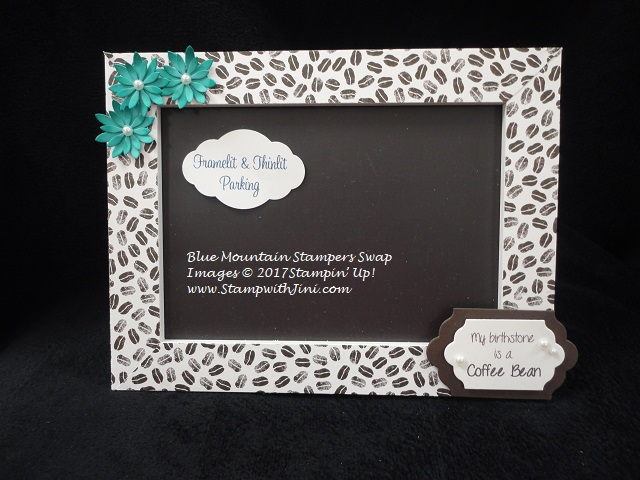
Have you seen the Petal Palette Bundle Suite of products in the Occasions Catalog? If not why not check it out? It is filled will all kinds of goodies, stamp, dies, paper, ribbon and more!
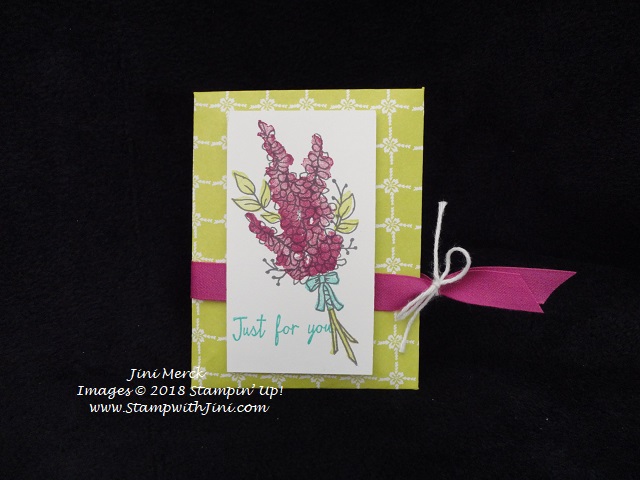
Check out these wonderful cards made with the Petal Palette Bundle (145655). While both of these cards use the Petal Passion Designer Series Paper (145589) this first one is simple stamping.
Isn’t the embellishment lovely with it’s small pearl?
Have you seen the Paper Pumpkin kit for February? Why not check out my unboxing video to see what it’s all about.
If you’re interested in trying Paper Pumpkin, why not try out my Paper Pumpkin Craft Time? Not only will you get a chance to play with the Paper Pumpkin kits, but it’s free when you subscribe that day! Click HERE to see my Calendar of Events and learn more.
And did you know that during Sale-a-bration you can earn FREE Sale-a-bration products when you purchase a Prepaid Subscription?
Not only will you get fabulous kits in the mail each month, you’ll get FREE stuff. Whoo hoo!
And since Paper Pumpkin is celebrating it’s 5th Anniversary you’ll receive a free gift in your March Paper Pumpkin Kit as an added bonus too.
Click HERE to learn more about your Paper Pumpkin options today!
Shop at my Online Store and use Host Code UCBWYB2B place a $75 order and receive a FREE gift!
Click Here to learn more about using the Hostess Code If you order Online make sure your profile information is up to date and you’ve allowed me to contact you so I can mail you your FREE gift!
Check out this quick and easy last minute Valentine’s Day Treat Tent that I made for my hubby
– it holds what else, chocolate!
This project uses an old favorite, Teeny Tiny Wishes stamp set since it is filled with tons of all occasions sentiments perfect for this punch and a little something for any project!
I’ve made a video tutorial for you in case you want to make some too.
Do you love to make a little something for family and friends for Valentine’s Day? I found these cute little boxes of chocolate recently and couldn’t resist making something with them.
This little project is so quick and easy and since the Lift Me Up stamp set has a lot of sentiments to choose from you could make this project for all kinds of Occasions!
The lid lifts up so that you can write a little something under the lid and the box of chocolate slides out for easy access. My hubby is going to love that. LOL!
Want to learn how to make one for yourself? Here is a quick and easy video tutorial for you.
Lift Me Up Slider Card Video Tutorial
I’ve also made a printable PDF for you too with the complete supply list and instructions since the video focuses on the slider card it self. Why not check it out?
Shop at my Online Store in January and use Host Code RQGVFRW6 place a $75 order and receive a FREE gift!
Click Here to learn more about using the Hostess Code If you order Online make sure your profile information is up to date and you’ve allowed me to contact you so I can mail you your FREE gift!
Sign up for my FREE Newsletter My Newsletters include stamping tips, ideas and updates on what is happening with me! You’ll also receive a FREE Class Tutorial using the 2017-2019 In Colors when you sign up!
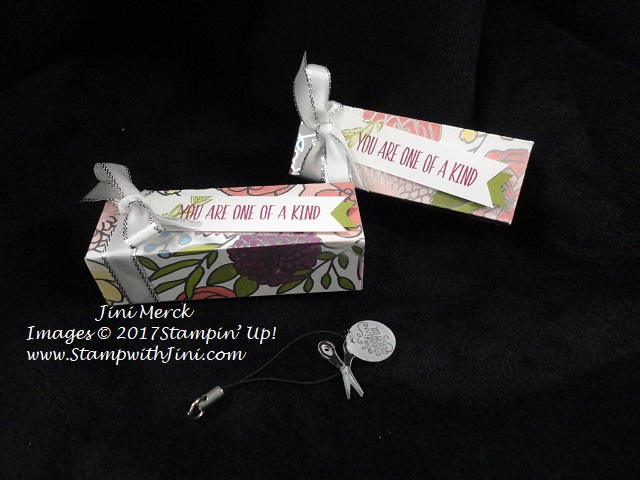
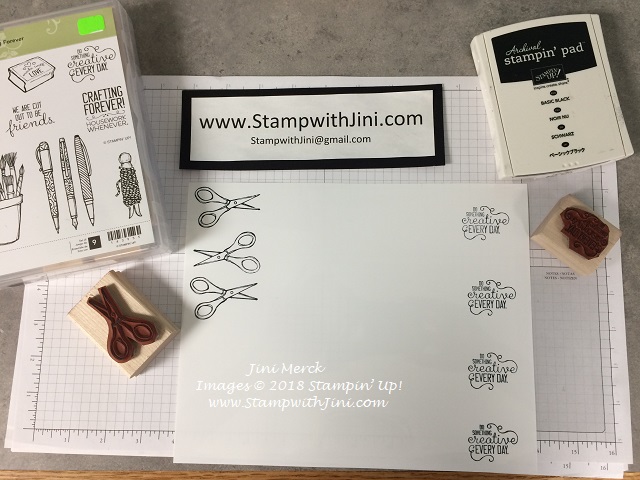
Love boxes? Here is a quick and easy one you can make to hold small items. I made this box recently to hold a gift that my Team received – a scissors charm.
The Sweet Soiree Specialty Designer Series Paper is breath taking with the silver foil and one of my first purchases when I was able to do my OnStage Product Purchase Premiere that I shared with you back in November. The package has 12 patterns and each one of the 6 double sided patterns has a side with silver foil on it. So you’ve got lots of designs to choose from!
This adorable little box is so quick and easy to make that I couldn’t resist doing a video tutorial for you so you can make some too.
Sweet Soiree Box Video Tutorial
Easy? I’ve given you a complete supply list below for the box. And would you like to know how I made these charms?
Shrinky Dinks! Yes, you heard me right – a throw back to our childhood. I love watching them curl up and shrink. LOL!
Simply stamp the images from the Crafting Forever stamp set (143955/143958) onto the Shrinky Dinks using Basic Black Archival Ink and color them with Stampin’ Blends or Sharpies. (Be careful not to touch the line image or it may smear.)
I fussy cut the scissors and used a circle punch for the sentiments. After that I punched a 1/8″ circle using my Handheld Circle Punch. Heated according to the directions and then added them to a jump ring so that I could add them to the premade holder.
Quick and easy – since I made the scissors different colors we can all tell our scissors apart now!
Shop at my Online Store in January and use Host Code RQGVFRW6 place a $75 order and receive a FREE gift!
Click Here to learn more about using the Hostess Code If you order Online make sure your profile information is up to date and you’ve allowed me to contact you so I can mail you your FREE gift!
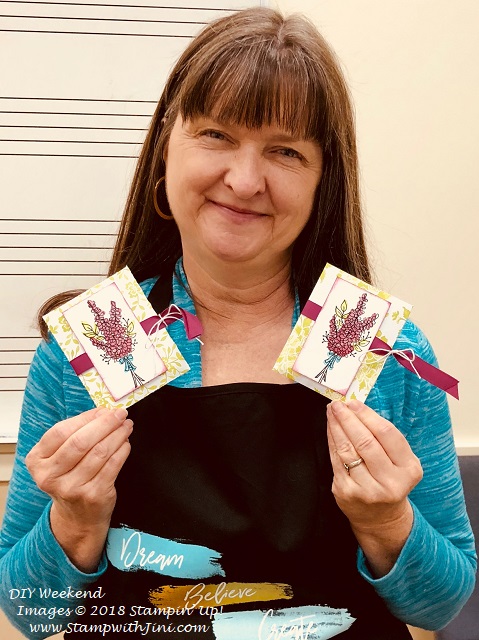
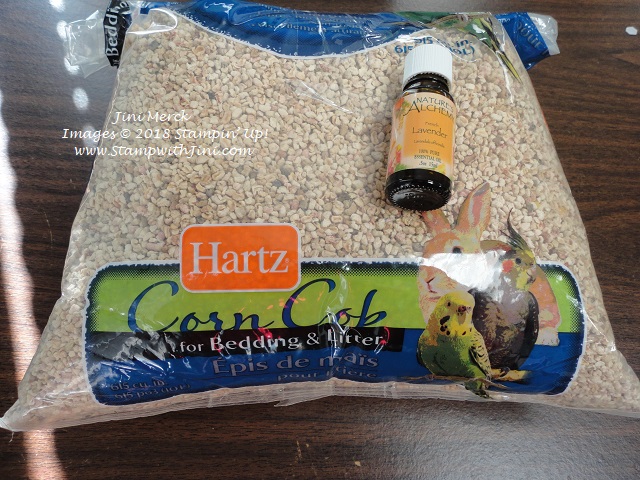
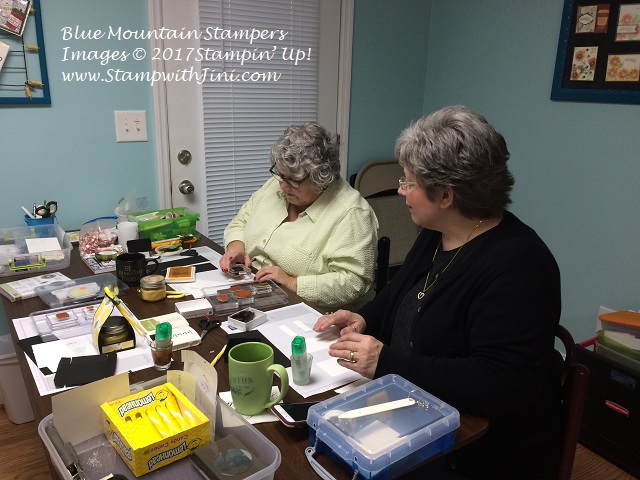
I recently held my Occasions Catalog Kick Off the end of December and so I thought I’d share the projects that we made with you over the next few days along with the tutorials for them. Today’s lavender sachet was their gift for attending.
Everyone was great about the fact I wasn’t able to finish assembling them myself due to a last minute procedure the day before, so it became a third project for them. LOL! I’ve got such a great group of stampers!
We had a lot of fun using the new products and stamping together. Everyone who attended not only made 3 fun projects, but also got to see the fun new products from them for the first time.
Want to see how they are made? I’ve whipped up a quick video tutorial for you and also a printed tutorial too!
The recipe for the sachet filling is easy to make, I’ve included it in the Tutorial, all you need is some corn cob pet bedding and essential oils.
The Lots of Lavender Stamp Set is part of our FREE Sale-a-bration products. What is Sale-a-bration? It’s a great time of year! When you shop with me, for every $50 you spend (before tax and shipping), you get to choose a FREE product from the Sale-a-bration brochure. Plus, new this year: You can earn even bigger rewards when you spend $100. Just look for the $50 & $100 reward icons when looking through the brochure.
If you are shopping in my Online Store – the ordering system will prompt you and let you know which options you have.
There are 3 ways to save and earn during Sale-a-bration – Shop, Host or Join the choice is yours! Let’s set a private party date today for you and your friends so you can Host and earn an extra $25 in Host Rewards!
Got questions? Please let me know I’m here to help.
Stop back by tomorrow when I’ll be sharing one of the cards we made using the Flying Home stamp set from the Occasions Catalog.
Shop at my Online Store in January and use Host Code DJ9ZJAKU place a $50 order and receive a FREE gift!
Click Here to learn more about using the Hostess Code If you order Online make sure your profile information is up to date and you’ve allowed me to contact you so I can mail you your FREE gift!
Wondering How to Get YOUR Copy?
If you haven’t ordered in a while
Don’t have a demonstrator
Contact me at [email protected] or give me a call. I’ll be happy to mail you one or if your local set one aside for pick up
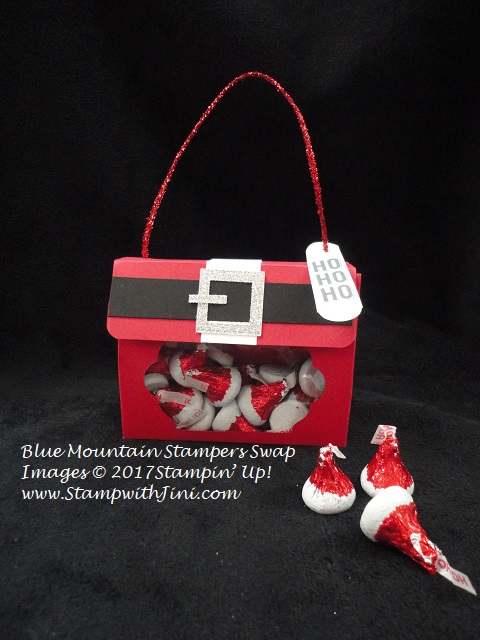
I’ve said it before and I’ll say it again – I love to pamper my team! So for this month’s team meeting we had our Annual Holiday luncheon and enjoyed some time together where we laughed, shared, played and stamped.
Want to see some of the wonderful items they’ve been making since the last meeting?
Fantastic projects, right? I can’t pick a favorite – I’ve got such a great team of folks who just love to paper craft!
We had fun playing the dice game too. Have you ever played this game?
Fun, and fast paced! And of course when the clock runs out – the goodies are yours!
I made these fun Lots of Lavender Bags. The stamp set is one of our Sale-a-bration options and I couldn’t resist the yummy new ribbon from the Occasions Catalog.
Each bag was filled with a little something special from the NEW Occasions Catalog! Everyone was a winner!
And of course we made a couple of projects too- So we did some stamping too! I had so much fun designing for my Santa’s Workshop Class that I had too many projects for just one class. LOL! You know me I love gift items and 3ds!!! So we made some candle holders and learned a fun new technique while we were at it!
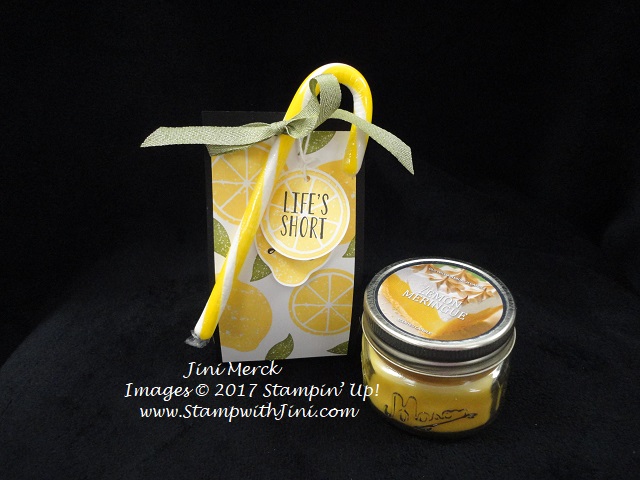
I found these yummy lemon candy canes at the Dollar Tree and couldn’t resist putting them with a lemon scented candle and using the Lemon Zest stamp set (143805/143808). This bundle has very quickly become one of my go to favorites! Lemons, oranges, and limes – oh, my!
I thought you might enjoy making some of these for yourself. With all the crazy flavored candy canes out there right now the options are endless, but of course I can’t resist anything lemon!
Here is my Blue Mountain Stampers’ Lemon Zest Candle Tutorial (printable PDF)
I’ve taken it a bit slower this past week and forgot I had this fun video to share with you from my OnStage Product Purchase Premiere – no worries tho, because I can share it with you today and you can see some of our wonderful new items in the Occasions Catalog.
OnStage Live – Product Purchase Premiere Sneak Peek Video
So what do you think? Love the new items too? It’s just a peek of what’s inside the 2018 Occasions Catalog! And as I am sure you can guess, being the first to see this new catalog or any of our new catalogs is a very exciting AND a huge perk of being a Demonstrator – after all who wouldn’t want to be first? Right!
Add the fact that you’ll receive a discount on all these products and you can’t loose! If you feel this is a good time to join Stampin’ Up! and my team, the Blue Mountain Stampers, you too can be first too! And of course, Sale-a-bration is the biggest time of the year for Stampin’ Up! A Starter kit special is fast approaching and it’s going to be the best time to join this amazing company! (Starting January 3rd)
I’d LOVE for you to join our Blue Mountain Stampers family and enjoy all our team perks too in addition to the wonderful perks that Stampin’ Up! offers. We welcome everyone!
The Starter kit is a real sweet deal, especially if you have a long wish list – you simply pick out your choice of $125 of product for just $99 – and pay no shipping! And if you join during Sale-a-bration (January 3rd – March 31st) you can pick out ANY two stamp sets for free! That’s an additional $100+ value!!!
What are the Blue Mountain Stampers?
That’s the name of our stamping community. We enjoy welcoming new members to our group. We’re from all over. So if you’re considering joining Stampin’ Up!, you may have questions about how I would support you as part of my team. I do offer a variety of ways to learn, grow and to have FUN as a Blue Mountain Stamper!
We have a very activity group that share and answer each other’s questions on our Exclusive face book group. If you’re looking for fun, a place to grow and share with others…You’ll fit right in!
Hobbyists are welcome!
Did you know? 90% of my Blue Mountain Stampers’ areHappy Shoppers – purchasing for themselves, (along with their family and friends.) That’s right…you can just get a discount on products you love!
We welcome the hobbyist who’s looking to be a “happy shopper” (and save money), as well as those of you that want to build a business (and make money).
Everyone is welcome, after all there’s room for both and everyone in between.
There are so many perks to being part of Stampin’ Up:
An ongoing 20% discount off all of your orders (and the ability to increase that to 5%)
Additional income of up to another 18% of your sales if you choose to earn more
Pre-ordering NEW product releases before they go live
Special Events such as OnStage Live & Local where you can be inspired and connect with other Paper Crafters from around the world!
FREE stamps with various promotions
Qualify for cash bonuses, product rewards, incentive trips and more
Quarterly Stampin’ Success magazine with lots of inspiration and projects
Weekly Newsletter emailed with tip, projects and ideas
And as part of the Blue Mountain Stampers I provide the following additional Perks:
Exclusive Team Resource Page – videos, PDFs and more
Exclusive Face book Group – A great way to share and connect with other team members and share
Monthly Creative Challenges
Swapping Opportunities
Team Retreats
Meetings – both local and online/virtual
Monthly Crafting Day
Recognition & Incentives
Training available for workshops, clubs, classes and more!
Additional support and business coaching available
And there is NO Obligation when you purchase your starter kit – Join the Blue Mountain Stampers and see what it’s all about!
If you have any questions at all…don’t hesitate to ask me! I’m here to help you have fun, create, learn and inspire each other!
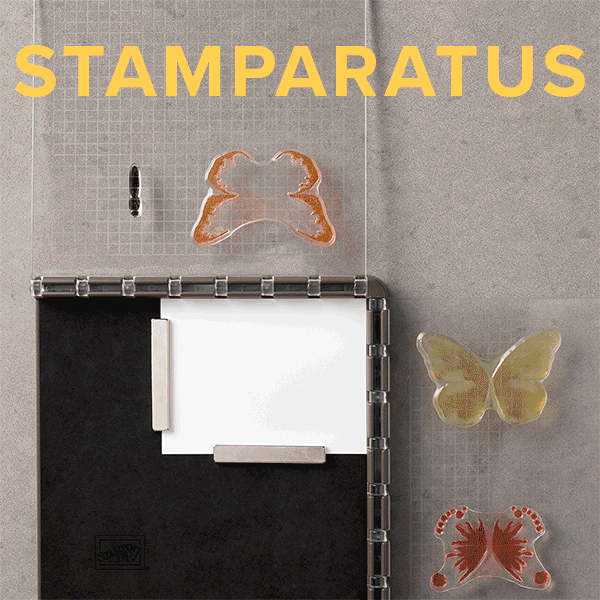
The Stamparatus was launched during On Stage Live – Salt Lake and I’m so excited since I was part of the Leader to Leader Team that helped develop this new tool!!! I can’t wait to get my hands on it and I’m sure you’ll feel the same.
And the good news is I’ll be one of the first to receive mine, since I was part of the Leader to Leader development team, so you’ll get to see and use it first during my classes and team meetings before February!!! (I just LOVE being a demonstrator with Stampin’ Up!)
The Stamparatus will change the way you stamp, and before long, you’ll wonder how you crafted without it!
What is a Stamparatus?
Why do YOU need one? You’ll fall in love with stamping all over again when you learn everything you can do with it!
Make multiples with ease
Consistently stamp crisp, clean images
If you want a darker impression, apply more ink and restamp—no need to start over
Make fewer mistakes, saving time and money
Easily create 2-step, 3-step, and 4-step stamped images using reversible plates
Hinge Stamping….. Yes, this is a new stamping term!!! It’s sooo simple you’re going to LOVE it!!!
Here is a video to show you the NEW Stamparatus!
Product details!
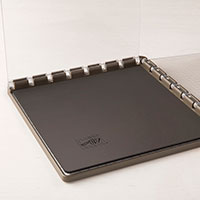
Compatible with Stampin’ Up!’s red rubber and photopolymer stamp
Foam mat to use with photopolymer stamps
Rulers and gridlines for quick measuring
2 open sides so you can stamp on larger paper
2 reversible plates: a total of 4 surfaces to work with
2 magnets to hold the paper in place
Magnet storage areas
Price–$49.00
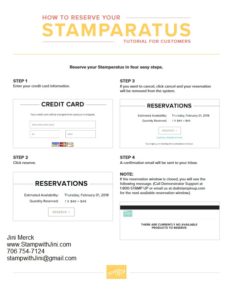
RESERVE YOURS:
Thursday, November 16th
With the launch of this tool, Stampin’ Up! is trying something different: testing a new reservation system. It acts like a true preorder: you reserve your spot and we guarantee shipment as soon as it is available in the Stampin’ Up!s warehouse.
The global launch will feature three reservation windows. For each window, please note the following:
Reservation quantities are while supplies last.
Limit is 1 tool per customer per reservation window.
You may participate in multiple reservation windows.
In order to reserve your Stamparatus, you are required to provide your credit card information.
Credit cards will not be charged until the Stamparatus ships from our facility. When you close your order, be sure to verify that your credit card and shipping information is correct.
How cool is that?
Here’s how to Reserve your Stamparatus on Thursday, November 16th at 4 p.m. (ET)
It’s easy:
(see the picture below for steps)
1. If you don’t already have one you’ll want to create an your account in my Online Store and chose me as your Demonstrator (click HERE). Here is the info you’ll need…
Jini Merck
Demo ID 2048121
Clarkesville, GA 30523
Go ahead and do this today so you’ll be ready to log in and reserve yours tomorrow!
2. Click HERE to Reserve yours on November 16th and click on the Stamparatus link to get started
There are 3 opportunities to reserve a Stamparatus. Here are the options and they are sure to fill up fast since there are a limited number of spots in each!
I know you’ll want to get in the first reservation group like me so you’ll get yours as soon as possible next year! So you’ll want to reserve yours as soon as possible tomorrow Thursday, November 16th!
Got Questions? Here are some Answers:
Stamparatus Launch Q & A
Q: How do I reserve my Stamparatus?
A: Normally you order Stampin’ Up! products through the online store; in this case, you will click the RESERVE link on the Stamparatus page which will take you to the reservation page. For step-by-stepinstructions, please see the How to Reserve Your Stamparatus Tutorial for Customers.
Q: What if I do not have a Stampin’ Up! customer account?
A: To reserve a Stamparatus, you must have a customer account. To create one, click Create Account on the online store.
Q: Why does it take so long for the Stamparatus to ship?
A: We will place an order with the manufacturer based on how many reservations are made during any given reservation window. Shipping dates depend on how long it takes the order to arrive in our warehouse after the tools have been manufactured.
Q: Am I billed at the time I reserve my Stamparatus?
A: No. However, a credit card is required to reserve the product.
Q: When will I be charged for the Stamparatus?
A: When inventory arrives in the warehouse, we will add your reservation to a shopping cart. We will then send you an email notifying you that your Stamparatus order is ready. Once you finalize payment and close your order, the system will charge your credit card.
Q: Will I be able to add other products to my Stamparatus reservation?
A: No. However, once your reservation is transferred to your shopping cart, you will then be able to add other items to your order. Important note: Please do not delete the Stamparatus from your order. We will not be able to add it back and you will lose your reservation.
Q: Will I be able to update my address and credit card information when I open my shopping bag to complete my order?
A: Yes.
Q: What if I change my mind and want to cancel my reservation?
A: You can cancel your reservation at any time. To cancel, please see the How to Reserve Your Stamparatus Tutorial for Customers PDF.
Q: Will the tool be available in the 2018–2019 annual catalog?
A: Yes. Once the annual catalog ordering period begins, you will be able to order the Stamparatus as you would any other product. Reservations will no longer be required, and there will be no limit on the number of tools you can order.
Q: Once the Stamparatus has been added to my shopping cart, how long will it stay there?
A: Indefinitely. As with all products, it will be subject to temporary interruptions in availability depending on demand.
Q: When I close my order, can I take advantage of current Stampin’ Up! promotions?
A: Yes.
Q:Can I participate in all three reservation periods?
A: Yes.
Q:How many stamp placement tools can I reserve per reservation window?
A:For customers, there is a limit of 1 per reservation window.
Q: How did we come up with the name Stamparatus?
A: We landed on an innovative name by combining two words that speak to the end use of the tool as well as Stampin’ Up! branding.
Stamp: To impress a pattern or mark (especially an official one) on a surface, object, or document using an engraved or inked block or die or other instrument
Apparatus: The technical equipment or machinery needed for a particular activity or purpose
Stamp + Apparatus = Stamparatus
Shop at my Online Store and use Hostess Code PCPHSH24 during November and receive a free gift from me with a qualifying order of $50 or more in product!
Click Here to learn more about using the Hostess Code If you order Online make sure your profile information is up to date and you’ve allowed me to contact you so I can mail you your FREE gift!
Sign up for my FREE Newsletter My Newsletters include stamping tips, ideas and updates on what is happening with me! You’ll also receive a FREE Class Tutorial using the 2017-2019 In Colors when you sign up!
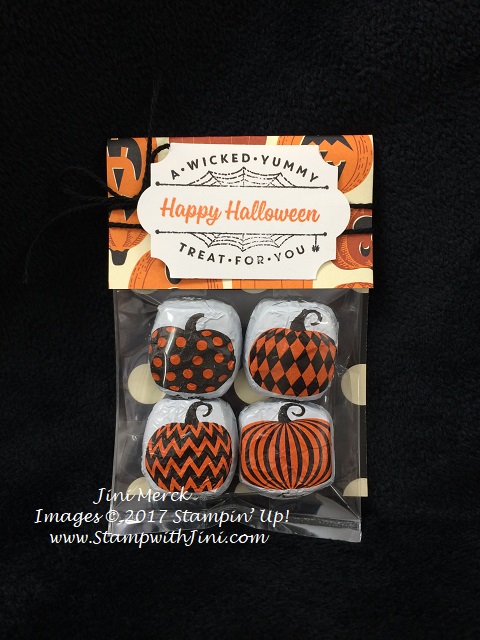
Who doesn’t love a quick and easy treat to spoil our family and friends? Here is one that fits the bill using the Spooky Cat Stamp Set from the Holiday Catalog.
Cute? I found these Dove chocolates at my local Walmart and couldn’t resist since they had these fun patterns on them.
Want to see how I made them? Here is a quick video Tutorial for you!
Spooky Cat Treat Bags Video Tutorial
Easy? Told you so. LOL! And the good part is you can make a ton of them using a sheet of 12×12 Designer Series Paper. My lucky class attendees will be receiving one of these at their spots this month – I need to make some more since these are all I have left from the first batch.
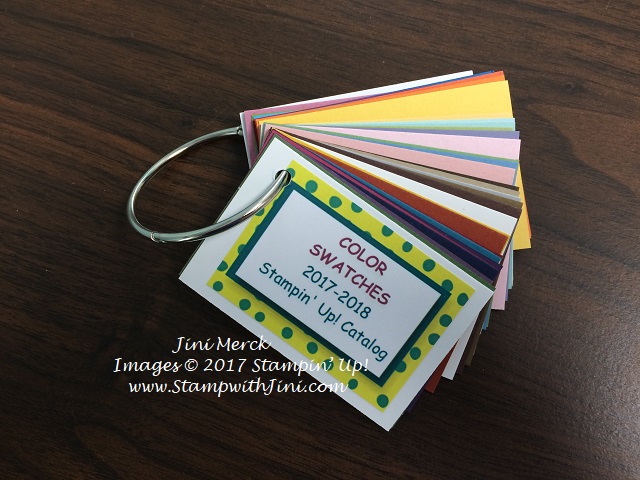
Shop at my Online Store and use Hostess Code RDZGJVPC during October and receive a free gift from me with a qualifying order of $50 or more in product! You’ll receive my 2017 Color Ring with a swatch of all 50 current colors all on a convenient ring!
Click Here to learn more about using the Hostess Code If you order Online make sure your profile information is up to date and you’ve allowed me to contact you so I can mail you your FREE gift!
#HurricaneRelief & #Making a Difference
I’m donating the sales from my hand stamped cards that you can purchase. To learn more Click HERE.