Walk in the Wild Birthday

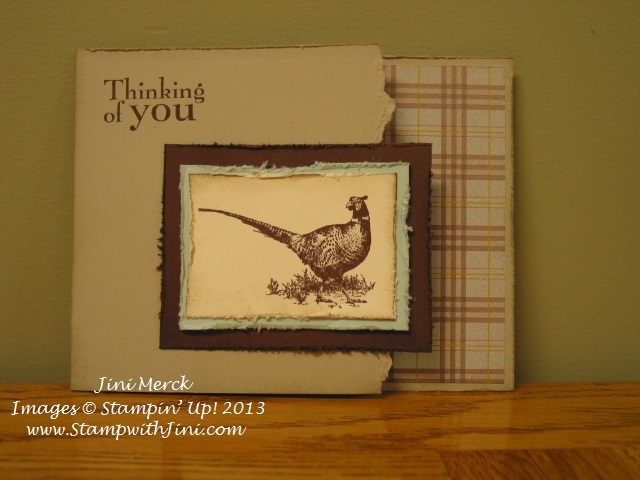
Seems like we have a lot of birthdays to celebrate in September, so here is my latest creation for one of our friends using the Walk in the Wild stamp set (130354/130357) I really like to use the Walk in the Wild stamp set for the guys in my life and when paired with Sweater Weather Designer Series Paper from the Holiday Catalog, I think it’s a great combination for all those fall birthdays I’ve got on my calendar.

Walk in the Wild

Since this is for a guy who is a hunter I wanted to make the card look a bit more aged and rustic. So I used our Stampin’ Distress Tool to really rough up the edges of my mats along with sponging everything.  And to add a little more texture I just did some tearing on the edge of my card stock to allow the wonderful Sweater Weather Designer Series Paper to show that I used as my inspiration for my color choices.

I really like the way this card turned out. Want to see another card I created using the Walk in the Wild stamp set? Click HERE.

Supplies:

Stamp Set: Walk in the Wild (130354/130357)

Inks:  Chocolate Chip (126979) and Sahara Sand Classic Ink (126976)

Paper: Sweater Weather Designer Series Paper (132184), Sahara Sand (121043), Soft Sky (131203), and Very Vanilla (101650)

Accessories: Stampin’ Distress Tool (127562), Stampin’ Sponges101610), and Dimensionals (104430)

Click here to order your Stampin’ Up! Products online 24/7! (US only)
Mystery Hostess Code

Use Mystery Hostess Code 64XT62GT when placing your order and your name will be entered into my Mystery Hostess Drawing. This Mystery Hostess Code 64XT62GT will be good through Saturday, October 5th. The number of hostess will depend on the total sales and I’ll be drawing a hostess for every $150 in sales.

Click Here to learn more about using the Hostess Code

Dying Clothes Pins Video

Oops… I’m rather embarrassed; when I shared my Photo Clothes Line project with you last week and the accompanying video I didn’t update the YouTube Channel so the video didn’t work. Sorry – the problem has been fixed so you’re able to watch my Dying Clothes Pins Video at this time. You can watch it below, or if you prefer you can Click HERE to see my entire Photo Clothes Line Post with the accompanying video.

Photo Clothes Line

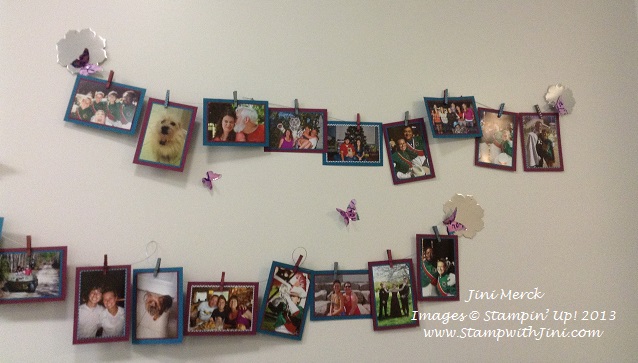
Here is my final project that I created for my daughter’s dorm room, a Photo Clothes Line using  Dyed Clothes Pins – I wanted to have a way for her to hang pictures of friends and family easily. Especially since nothing seems to be sticking to her dorm walls I was able to hang this project up easily with push pins.

Photo Clothes Line (1)

First I created three different photo clothes lines for her to hang photos and such from using these cute little Floral Frames Framelits. (Framelits aren’t really designed to cut anything other than paper, but I decided to take the risk and give it a try and it worked).

Then for a touch of the whimsical I added butterflies using the Beautiful Butterflies Bigz Die. I simply used my Crop-a-Dile to punch some holes and added some silver wire that I could bend and shape the way I wanted across her wall. It wasn’t the floral wire that I have used in the past, but since I couldn’t find any last minute on the way to Milledgeville, I figured this would have to do in a pinch. I’m not really happy with the wire so I’ll replace it the next time I visit with the floral wire I found afterwards.

Here is a closer photo of part of the photo clothes line hopefully you can see the butterflies better. The room is really narrow so it was tough to get a shot straight on of the entire thing.

Photo Clothes Line (2)

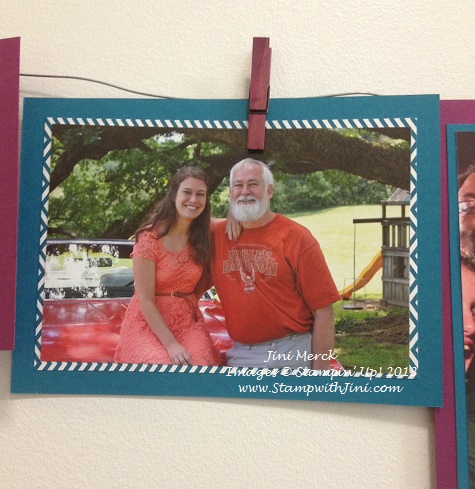
Finally I used the Dyed Clothes Pins I made to hang the photos that I attached to my coordinating photo mats. Kaitlin seems to be happy with the look and final splash of color to her room.

And of course Dad wanted to make sure his baby girl had a picture or two of him – lol. So here is one of them he chose from this spring in her graduation dress on with Larry’s other baby, his 1969 Cutlass. (Poor guy, he’s not missing her at all, ya right – he keeps asking me if she has called. I know he is counting down till fall break!)

Does this dress look familiar? It should, it is just like the one on the cover of our catalog – just in Calypso Coral. Something Kaitlin rolled her eyes at when I pointed it out to her.

Photo Clothes Line Close up

Want to learn how I created the matching color clothes pins? Why not check out my latest video, Dying Clothes Pins.

Did you like this video? Why not leave me a comment? And if you’d like to be the first to know about my latest videos why not sign up for my YouTube Channel HERE. And if you haven’t already why not sign up for my FREE Newsletter where I’ll be sending you helpful tips and hints, and videos along with my information monthly.

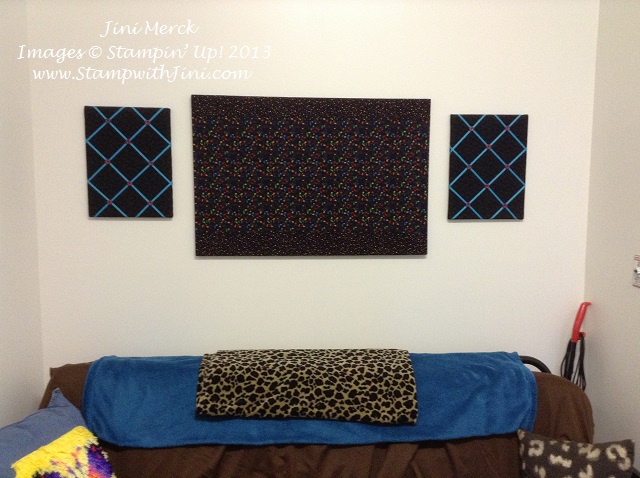
This last photo is of her seating area and the finished French memo boards I showed you in an earlier post. She now has lots of different places to tuck her mementos and items she wants to save.

French Memo Board in Dorm room

Kaitlin seemed very pleased when she got back to her dorm room and found I had spent some time cleaning, organizing and hanging up things while she was at class. I know she is really spoiled, right? But between her finishing up the season with Drum Corp, her heavy class load, and chest pain I felt I could spoil her a little. Even her suite mate thought that it was pretty cool of her mom to do that for her (Whew right, didn’t want to embarrass the kid!)

Supplies:

Paper: Regals Designer Series Paper Stack (130139), Polka Dot Parade Designer Series Paper (126902), Island Indigo Card Stock (122923), and Rich Razzleberry Card Stock (115316)

Accessories: Island Indigo Classic Stampin’ Refill (122932), Rich Razzleberry Classic Stampin’ Refill (115664) and Mini Clothes Pins

Click here to order your Stampin’ Up! Products online 24/7! (US only)

Use Mystery Hostess Code 64XT62GT when placing your order and your name will be entered into my Mystery Hostess Drawing. This Mystery Hostess Code 64XT62GT will be good through Saturday, October 5th. The number of hostess will depend on the total sales and I’ll be drawing a hostess for every $150 in sales.

Click Here to learn more about using the Hostess Code

Modern Medley Colored Cork Board

Great news – my videos are back. After a break due to camera problems I think I’ve finally got it figured out. So here is my latest project that I’ve been wanting to share with you.

adding color to corkboards-001

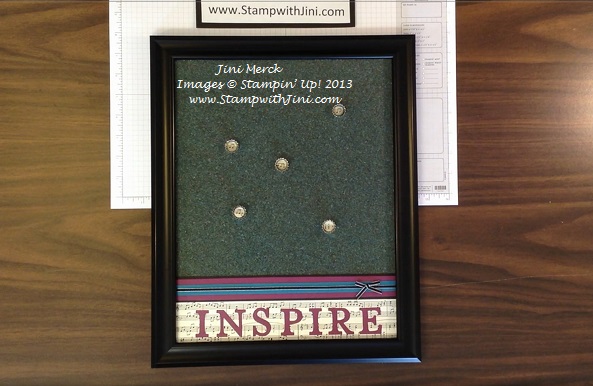
I created this Colored Cork Board as part of my daughter’s message center for above her dorm room desk. When I started this project I figured I’d just use the cork board as it was but then I really wasn’t happy with the look – so after a little experimenting I came up with this technique for Adding Color to Cork Boards. It’s a lot of fun – so why not check it?

I finished up my Modern Medley Cork Board by decorating it and then added some push pins to hang things with. I made these push pins using some of our Modern Medley Designer Series Paper that I added to our little Bottle Caps (from the Spring Catalog) that I had laying around my studio. Then I just topped the Designer Series Paper with a little of our Crystal Effects allowed them to dry and Voila’ – A cork board that I’m my daughter is tickled with.

Here is a close up of the focal point.

Cork Board closeup

Do you like it? Why not leave me a comment and let me know what you think of my latest video and camera. I’m happy with it and still have some learning to do, but I think it has a little better sound quality. How about you?

If you like this project – Why not sign up for my monthly Newsletter where you’ll get tips and projects monthly delivered directly to your inbox along with my class event schedule. Or you can sign up for my Blog News and get my blog posts delivered right in your email as soon as they post. Want to get both? That’s great – just sign up for both. It’s free so why not? Click HERE to sign up today and get a FREE Pinwheel Tutorial!

Want to see the coordinating Dry Erase Board I made click here. Then  check back next week when I’ll be showing you all the finished projects in her dorm.

Supplies:

Paper: Modern Medley Designer Series Paper (126926), Island Indigo (122923), Rich Razzleberry (115316) and Basic Black Card Stock (121045)

Accessories: Island Indigo Classic Ink Refill (122932), Stampin’ Spritzer (126185), Big Shot (113439), Typeset Alphabet Bigz Dies (127553), Frame and Cork Board

Click here to order your Stampin’ Up! Products online 24/7! (US only)

Use Mystery Hostess Code WSCBPMPF when placing your order and your name will be entered into my Mystery Hostess Drawing. This Mystery Hostess Code WSCBPMPF will be good through Saturday, September 14th. The number of hostess will depend on the total sales and I’ll be drawing a hostess for every $150 in sales.

Click Here to learn more about using the Hostess Code

Holiday Catalog Premiere Party

Holiday Catalog Premiere Party Banner

Click HERE to see my flyer with all the details
NEW Items Added to Clearance Rack

Clearance Rack

Great news – lots of new items have been added to the Clearance Rack as of yesterday. Shop today and get some wonderful deals on some great items. If you are a Big Shot lover there are even some don’t want to miss dies available!

Magnetic Platform Now Available to Order

magnetic platform

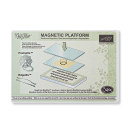
Magnetic Platform Item #130658

The new Magnetic Platform for the Big Shot is finally available again. Whoo hoo! All backorders have been filled at this time and the order number has been turned back on. So why not order yours today along with your Clearance Rack items?

Click here to order your Stampin’ Up! Products online 24/7! (US only)

NEW Envelope Punch Board Available Today!

envelope Punch banner

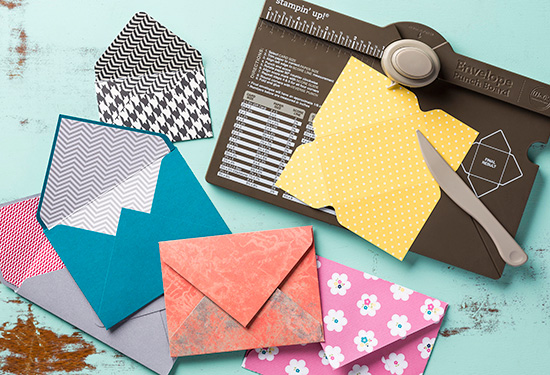
You’re going to love our NEW Envelope Punch Board (item 133774). You can use this tool to create anything from itty bitty to long and skinny envelopes in a flash!

  • It creates totally customizable envelopes in up to 66 different sizes (not to mention  a million different color and pattern options depending on the paper you want to use). Even tried and true envelope sizes will only take you      moments to create!
  • It’s super easy to use; all you have to do is measure for the first punch and from there you just turn and score you’ll go crazy (in a good way).
  • It’s small and lightweight; it’s super portable and easy to store. It’s small and light enough that you could use it while watching a  soccer match, at a park, at a friend’s for craft night-anywhere.
  • It even has a slick scoring tool as well as a punch that lets you create rounded corners on your envelopes.
  • It’s easy to keep it all together; the stylus storage compartment and two punches are designed into the tool so you don’t have a bunch of little pieces to keep track of (even the instructions are printed right on the tool so you won’t lose them!).
  • The price is terrific-It’s only $19.95 and for a tool that does so much!

Want to see more? Check out this video by Brian Pilling–

How great is that, right? Contact me today to get yours!

Click here to order your Stampin’ Up! Products online 24/7! (US only)

Hostess Code TQWHSYW3. – You’ll receive a FREE Washi Tape 5 Ways Class Tutorial (a value of $14.95).  It’s my gift to you! And since Washi Tape is so much fun – you’re going to love this FREE Class!

Click Here to learn more about using the Hostess Code


Really Good Greetings

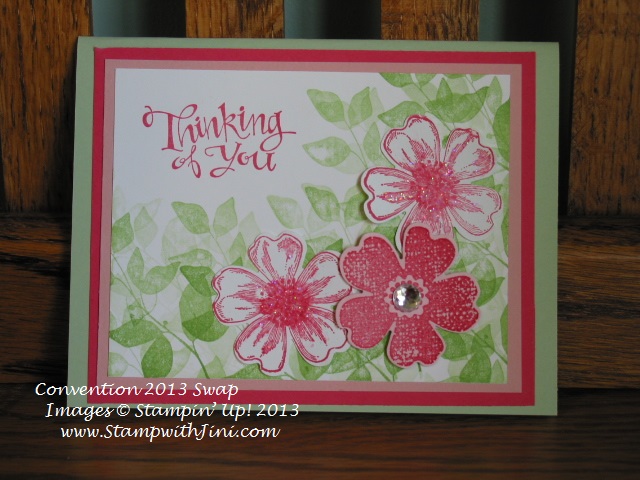
This week I’ll be sharing some more of the great convention swaps that I received. I hope you are enjoying them. So without further ado…. Here is another great card that I received from Wanda at convention using the Really Good Greetings stamp set. There are a lot of fresh, fun greetings that come in this set that I think you’ll really enjoy. This card uses one of my favorites and isn’t it great it fits right inside one of our Chalk Talk Framelits?

Really Good Greetings convention swap 2013

I just love the way Stampin’ Up! items coordinate together. It is one of the things that initially drew me to Stampin’ Up! when I began stamping all those years ago. I quickly learned that I saved money because I wasn’t always trying to find something that would work together with something I already had like I did when I purchased things at my local big box store.

If you love the Flower Shop stamp set as much as I do you’ll want to check out my video with hints on how to assemble your stamps so they line up easily with the coordinating punch. Click HERE to see that post.

Stamp Set: Inks: Really Good Greetings (item 130330/130333) and Flower Shop (item 130939/130942)

Paper: Gingham Garden Designer Series Paper (item 129310), Daffodil Delight, Whisper White, and Pear Pizzazz

Accessories: Gingham Garden Washi Tape, Pansy Punch (item 130698), Rhinestones Basic Jewels (item 119246), Chalk Talk Framelits (item 129983) and Secret Garden Framelits (item 129372)

Click here to order your Stampin’ Up! Products online 24/7! (US only)

Hostess Code TQWHSYW3

Flower Shop

Flower Shop (item 130939/130942) is one of my favorite stamp sets from the 2013-2014 Catalog. What makes it one of my favorites? Well, first the fact that it has some great images and second it has a coordinating punch! After all I can’t resist a punch, who can right? And Best of all the fact that it comes in a Bundle (item 132727/132726)which means you save 15%!

Flower Shop convention swap 2013

Here is a great card that uses the Flower Shop stamp set that I received in a swap at convention. I’m loving the NEW 2013 In Colors – how about you?

Stamp Set: Flower Shop (item 130939/130942), Summer Silhouettes (item 132082/126447), and Sassy Salutations (item 132070/126707)

Inks: Strawberry Slush, Pistachio Pudding, and Gumball Green

Paper: Blushing Bride, Pistachio Pudding, Strawberry Slush, and Whisper White

Accessories: Pansy Punch (item 130698), Large Rhinestones Basic Jewels (item 129324) and Dazzling Details (item 124117)

Click here to order your Stampin’ Up! Products online 24/7! (US only)

Hostess Code KZXTAUQ2

Stampin’ Trimmer Rotary Additions Now Available!

rotary trimmer

Yippie! the NEW Rotary Trimmer Addition along with the different style Cutting Blades and Cutting Mat that are show in the 2013-2014 Catalog (page 176-177) and Holiday Catalog (page 24) are now available to order.

Why not jazz up your creations with these exciting new addition to our tool line? You’re going to love this fun new way of cutting!

Check out this latest video showing you the Rotary Trimmer Addition and how it works

Here is a list of the Stampin’ Trimer Rotary Additions now available to order:

129407  Stampin’ Trimmer Rotary Addition (includes rotary track and handle along with the straight edge blade

129408  Straight Stampin’ Trimmer Rotary Cutting Blade

129409  Tiny Wave Stampin’ Trimmer Rotary Cutting Blade

129410  Small Scallop Stampin’ Trimmer Rotary Cutting Blade

131375  Stampin’ Trimmer Replacement Cutting Mat

132788  Perforating Stampin’ Trimmer Rotary Cutting Blade (found in the Holiday Catalog, p. 24)

Sales Tax Holiday

Sales Tax Free Image

Save Georgia sales tax on some great items when you place your order with me on August 9 & 10th. Click HERE to see the list of sales tax FREE items.

Place your order online and use Hostess Code KZXTAUQ2 on August 9th or 10th to take advantage of these savings.

Or, let me know what you’d like anytime between now and 9 p.m. on Saturday and I’ll be happy to place your order for you. Just call me at 706 754-7124 or email me at StampwithJini@gmail.com with your wish list and I’ll call you back to get your credit/debit card information.

It’s that easy to take advantage of the Sales Tax Holiday and don’t forget you can add your favorite Holiday Catalogs items too!

Spend $50 and you’ll get a spot on my 50/50 Board giving you a chance to win $50 in FREE merchandise!

Click here to order your Stampin’ Up! Products online 24/7! (US only)

Hostess Code KZXTAUQ2

NEW Thinlits Card Dies Introduced

Thinlits Card Dies

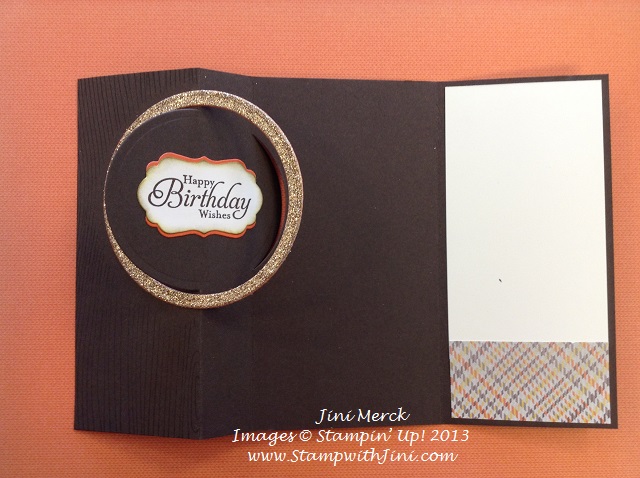
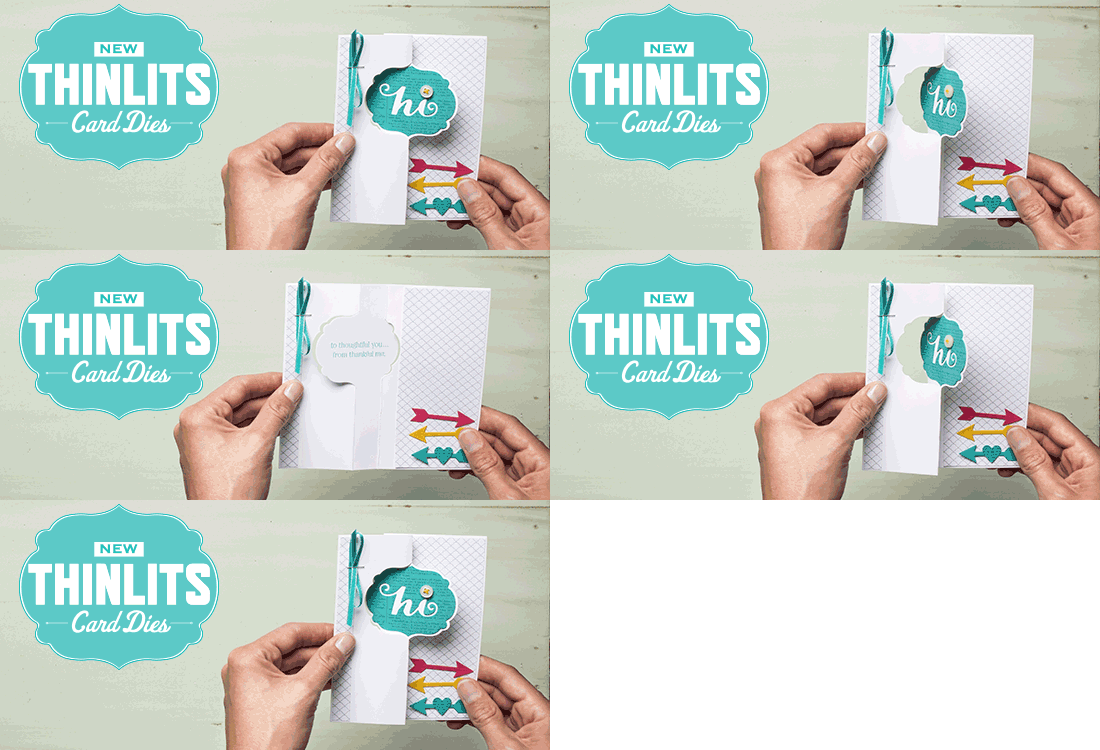
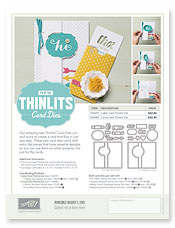
You’re going to love these NEW Thinlits Card Dies! They create these fun flip cards AND Thinlits Card Dies come with extra die pieces that you can use on other projects too!

There are two NEW Thinlits Card Dies to choose from:

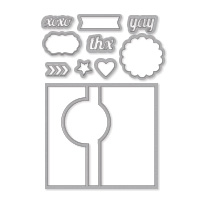
Label Card Thinlits Die Item #133479

Label Card Thinlits Die image

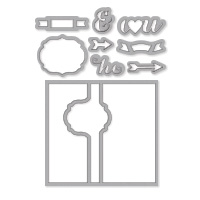
Circle Card Thinklits Die item #133480

Circle Card Thinlits Die image

Check out this video showing you these fun NEW Thinlits Card Dies

Thinlits Card Flyer Image

Holiday Catalog Goes Live Today!

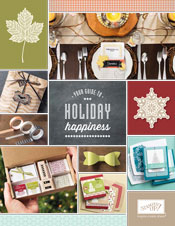
The 2013 Holiday Catalog launches today, and it’s filled with plenty of products for you to get started on your holiday projects.

Holiday Catalog 2013

View the online 2013 Holiday Catalog HERE.

Contact me today to order your items or use the Hostess Code KZXTAUQ2 to place your order online.

Yippie! More Convention Swaps

Now for some more of my Convention swaps – I know you’ve been waiting to see them, right?

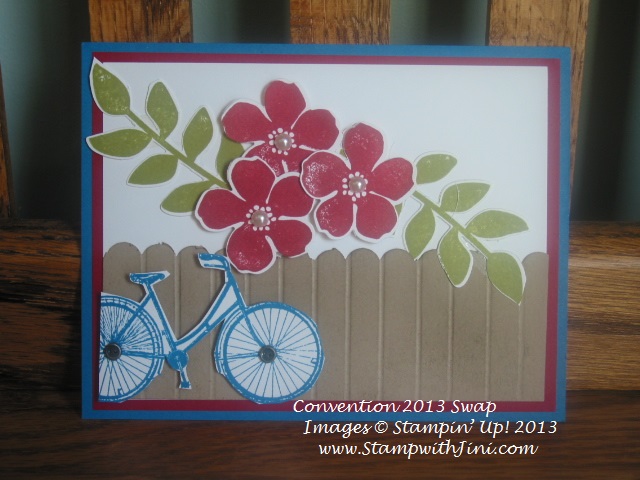
This first one uses the bicycle image from the Postage Due (item 132064/126397) and Secret Garden (item131940/129144). I love the way that Patricia used the Vintage Trinkets (item 118764) for the center of the wheels and the score board and Scallop Edge Border Punch (item 119882) to create the fence.

Postage Due Convention Swap 2013

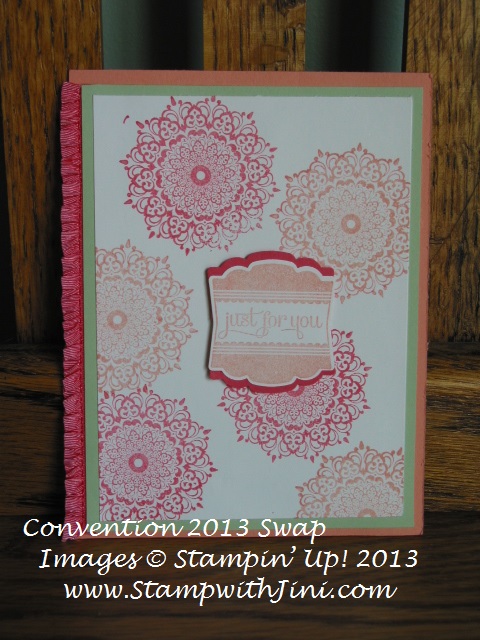
This next card uses our yummy 2013 In Colors and the Label Love (item 130619/130297) and Happy Day (item 130294/130297) stamp sets along with our NEW Artisan Label Punch (item 130920).

Label Love Convention Swap 2013

There are a lot of great things happening with Stampin’ Up! Want to learn all about it? Why not sign up for my FREE Newsletter or get my Blog posts delivered right to you inbox. Click HERE to learn more and sign up today.

Click here to order your Stampin’ Up! Products online 24/7! (US only)

Hostess Code KZXTAUQ2

Creating Clouds with Stampin’ Spritzers Video Tutorial

Wow, has it already been a couple of days since I shared with you? Today’s card was so much fun creating that I wanted to share it and a the Creating Clouds with Stampin’ Spritzers video I made with you before time slipped away again from me today – lol.

This card is one of my favorites that I’ve made recently since it uses one of my favorite products – the Stampin’ Spritzer (item 126185). I just have so much fun with these things I don’t want to stamp once I start.

Sassy Salutations Creating Clouds Video

Check out my video Creating Clouds with Stampin’ Spritzers  to see how I did it.

Supplies:

Stamp Set: Sassy Salutations (item 132070/126707)

Inks: Island Indigo

Paper: Mellon Mambo, Island Indigo and Whisper White

Accessories: 2 3/8″ Scallop Circle Punch (item 118874), 1 3/4″ Scallop Circle Punch,  1 1/4″ Scallop Circle Punch, Stampin’ Spritzer (item 126185), Pool Party Refill (item ) and Coastal Cabana Refill (item ), Gingham Garden Designer Washi Tape (item 129314), Linen Thread (item 104199), and Beautiful Butterflies Die (item 114507)

Click here to order your Stampin’ Up! Products online 24/7! (US only)

Buy 3 Get 1 FREE!

  July DSP promotion                     

For a limited time when you buy 3 packs of Designer Series Paper you can get one for FREE! Promotion ends July 31st

NEW Undefined Stamp Carving Kit

Undefined banner image

Woohoo! Just announced yesterday during Convention is our NEW Undefined Carving Kit! Check it out.

Have you ever wanted a stamp but couldn’t find the perfect image? Do you have a special family logo or a sketch you’d like to have as a stamp. Well now you can! Undefined is Stampin’ Up!’s new stamp carving product line. You define the rubber stamp any way you want.

Its an entirely new and different creative experience when you carve your very own stamp . And when you’re finished, you will have created a one-of-a-kind stamp!

How exactly do you carve a stamp? Watch the video to see a quick tutorial.

Intrigued? I know you’ll want to get your hands on the kit and start carving your own masterpieces. So here are the item numbers you’ll need (I suggest adding a refill kit on your first order . . . trust me, you’re gonna want it).

Item #

Description

Price

133402

Undefined Stamp Carving Kit

$19.95

134808

Undefined Refill Kit

$9.95

124236

Clear-Mount Cling Foam*

$10.95

*Add a sheet of Clear-Mount Cling Foam to create your own clear-mount stamps. Mounting your stamps on the cling foam allows you to make stamps any size you want, not just what will fit on the blocks in the kit.

Undefined carving kit image

Included in the Stamp Carving Kit:

  • 2 carving tools
  • 3″ x 4″ rubber
  • 3″ x 4″ foam
  • 4 wood blocks (various sizes)
  • 1 Island Indigo Stampin’ Write Marker
  • 3 postcards
  • Instruction sheet
  • Stamp image templates

Undefined refill kit image

Included in the Refill Kit:

  • 3″ x 4″ rubber
  • 3″ x 4″ foam
  • 4 wood blocks (various sizes)
  • Instruction sheet

Go ahead – Express your personality, thoughts, feelings, etc. with a stamp you’ve carved all on your own!

Click HERE to see a printable Undefined Carving Kit Flyer

Click here to order your Stampin’ Up! Products online 24/7! (US only)

convention special banner

Convention Special Hostess Code EVGFBV9E. – You’ll receive a FREE Washi Tape 5 Ways Class Tutorial (a value of $14.95).  It’s my gift to you! And since Washi Tape is so much fun – you’re going to love this FREE Class!

Click Here to learn more about using the Hostess Code

Buy 3 Get 1 FREE!

        July DSP promotion               

For a limited time when you buy 3 packs of Designer Series Paper you can get one for FREE! Promotion ends July 31st

Wetlands

Convention starts later this week so I thought I would share with you one of the cards I made for my summer themed swap using the Wetlands Stamp Set (item 126695/126697). I just love this set and all the wonderful things you can create with it. And the new Framelits are wonderful, and as you can see they coordinate with the Framelits you may already have.
Wetlands Summer Themed convention swap Here is a picture of my swaps ready to go. And although I’m unable to attend Convention my friend graciously offered to include me in an organized swap she was doing.
Wetlands Summer Convention swaps This card was a lot of fun to make. I love the water and grew up close to Lake Michigan so these little birds just make me feel so happy and peaceful – I can almost hear the waves lapping on the shore. One of my favorite pastimes as a teen was just watching the waves roll in.

And this week I’ve been able to enjoy the beach again with my sister and daughter in Galveston. Here is a picture my sister took before we started walking on the shore to look for the hermit crabs we enjoyed last year. The scene reminded me of the Wetlands image above.

Galveston beach

And here is a photo of my daughter Kaitlin and I after doing some beach combing looking for shells.  I’m looking forward to finding some ideas for the shells when we get back home on Pinterest.

Galveston us

Wonder how I added color to the Tea Lace Paper Doilies? I just love this technique -It’s addictive! Check out this video below to learn how.

Wetlands is such a great stamp set for masculine cards too! If you’d like to see another card that I created using this set stop on by tomorrow.
If you love this set too and would like to take my class using the Wetlands set click HERE for more information.

Supplies:

Stamp Set: Wetlands (item 126695/126697)

Inks: Baked Brown Sugar

Paper: 2013-2015 In Color Designer Series Paper Stack (item 130136), Soft Sky, and Baked Brown Sugar

Accessories: Labels Collection and Deco Labels Collection Framelits, Needlepoint Border Embossing Folder, Soft Sky Seam Binding, Tea Lace Paper Doilies, Stampin’ Spritzer, Baked Brown Sugar Reinker

Click here to order your Stampin’ Up! Products online 24/7! (US only)

convention special banner

Convention Special Hostess Code  EVGFBV9E – Use this code and receive a FREE Washi Tape 5 Ways Class Tutorial.

magnetic platform

Important Magnetic Platform Update

Due to an unfortunate backorder situation, the Big Shot Magnetic Platform (item 130658) will be temporarily turned off Thursday, July 18, at 12:01 AM (MT). This means that you won’t be able to buy it until further notice. While we’re thrilled to be offering a product that you clearly like, we regret not being able to anticipate just how much you would like it. We apologize for any inconvenience this may cause.

Here are answers to some of the questions you might have:

Why are you doing this? We went through what we thought would be a 13-week supply of the Magnetic Platform in just three weeks, and rather than continuing the backorder situation for you, we believe it’s best to make it unavailable for purchase until we can replenish our inventory. Our supplier is working at capacity to meet our demand, and we will continue working closely with them to get the situation addressed as quickly as possible.

When will the Magnetic Platform be available? We expect that it will be available early fall.

What if I already ordered it when it was on backorder? We’ll fill all closed backorders as we get more Magnetic Platforms in. We are receiving periodic shipments from our vendor and as soon as they come in we’ll fulfill orders in the approximate order they were received.

Remember, you have until Thursday, July 18, at 12:01 AM (MT) to close current Magnetic Platform orders (or make a new one); all of these placed orders will be on backorder.

single-markers-HALFflyer-june26_october31_NA