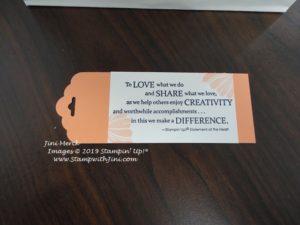
Today’s project is one that I made for part of my Team gift that I gave everyone attending OnStage in Charlotte this past weekend. It’s a twist on the floating frame cards you’ve been seeing pop up – but this really is a frame lol. I thought it would be great to have a special frame of our stamping friends and a reminder of the wonderful time we had last weekend.
I really like the way the frame turned, out so I thought I’d share a video tutorial with you on how I made them. They are really easy to do. It’s a few days late since the first time I filmed it the file was corrupted so I had to do it again, not sure exactly why, but then that is the way with technology, right?
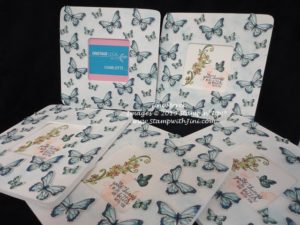
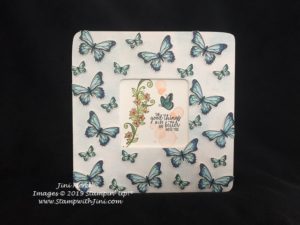
I’ve used the Stampin’ Blends to color the butterflies and I chose the shades of blue since our Team name is The Blue Mountain Stampers. Get it?
I placed those that I could on their pillows once we arrived in Charlotte.

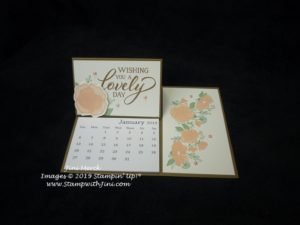
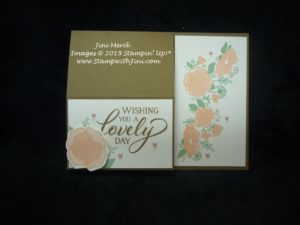
The bags were stamped using the retiring Bloom by Bloom stamp set (148820) and Happiness Blooms Designer Series Paper (148795) was used for the tags.
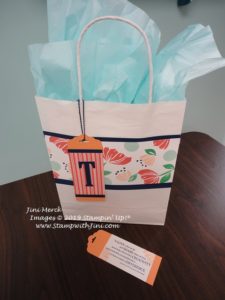
I also used the Large Letter Framelits (141712) that are also on the retirement list for the tags – boy, do I hate to see these go, I use them all the time! Get yours before the supply is gone.
And here is a close up of the back.
Want to see how I made these Butterfly Gala floating frames?
Here is a video for you and of course a PDF tutorial too. I’ve also included a complete supply list below for you so you can make some too. So keep scrolling since it is at the very bottom!
Butterfly Gala Floating Frame Video Tutorial
Butterfly Gala Floating Frame Tutorial PDF
Last Chance List Update:
Retirement List: Please note that I’ve updated the PDF with items that are carrying over noted. They are both highlighted and * is behind their names. These items are being reconfigure and will only be offered in our new Cling offering in the 2019 Annual Catalog. Please let me know if you have any questions I know that the lists can be a bit confusing. The easiest way to see everything is in my Online Store HERE.
Stop back by tomorrow when I’m hoping to post some of the fun of OnStage with you – today I’m heading to the vet. Our four legged family member, Chewie decided to have a run in with the fence and lost on Friday night while I was gone to OnStage.
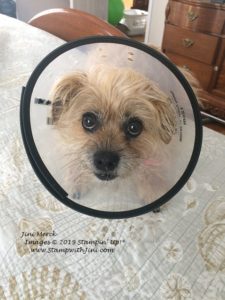
Poor thing. She has needed a lot of extra attention since I’ve been home and is not liking the confinement needed so she can heal.
Enjoy!
Supplies:
Stamp Set: Butterfly Gala (148580*)
Inks: Balmy Blue Classic Ink ( 147105/147168 ), Memento Tuxedo Black Ink Pad (132708/133456), Pool Party (144605) and Bermuda Bay Stampin’ Blends Combo Pack (144600), Night of Navy (144036) and Balmy Blue Stampin’ Blends Light (148540), and Color Lifter (144608)
Paper: Whisper White Card stock (100730)
Accessories: Butterfly Duet Punch (*148523), Paper Snips ( 103579 ), Stampin’ Sponges (141337), Mini Stampin’ Dimensionals (144108) and Stampin’ Dimensionals (104430)
Other Non-Stampin’ Up! products: wood frame, white acrylic ink and brush
*Butterfly Gala Punch (*148523)

Click here to order your Stampin’ Up! Products online 24/7! (US only)
Shop at my Online Store and use Host Code GXJ4CGDM
Click Here to learn more about using the Hostess Code If you order Online make sure your profile information is up to date and you’ve allowed me to contact you (If you chose no contact in the past you’ll need to call 1-800-Stamp Up to have them change your profile for you.)
Sign up HERE for my FREE Newsletter or Get my Blog Posts delivered right to your inbox HERE
The Annual Catalog is right around the corner and I won’t be able to mail you one if you have chosen no contact.