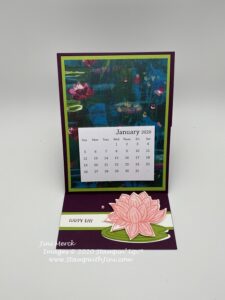
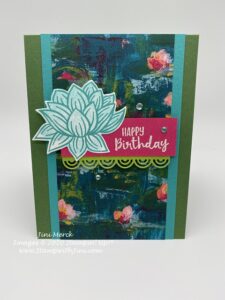
It’s a week of tutorials and today I’ll be starting with a project that uses several of our FREE Sale-a-bration products that coordinate together. When I first saw this Sale-a-bration option I knew it was one I wanted to add to my collection and would reach for over and over again! I shared with you my January #imbringingbirthdaysback birthday card I made earlier HERE.
And since I thought it would be a lot of fun to kick the year off with calendars for my stamping friends here is what I came up with.
I’m still in the process of putting them together, but I wanted to share this with you – so if you’re a customer of mine watch for one coming to your mail box soon!
Can you name the set the sentiment is from without looking?
The “Happy Day” sentiment for this project is from one of my favorite sentiment sets, Itty Bitty Greetings. This set holds 32 greetings that cover all kinds of occasions, so it’s a great value and wonderful to team up with your favorite image sets.
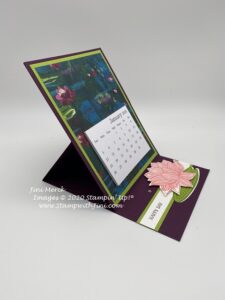
Easel fancy folds are perfect for setting this calendar up on your desk and enjoying it though out the year, and with this Lily Impressions Designer Series Paper it’s like looking at a little piece of art.
Want to make one too? I’ve got a video and pdf tutorial for you today.
And then stop by again tomorrow for another project I’ve created along with a free tutorial.
Want to receive my blog posts right to your in box? Why not sign up for my blog feed? CLICK HERE to receive my posts right to your in box. And if you like to receive a tutorial with your class projects, did you know that I include documentation like this with each and ever class I hold? Step by Step instructions and supply lists for the projects you create in class is always handy so that you can create the projects any time you’d like!
Shop at my Online Store and use Host Code NUGKV32K
Click Here to learn more about using the Hostess Code If you order Online make sure your profile
information is up to date and you’ve allowed me to contact you (If you chose no
contact in the past you’ll need to call 1-800-Stamp Up to have them change your
profile for you.)
Have you seen the Sale-a-bration Brochure? If you have I’m sure you have seen the Lovely Lily Pad stamp set. It drew my eye immediately and with it’s coordinating products it’s a have to have.
This project uses several of our Sale-a-bration products and I had a lot of fun creating it. I’ve made a quick video tutorial for you along with a PDF too. Why not take a look and leave me a comment to let me know what you think?
#imbringingbirthdaysback January Lovely Lily Pad Birthday Card Video Tutorial
#imbringingbirthdaysback January – Lovely Lily Pad Card Tutorial PDF
Did you know when you host a private class with me or place a qualifying order you can earn this set for FREE? And during Sale-a-bration you can earn an exclusive stamp set with a qualifying party too! Why not contact me today and set up a time together with your friends to stamp? A in person or virtual class on face book – the choice is yours!
Whew! it’s been a busy month already and I’ve got lot’s to share with you, so why not stop back by tomorrow when I’ll share some projects from my team meeting last week?
And remember if you’d like a birthday card from me during 2020 – you’ll want to send me an email with your name, address and birthday so I can mail you one! It’s a new year and a new start, so I’m starting a new list!
Shop at my Online Store and use Host
Code FSTG4WJK
Click Here to learn more about using the Hostess Code If you order Online make sure your profile
information is up to date and you’ve allowed me to contact you (If you chose no
contact in the past you’ll need to call 1-800-Stamp Up to have them change your
profile for you.)
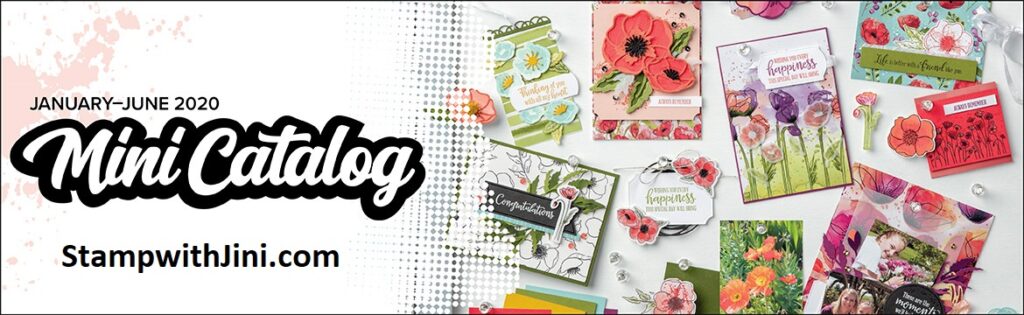
Woo hoo! the NEW 2020 January – June Catalog is LIVE! You can get all the new products you’ve been dreaming of.
Don’t have a Demonstrator and would like a copy? Email me your Name, Address and Phone number and I’ll be happy to mail you a catalog. Meanwhile you can see all the wonderful products HERE in my Online Store.
AND Sale-a-Bration starts today too!
If you are new to Stampin’ Up! and paper crafting you might be wondering
what’s so special about that?
Well it’s the best time of year and it’s a big deal – Why? Because you have
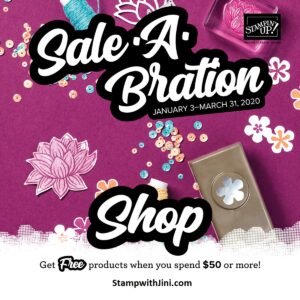
3 great ways to qualify for FREE Stampin’ Up! products!!!
Here’s the details for Sale-a-Bration:
DATE: January 3 thru March 31, 2020
SHOP:
For every $50 or $100 you spend (before tax and shipping), choose a FREE Sale-a-Bration product
There’s no limit to what you can get FREE.
HOST:
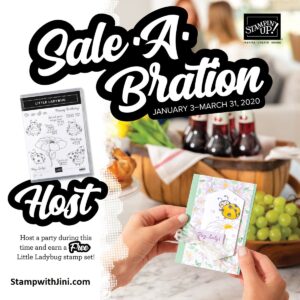
• When your party (or online order) is $300 or more, you’ll receive an exclusive HOST set, the adorable Little Ladybug (that’s a $23 value)
• And you can put that money towards the cost of your own Starter Kit to join my team, the Blue Mountain Stampers
JOIN My Team, The Blue Mountain Stampers:
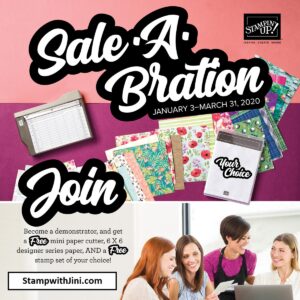
During Sale-a-bration choose a FREE Stamp Set of your Choice and FREE Shipping too!
You’ll also receive our NEW Mini Paper Cutter & a 6″x6″ Designer Series Paper Sampler
That’s almost a $200 Value!!!
If you’ve ever considered joining Stampin’ Up!, now is a great time
to join! And my team, The Blue Mountain Stampers might just be
the right place for you!
Looking to join as a hobbyist or earn a little cash, or maybe your somewhere in between? Everyone is welcome on my team!
Enjoy stamping and sharing with other crafters? You’ll have lots of choices with us, we gather at least 2 times a month
Join my stamping community now – you can join us next week at our Team Meeting & Winter Retreat!
I look forward to welcoming you to our group!
If you have any questions about Sale-a-Bration or Joining my Team, please feel free to ask me. I’m here to help and always happy to answer your questions. Simply email me at StampwithJini@gmail.com
Click HERE to learn more about the Blue Mountain Stampers and joining my team.
Shop at my Online Store and use Host
Code FSTG4WJK
Click Here to learn more about using the Hostess Code If you order Online make sure your profile
information is up to date and you’ve allowed me to contact you (If you chose no
contact in the past you’ll need to call 1-800-Stamp Up to have them change your
profile for you.)
Learning new things is always fun and during OnStage in November one of the presenters showed us a Reverse Die Cutting Technique which I couldn’t resist recreating with my team at our OnStage After Party.
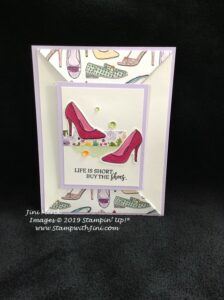
This card not only use a fancy fold called the Double Point, it also uses a fun technique with our dies. It was definitely a wow moment at my table that afternoon. And since I know that if I don’t do something right away I’d forget the steps, I whipped up this project quickly.
Not only are you going to love the New Dressed to Impress Bundle with it’s quirky sayings, but it is perfect for this technique with the shoe image.
This stamp set is part of my March Classes so why not stop by my Calendar of Events and save the date. Not only am I offering it LIVE but it will also be available in a Kit to Go you you can get the free class when you sign up too!
Want to see how I made this card? I’ve got a couple of videos for you so you can make one too!
Then stop back by tomorrow when I’ll be sharing one of the resources with you – my Technique Book.
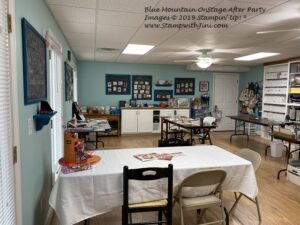
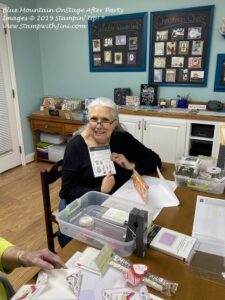
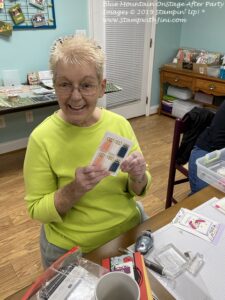
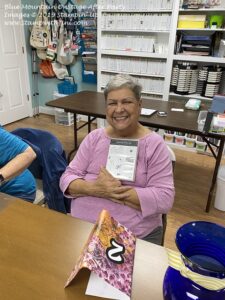
Meanwhile here are some pictures from the OnStage After Party. We started with a nice meal together.
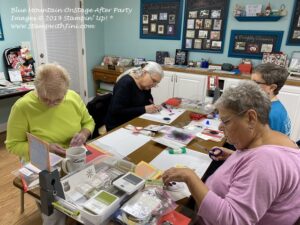
There was lots of fun, stamping and prizes to go around too!
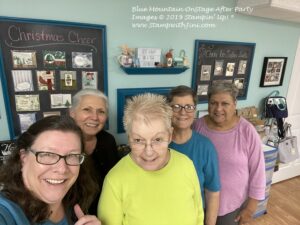
Here is a group photo from that evening.
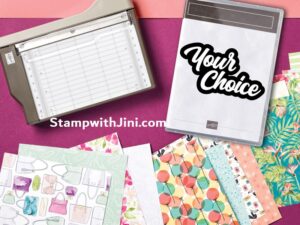
Sound like fun? Looking for a great group to join and craft with? The Blue Mountain Stampers might be the right fit for you! And in less than 24 hours you can get the Starter Kit, get an exclusive Mini Trimmer, 6″ X 6″ Sampler of our new Designer Series Papers, AND choose ANY stamp set of your choice! That’s on top of the great deal our Starter Kit is already! PLUS FREE shipping! All for just $99.
It’s the best deal in the Catalog – You’ll get to choose up to $125 in product and get all the additional items for just $99 with free shipping starting January 3rd to March 31st during Sale-a-bration!
Want to learn more about the Blue Mountain Stampers? Click HERE
What are the Blue Mountain Stampers?
That’s the name of our stamping community. I enjoy welcoming new
members to our group. We’re from all over. If you’re considering joining
Stampin’ Up!, you may have questions about how I would support you as part of
my team. I do offer a variety of ways to learn, grow and to have FUN as a Blue
Mountain Stamper!
Exclusive Team Resource Page – videos, PDFs and more
Exclusive Face book Group – A great way to share and connect with other team members and share
Monthly Creative Challenges
Swapping Opportunities
Team Retreats
Meetings – both local and online/virtual
Monthly Crafting Day
Monthly Lunch & Learn
Recognition & Incentives
Additional support and business coaching available
We have a very active group that share and answer each other’s questions on
our Exclusive face book group. If you’re looking for fun, a place to grow
and share with others…You’ll fit right in!
Hobbyists are welcome!
Did you know? 90% of my Blue Mountain Stampers’ areHappy Shoppers – purchasing for themselves, (along with their family and friends.) That’s right…you can just get a discount on products you love!
We welcome the hobbyist who’s looking to be a “happy shopper” (and save money), as well as those of you that want to build a business (and make money).
Everyone is welcome after all there’s room for both and everyone in between.
And there is NO Obligation when you purchase your starter kit – Join the Blue Mountain
Stampers and see what it’s all about!
Shop at my Online Store and use Host
Code FX64QSU4
Click Here to learn more about using the Hostess Code If you order Online make sure your profile
information is up to date and you’ve allowed me to contact you (If you chose no
contact in the past you’ll need to call 1-800-Stamp Up to have them change your
profile for you.)
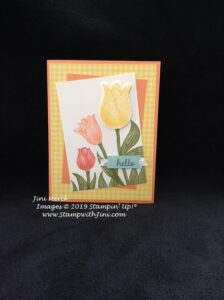
Here is a fun stamp set that has lots of potential AND it comes with a coordinating punch too so it makes projects quick and easy. You’ll want to watch for punch art ideas that will be sure to follow once the catalog launches January 3rd.
I used our Brights Designer Series Paper for this bright cheerful card and teamed it up with our Grapefruit Grove and Calypso Coral Classic Inks.
Here is a quick video to show you how I put this card together.
Timeless Tulip Card Video Tutorial
And of course a PDF that you can save and print off with a complete supply list and directions as a companion for your crafting needs.
Shop at my Online Store and use Host
Code FX64QSU4
Click Here to learn more about using the Hostess Code If you order Online make sure your profile information is up to date and you’ve allowed me to contact you (If you chose no contact in the past you’ll need to call 1-800-Stamp Up to have them change your profile for you.)
RSVP Today!
Receive a Birthday card from me in 2020! Click on the image to learn how
Today’s project is one that I made for my Team OnStage After Party as a treat and it some how got buried on my desk. (lol if you could only see it). That’s the bad news, but because of that the good news is over the next week I’ll be sharing some fun projects and tutorials with you now using NEW 2020 Mini Catalog products from that fun event along with some pictures too! Sound good? Hold on to your hats – this Mini is packed with fantastic product choices for us!!!
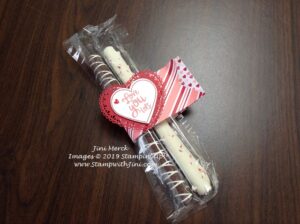
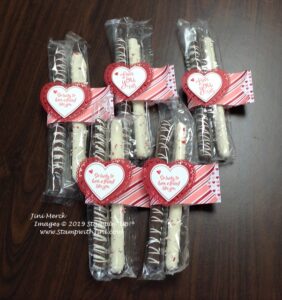
Cute? It’s a quick and easy treat for some one you love. Whether you make the treat yourself of buy prepackaged ones it’s sure to be a favorite, since who doesn’t love the salty and sweet combination?
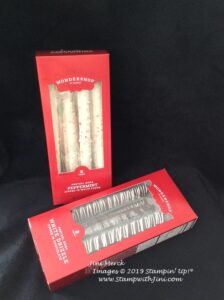
I found these at Target before the holiday, so you might be able to find some on sale some where at this point too.
I whipped up a bunch of these quickly for those attending the OnStage After Party.
Want to give them a try? Here is a quick video tutorial showing you how I put them together.
Heartfelt Chocolate Covered Pretzel Treat Video Tutorial
Here is a printable step by step with the complete supply list and measurements for you as a companion to the video.
Heartfelt Chocolate Covered Pretzel Treat PDF Tutorial
Enjoy! And then stop back by to check out more of my FREE tutorials using the 2020 Mini Catalog products as we head into the final week of the year.
Have You Held Your Spot in this first LIVE event of the year?
And if you live locally don’t forget my Mini Catalog Kick Off Event – not only will you get to see the products you’ll be creating some fun projects too using some of them!
Why not stop by my calendar of events and see what all is going on during 2020? The beginning of the year is a great time to carve out some time for your creative side and I’m here to help you do that!
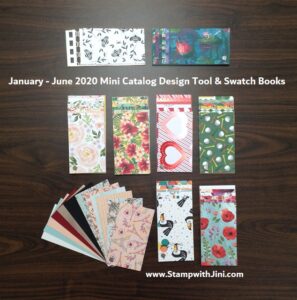
Don’t live locally or currently have a demonstrator and want a 2020 January – June Mini Catalog? Email me at StampwithJini@gmail.com your full Name, Address and Phone Number and I’ll be happy to mail you one of your own.
I’ll also have some great PreOrder options for you that include all the wonderful papers in this Mini Catalog. You can check them out HERE.
But you’ll want to hurry and order yours today since the PreOrder deadline is coming up fast! January 2nd is right around the corner.
Supplies:
Stamp Set: Heartfelt (*153775)
Inks: Real Red (147084/103287), Flirty Flamingo (147052/141402), and Real Red Dark Stampin’ Blends (147934)
Shop at my Online Store and use Host
Code FX64QSU4
Click Here to learn more about using the Hostess Code If you order Online make sure your profile information is up to date and you’ve allowed me to contact you (If you chose no contact in the past you’ll need to call 1-800-Stamp Up to have them change your profile for you.)
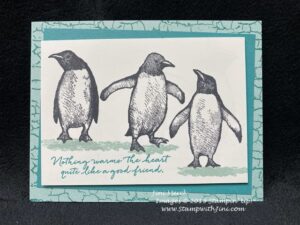
I got started stamping with this fun set and couldn’t stop stamping with them. So here is another card for you made with these delightful birds, this time my December Thank You card.
This time I’ve teamed them up with the Crackle Paint Background Stamp to create this “icy” look.
Done in shades of blue I really like the way it turned out. And when you use your Stamparatus they are a breeze to make!
Shop at my Online Store and use Host Code FX64QSU4
Click Here to learn more about using the Hostess Code If you order Online make sure your profile information is up to date and you’ve allowed me to contact you (If you chose no contact in the past you’ll need to call 1-800-Stamp Up to have them change your profile for you.)
What a great surprise it is to find my Paper Pumpkin Kit in my mail box every month – it’s a little taste of crafting happiness as I open the box. The kit this month coordinating with the lovely cards from October, but it was a stand alone kit with it’s 24 Tags.
My box was filled with goodies that I couldn’t resist using for other project too, such as today’s card.
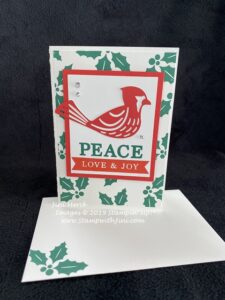
I just fell in love with this bold Poppy Parade cardinal piece that was included.
Want to see how I made this alternate project? Why not check out this quick video tutorial?
Paper Pumpkin November 2019 – Winter Gifts Note Card Tutorial
Note cards are perfect for new stampers since you get both the card and envelope for one great price!
Here is a printable PDF for you that includes the measurements and a complete supply list for you.
Paper Pumpkin November 2019 – Winter Gifts Note Card Tutorial PDF
If you need a quick and easy Holiday Gift Paper Pumpkin is a perfect choice! Gift someone the gift of crafting with these all inclusive kits! You can buy a prepaid subscription to gift someone or create Subscription for it and have it sent direct to them. The choice is yours!
And right now we have some past kits as part of of Year End Sale too so you can stock up on those gifts or get one for yourself
You can find PrePaid Subscription options in my Online Store or you can Subscribe HERE.
Don’t miss out on the December kit – sign up ends December 10th!
Want to learn more? Why not try my Paper Pumpkin Craft Time? You can come and see what it is all about for just $5 and it is free if you subscribe at the event. Just check out my Calendar of Events to see this and all my classes and events.
Then stop back by tomorrow when I’ll be sharing another way I used this fun kit.
Shop at my Online Store and use Host
Code FX64QSU4
Click Here to learn more about using the Hostess Code If you order Online make sure your profile
information is up to date and you’ve allowed me to contact you (If you chose no
contact in the past you’ll need to call 1-800-Stamp Up to have them change your
profile for you.)
Today I’ll be sharing a few more swaps that I received from folks during the OnStage event in Atlanta along with my sneak peek of the goodies I received from the 2020 January – June Mini Catalog Product Purchase Premiere!
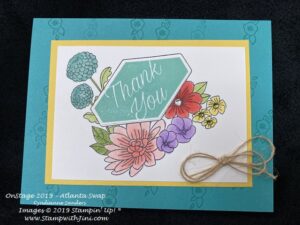
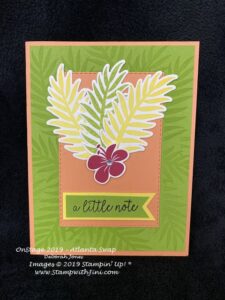
I’ll start with the swaps first all of these sets can be found in our 2019 Annual Catalog. Swapping cards is a way for us to share and meet other stampers and I always love the variety of cards. This first card uses the Accented Blooms stamp set (151336).
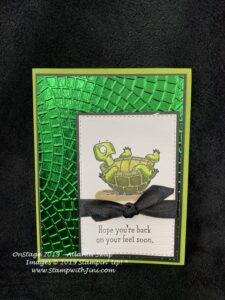
And this next card uses one of my favorite sets Back on Your Feet (149385) – seems like I’ve needed lots of get well cards this year.
And how about this fun tropical feeling card – perfect for warming up that cold arctic blast we were experiencing last week. The Tropical Chic stamp set (148226) has a set of coordinating dies which makes it a lot of fun to use.
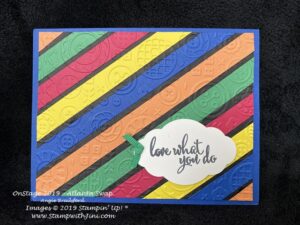
And a fun card that uses strips to create a colorful back ground and it uses
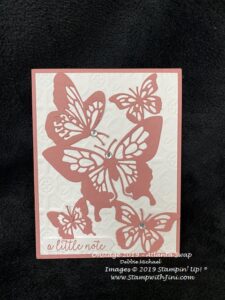
the Love What You Do stamp set (148042) which has some wonderful sentiments in it. And here is a card made with our Butterfly Beauty Dies (148536) and the Butterfly Gala stamp set (148580) two very popular products.
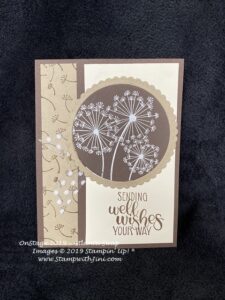
And how about this next card using the Dandelion Wishes stamp set (151345)?
My final swap to share with you today uses the Winds of Change Stamp set (149357),
Got a favorite? Why not leave me a comment and let me know which one you like best?
More #OnStage2019 Fun
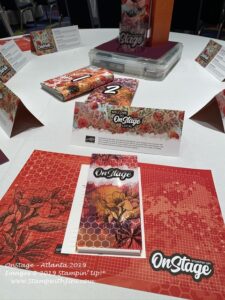
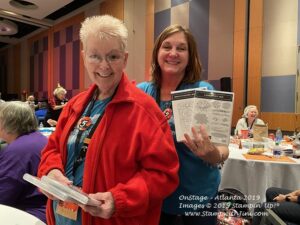
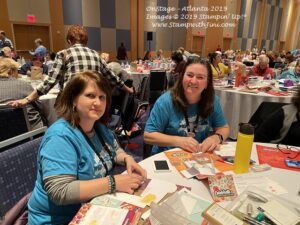
Here are a few more photos from the event – it was so much fun having my team there to celebrate with me. Stampin’ Up! always makes the tables a fest for your eyes with it’s colors and images. And of course a gift.
prize patrol is always a hit
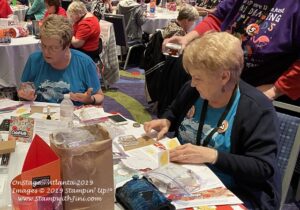
And of course a little stamping too rounds out the event – what fun to see and try the products!
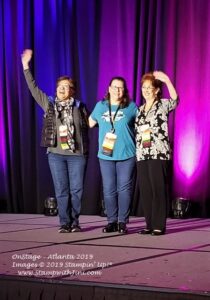
And some recognition too – I was excited to celebrate my earning of the Maui Trip and my 10th Anniversary as a Demonstrator. In addition, I was surprised to learn I was 48th in the US as a Team Leader. (Currently there are 37,591 Demonstrators in the US and 52,142 in the World.)
I’m truly thankful, grateful and blessed! I appreciate the fact I have the most wonderful Team, The Blue Mountain Stampers and the best customers a Stampin’ Up! Demonstrator could ask for!!!
And now for the sneak peek I know you’ve been waiting for – Here is my video of my unpacking of my 2020 January – June Mini Catalog & 2020 Sale-a-bration products that I was able to order during after OnStage during the Product Purchase Premiere. One of the best things I like about being a demonstrator is being able to get products first!
2020 January Mini Catalog OnStage Product Purchase Premiere Sneak PeekVideo
Fun right? You’re going to LOVE this Mini Catalog.
Interested in being one of the first to order products too? My video is just a peek of what’s inside the 20202 January Mini Catalog! And as I am sure you can guess, being the first to see this new catalog or any of our new catalogs is a very exciting AND a huge perk of being a Demonstrator – after all who wouldn’t want to be first? Right! Add the fact that you’ll receive a discount on all these products and you can’t loose! If you feel this is a good time to join Stampin’ Up! and my team, the Blue Mountain Stampers, you too can be first too!
What are the Blue Mountain Stampers?
That’s the name of our stamping community. I enjoy welcoming new
members to our group. We’re from all over. If you’re considering joining
Stampin’ Up!, you may have questions about how I would support you as part of
my team. I do offer a variety of ways to learn, grow and to have FUN as a Blue
Mountain Stamper!
Exclusive Team Resource Page – videos, PDFs and more
Exclusive Face book Group – A great way to share and connect with other team members and share
Monthly Creative Challenges
Swapping Opportunities
Team Retreats
Meetings – both local and online/virtual
Monthly Crafting Day
Monthly Lunch & Learn
Recognition & Incentives
Training available for workshops, clubs, classes and more!
Additional support and business coaching available
We have a very active group that share and answer each other’s questions on
our Exclusive face book group. If you’re looking for fun, a place to grow
and share with others…You’ll fit right in!
Hobbyists are welcome!
Did you know? 90% of my Blue Mountain Stampers’ areHappy Shoppers – purchasing for themselves, (along with their family and friends.) That’s right…you can just get a discount on products you love!
We welcome the hobbyist who’s looking to be a “happy shopper” (and save money), as well as those of you that want to build a business (and make money).
Everyone is welcome after all there’s room for both and everyone in between.
And there is NO Obligation when you purchase your starter kit – Join the Blue Mountain Stampers and see what it’s all about!
Are you eligible for a FREE Stampin’ Up! 2020 January-June Mini Catalog?
I’m currently working on my mailing
list for shipping the 2020 Catalogs (and will be finalizing it by November 29th)
–
You’ll be the first to get one
(around the mid December) if:
Are you a frequent customer of mine? If you ordered a minimum of $50 from me in the last three months (or 90 days) you are eligible to receive FREE Stampin’ Up!Catalogs.
Have you hosted a Private Party? If you have gathered with friends in the last 3 months (or 90 days) you are eligible to receive FREE Stampin’ Up! Catalogs.
Haven’t ordered from me for a while? Place an order with me and you are eligible to receive a FREE Stampin’ Up!Catalog. (If you are placing an Online Order make sure your information is up to date and correct).
If you don’t already have a Demonstrator and would like a 2020 Mini Catalog email me your Name, Address, and Phone number to StampwithJini.com and I’ll be happy to send you one.
Shop at my Online Store and use Host
Code KTYQJ3TY
Click Here to learn more about using the Hostess Code If you order Online make sure your profile
information is up to date and you’ve allowed me to contact you (If you chose no
contact in the past you’ll need to call 1-800-Stamp Up to have them change your
profile for you.)
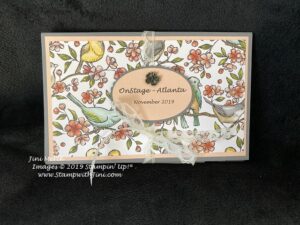
Whew, it’s been a busy weekend and I’m just catching up. I had a fantastic time over the weekend at our OnStage Local in Atlanta. It’s always great to meet new friends! Friday I shared one of the table 3d treats I made for folks and today I wanted to share the fun flip album I made as part of my team gifts for the event.
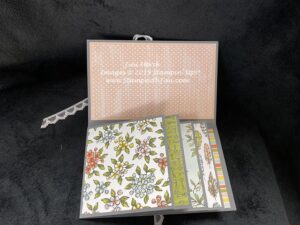
I just love the Bird Ballard Designer Series Paper with all it’s lovely water colored images so it was a perfect choice for this project as we were getting our first look at the 2020 January-June Mini Catalog & Sale-a-bration Brochure. (You are going to LOVE it!)
This album was fairly easy to whip up and is perfect for all kinds of events, trips, or even a brag book for Grandma! It will hold up to 10 photos including a 4×6, but is compact so it’s easy to store or take along with you.
I’ve made a video tutorial for you so you can see how I created this Flip Album
Bird Ballard Flip Album Video Tutorial
And if you’d like the complete supply list, measurements, and a step by step tutorial that contains some additional photos to go along with it here is my PDF version too.
So what do you think? Like it and want to make one too? Why not leave me a comment and let me know?
#OnStage2019 – Atlanta
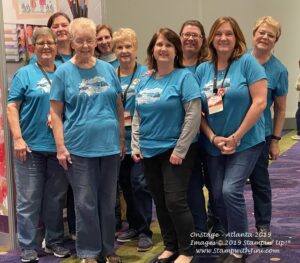
I loved having our largest group yet from our team attend and I think everyone had a blast learning, sharing, and meeting others from across the country. Since we had a large enough group we even sported our first team t-shirt! Spending time with these special ladies was a great way to end my 10th Anniversary year being a Stampin’ Up! Demonstrator.
I’ll be sharing more of our #OnStage2019 experience through out the week as I unpack things. So stop on by to check out some sneak peaks too!
On a personal note my technology has been uncooperative so I apologize for things being a bit scattered lately. I had to spend the day at the Apple store yesterday, so hopefully I’ve got things sorted out now. Next to find a computer person.
Shop at my Online Store and use Host
Code KTYQJ3TY
Click Here to learn more about using the Hostess Code If you order Online make sure your profile
information is up to date and you’ve allowed me to contact you (If you chose no
contact in the past you’ll need to call 1-800-Stamp Up to have them change your
profile for you.)