Today’s card is a fun ocean scene created with the Friendly Fins Bundle. I love anything ocean and knew with these mana rays I had to have the bundle. I knew my daughter would love it since when on the Big Island a few years ago we were able to swim with these wonderfully gentle creates. Today’s card uses the dolphins but the concept works for both.
I’ve got a video tutorial for you showing how to make this card along with the PDF. Why not check them out?
Friendly Fins Half Hexagon Pop Up Card Tutorial PDF
Shop at my Online Store and place an order for $60 or more in product receive a FREE Gift from me; my Unbounded Beauty Card Class PDF and a supply kit to create the projects while supplies last.
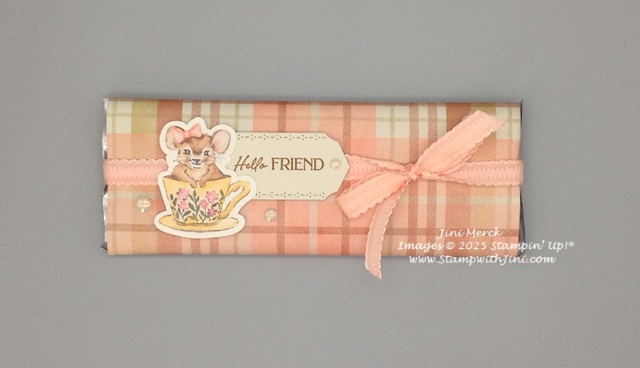
For today I’ve used the cute little mouse in a tea cup since my friend is a tea lover. After all who doesn’t love a little tea with something sweet? But with all the choices and the fact you can cut out the Designer Series Paper too with the coordinating dies, this pack of paper is sure to be used up quickly so you’ll want to be sure to get an extra pack!
Check out this quick little project.
Cute? I think it will bring a smile to my friends face how about you?
I’ve whipped up a quick little video tutorial and PDF for you too.
My PDF has the YouTube link in addition to the supply list, measurements and instructions. So go ahead print it out so you’re all set when you get ready to create!
Shop at my Online Store and use March’s Host Code XF3VWS6Z with a product order of $60 or more and receive a FREE Gift from me; my Mixed Media Florals Fun Fold Card Class PDF and a supply kit to create the projects while supplies last. If you’re placing an order of $150 or more; no worries. Do not use my host code so you can get your benefits, you’ll still get my FREE gift
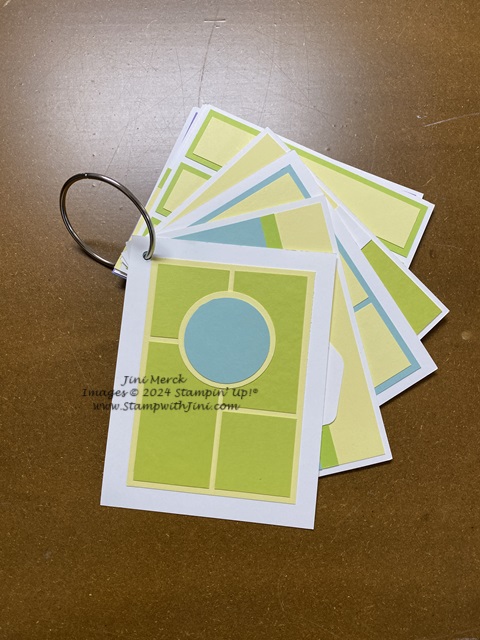
I’ve been sharing my card sketches with you over the past months and today I’m going to share one of the ways I store them on my desk with this cute little crate I decorated.
I’ve used a inexpensive wooden crate that I found at my local dollar store to decorate and have given you a PDF that even has the labels that you can die cut in both black and Blackberry Bliss so you can choose how you decorate your little crate. Simply print the PDF you want on Basic White Card stock and go!
These card sketches are great for inspiration and having them handy on my desk makes it easy to get started!
I’ve punched a hole on them and put them on a ring to keep them together so they sit up nicely in my wooden crate.
Want to see how I decorated this crate? I’ve got a PDF and video tutorial for you so you can make them too!
If you haven’t seen my past sketches, you can start by checking out my Darling Dinos You’re the Best Card & video tutorial from Wednesday this week or click on Sketches in my categories to see them. Then stay tuned as I’ll be sharing more with you in time.
I hope you’ll enjoy this little 3d project and crate a crate of your own. This fun little project can hold all kinds of things!
Enjoy! And don’t forget to stop back by next week when I’ll be sharing more fun projects with you. And of course if you would like to see my YouTube videos why not click on my YouTube channel and subscribe today?
Shop at my Online Store and use March’s Host Code XF3VWS6Z with a product order of $60 or more and receive a FREE Gift from me; my Mixed Media Florals Fun Fold Card Class PDF and a supply kit to create the projects while supplies last. If you’re placing an order of $150 or more; no worries. Do not use my host code so you can get your benefits, you’ll still get my FREE gift
Sign up HERE for my FREE Newsletter and Class Schedule and receive my FREE 2024-2025 In Color Spotlight on Nature Card Class OR Get my Blog Posts delivered right to your inbox HERE
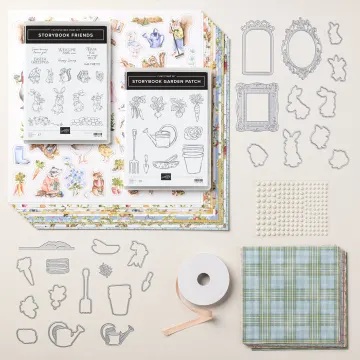
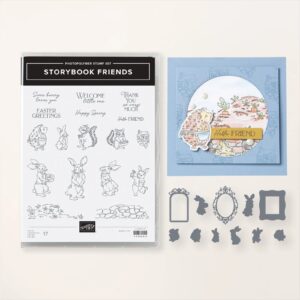
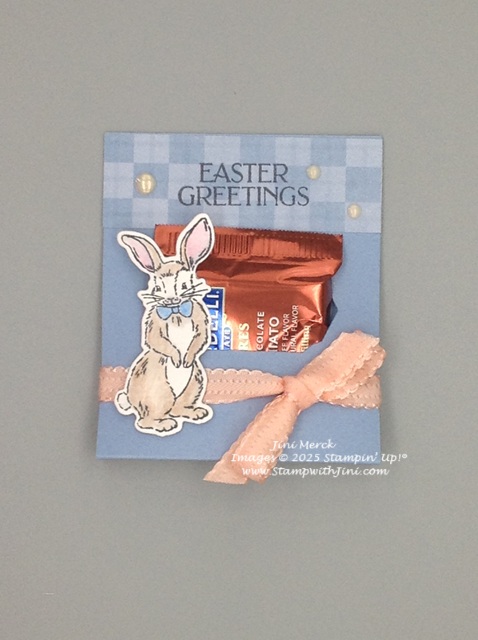
I love making little treats, it is what got me started in paper crafting as a child and came in so full bloom when my own children were young. So today I’ll be sharing with you a sweet little treat for Easter using the Storybook Friends Bundle (164675). I’ll be sharing these fun little treats with my fellow stampers at OnStage in Raleigh.
This bundle has some great images and sentiments so this treat can easily be used for different events, like a baby shower or spring.
Here is my video tutorial showing you how I created this treat be sure to check out the PDF below as it has everything you need to know to create this fun little treat including the YouTube link!
Shop at my Online Store and use March’s Host Code XF3VWS6Z with a product order of $60 or more and receive a FREE Gift from me; my Mixed Media Florals Fun Fold Card Class PDF and a supply kit to create the projects while supplies last. If you’re placing an order of $150 or more; no worries. Do not use my host code so you can get your benefits, you’ll still get my FREE gift
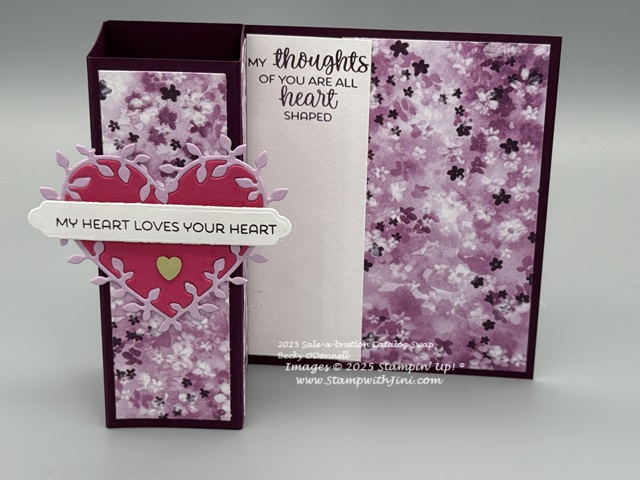
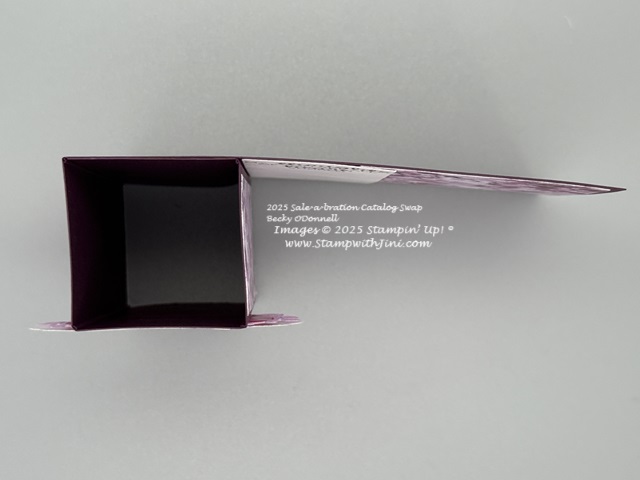
But it is super simple to create the box since the panel buts right up to the score line. Simply score the 11″ x 4 1/4″ base at 1 1/2, 3, 4 1/2 and 6 and decorate! And it folds flat too so it is great for mailing as it fits into our standard envelope.
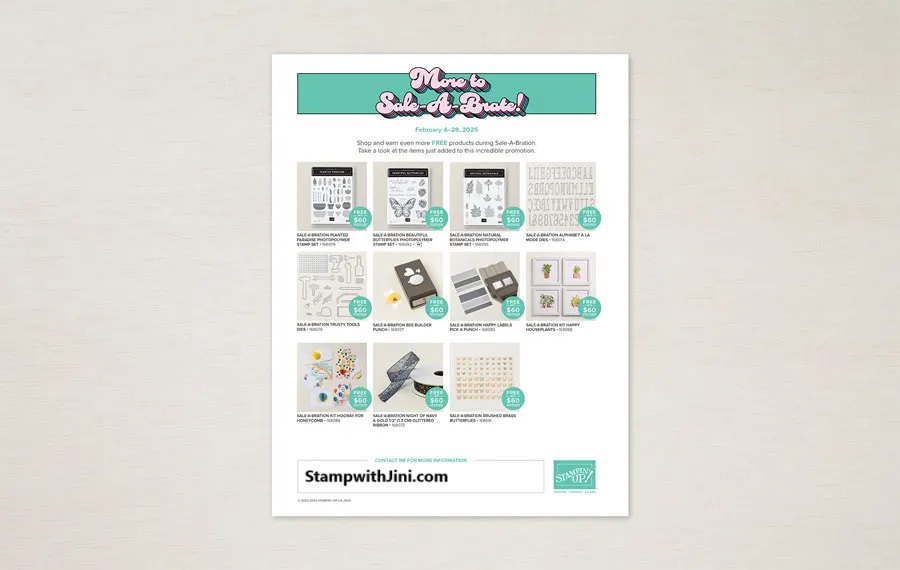
Did you know that we have some NEW options for Sale-a-bration? Check out this flyer that shows you them.
Just a couple of things to note about these FREE Sale-a-bration products.
You must use the item numbers on the flyer in order to redeem these products as Sale-A-Bration items. These products have different item numbers in the catalog, which won’t register as part of Sale-A-Bration.
If these two kits being offered as Sale-a-bration products sell out they won’t be returning and will be discontinued.
Shop at my Online Store and use February’s Host Code FAZVPX3J with a product order of $60 or more and receive a FREE Gift from me; my Storybook Friends Fun Fold Card Class PDF and a supply kit to create the projects while supplies last. If you’re placing an order of $150 or more; no worries. Don’t use my host code so you can get your benefits, you’ll still get my FREE gift
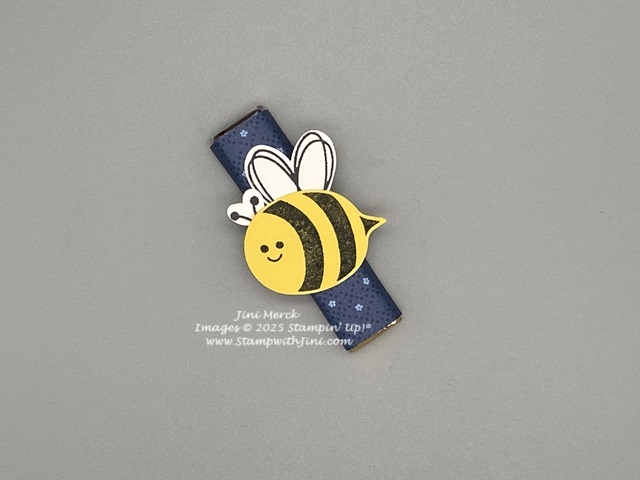
Today I’m going to share a quick little treat to whip up for someone special, or create a bunch of them and share with everyone lol. These little treats are so fun and easy to make you won’t want to stop! I was tickled when I received this little treat in a swap a couple of years ago during a BackStage event and could wait to make my own.
Punches are my go to when creating large numbers of treats like this one that I made for the teachers at my daughters school. And if you love bees and enjoy scrapbooking check out our Meant to Bee Bundle (167243) that includes a set of dies.
Shop at my Online Store and use January’s Host Code XSR6A9QU with a product order of $60 or more and receive a FREE Gift from me; my Friendly Seagulls Card Set Class PDF and a supply kit to create the projects while supplies last If you’re placing an order of $150 or more; no worries. Don’t use my host code so you can get your benefits, you’ll still get my FREE gift
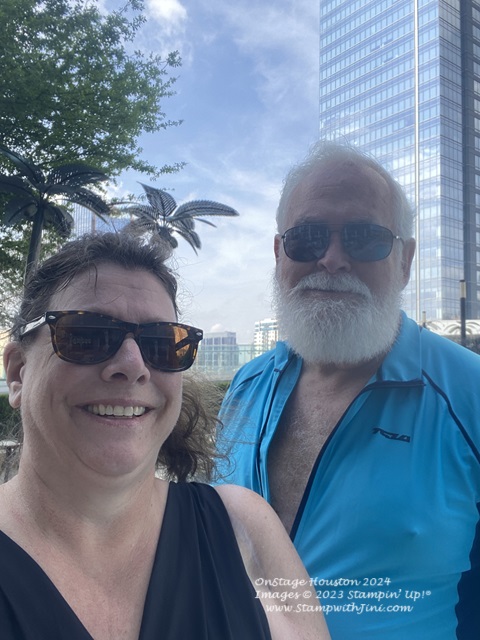
Whew. I’m catching back up after returning from Houston and the fantastic Stampin’ Up! event there. So today I thought I’d share some photos and some of the swaps I received during the event.
Stampin’ Up! outdid themselves with this event and the excitement was high – it’s been along time since we have been able to gather like this. My husband, Larry joined me for this event since we have family in Houston and would spend some time with them after.
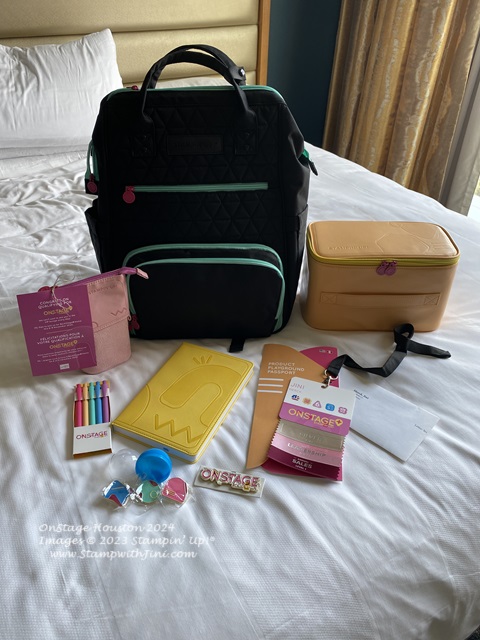
Yep, that’s my cutie enjoying a bit of lazy river time on top of the Marriott with myself and other demonstrators before check in time for the event. He seemed to enjoy the energy that surrounded him and I had a hard time getting him to give me back my bag as I got ready for the General Session to start. Check out the goodies our Summer Splash trimmed backpack was filled with. A fun crafting bag tucks in the bottom and slides out through the pocket and a coordinating pencil “cup” bag in our new In Color Pretty in Pink.
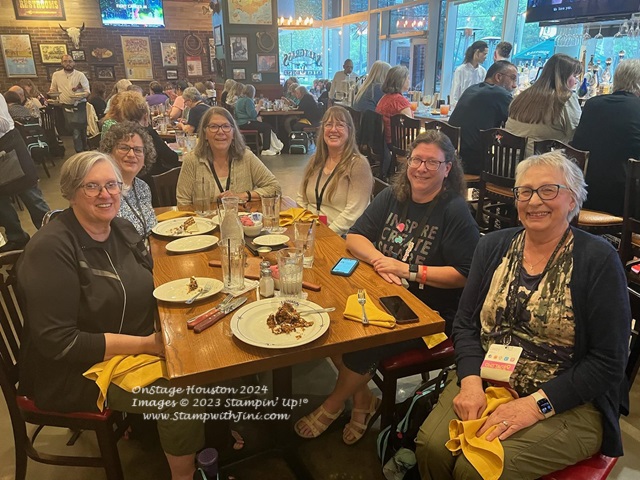
A wonderful beginning for sure where I had a lovely opportunity to connect with some new stamping friends. A quick dinner at the Saltgrass Steak House with some yummy food
and then on to After Hours and some on hand stamping fun with new products from the 2024 Annual Catalog!
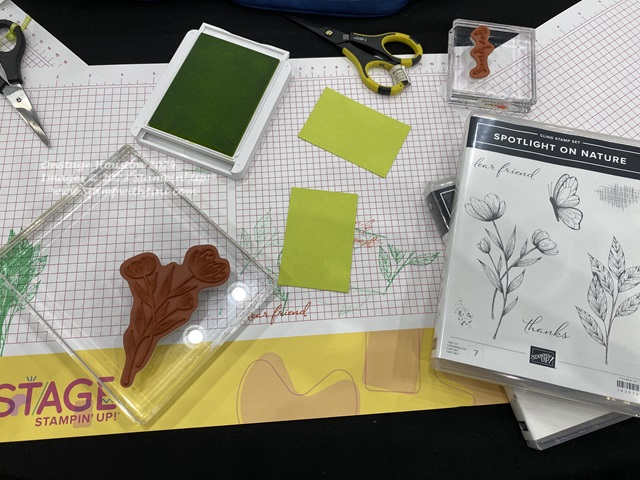
Hundreds of us filled the space for an full evening of stamping, laughter, and fun. Everyone was excited to see the new products and In Colors! They sure didn’t disappoint. I choose one of the Bundles, Spotlight on Nature (163579) that was offered since it has some great images and basic shape dies.
I’m looking forward to sharing these projects and more with you soon. Along with more photos from the event throughout this week.
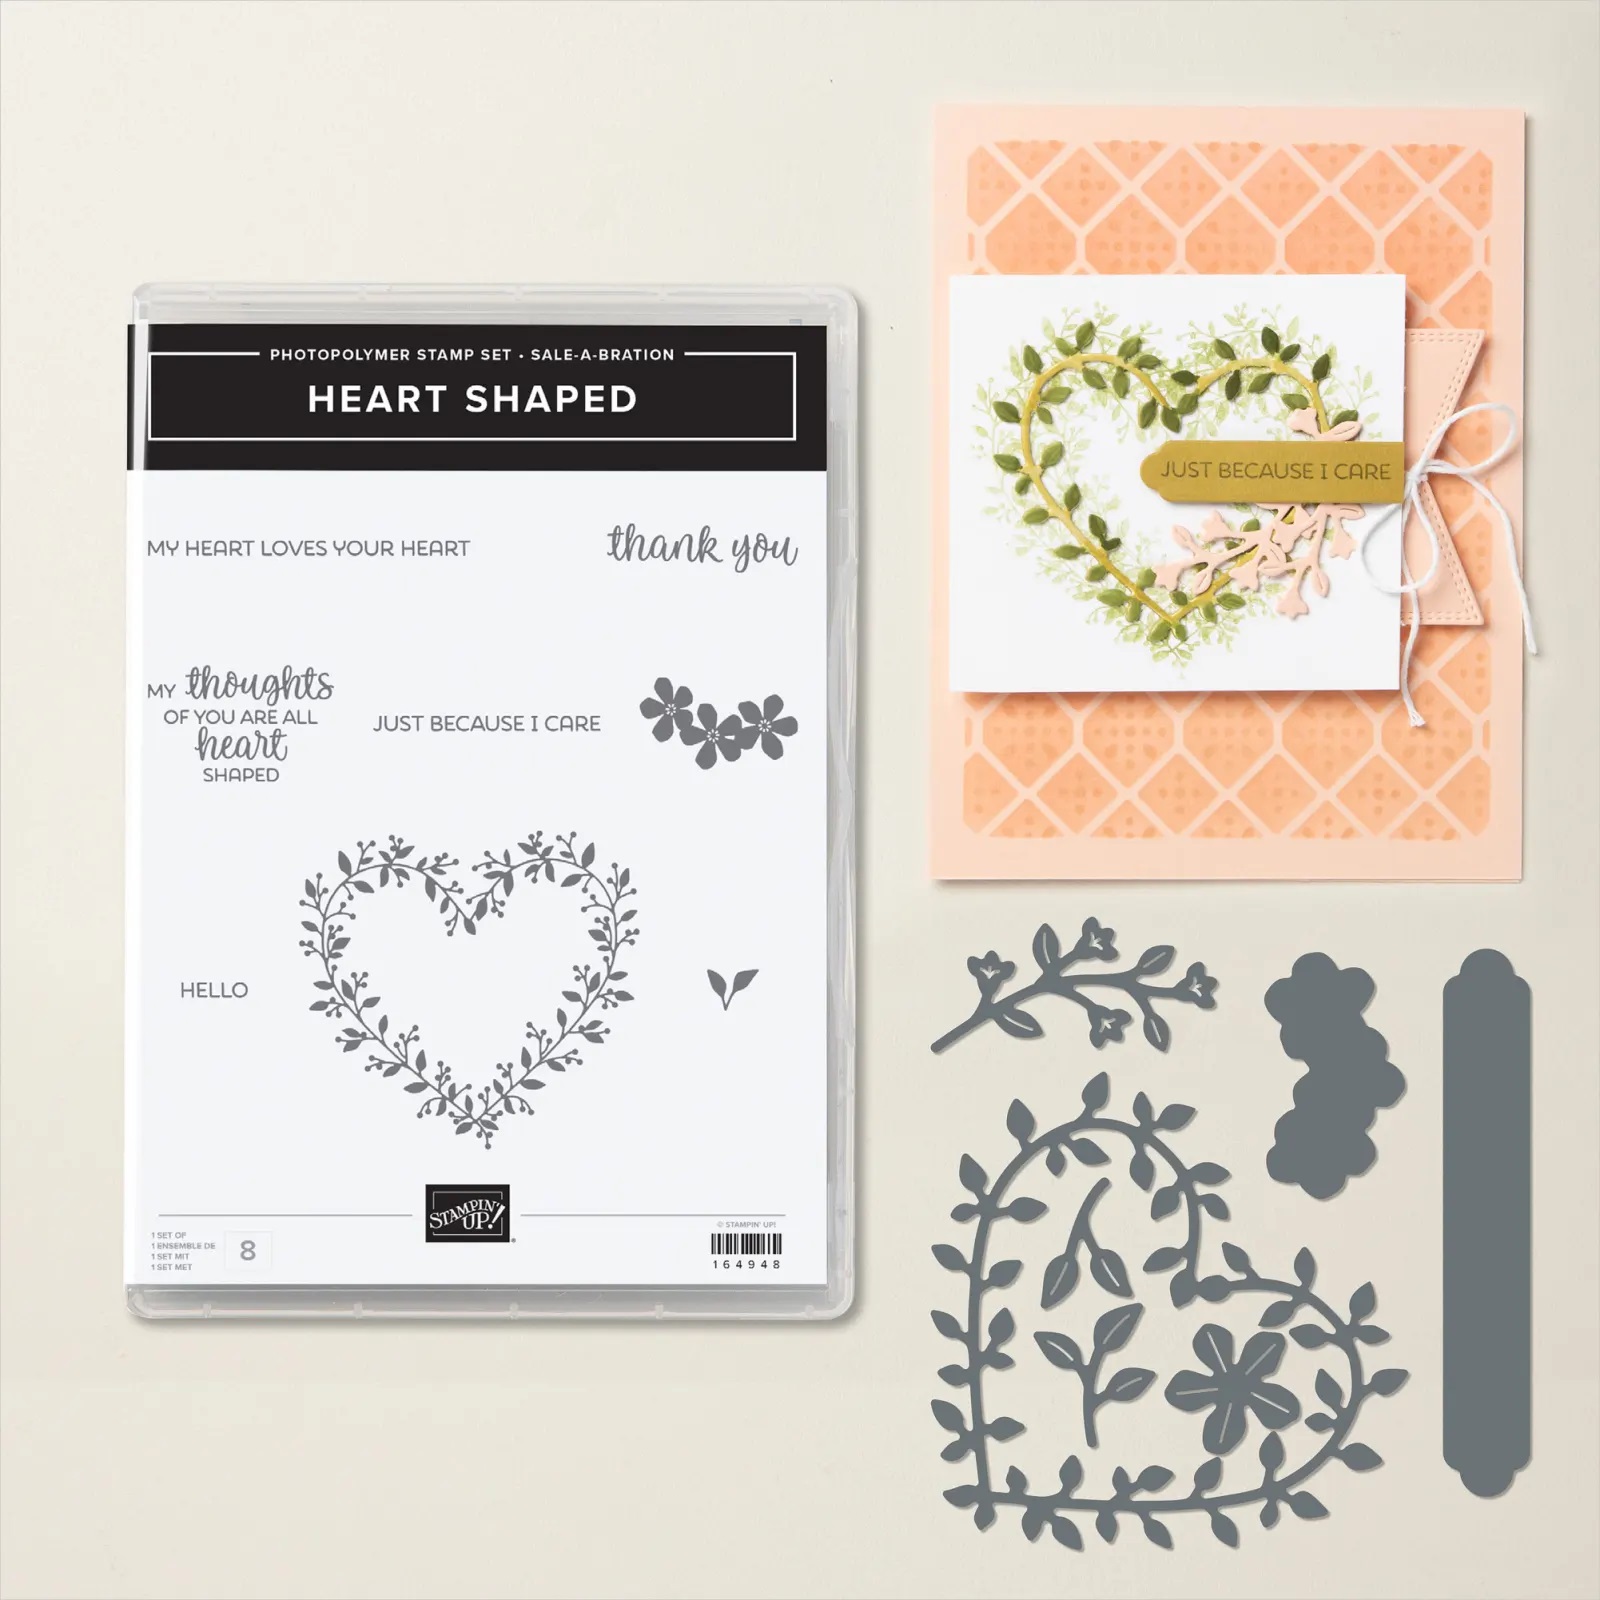
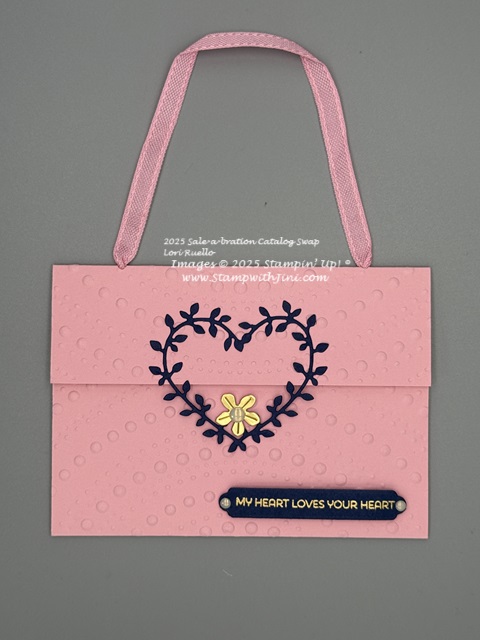
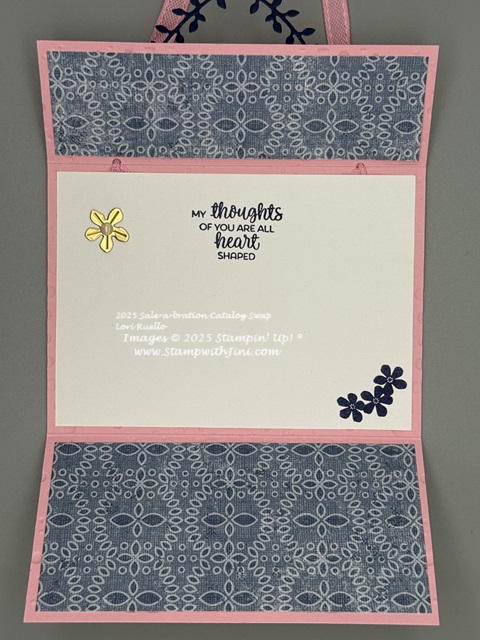
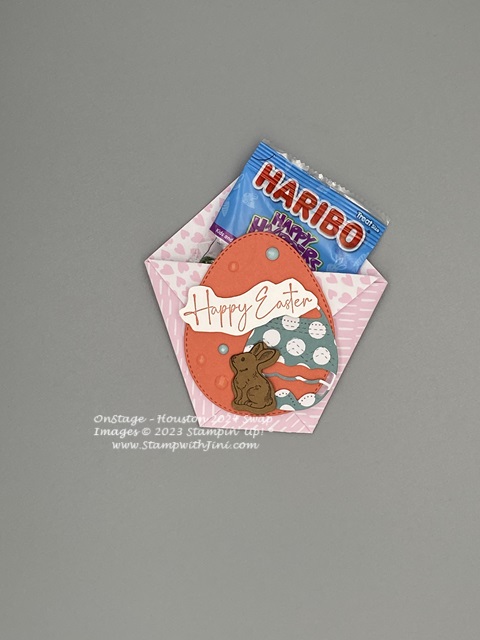
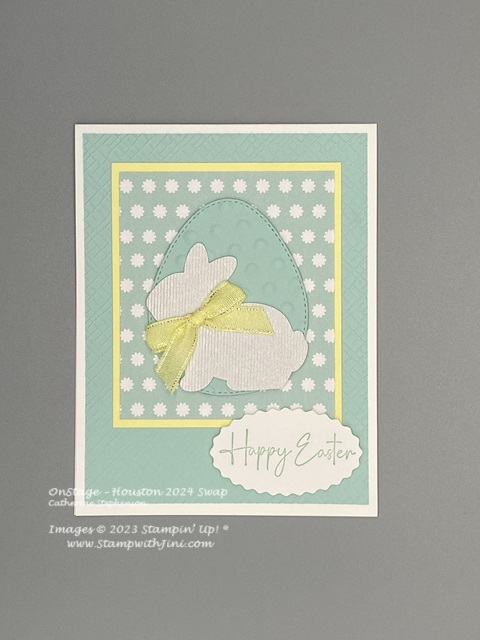
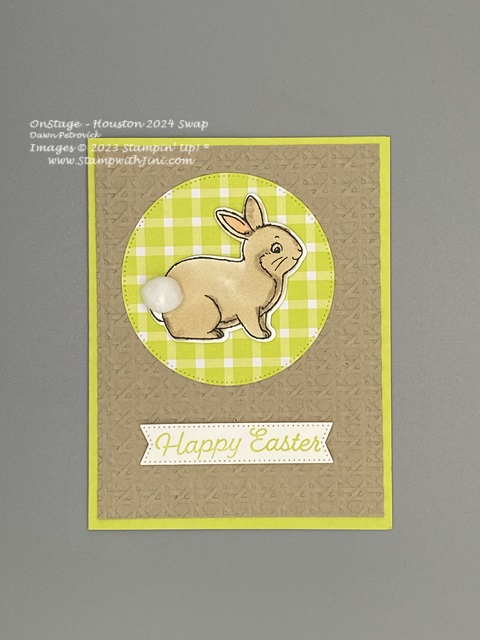
Now how about some swaps? I thought I’d share of my Easter swaps with you since it is right around the corner. There were some really cute projects swapped for Easter here are a few that I received.
This first one is a fun little 3d treat holder that uses the Diaper Fold.
Shop at my Online Store and use Host Code CH3HXFEQ with a product order of $50 or more and receive a FREE Gift from me; my Perennial Lavender Card Class!
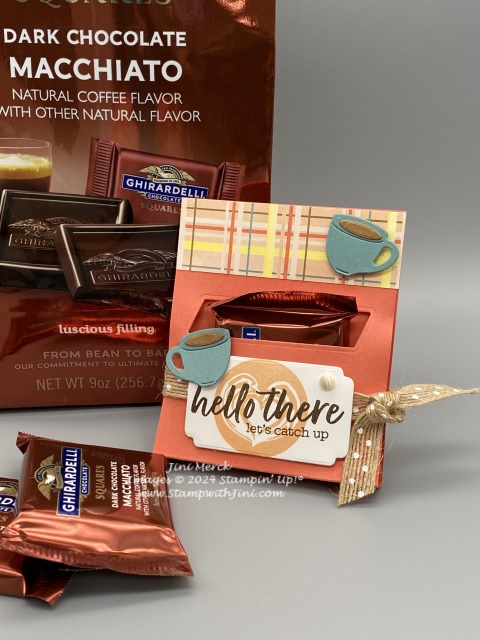
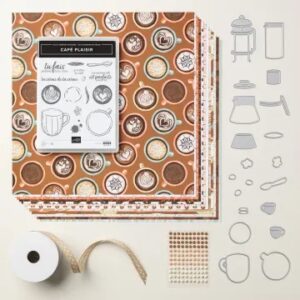
Today’s little treat holder is one that I created for my #OnStage Houston event. I couldn’t resist after finding the Ghirardelli Macchiato Chocolates. It’s like a little taste of espresso on the go. Yum!
The NEW A Little Latte Suite Collection (Online Exclusive 163466) is a coffee lovers dream, as this Suite is filled with wonderful images, dies, and textures for creating. But because it is an Online Exclusive you’ll only find it in my Online Store rather than a catalog.
Want to see how I made this quick little treat for my stamping friends? Check out my video tutorial
And here is a pdf for your convivence too, it contains a complete supply list, measurements, step by step instructions and the video link. Giving you everything in one place!
Enjoy! I think I’m off to grab a cup of coffee lol with my sister. And you’ll want to be sure to watch for my card tutorial using this Online Exclusive tomorrow.
Shop at my Online Store and use Host Code CH3HXFEQ with a product order of $50 or more and receive a FREE Gift from me; my Perennial Lavender Card Class!
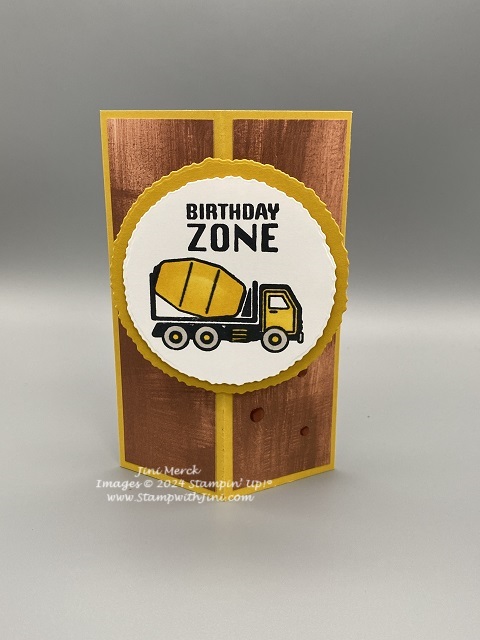
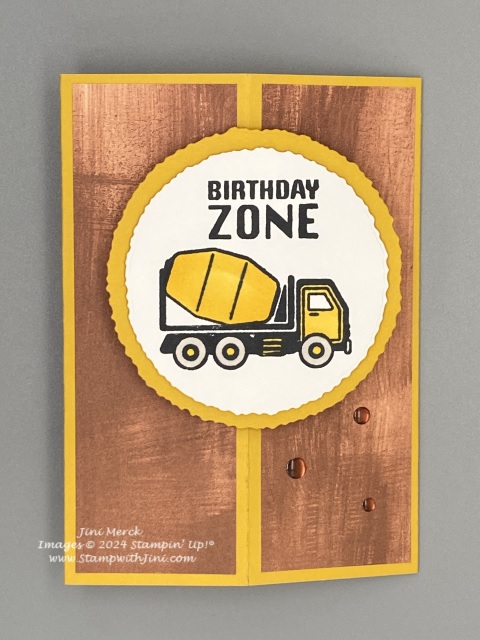
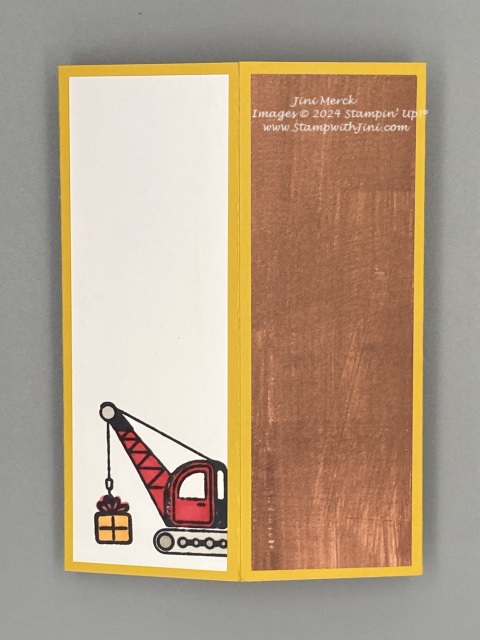
Remember today kicks off a whole week of fun tutorials to celebrate my 15th Anniversary as a Stampin’ Up! Demonstrator. It’s my way of saying thank you for being part of my journey, I wouldn’t be able to do this without all my wonderful crafting friends.
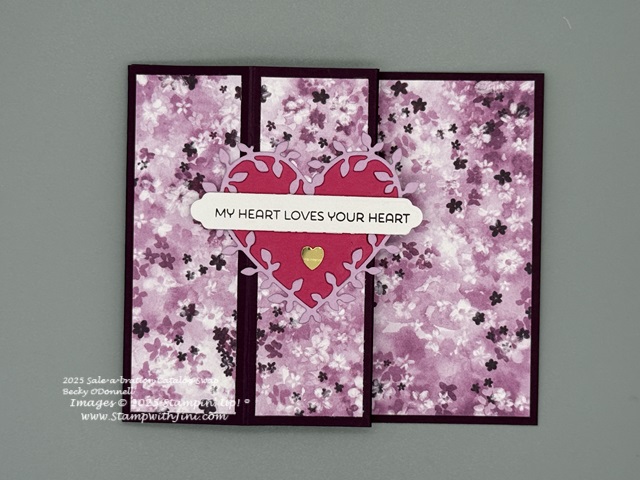
So today’s card is a fun little card that is 3d and uses the Construction Zone stamp set (161582). It will fold flat when you want to mail it and pops up and creates a little box for you to display making it a lot of fun.
This card is great for the guys in our lives and our Stampin’ Blends make it a snap to add bold color.
Shop at my Online Store and use Host Code CH3HXFEQ with a product order of $50 or more and receive a FREE Gift from me; my Perennial Lavender Card Class!
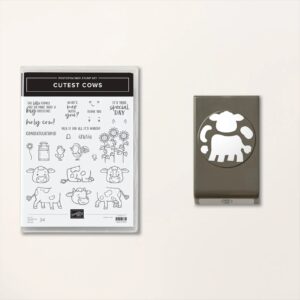
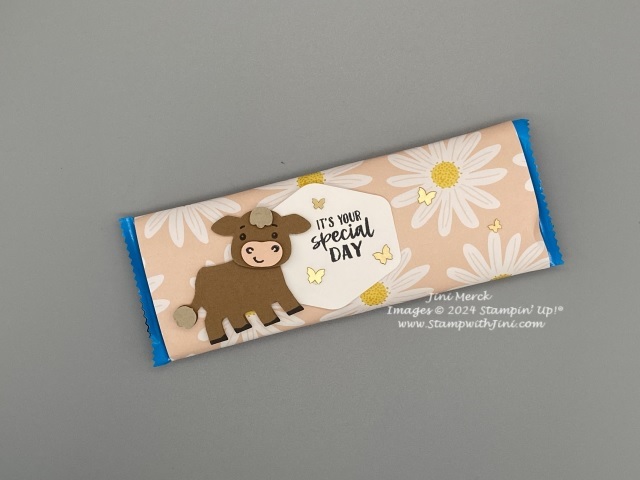
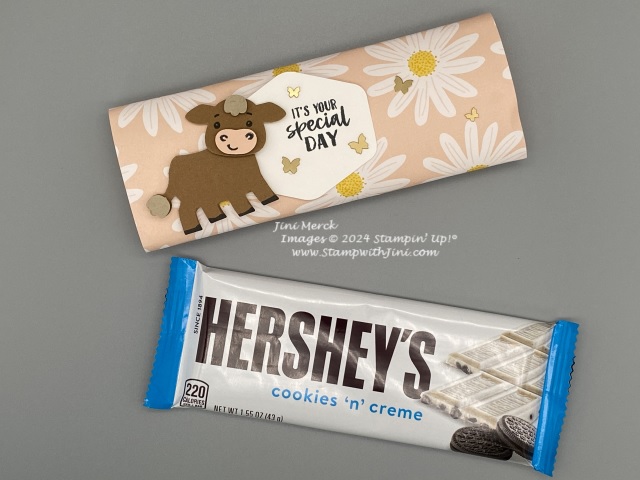
It’s a rainy day in Georgia and with the drop it temperatures its a great day to stay in and craft. So today I’d like to share with you a fun little project that I designed for a friends birthday using the Cutest Cows Bundle (162897).
I love the fact this set has fun little expressions and sentiments too.
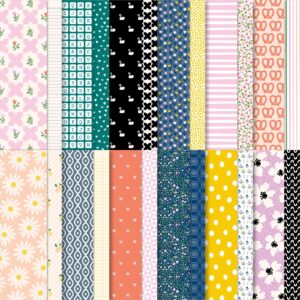
This treat is quick and simple to make. That along with this fun stack of paper with multiple patterns that you can use makes it wonderful for creating a ton of treats for a special day. And it holds your favorite candy bar, I couldn’t resist the Cookies & Cream for this project.
I’ve whipped up a quick tutorial for you and a PDF too. Why not take a few minutes and check it out?
Shop at my Online Store and use Host Code EVNY7KRZ with a product order of $50 or more and receive a FREE Gift from me; my fun fold Cutest Cow Card Class!