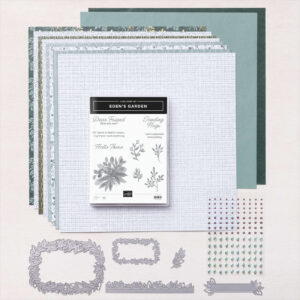
Today’s project is the last and final card for the One Sheet Wonder Template #1 and it uses that fantastic Ever Eden Cotton Paper.
Whew! that makes 4 quick and easy card all using one 6×6 piece of Ever Eden Designer Series Paper! If you missed the Template for this project CLICK HERE to check it out. Want to see the tutorial? I won’t make you wait any longer.
One Sheet Wonder Eden’s Garden Lay Out #4 Card Video Tutorial
One Sheet Wonder Eden’s Garden Lay Out #4 Card Tutorial PDF
Are you liking the One Sheet Wonder Template that I’ve shared with you this week? It’s a great way to make multiple cards using your Designer Series Papers. I especially like the Eden’s Garden stamp set for it’s sentiments. This makes a great set of cards to gift too since it has a variety of sentiments we need year round. What do you think? Why not leave me a comment and let me know? And of course if you’d like this Collection of products why not stop by my Online Store? The Eden’s Garden Collection is available until January 3rd or while supplies last. It’s a beautiful collection with special products that are only available during the promotion since it is a sneak peek into the January – June Mini Catalog. While you can get the Bundle later, I don’t think you’ll be disappointed with the exclusive products.
Want to see a lovely Home Decor project I made using this Collection too? CLICK HERE to see my tutorial.
Shop at my Online Store and use Host Code TUK3SXFDand receive a FREE Gift
Click Here to learn more about using the Hostess Code If you order Online make sure your profile information is up to date and you’ve allowed me to send you your free gift.
If your Online order is $150 or more make sure not to use the host code so that you can take advantage of the Host Benefits yourself – No worries, I’ll still send you your free gift. It’s my way of saying thank you for choosing me as your demonstrator!
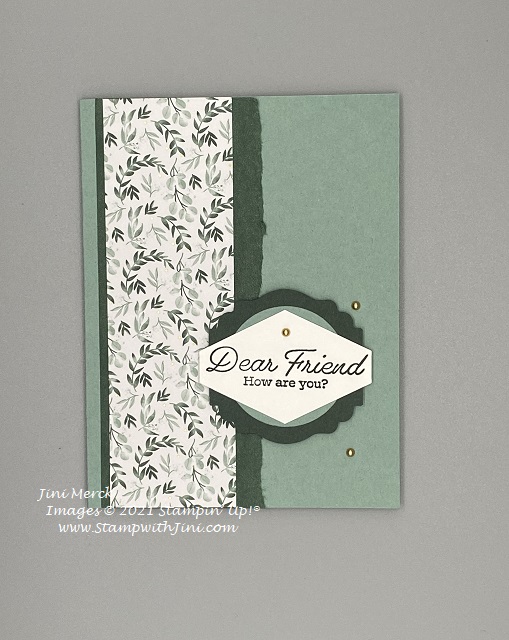
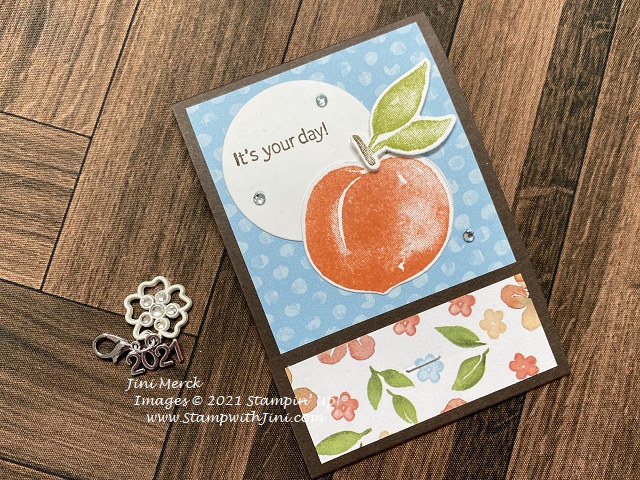
I hope you’re enjoying the One Sheet Wonder Tutorial – Today’s card Lay Out #3. This card is made extra special due to the Ever Eden Cotton Paper that was used to highlight the beautiful pattern from the Ever Eden Designer Series Paper.
This Cotton Paper is really quite cool to work with, one side has more of a sheen than the other and when torn like I have here it gives you another texture. Why not check out my Video Tutorial?
One Sheet Wonder Eden’s Garden Lay Out #3 Video Tutorial
And of course, a printable PDF too.
Eden’s Garden One Sheet Wonder Lay Out #3 Card Tutorial PDF
Enjoy! And don’t forget to stop back by tomorrow for Lay Out #4, our 4th and final card for this One Sheet Wonder Template.
Shop at my Online Store and use Host Code TUK3SXFDand receive a FREE Gift
Click Here to learn more about using the Hostess Code If you order Online make sure your profile information is up to date and you’ve allowed me to send you your free gift.
If your Online order is $150 or more make sure not to use the host code so that you can take advantage of the Host Benefits yourself – No worries, I’ll still send you your free gift. It’s my way of saying thank you for choosing me as your demonstrator!
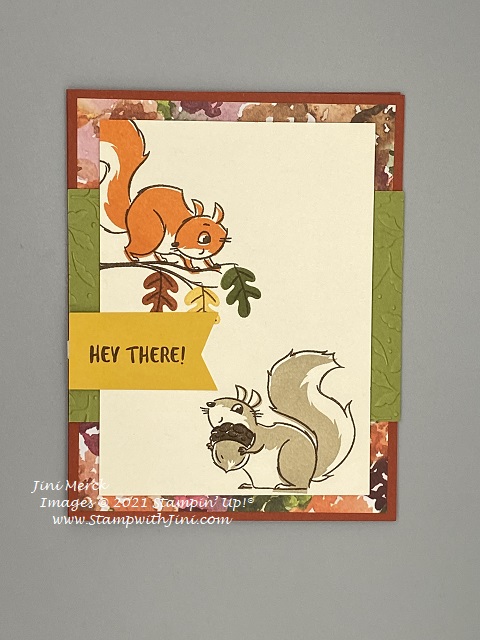
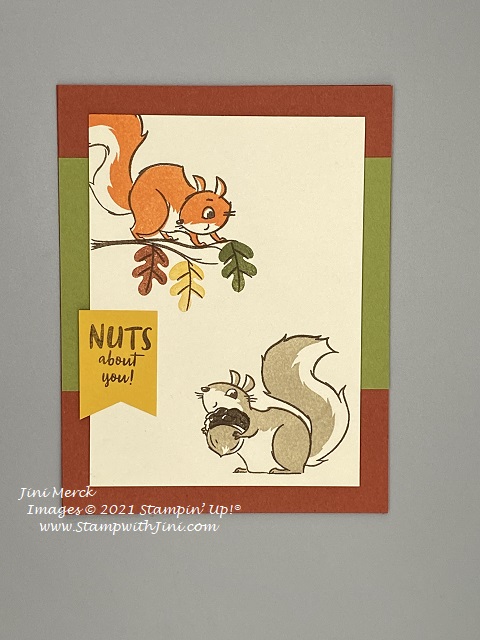
Today’s card is the last and final card in my Step It Up Series using the Nuts About Squirrels stamp set. The addition of the Beauty of the Earth Designer Series Paper adds a wonderful pop of color and texture that ties everything together nicely. I’ve deviated a bit from the Mini Catalog design, but that is one of the fun parts about stamping.
I’ve also changed up the sentiments in this Series so that I could show you all the great sentiments in the set.
Step It Up Series 1 – Nuts About Squirrels Card #3 Video Tutorial
Step It Up Series 1 – Nuts About Squirrels Card #3 TutorialPDF
Shop at my Online Store and use Host Code NHWM3ADB and receive a FREE Gift, a Cutest Halloween Treat Tag Class
Click Here to learn more about using the Hostess Code If you order Online make sure your profile information is up to date and you’ve allowed me to send you your free gift.
If your Online order is $150 or more make sure not to use the host code so that you can take advantage of the Host Benefits yourself – No worries, I’ll still send you your free gift. It’s my way of saying thank you for choosing me as your demonstrator!
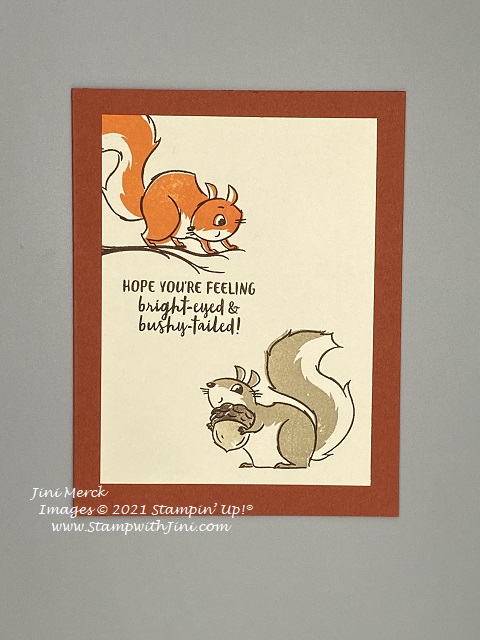
Yesterday I shared the first card in my 3 card Step It Up Tutorial Series highlighting quick and easy stamping. Today’s card adds a punch and a bit more. So why not check it out?
This card uses the same adorable images but has a few more colors added to make it a bit more fun. I love the Rich Regal Color Collection for fall and winter projects, you can’t go wrong with this color pallet.
I’ve got several rows of corn to process today, so I’m making this a quick post. Here is the quick video I made for you so you can see how I stepped up this card.
Step It Up Series 1 – Nuts About Squirrels Card #2 Video Tutorial
Step It Up Series 1 – Nuts About Squirrels Card #2 TutorialPDF
Shop at my Online Store and use Host Code NHWM3ADB and receive a FREE Gift, a Cutest Halloween Treat Tag Class
Click Here to learn more about using the Hostess Code If you order Online make sure your profile information is up to date and you’ve allowed me to send you your free gift.
If your Online order is $150 or more make sure not to use the host code so that you can take advantage of the Host Benefits yourself – No worries, I’ll still send you your free gift. It’s my way of saying thank you for choosing me as your demonstrator!
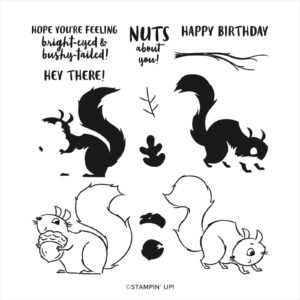
Today’s card is one I took right from the pages of the Mini Catalog using the Nuts About Squirrels stamp set. I love this kind of project where you can make it simply or you can step it up by using a few extra items that you may have. I’ll be sharing 3 card tutorials with you in this series using the same basic supplies. Today’s card is perfect for the stamper who is just starting to collect supplies or someone who just wants a clean and simple card. Isn’t that the great thing about stamping?
This stamp set is just so cute with it’s 2 step images and it’s great with it’s all occasions sentiments.
Here is a quick video for you and a PDF too that you can print with a complete supply list and step by step instructions.
Step It Up Series 1 – Nuts About Squirrels Card #1Video Tutorial
Step It Up Series 1 – Nuts About Squirrels Card #1Tutorial PDF
Enjoy! and then stop back by tomorrow when I’ll be sharing the second card in this series with you.
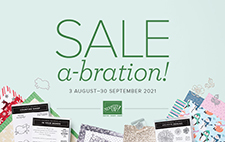
Just a Reminder Sale-a-bration Ends Tonight!
There is still time to get your favorite Sale-a-bration items before they are gone! Why not place an order today and get your favorites?
It’s also the last day to get your Sale-a-bration Starter Kit for just $99!
When you choose this option you’ll receive not only $125 in product but also a Bundle from our Mini Catalog list and start receiving a 20% discount on your favorite products from Stampin’ Up!. It’s the best Kit in the catalog!!! and That’s almost a $200 value for just $99 plus tax. Click HERE to learn more.
Shop at my Online Store and use Host Code NHWM3ADB and receive a FREE Gift, a Cutest Halloween Treat Tag Class
Click Here to learn more about using the Hostess Code If you order Online make sure your profile information is up to date and you’ve allowed me to send you your free gift.
If your Online order is $150 or more make sure not to use the host code so that you can take advantage of the Host Benefits yourself – No worries, I’ll still send you your free gift. It’s my way of saying thank you for choosing me as your demonstrator!
How about some swaps, team time and a fun treat tutorial? Today I thought I’d share what we’ve been doing as a my group recently. I’ve got a great team and we have a lot of fun together when we gather each month, so I thought I’d share some of the groups swaps first. I’ll start with some of the Sale-a-bration cards.
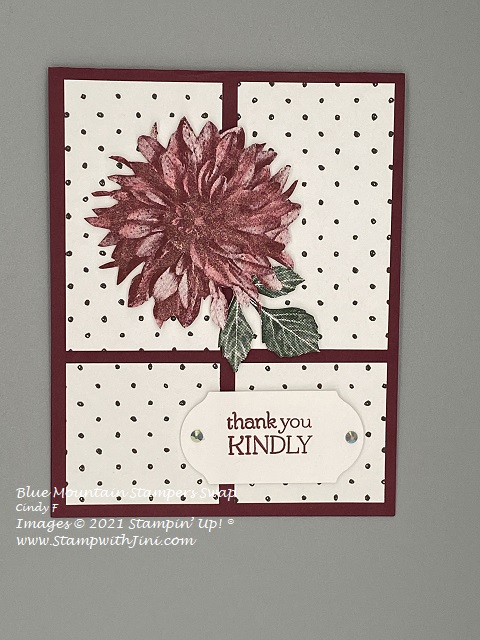
this first card uses the lovely Feels like Home stamp set (Sale-a-bration 156607) and has been colored with our Watercolor Pencils (141709 & 149014) assortments for a softer look. And this next card was created using the Delicate Dahlia stamp set (Sale-a-bration 156601) and Merry Merlot for a bold look.
If you don’t recognize the polka dots it’s from the Beautifully Penned Designer Series Paper pack (Sale-a-bration 156630) which as you can see is quite versatile. A bit of fussy cutting and some Wink of Stella finish off this lovely card. And how about this big bold sunflower?
This card uses the Celebrate Sunflowers (152517) and the coordinating Sunflower Dies (152704) and it’s also a fun buckle card, the sentiment tucks into a punched slot behind the sunflower.
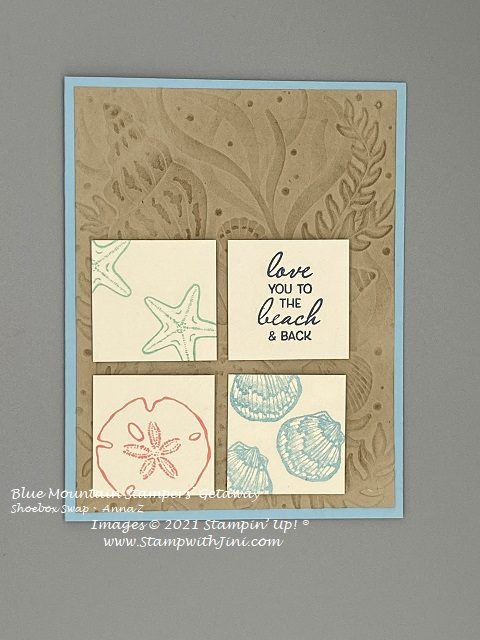
Not only do we do team meetings each month, but we also had a team retreat in August, so I thought I’d share a couple of the swaps from that today. This first project uses the Friends are Like Seashells Bundle (159516) and Seashells 3D Embossing Folder (154309).
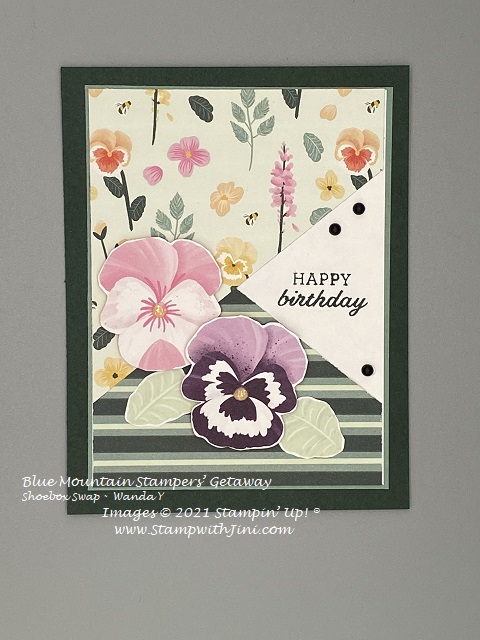
And how about some pansy fun using the Pansy Petals Suite (155810)? A simple cutting technique creates this criss-cross pattern for the card front.
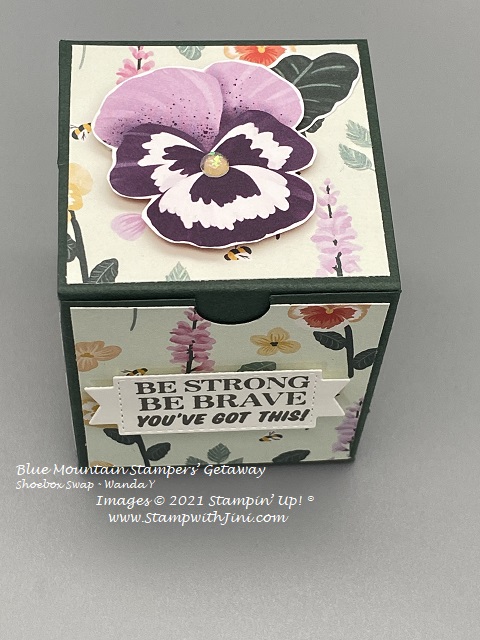
We also made a fun little box that was filled with some treats.
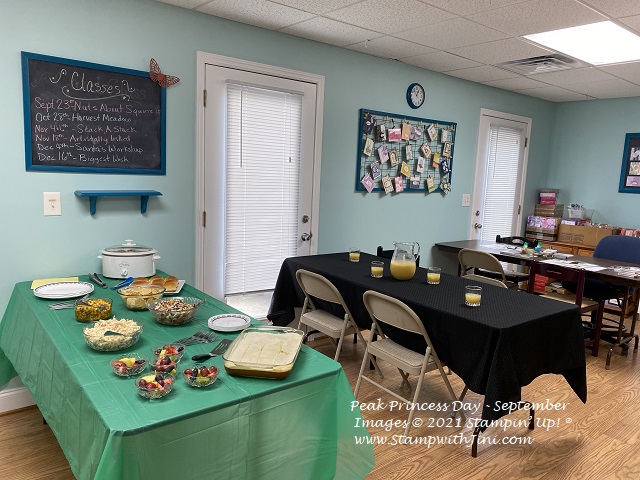
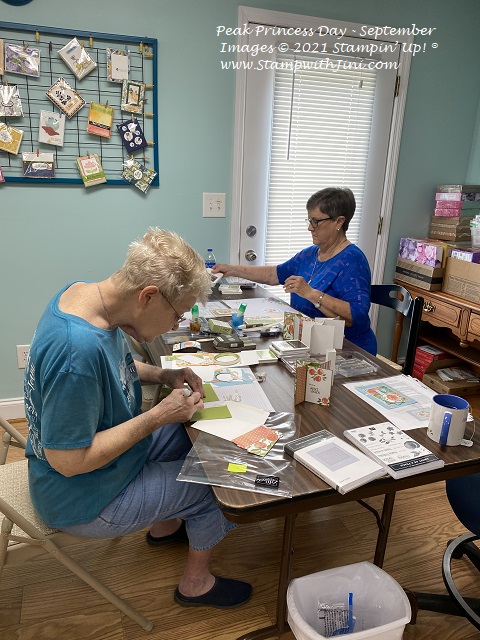
I really love this Pansy Petals Designer Series Paper (155807) and the fact you can cut tons of flowers out with the bundle’s dies and isn’t the little box adorable? Want to see more team fun? This month was our bi-annual Peak Princess event. What is that? It’s a special day filled with pampering that my team can earn. This time we made 3 special projects, won prizes and enjoyed a nice Hawaiian inspired luncheon together.
The pulled pork and Mango Salsa we had were a hit so I thought I’d share the recipes with you. The pulled pork is soooo easy with just 3 ingredients and you make in the crock pot too! And you may find the Mango Salsa addictive – eat it with chips, or you can add it on top of fish or shrimp taco too.
Whew – that’s a lot I know but I hope you enjoyed a bit of a peek into what it’s like to be a Blue Mountain Stamper.
What are the Blue Mountain Stampers?
That’s the name of our stamping community. I enjoy welcoming new members to our group. We’re from all over. If you’re considering joining Stampin’ Up!, you may have questions about how I would support you as part of my team. I do offer a variety of ways to learn, grow and to have FUN as a Blue Mountain Stamper!
Exclusive Team Resource Page – videos, PDFs and more
Exclusive Face book Group – A great way to share and connect with other team members and share
Monthly Creative Challenges
Swapping Opportunities
Team Retreats
Meetings – both local and online/virtual
Monthly Crafting Day
Monthly Lunch & Learn
Recognition & Incentives
Training available for workshops, clubs, classes and more!
Additional support and business coaching available
We have a very active group that share and answer each other’s questions on our Exclusive face book group. If you’re looking for fun, a place to grow and share with others…You’ll fit right in!
Hobbyists are welcome!
Did you know? 90% of my Blue Mountain Stampers’ areHappy Shoppers – purchasing for themselves, (along with their family and friends.) That’s right…you can just get a discount on products you love!
We welcome the crafter who’s looking to be a “happy shopper” (and save money), as well as those of you that want to build a business (and make money).
Everyone is welcome after all there’s room for both and everyone in between.
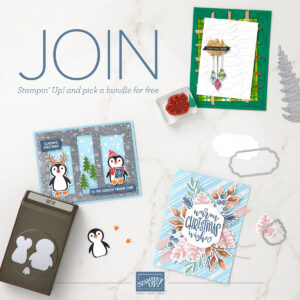
And there is NO Obligation when you purchase your starter kit – Join the Blue Mountain Stampers and see what it’s all about!
As you can see we love stamping and sharing together and are very active though out the year. If you think you’d enjoy joining us, right now is a great time to do so. But you’ll want to hurry since this special Sale-a-bration Kit offer ends in just 2 days!
For just $99 and tax you’ll get to choose not only $125 in product of your choice, but you’ll also get to choose one of our Bundles from the MINI Catalog! That’s almost a $200 value for just $99! And there is no obligation when you join. You can learn more about this fantastic offer HERE along with the benefits of joining my team too. Got questions, I’m happy to answer any questions you have about earning a discount on your favorite Stampin’ Up! products.
Shop at my Online Store and use Host Code NHWM3ADB and receive a FREE Gift, a Cutest Halloween Treat Tag Class
Click Here to learn more about using the Hostess Code If you order Online make sure your profile information is up to date and you’ve allowed me to send you your free gift.
If your Online order is $150 or more make sure not to use the host code so that you can take advantage of the Host Benefits yourself – No worries, I’ll still send you your free gift. It’s my way of saying thank you for choosing me as your demonstrator!
I just love this little set, it has such cute images and sentiments for all kinds of projects. Today’s card uses our NEW In Color, Polished Pink, and it’s a very popular color, so it makes it a great choice to add to your collection of colors. I’ve teamed it up with one of my favorites, Coastal Cabana for a fun summer time feel.
Check out this cute little 3d card I made using a fun fold to create card with tons of dimension.
It has a signature panel on the back of the box
And it will fold flat for mailing. Cool, right?
Here is a quick video tutorial for you that shows you how I made this bright, colorful card.
Party Puffin Pop Up Box Card Video Tutorial
And of course, a PDF with a complete supply list, the measurements, and step by step insturctions too.
If you love this set as much as I do, you’ll be happy to know that I’ll be highlighting this set in my July Card Class. Did you know you can get my classes for free each month when you place a minimum order using my Host Code? Check out my calendar of events HERE to learn more about my classes.
Shop at my Online Store and use Host Code Y3ES9HYC
Click Here to learn more about using the Hostess Code If you order Online make sure your profile information is up to date and you’ve allowed me to send you your free gift, and you’ll receive the new 2021-2023 In Color Swatches
If your Online order is $150 or more make sure not to use the host code so that you can take advantage of the Host Benefits yourself – No worries, I’ll still send you your free gift. It’s my way of saying thank you for choosing me as your demonstrator!
Host a Party and get more free stuff!
Contact me today to chose a time that works well for you and your friends! Can’t gather? That’s ok you can choose between my book party or facebook party.
Yesterday I shared with you a fun little treat holder and today I wanted to share my Easter version with you.
This treat holder is sooo easy to make with a few score lines and the Oh So Ombre Designer Series paper is perfect for this project since it comes in 6×6 and requires no cutting! And even better you get 12 sheets of each pattern so you can make 48 from one pack of paper!
I’ve colored this cute little spring image with my Stampin’ Blends making it quick and easy and gives it a clean look. Do you see the bit of shine in the center of the flowers? Its the 2020-2022 In Color Enamel Dots – So much fun!
You can see how I made these little treats in my video tutorial yesterday, but I wanted to make sure you had a PDF tutorial for this project so you have the step by step instructions that I used too. Why not check it out?
Love this project? The Oh So Ombre Paper is one of our Sale-a-bration products that will be gone for good after Sunday, February 28th. So you’ll want to place and order so you can earn this FREE item with your qualifying order before it’s too late.
Love quick and easy treats? I know I do – I love cute packaging that brings a smile to that special someone’s face. And the Flowers for Every Season 6×6 Designer Series Paper makes these treats quick and easy!
I whipped these up last week for my team’s Peak Princes event on Sunday. This event celebrates my teams accomplishments over the last 6 months, so this sentiment seemed perfect for it. I not only tucked in some chocolate, because who doesn’t love that? I also included their lanyard charm that I created with one of our embellishments too.
Check out just how quick and easy it is to make with just some score lines in my video tutorial so you can whip some up too!
If you like quick and easy cards then this series of tutorials might be just the right fit for you. Whether you’re new to stamping or someone who has been stamping a while new tricks are always great.
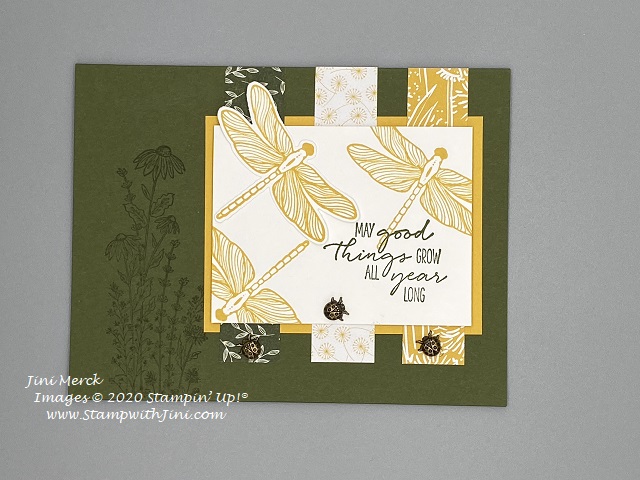
And I’m loving this bundle, it’s so easy to work with, has wonderful sentiments for all kinds of occasions and has adorable little Ladybug Trinkets too! Not to mention the rich Designer Series Paper 6×6 stack which gives you lots of options.
I don’t want to delay sharing this second card in the 3rd of my Mix It Up Series, so here you go, here are my video and PDF tutorials for you today.
Mix It Up Series #3 Dragonfly Garden Card #2 Video
Mix It Up Series #3 Dragonfly Garden Card #2 PDF Tutorial