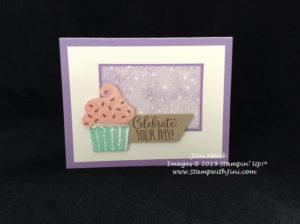
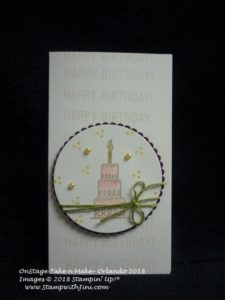
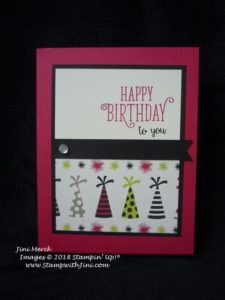
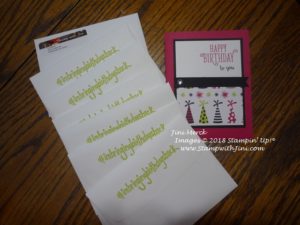
Bubble Over Birthday Fun

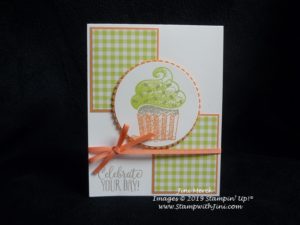
I hope everyone had a wonderful Easter. Here in North Georgia we couldn’t have asked for nicer weather, but it was rather odd having it fall on April Fool’s Day this year.  Yesterday was also my son, Johnathan’s 26th birthday and so I wanted to make him something special. I was inspired by our recent Stampin’ Success, so I reached for my Bubble Over Bundle and got to work. (I bet you can imagine how many times I was told he’ll arrive any moment during labor, followed by April Fool’s Day! Not a lot of fun after 12 hours in labor and it being my first. But then I wouldn’t have those fun stories to tell him either. LOL!)

And of course, I always make a theme cake for him that was inspired by the Bubble Over Bundle. The cap is a little wonky but he didn’t seem to mind.

He loves the special theme cakes that I’ve made over the years for him and this one was no different. It put a big smile on his face, and I learned something too. Did you know you can make a beer cake? I didn’t until my friend mentioned it, but why not right? Need to check out some recipes since I know it will be a lot of fun to give a try. (How appalling after being raised in Milwaukee. Ahhh the smell of hops… a story for another time.) LOL!

Want to see how I made the card? I’ve made a tutorial for you.

Bubble Over Birthday Card Tutorial (printable) PDF

Enjoy!

OnStage Fun – Coming Soon

I’m so excited later this week I’ll be attending our OnStage event here in Atlanta and I’ve been working on some goodies that I’ll be sharing with you later in the week for my team members who are attending too! A full day of stamping fun AND the new 2018 Annual Catalog is going to be unveiled too!!!  Whoo hoo! It’s part of the fun and part of what I love about being a Demonstrator. Click HERE to learn about being part of my team and joining in the fun.

Speaking of the 2018 Annual CatalogsI’ll be ordering these catalogs for my customers next month as they will ship in May.   If you have ordered a minimum of $50 from me in the last 6 months you’ll receive a catalog from me.  If you’re unsure if you’ve ordered $50, you can contact me or login to my online store and check your order history. (Please remember you’ll want to make sure your mailing address is up to date and that I can contact you.)

Supplies: 

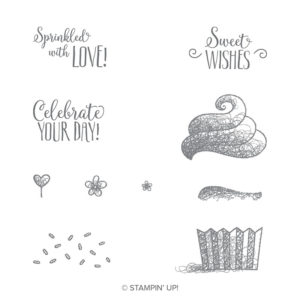
Stamp Set: Bubble Over (*145868)

Inks: Crumb Cake Classic Ink (126975), Chocolate Chip Classic Ink (102128), Emerald Envy Classic Ink (141396), Dapper Denim Classic Ink (141394)

Paper: Pick a Pattern Designer Series Paper (144163), Emerald Envy Card stock (141415), White Vellum Card stock (101856), and Whisper White Card stock (100730)

Accessories: Bottles & Bubbles Framelits Dies (*145663), Starburst Punch (143717), Linen Thread (104199)

* Bubble Over Bundle (146082)

Click here to order your Stampin’ Up! Products online 24/7! (US only)

Shop at my Online Store and use Host Code 36G9DRMX


Click Here to learn more about using the Hostess Code

Sign up for my FREE Newsletter My Newsletters include stamping tips, ideas and updates on what is happening with me! You’ll also receive a FREE Class Tutorial using the 2017-2019 In Colors when you sign up!


Easter Treat Tent Tutorial & More

Today’s project is a quick and easy punch bunny treat that holds Lindt Lindor Chocolate bar.

Cute right? I love the way we can use the Cookie Cutter Builder Punch and coordinating stamp set to create this cute little bunny!

Here is a tutorial for you with the supply list so you can make your own little treats!

Punch Bunny Sweet Soiree Treat Tent Tutorial (printable) PDF

And you can click here to see my video tutorial on how to make my Painted with Love Treat Tent Tutorial from an earlier post.

Count Down for Sale-a-bration

We are just 2 days away from the end of Sale-a-bration! So I thought I’d share some wonderful swaps that I’ve received to inspire you using some of my favorite products from Sale-a-bration.

These first cards are made with the Party Pandas stamp set – one of our most popular Sale-a-bration choices.

This next card is made with the Lots of Lavender stamp set.

And these next two cards are made using our Celebrate You Thinlits Dies – one of our $100 choices

I love how this one uses our Sale-a-bration choices – Bubbles & Fizz Designer Series Paper

And finally – Beautiful Peacock done in Island Indigo and Bermuda Bay – yes you spotted our wonderful Shimmer Ribbon Pack. This ribbon is beautiful and comes in 3 widths as well as colors in this FREE Sale-a-bration option.

The good news is you still have time to earn your FREE Sale-a-bration items since Sale-a-bration ends on March 31st at 11:50 PM (MT). Want to place an order? Or got questions? Please feel free to contact me at [email protected] or stop by my Online Store.

Click here to order your Stampin’ Up! Products online 24/7! (US only)

Shop at my Online Store and use Host Code 36G9DRMX


Click Here to learn more about using the Hostess Code If you order Online make sure your profile information is up to date and you’ve allowed me to contact you so I can mail you your FREE gift!

March Thank You Cards – All Things Thanks Tutorial

I love to send out thank you cards each month to my stamping friends – It not only allows me to share, but say thank you to them for choosing me as their demonstrator. This month’s card is a monochromatic card made with the All Things Thanks stamp set, which is one of my favorites since it has a variety of fonts and sizes. It makes it a perfect set for all kinds of projects!

And the fact it is monochromatic makes it perfect for new stampers since it uses a limited amount of supplies!

Check out my tutorial so you can make some too-

All Things Thanks Thank You Card Tutorial (printable PDF)

I’ve got the supply list below for you too.


Got your Reinkers? – 2016 In Color Reminder

Just a reminder as we head in to the last couple of weeks of Sale-a-bration. It’s a great time to finish up your color families and make sure that you have the products that you need and love AND earn FREE Sale-a-bration products. Ink Pads, Card stock, Ink Refills, and markers along with other accessories such as ribbons.

In particular you’ll want to double check your 2016 In Colors since these items tend to disappear fast once the retirement list is announced in mid April.

Stop back by tomorrow when I’ll be sharing fun gift project using the Petal Palette stamp set!

Supplies: 

Stamp Set: All Things Thanks (143089/143097)

Inks: Fresh Fig Classic Ink (144082)

Paper: Fresh Florals Designer Series Paper Stack (144131), Fresh Fig (144242), Whisper White (100730), and Whisper White Thick Card stock (140272)

Accessories: Layering Ovals Framelits Dies (141706), Whisper White 1/8″ Shear Ribbon (144172), and Basic Rhinestone Jewels (144220)


Click here to order your Stampin’ Up! Products online 24/7! (US only)

Shop at my Online Store and use Host Code J77CXF2F

Heartfelt Bloom Thank You

Today’s card is one that I’ve created using the Heartfelt Bloom stamp set (147197/147202) that I earned for FREE during Sale-a-bration. I’ve made a bunch of these cards to send out as Thank You’s for February – so you might be receiving one soon in your mail box!

I just love the photo realistic image that this stamp produces and it’s great as a quick and easy focal point. Today’s card is done in Bermuda Bay and monochromatic, which I just love since it is a great way to build your stamping supplies if you are new to stamping.

Would you like to make some too? Great news, I’ve created a quick tutorial for you.

Heartfelt Blooms Thank You Card tutorial (printable PDF)

Enjoy!

Click here to order your Stampin’ Up! Products online 24/7! (US only)

Shop at my Online Store and use Host Code UCBWYB2B place a $75 order and receive a FREE gift!

All Things Thanks Tutorial

Today’s card is one that I designed recently as my January thank you card. I really love the way it turned out – I thought it was bright and cheerful.

I made a bunch of these cards to mail out to those of you who placed an order with me in January, so maybe it will be in your mail box soon. lol

Want to make some for yourself? I’ve whipped up a quick tutorial for you with a complete supply list and measurements. So why not check it out?

All Things Thanks Card Tutorial (printable) PDF

Enjoy!

Supplies: 

Stamp Set: All Things Thanks (143089/143097) and Paisleys & Posies (142196)

Inks: Pool Party (126982), Island Indigo (126986), Daffodil Delight (126944) and Berry Burst Classic Ink (144083)

Paper: Berry Burst (144243), Pool Party (122924), Daffodil Delight (119683) and Whisper White Card stock (100730)

Accessories: Berry Burst 1/2″ Finely Woven Ribbon (144133)

Click here to order your Stampin’ Up! Products online 24/7! (US only)

Shop at my Online Store and use Host Code  Z7DR6EB3 place a $75 order and receive a FREE gift!

Sign up for my FREE Newsletter My Newsletters include stamping tips, ideas and updates on what is happening with me! You’ll also receive a FREE Class Tutorial using the 2017-2019 In Colors when you sign up!

Painted with Love Post it Note Holder

I love creating little gifts for family and friends and this one if a practical post it note holder for my husband – a little love, a little help to keep track of things. LOL

This colorful little Post it Note Holder hold a simple little pad of sticky notes I found at my local Walmart recently – cute right?

And the gold little heart just beckoned me since it reminded me of the beautiful Painted with Love Specialty Designer Series Paper and it’s gold foil accents!

I’ve made a quick little tutorial for you too! So why not check it out?

Painted with Love Post it Note Holder Tutorial (printable) PDF

Supplies:

Stamp Set: Petal Palette (*145785/145788)

Inks: Rich Razzleberry Classic Ink (126950)

Paper: Painted with Love Specialty Designer Series Paper (145580), Rich Razzleberry Card stock (115316), Melon Mambo Card stock, Gold Glimmer Paper (133719), and Very Vanilla card stock (101650)

Accessories: Simply Scored Scoring Tool (122334), Petal & More Thinlits Dies (145655), Sweet & Sassy Framelits Dies (141707), and Bone Bolder (102300)

Adhesives: Snail Adhesive (104332/104331) and Stampin’ Dimensionals (104430)

Non Stampin’ Up!: 3″ x 3″ Sticky Note Pad

*Petal Palette Bundle (145973/145974)

Click here to order your Stampin’ Up! Products online 24/7! (US only)

Shop at my Online Store in January and use Host Code RQGVFRW6 place a $75 order and receive a FREE gift!

Click Here to learn more about using the Hostess Code If you order Online make sure your profile information is up to date and you’ve allowed me to contact you so I can mail you your FREE gift!

Sign up for my FREE Newsletter My Newsletters include stamping tips, ideas and updates on what is happening with me! You’ll also receive a FREE Class Tutorial using the 2017-2018 In Colors when you sign up!


Flying Home

The Flying Home is a image set that is filled with sweet little images perfect for all kinds of occasions.

and while it doesn’t have any sentiments included in the set, this makes it perfect for pairing up with the sentiments of your choice.

Today I’m sharing with you one of the cards we made during my Occasions Catalog Kick Off. It’s a total case since I loved it just the way it was. There is a bit of fussy cutting for the nest and butterfly, but that’s well worth it I think.

And as mentioned I’m including a Tutorial for the card so you can make one too! I just love how easy our Stampin’ Blends make coloring this card!

Flying Home Card Tutorial (Printable PDF)

Enjoy!


Want to take the #redboxchallenge?

Yesterday I shared my alternate Paper Pumpkin Project using the December Kit and forgot to share with you the #redboxchallenge. I thought you might enjoy the challenge too.

Anyone can play since you have until the end of the month to participate so if you arent already a Paper Pumpkin subscriber you can join before the end of the day tomorrow and get past kits.

Here are the details:

Stampin up has decided to kick off 2018 with a super fun giveaway. They are calling it the Red Box Challenge, and it’s easy to get in on the fun!
Simply put together a WOW project using an unused, past kit – or buy a past kit that you’ve had your eye on. Then share an image of your project on Facebook or Instagram with #redboxchallenge and you will be entered into a random drawing to win a Paper Pumpkin kit.
Now, all our kits are amazing — but the random drawing winners will receive the upcoming Paper Pumpkin 5th Anniversary March kit. (This is sure to be extra special!).
Interested? You’ll need to read the Red Box Challenge Rules
click HERE to see the rules and fine print
 See you tomorrow when I’ll be sharing another tutorial for a card made with the fantastic Sale-a-bration set Heartfelt Blooms!

Supplies: 

Stamp Set: Flying Home (145926/145929) and Petal Palette (*145788)

Inks: Memento Tuxedo Black,(132708), Wild Wasabi Classic Ink (126959), Old Olive Stampin’ Blends Combo Pack (144597), Pool Party Stampin’ Blends Combo Pack (144605), Light Pumpkin Pie Stampin’ Blends (144578), Light Bermuda Bay Stampin’ Blends (144580), Ivory Stampin’ Blends (144606) and Bronze Stampin’ Blends (144607)

Paper: Daisy Delight Designer Series Paper (144137), Wild Wasabi (108641), Pool Party (122924) and Whisper White Card stock (100730)

Accessories: Petals & More Thinlits Dies (*145655)

Petal Palette Bundle (*145974/145973)


Click here to order your Stampin’ Up! Products online 24/7! (US only)

Shop at my Online Store in January and use Host Code DJ9ZJAKU place a $50 order and receive a FREE gift!

Click Here to learn more about using the Hostess Code If you order Online make sure your profile information is up to date and you’ve allowed me to contact you so I can mail you your FREE gift!

Sign up for my FREE Newsletter My Newsletters include stamping tips, ideas and updates on what is happening with me! You’ll also receive a FREE Class Tutorial using the 2017-2019 In Colors when you sign up!

Lots of Lavender Sachet Video Tutorial

I recently held my Occasions Catalog Kick Off the end of December and so I thought I’d share the projects that we made with you over the next few days along with the tutorials for them.  Today’s lavender sachet was their gift for attending.

Everyone was great about the fact I wasn’t able to finish assembling them myself due to a last minute procedure the day before, so it became a third project for them. LOL! I’ve got such a great group of stampers!

We had a lot of fun using the new products and stamping together. Everyone who attended not only made 3 fun projects, but also got to see the fun new products from them for the first time.

Want to see how they are made? I’ve whipped up a quick video tutorial for you and also a printed tutorial too!

Lots of Lavender Sachet Video Tutorial

Lots of Lavender Sachet Tutorial (Printable) PDF

Here is what I used to fill the sachets –

The recipe for the sachet filling is easy to make, I’ve included it in the Tutorial, all you need is some corn cob pet bedding and essential oils.

The Lots of Lavender Stamp Set is part of our FREE Sale-a-bration products. What is Sale-a-bration? It’s a great time of year! When you shop with me, for every $50 you spend (before tax and shipping), you get to choose a FREE product from the Sale-a-bration brochure. Plus, new this year: You can earn even bigger rewards when you spend $100. Just look for the $50 & $100 reward icons when looking through the brochure.

If you are shopping in my Online Store – the ordering system will prompt you and let you know which options you have.

There are 3 ways to save and earn during Sale-a-bration – Shop, Host or Join the choice is yours! Let’s set a private party date today for you and your friends so you can Host and earn an extra $25 in Host Rewards!

Got questions? Please let me know I’m here to help.

Stop back by tomorrow when I’ll be sharing one of the cards we made using the Flying Home stamp set from the Occasions Catalog.

Click here to order your Stampin’ Up! Products online 24/7! (US only)

Shop at my Online Store in January and use Host Code DJ9ZJAKU place a $50 order and receive a FREE gift!

Click Here to learn more about using the Hostess Code If you order Online make sure your profile information is up to date and you’ve allowed me to contact you so I can mail you your FREE gift!


Wondering How to Get YOUR Copy?

  • If you haven’t ordered in a while
  • Don’t have a demonstrator

Contact me at [email protected] or give me a call. I’ll be happy to mail you one or if your local set one aside for pick up

Merry Music Post It Note Holder Tutorial

Here is a project that I’m making for my daughter and her coworkers for the holiday season. I thought it would be a useful item since they are teachers – that is if they can find the ever elusive pen on their desks. LOL!

Hmmm…. maybe I should include a pen holder too? I’m going to have to think about that. I made these in Real Red since the High School colors are Black & Red.

Want to see a video so you can whip some up too?

Merry Moments 3×3 Post It Note Holder Video Tutorial

What do you think? A great gift item? And good news right now you can find 12×12 Card stock in a pack of 24 sheets in Cherry Cobbler (144646) and Old Olive & Kraft (144622) with 12 sheets each on our Holiday Catalog Retirement list so you can make lots of these. We also carry assortment packs in our Annual Catalog like I used here. I’ll give you a complete supply list below.

Oh and here is a printable tutorial for you too!

Merry Music 3×3 Post it Note Holder Tutorial (printable PDF)

Enjoy!

Supplies: 

Stamp Set: Flourishing Phrases (141531/141534)

Inks: Basic Black Archival Ink Pad (140931)

Paper: Merry Music Specialty Designer Series Paper (144623), Best Brights 12×12 Card stock (145409), Basic Black (121045) and Whisper White card stock (100730)

Accessories: Layering Ovals Framelits Dies (141706), Musical Instruments Framelits Dies (144677), and Simply Scored Scoring Tool (122334)

Adhesives: Snail (104332/104331) and  Fast Fuse Adhesive (129026)

Non Stampin’ Up!: 3×3″ Posit It Notes

Click here to order your Stampin’ Up! Products online 24/7! (US only)

Shop at my Online Store in December and use Hostess Code ANN4HBHX place a $25 order and receive a FREE gift from me!

Want a 2018 Occasions Catalog?

  • Are you a frequent customer of mine? You’ll be the first to get one!  If you live locally you can pick up one at my December events. Not local or live out of State? No worries – I’ll be mailing one to you soon.
  • Haven’t ordered from me in a while or are new? Place an order with me during the month of December. (Make sure your Online Profile information is up to date so I can get it to you!)


Click Here to learn more about using the Hostess Code If you order Online make sure your profile information is up to date and you’ve allowed me to contact you so I can mail you your FREE gift!

Painted Harvest Thank You

I’ve really fallen in love with the Painted Harvest Stamp set and it’s versatility, so today I thought I’d share a card that I made for my October Thank You’s.

It’s straight out of the Holiday Catalog – I find we have wonderful projects in our catalogs that make CASING quick and easy! What is CASING? It stands for Copy and Share Everything!

So why not case this card? I’ve done a quick tutorial for you to use.

Painted Harvest Thank You Card Tutorial (printable) PDF

Enjoy!

Supplies:

Stamp Set: Painted Harvest (144783)

Inks: Daffodil Delight (126944), Crushed Curry (131173), Garden Green (126973), Early Espresso (126974), and Crumb Cake (126975)

Paper: Very Vanilla Thick Card stock (114237), Crumb Cake (120953) and Very Vanilla Card stock (101650)

Accessories: Crushed Curry Solid Baker’s Twine (144354) and  Banner Triple Punch (138292)


Click here to order your Stampin’ Up! Products online 24/7! (US only)

Shop at my Online Store and use Hostess Code PCPHSH24


Save

Save

Save

Save

Save

Save

Save