Paper Hearts Video Tutorial

Are you ready for Valentine’s Day? I’m almost ready and since Valentine’s Day is just a few days away I wanted to share my video tutorial with you for these cute little Paper Hearts. I made these Paper Hearts to hang in the windows of my house. I think you’re going to have fun making them too – but be careful they’re so quick and easy they are addicting!

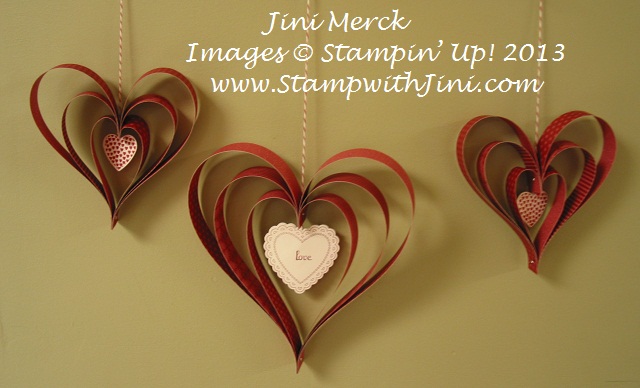
Here are 3 of the Paper Hearts that I made on Saturday.
Paper Hearts group

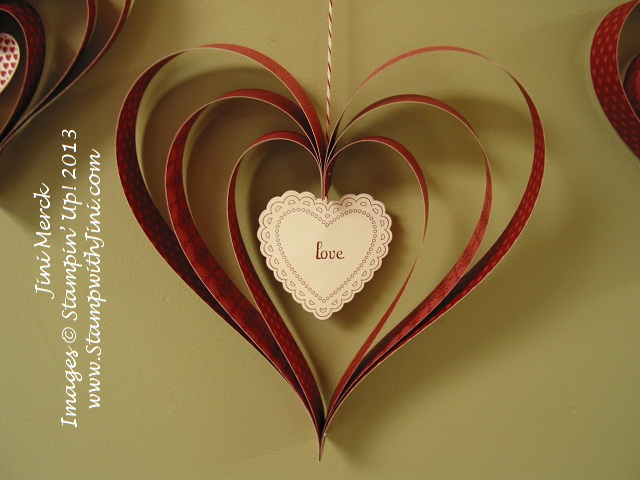
As you can see I made my Paper Hearts in 2 different sizes and I used the Hearts a Flutter Bundle (item 131098/131097) to create the spinning heart in the center. Can you see the word love stamped on the center of the larger heart? (You can check out the close up below for a better view.) I used the stamp set Fabulous Phrases to stamp the word love on one side, and the word you on the other side, so when it spins it says “Love You”.

Fabulous Phrases (item 117002/120501) is one of those stamp sets I use all the time since it is such a pretty font and it contains 30 stamps that you can make all kind of different phrases with! (Want to see some of the combinations you can make with this set? Click HERE for a PDF and then see how many more you can make!)
Paper Hearts large

Isn’t that fun? I can’t decide which one I like best since I just love the delicate scalloped heart image from the Hearts a Flutter stamp set, it reminds me of my Grandma for some reason. Why not leave me a comment below and let me know which Paper Heart you like the best.

Would you like to know how I made these Paper Hearts? Well why not check out my Paper Hearts Video Tutorial.

Here are the supplies I used to make my Paper Hearts:

Paper Hearts small

Regals Color Collection Designer Series Paper Stock (item117154 $21.95):

Small Paper Heart: ¾” x 4″, ¾” x 6″, ¾” x 8″ (cut 2 of each)

Large Paper Heart: ¾” x 7″, ¾” x 9″, ¾” x 11″ (cut 2 of each)

Cherry Cobbler Baker’s Twine (item 123125  $2.95): 12″ piece

1/8″ Silver Mini Brads (item 122941 $5.50): 2

1/16″ Circle Handheld Punch (item 101227 $8.95)

Whisper White Card Stock (item100730 $8.50)

Cherry Cobbler Classic Ink (item 126966  $5.95)

Hearts a Flutter Bundle (item131098 $42.95/131097 $36.95)

Fabulous Phrases (item 117002 37.95/120501 $26.95)

Please leave me a comment and let me know what you think of today’s Paper Hearts Video Tutorial. I’d love to know what you think of my second video tutorial and if you’d like to see more videos.

Did you know to leave a comment on any post all you have to do is click on the little thought bubble by the title if you don’t see the comment box? And did you know you don’t need to worry about the fact I ask for your email when you leave a comment since no one else will see it except me. My blog only asks for your name and email so it knows you’re a real person and not a robot spammer and I’ll only send you email if you have requested my Newsletter.

Click here to order your Stampin’ Up! Products online 24/7! (US only)
Twelve Weeks of Christmas

12 Weeks of ChristmasYou can still get the last two weeks of my 12 Weeks of Christmas Newsletter. Each newsletter contains a special project just for those of you whom are on my mailing list.So why not sign up today! Just fill out the information on the right hand side of my blog to request my newsletter now and then sit back and enjoy the 12 Weeks of Christmas projects that arrive in your mailbox on Wednesday every week.

Click here to order your Stampin’ Up! Products online 24/7! (US only)
FREE Project Tutorial

I’m really excited to offer you a FREE Project Tutorial this month that uses the French Foliage stamp set. This FREE Project Tutorial is a part of a simple rewards program I’m trying. When you place an order for $50 or more in merchandise, (tax and shipping are not included) through me, you will receive a FREE Project Tutorial by email. You will receive this link within 48 hours of placing your order! (All order types qualify.)

Unlike my traditional or Virtual Club, there are no time commitments in terms of months. (Typically my clubs run for 6 months.) FREE Project Tutorials will typically change monthly, so all orders placed during the month will receive the same tutorial.

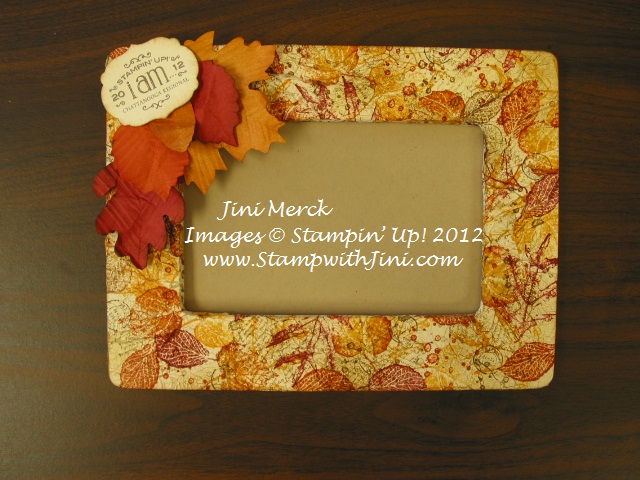
For the month of October I will be offering the French Foliage Technique Frame Tutorial. I created this gift recently for my TEAM members when we went to the Chattanooga Regional. They thought it was such a great gift that I thought you might enjoy making them too!

Here is a photo of the project – of course this one was made for my TEAM and so it has my Regional design on it – yours will be a little different.

The tutorial will include full color photos and detailed instructions for the project above along with some alternate suggestions. Also included is a detailed list of materials needed for the project.

Within 48 hours of placing your order with me, I will send your FREE tutorial by email from my StampwithJini@gmail address and it will come with an attached PDF file for you to download or print.

I’m looking forward to sharing these FREE Project tutorials with you! Please post a comment or email me if you have any questions.

Also, please be sure to sign up for my FREE Monthly Newsletters to receive stamping tips, ideas and updates on what is happening with Stamp with Jini. You’ll receive a FREE Pinwheel Tutorial when you do – And as an added bonus right now I’m sending out my 12 Weeks of Christmas Newsletters. (Only my Newsletter Subscribers receive this special Newsletter.)

Click here to order your Stampin’ Up! Products online 24/7! (US only)
Punch Art Scarecrow Tutorial

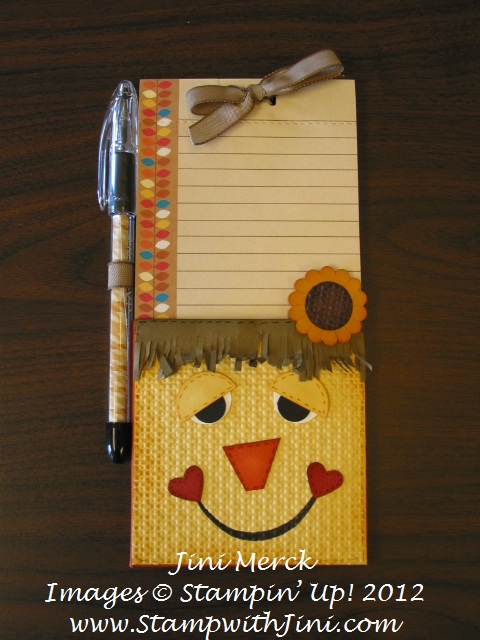
Wednesday I had my TEAM meeting and we made this little Punch Art Scarecrow Notepad together.

As I mentioned yesterday I received this scarecrow punch art swap at the Chattanooga Regional which was the inspiration for this project and I just tweaked the idea a bit to suit my style. You can click HERE to see my earlier post.

I loved the way this little guy turned out and so did my TEAM members. We had a lot of fun putting these Punch Art Scarecrow Notepads together. I like to make little gifts like this and thought this made a great project to give someone this fall who may not celebrate Halloween.

What do you think? Why not leave me a comment and let me know what you think. I love receiving feedback from you and it makes my day to know you’ve read my post. Sometimes I wonder if I’m the only one out there. Ever feel like that? I’ll try and respond to you when you leave comments too.

So……without further ado…. here is the promised tutorial for my Punch Art Scarecrow.

 Scarecrow Punch Art Tutorial

Supplies:

So Saffron card stock

Soft Suede card stock

Riding Hood Red card stock

Tangerine Tango card stock

Whisper White card stock

Basic Black card stock and Stampin’ Write Marker

More Mustard Classic Ink and Stampin’ Write Marker

Cherry Cobbler Classic Ink and Stampin’ Write Marker

Cajun Craze Classic Ink and Stampin’ Write Marker

Early Espresso Classic Ink and Stampin’ Write Marker

Stampin’ Sponges or Sponge Daubers

Small Heart Punch

½” Circle Punch

¾” Circle Punch

1″ Circle Punch

Big Shot

Square Lattice Embossing Folder

Paper Snips

Bone Folder

Multipurpose Liquid Glue

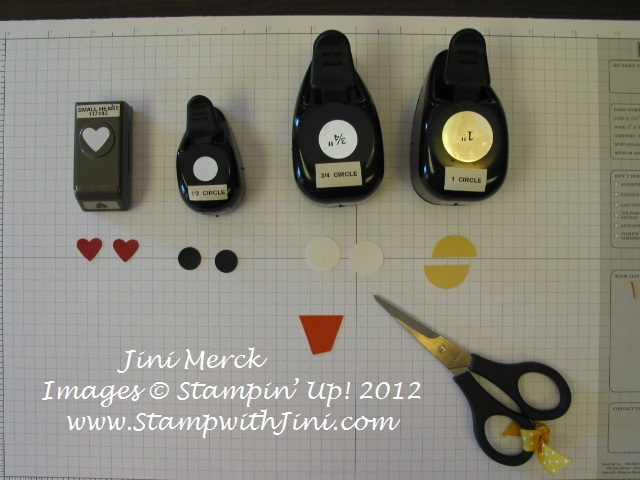
Start by punching out the following pieces –

Riding Hood Red CS and the Small Heart Punch – 2 hearts

Basic Black CS and the ½” Circle Punch – 2 circles

Whisper White CS and the ¾” Circle Punch – 2 circles

So Saffron CS and the 1″ Circle Punch – 1 circle, cut in half with the Paper Snips

Then take a piece of Tangerine Tango CS that is 1″ wide and cut a triangle shape, Cut off the one pointed end to create the nose.

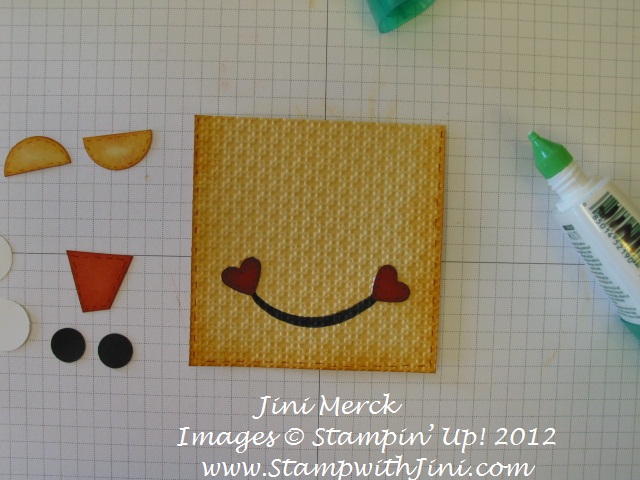
You should now have what looks like this and you are ready to begin. 

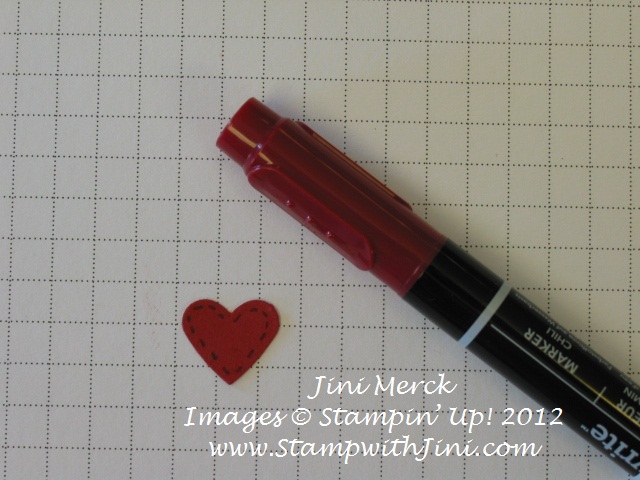
Using the Cherry Cobbler Marker Add Faux Stitching around the outside of both hearts.

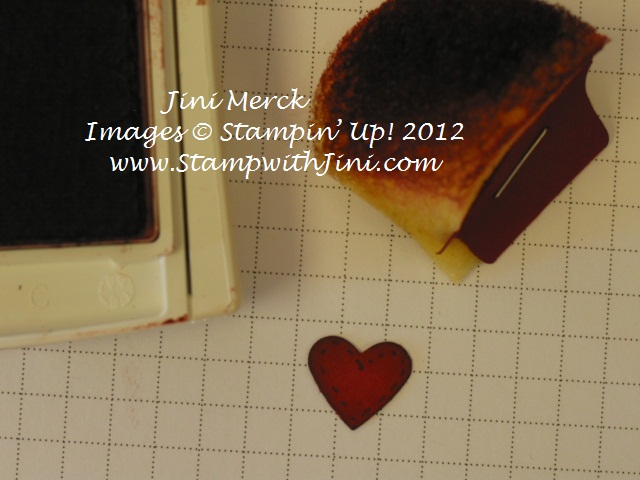
Then sponge both of the hearts with Cherry Cobbler Classic Ink. Set aside for later.

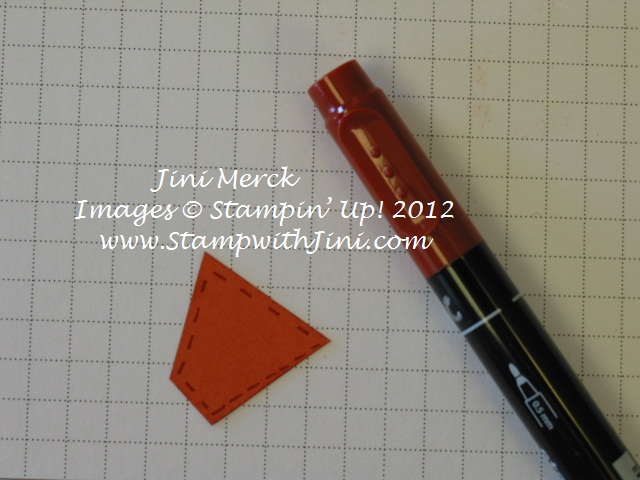
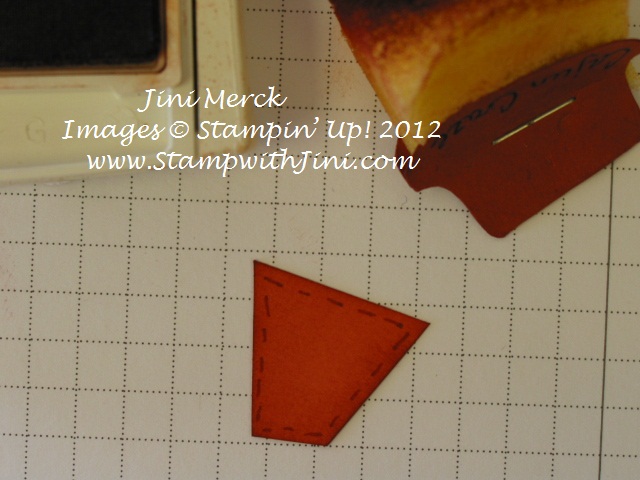
Next add Faux Stitching to your Tangerine Tango triangle with a Cajun Craze Stampin’ Write Marker. 

And Sponge the edges using Cajun Craze Classic Ink and set aside for later.

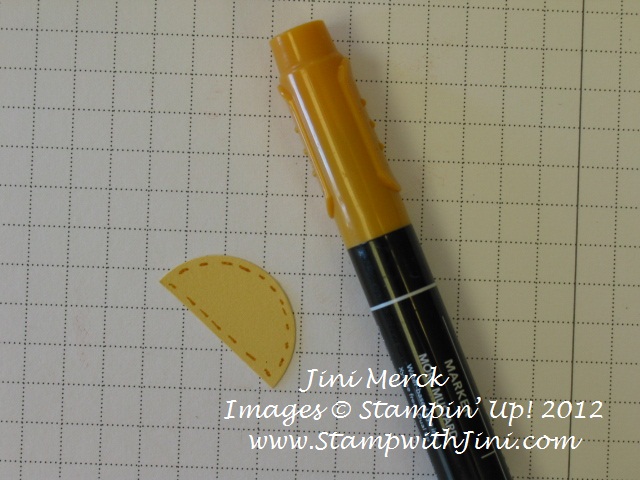
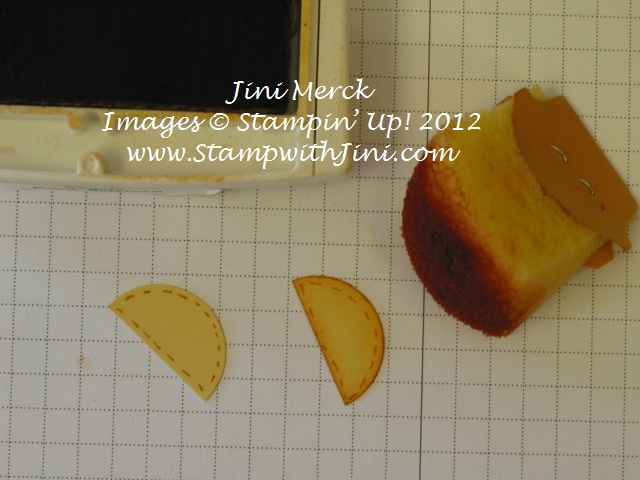
Create more Faux Stitching on the two half circles with the More Mustard Stampin’ Write Marker, 

Sponge the outside edges using More Mustard Classic Ink and set aside for later. 

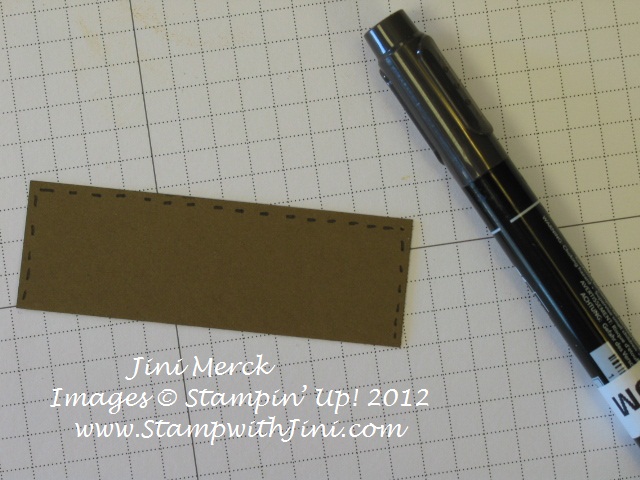
Now take a 3 ½” x 1″ piece of Soft Suede CS and add Faux Stitch using an Early Espresso Stampin’ Write Marker on both short sides and one of the long sides. 

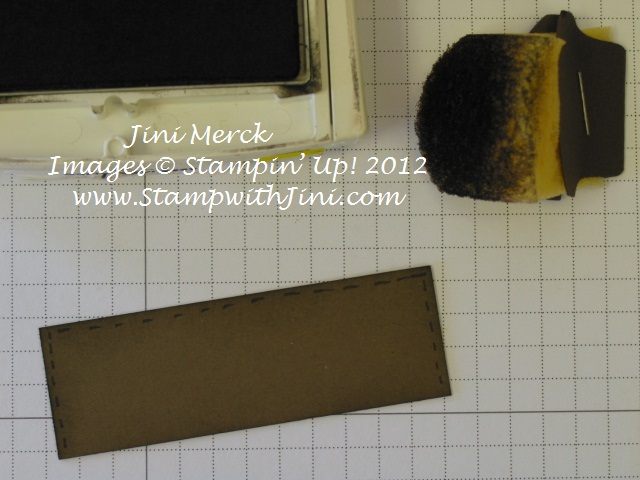
Sponge all four sides on the front and then flip it over and sponge the bottom long edge on the back. 

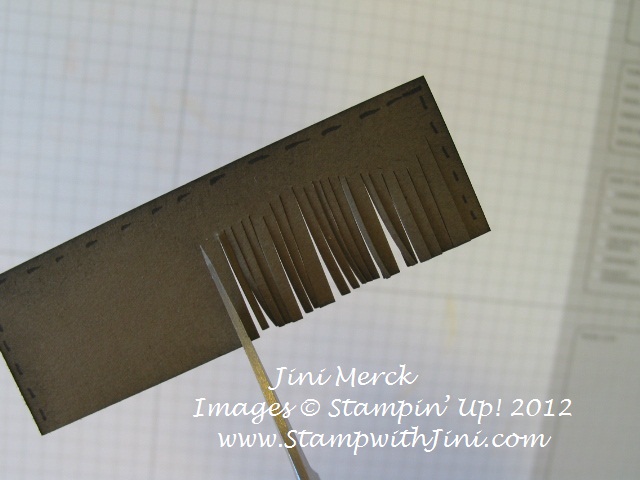
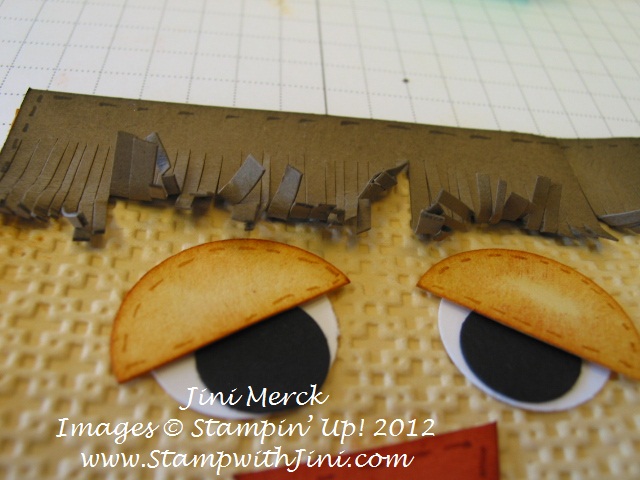
Next take your Paper Snips and cut a fringe on the bottom edge of your Soft Suede CS piece.

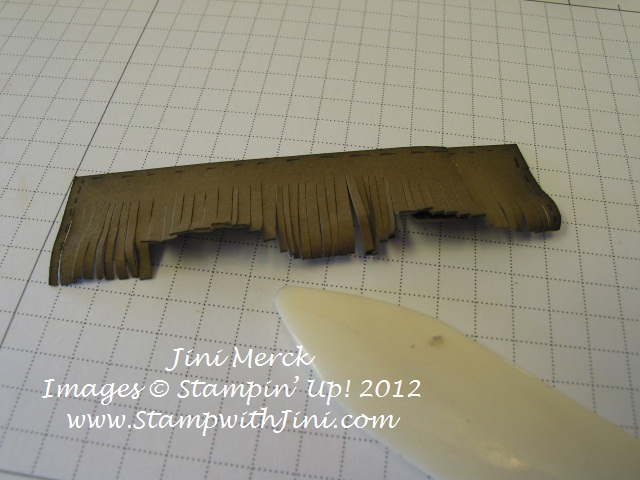
Next add some texture by curling the fringe you just created with your Bone Folder, alternating front and back curls. 

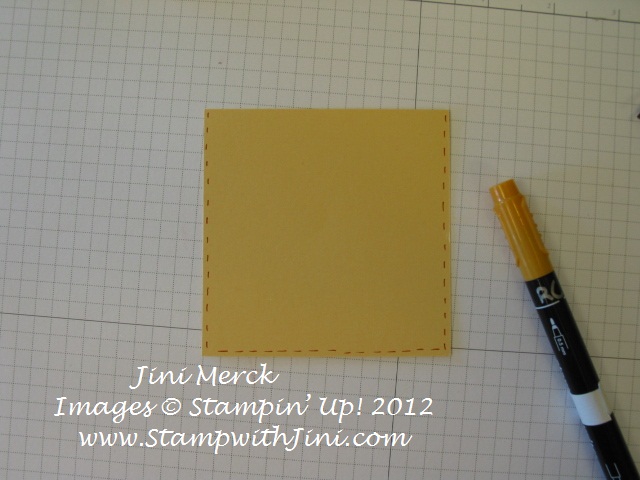
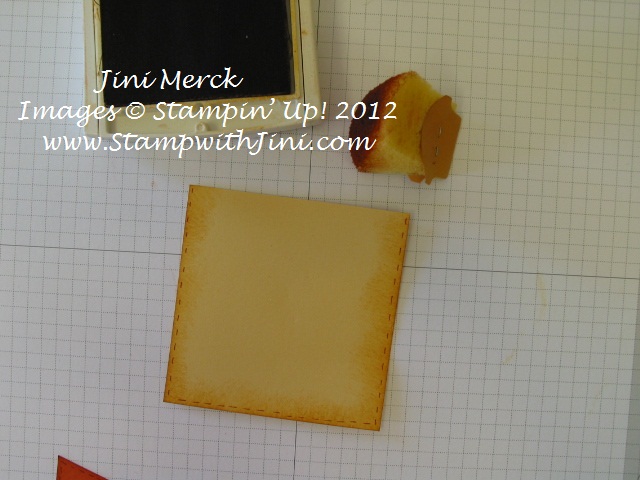
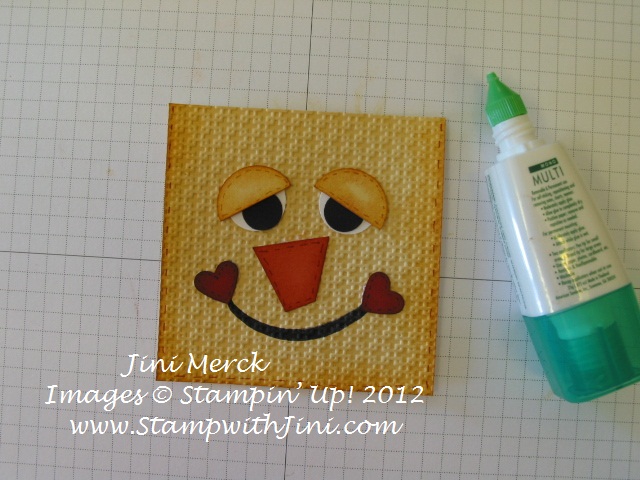
Using a More Mustard Stampin’ Write Marker create Faux Stitching around 3 sides of your 3 ½” x 3 ½” So Saffron piece of CS. 

Sponge the edges on the same three sides using More Mustard Classic Ink.

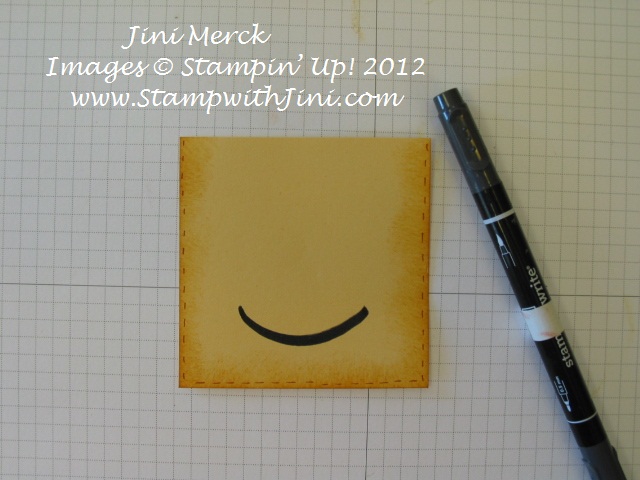
Next give your little guy a smile with a Basic Black Stampin’ Write Marker. I used the flare tip end. (Here is a Tip – Not comfortable free handing this part? Use the edge of a glass or any round shaped item as a guide.) Look you can see his little face already starting to take shape. 

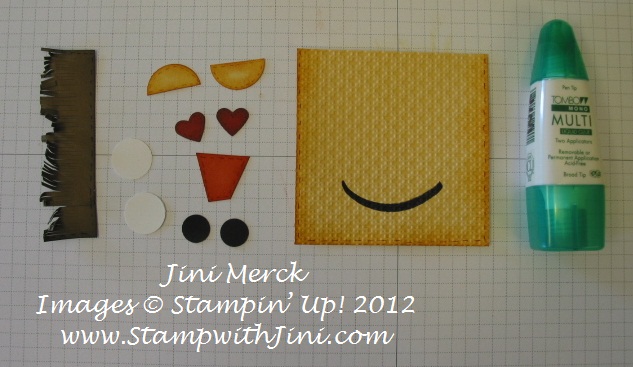
Run this piece through the Big Shot using your Square Lattice Embossing Folder.

Now you’re ready to assemble and you should have what looks like the photo below.

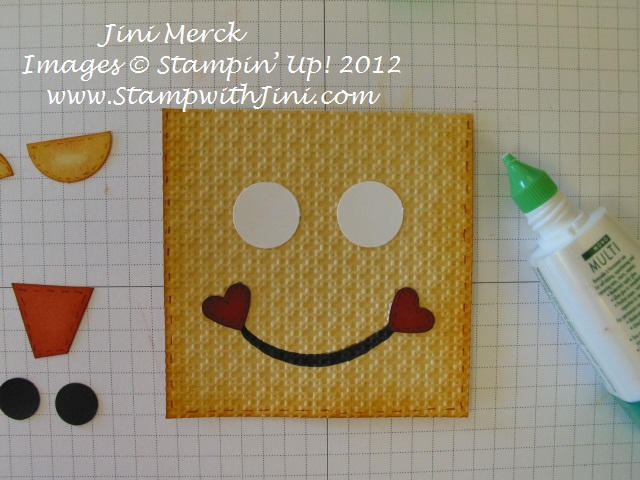
Add a smile to this little guys face by adhering the 2 small hearts to either side of the smile you drew. 

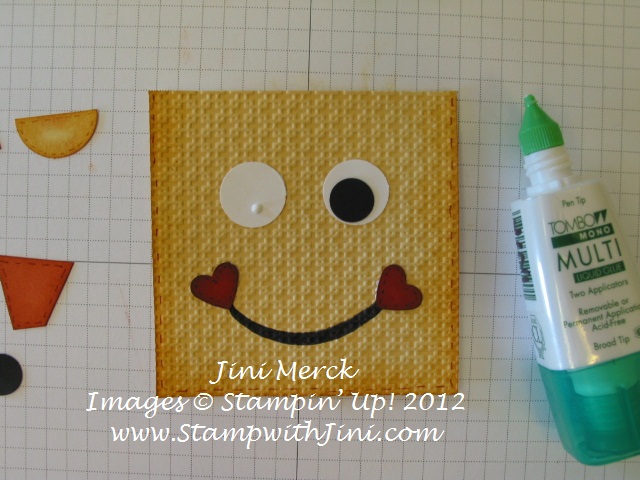
Next add the ¾” Whisper White circles. 

(Just a tip – when using Multipurpose Liquid Adhesive I like to place the glue on the bigger piece of card stock versus the smaller piece that I am gluing on. It is easy to reposition the piece once it is placed onto the project and I seem to stay a little cleaner too!)

And then the ½” Basic Black circle – look mom I can see! 

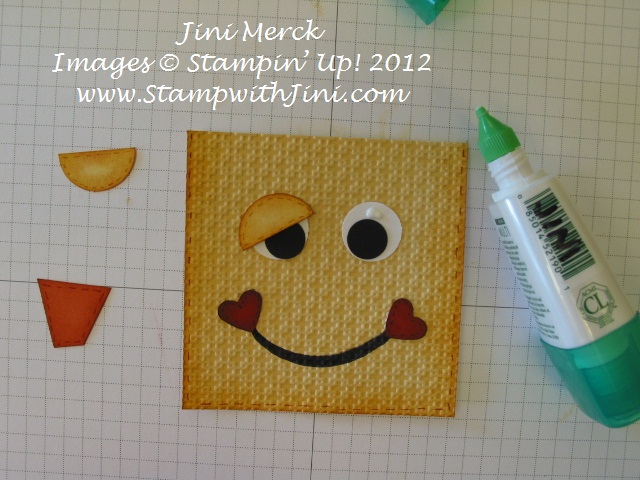
Next add his little Eye lids to make him look a little sleepy and give him some personality. After all guarding those sunflowers is hard work! 

And finally add his little nose so he can smell the sunflowers.

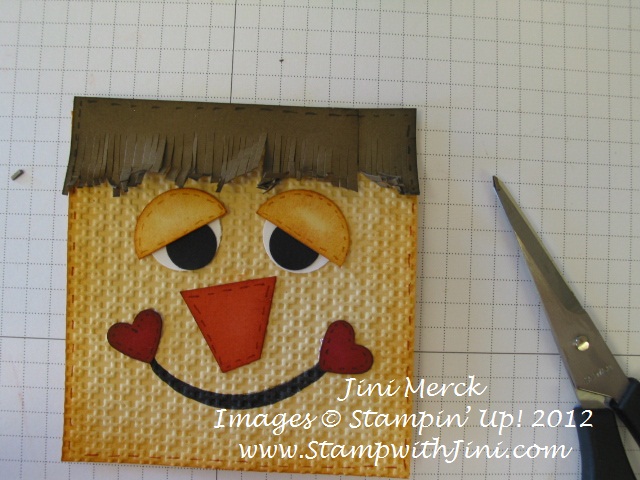
Attach the piece of fringed Soft Suede CS and Voila’ hair!  Here’s your little guy – you’re almost done. 

Finally take your Paper Snips and cut at different angles chunks out of his hair. That sponging on the back of the piece earlier is now starting to show a bit. Its ok you’re adding to his personality.  You can also fold, bend and crumple it a bit to add a little height and disarray to his do – After all whose hair looks great after standing in the field all day? 

Voila’ you’re finished and isn’t this little guy adorable?  Go ahead and attach his little face onto your project!

Click here to order your Stampin’ Up! Products online 24/7! (US only)
12 Weeks of Christmas Begins in Just 24 Hours!

Starting Wednesday, October 3rd…….Those of you who are on my mailing list will recieve my 12 Weeks of Christmas Newsletter email once a week for the next 12 weeks.

Each of these special newsletters will contain a exclusive project for a variety of items along with the instructions to make each project. Remember, I will not be sharing the 12 Weeks of Christmas projects on my blog. (These are exclusive projects that only my Newsletter subcribers shall receive.)

Don’t miss out on all the fun – You can sign up in the box below my 12 Weeks of Christmas design in the upper right hand corner of my blog.

It’s that easy! Don’t delay since only those on my Newsletter list receive my 12 Weeks of Christmas Newsletters and you won’t want to miss Week 1!

Holiday Keepsakes Ornament Class Updated

A New Bundle Offer for this class is being offered due to the new Bundle Promotion that began October 1st.

Now you really can have it all. Get your Ornament Keepsakes Stamp Set (wood or clear), Holiday Ornament Framelits, our NEW Silicone Craft Sheet, Candlelight Christmas Specialty DSP and a FREE Festive Paper-Piercing Pack in addition to learning how to make these wonderful ornaments during my class! You can even add the fabulous Snow Flurry Die to your class bundle and get a FREE Tutorial for the 2 ornaments above!

There are two days to choose from.

  •  Sunday, November 4th at 2 p.m.
  • Tuesday, November 6th at 6 p.m.

Sound interesting? Want to know the details?

  • First choose which Ornament Keepsakes Stamp bundle you want; Wood or Clear Stamps.
  • Wood Stamp Set Option & DSP $85
  • Clear Stamp Set Option & DSP $77
  • Wood Stamp Set, DSP & Snow Flurry Die Option $112
  • Clear Stamp Set, DSP & Snow Flurry Die Option $103


  • Then email at StampwithJini@gmail, or call me at (706) 754-7124 to pay for your Class order before Monday, October 15th at 8 p.m. so that I can have your bundle here and ready for you at class.
  •  Make sure to let me know which Class time works best for you so I can hold your spot.

That’s it – yes it’s that easy, so why not sign up for the Holiday Keepsakes Ornament Class today!

You can click HERE to see my Calendar of Events with details or click HERE  to see my original Class Post with updates and all the details and Bundle information for this class. If you have any questions please feel free to contact me.

12 Weeks of Christmas

I love making holiday projects and now you can too! Why not join in the fun.

Starting Wednesday, October 3rd…….Those of you who are on my mailing list will recieve my 12 Weeks of Christmas Newsletter email once a week for the next 12 weeks.

Each of these special newsletters will contain a exclusive project for a variety of items along with the instructions to make each project. Remember, I will not be sharing the 12 Weeks of Christmas projects on my blog. (These are exclusive projects that only my Newletter subscribers shall receive.)

Join in all the fun now – just sign up for my mailing list. You’ll find the sign up box below my 12 Weeks of Christmas design in the upper right hand corner of my blog.

It’s that easy! Don’t delay since only those on my Newsletter list by noon on Wednesday will receive my 12 Weeks of Christmas Newsletter – Week 1 Project.


Jack of All Trades Lolly

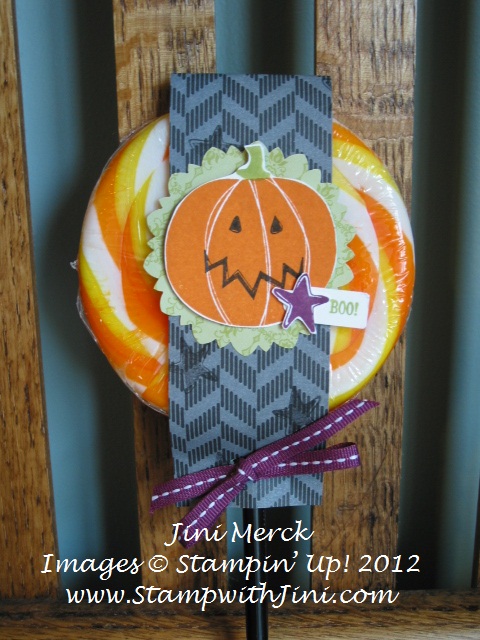
Do you need a great stamp set for both Halloween and fall? How about the Jack of All Trades stamp set? It’s such a great set that can be used in so many wonderful ways. It is one of my favorites to use for so many things, and with that cute little Harry Potter “feeling”  hat I really couldn’t resist putting it on my shopping list.

I found these wonderful lollies at my local dollar store recently and their just in time for Halloween goodie giving.  So, I grabbed my Jack of All Trades stamp set and got to work. My TEAM enjoyed making one of their own lollies, during our TEAM meeting this past Thursday evening.

How about you? Do you have someone who would enjoy this Jack of All Trades Lolly?

Supplies:

Stamp Set: Jack of All Trades and Tiny Tags

Inks: Rich Razzleberry, Basic Black, Lucky Limeade and Pumpkin Pie

Paper: Howlstooth & Scaringbone DSP, Whisper White, 2011-2013 In Color Designer Series Paper Stack, and Whisper White

Accessories: Rich Razzleberry ¼” Stitched Grosgrain Ribbon, Paper Snips, 2 3/8″ Scallop Circle Punch, and Jewelry Tag Punch

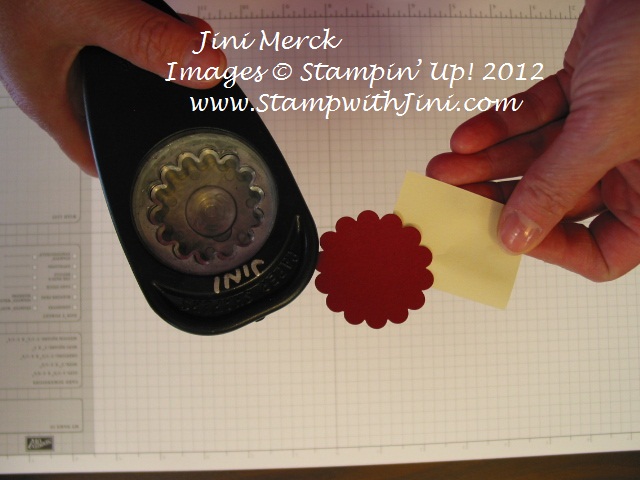
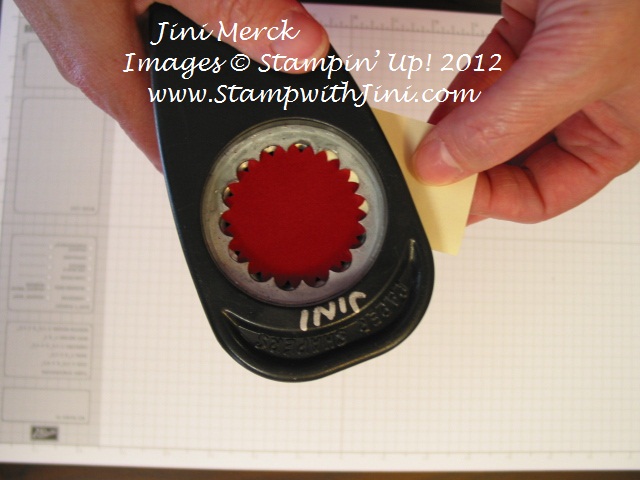
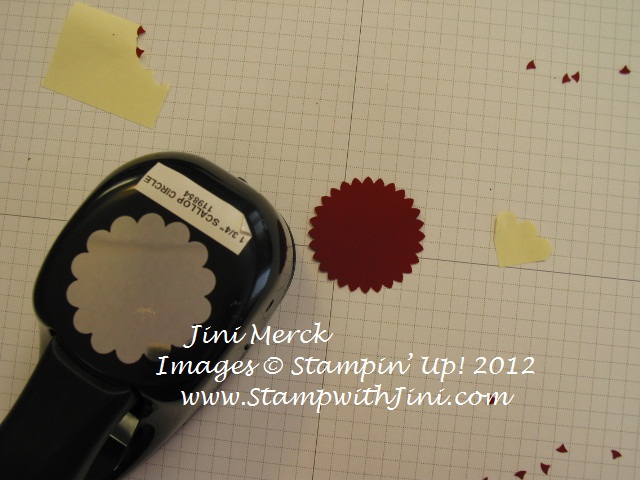
Wondering which punch I used for the medallion? Would you believe it is our Scallop Circle punch? Well here is a quick tutorial on how I did it.

Scallop Circle Medallion Tutorial

First punch out you scallop circle.

Next using a sticky note as a handle, slip the scallop circle back into your punch. And off set the scallops as shown.

Punch again and you have your scallop circle medallion.  It’s as easy as that!

Do you like learning new tips and techniques why not check out my Calendar of Events by clicking HERE to see what NEW classes are coming up soon. Classes aren’t convenient you say; why not join my Virtual Club. Click HERE for more details.

Click here to order your Stampin’ Up! Products online 24/7! (US only)
Got Milk? Cow Punch Art

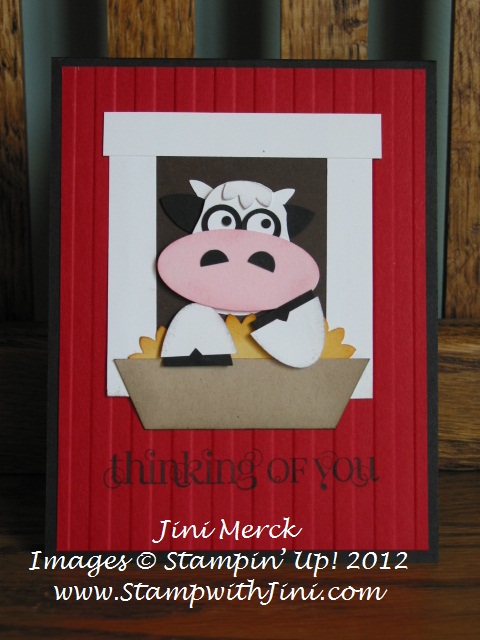
As promised yesterday when I showed you my Got Milk? swap from my friend Cindy, I worked on a tutorial for this cute little guy. If you want to see the whole project you can click HERE to see yesterday’s post.

I had the best time yesterday putting together this Cow Punch Art Tutorial for you that even my daughter enjoyed watching the process. As I was putting my little guys together with my fingers covered in my Multipurpose Liquid Glue, I could envision this little feller in one of those great big red barns from my youth.  (No, you’re not alone; I’m not the neatest at gluing tiny pieces together either. Especially since I forgot my “sticky stick” Tip! More later about my Sticky Stick and how to make your own.)

So, I was inspired to create this Cow Punch Art card. My son, Johnathan, when he saw the card said “barns are brown Mom, not red”. I guess he’s right whether it is because we live in Georgia or they just don’t build barns like that any more. The ones I remember from my childhood in Wisconsin were red.

What do you think of my card? I think next time I would make the inside window color Basic Grey not Early Espresso that might make my Cow Punch Art pop a bit more, what do you think? Would you leave me a comment and let me know? I’d love to hear from you – and it would make my day to know that someone out there is looking at my new blog…..

Supplies:

Stamp Set: Curley Cute

Inks: Basic Black, Pretty in Pink, More Mustard, and Basic Grey

Paper: Basic Black, Real Red, Crumb Cake, So Saffron, Pink Pirouette, Early Espresso

Accessories: Big Shot, Stripes Embossing Folder, Paper Snips, Owl Builder, Boho Blossoms, Blossom Petals Builder, and Large Oval Punches, Stampin’ Sponges and Multipurpose Liquid Glue

If you love these little guys too – here is my FREE Cow Punch Art Tutorial on how to make them.

Cow Punch Art Tutorial

Supplies:

Whisper White card stock

Basic Black card stock

Pink Pirouette card stock

Basic Grey card stock

Basic Grey Classic Ink

Pretty in Pink Classic Ink

Stampin’ Sponges or Sponge Daubers

Owl Builder Punch

Boho Blossoms Punch

Blossom Petals Builder Punch

Large Oval Punch

2 3/8″ Scallop Circle Punch

Multipurpose Liquid Glue

Dimensionals

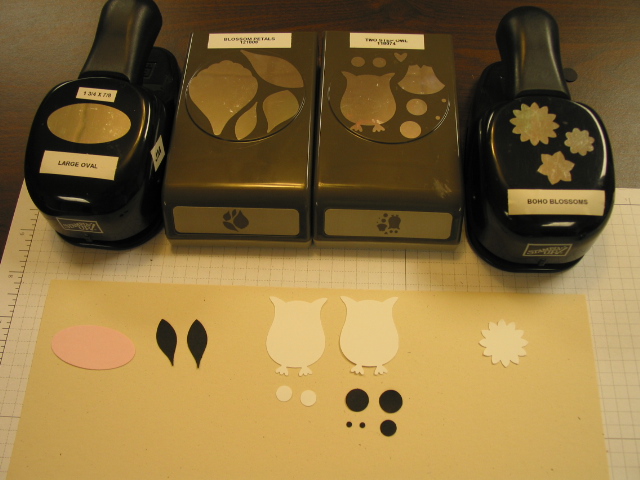
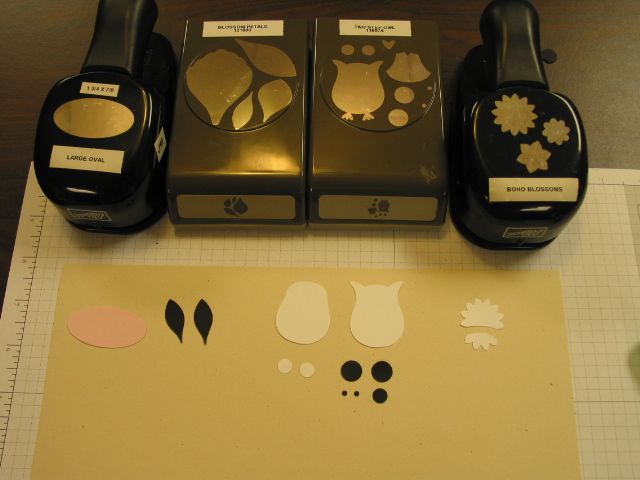
Punch out the following pieces –

Using the Owl Builder Punch and Whisper White card stock, punch 2 bodies and 2 medium circles. Then punch 2 large circles, 1 medium circle, and 2 small circles in Basic Black.

Punch one large flower out of Whisper White card stock using the Boho Blossoms Punch.

Punch 1 Large Oval from the Pink Pirouette card stock.

Finally punch out two of the smallest petals in Basic Black using the Blossom Petals Builder Punch.

You should now have punched out what looks like this:

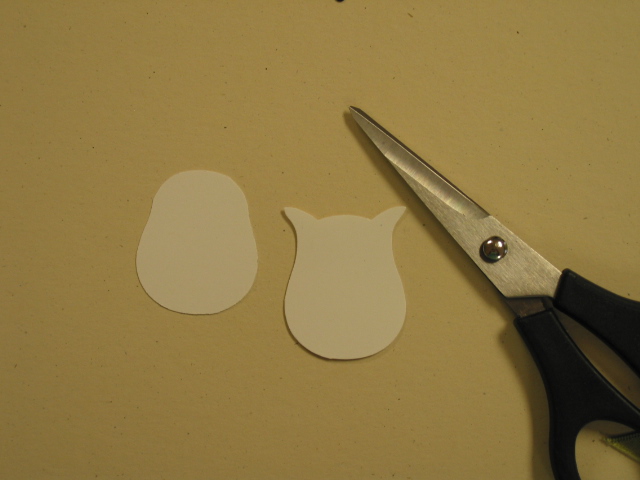
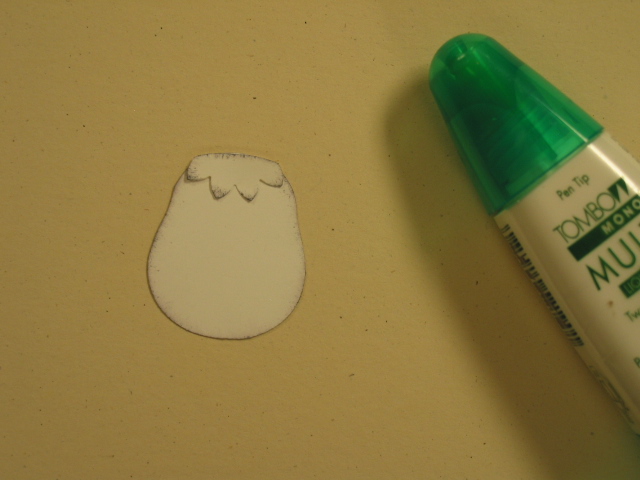
Using the owl pieces trim off the ears from one owl. Then trim off both sets of feet. You can just follow the curve when doing this.

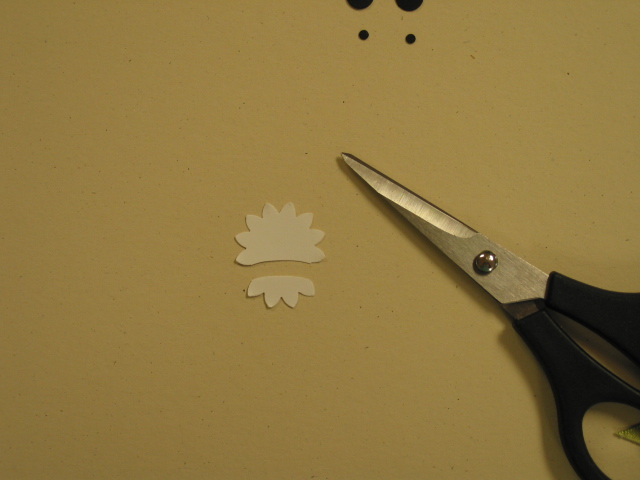
Next take the Boho Blossom and cut off 4 petals. Cut using a slight curve to match the top of the owl’s body.

You should now have what looks like this:

and now you are ready to start assembly on your adorable little feller.

Using the owl body that still has its ears, attach the two Basic Black petals just below the ears on either side. Look mom ears!


Set this aside to dry.

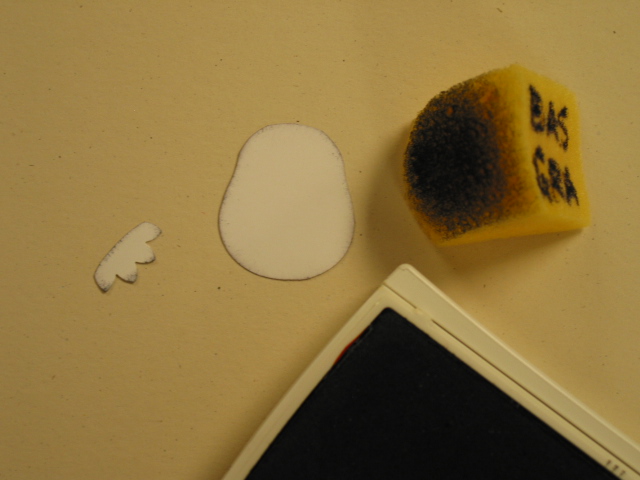
Next, sponge the edge of the cow’s face and Boho Blossom petals using Basic Grey and a Stampin’ Sponge.

Attach Boho Blossom petals to the top of cow’s head.

Voila hair!

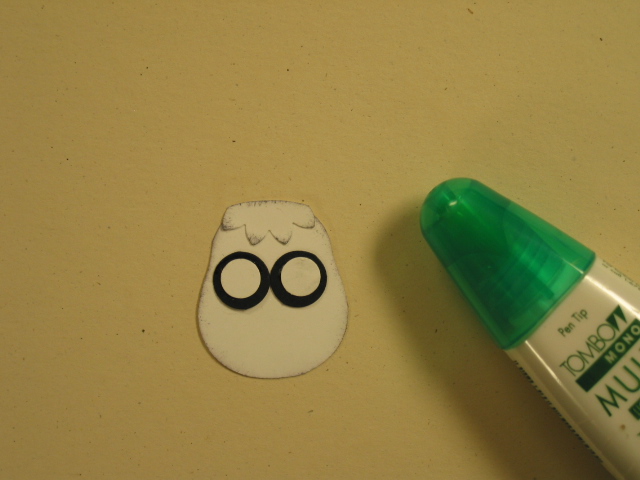
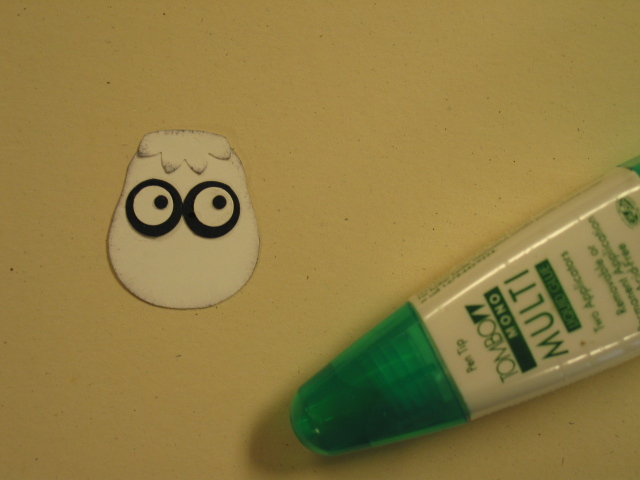
Then attach the large black circles so they touch,

Attach the medium white circles next,

And finally the small Basic Black circles to complete your eyes. Finally the little guy can see!

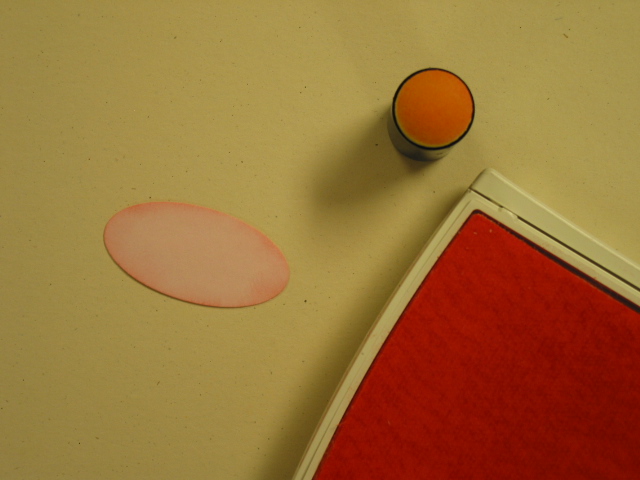
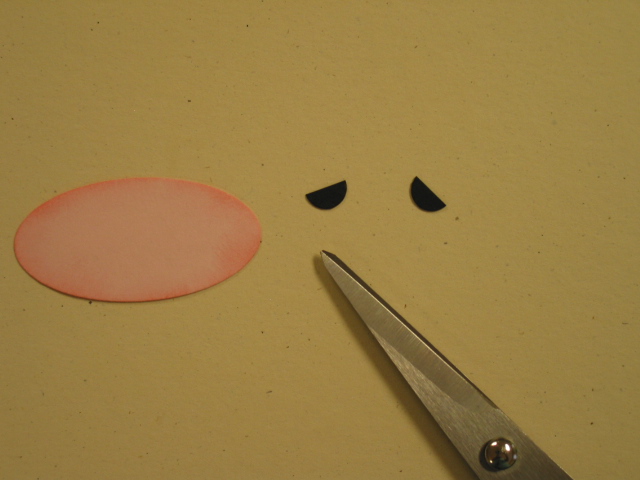
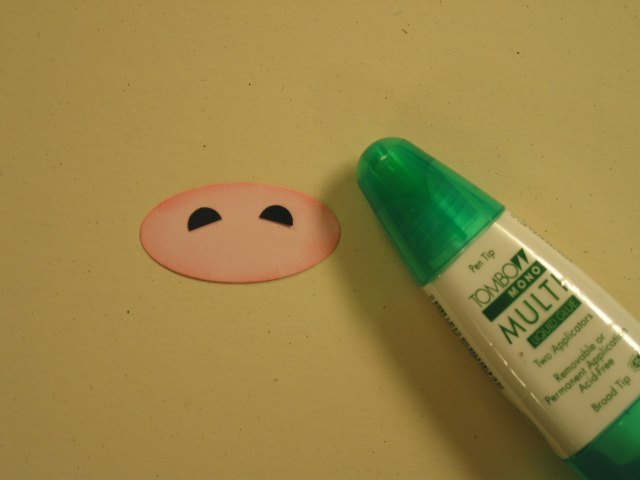
Now for his nose – Sponge the edges of the Pink Pirouette Large Oval piece using Pretty in Pink Ink.

Take the medium Basic Black circle and cut it in half.

Attach the pieces to the nose.

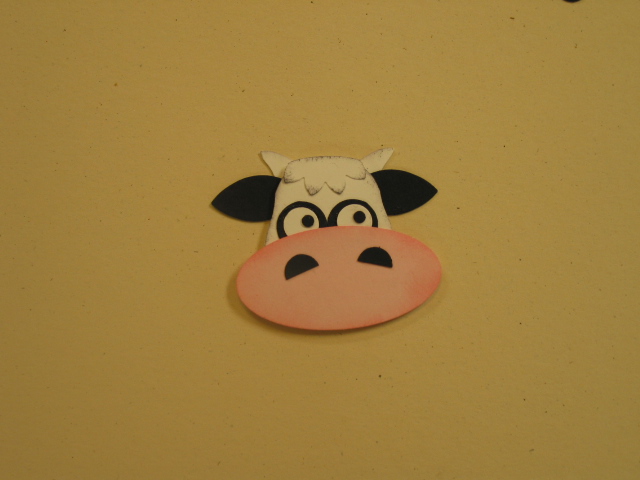
Attach the finished nose to your cow’s face.

Ahhh, take a deep breath. You’re almost done.

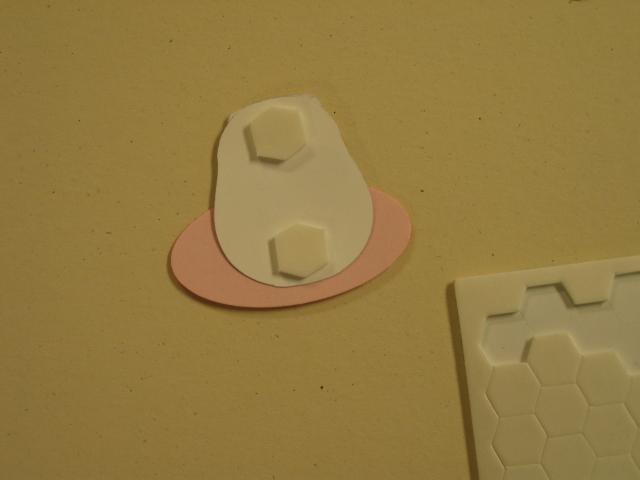
Allow this to dry if needed. Flip the finished piece over and attach 2 Dimensionals to the back.

Then attach this to the top of the piece with the ears – and voila’! You have an adorable little guy to use on your next project.

By the way, here’s a little helpful hint to make things a little less sticky along the way.  Make your own “sticky stick”. All you need is a little bit of Multipurpose Liquid Glue, your Silicone Craft Sheet and a tooth pick. Put a little drop of glue on to your Silicone Craft sheet. Roll your tooth pick in it and allow it to dry. Voila’ your very own “sticky stick”.

By the way, in case you didn’t know, our Multipurpose Liquid Glue is a great deal because it is a 2-way glue. When applied wet it adheres with a very strong bond. When allowed to dry first, it acts like a repositioning adhesive. How cool is that?

Did you enjoy this Cow Punch Art Tutorial? Why not join me in my Virtual Club and get exclusive Tutorials every month just for you. Click HERE for more information.

Got to go – it’s almost lunch time. Anyone Got Milk?

Click here to order your Stampin’ Up! Products online 24/7! (US only)
Got Milk?

Got Milk? This slogan reminds me of my childhood, where “got milk” was a given – since after all, I lived in Wisconsin. Dairy products were a given and those black and white cows dotted our pastures.

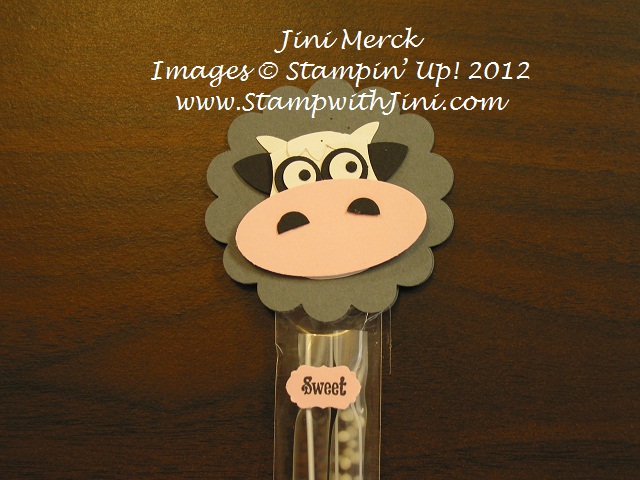
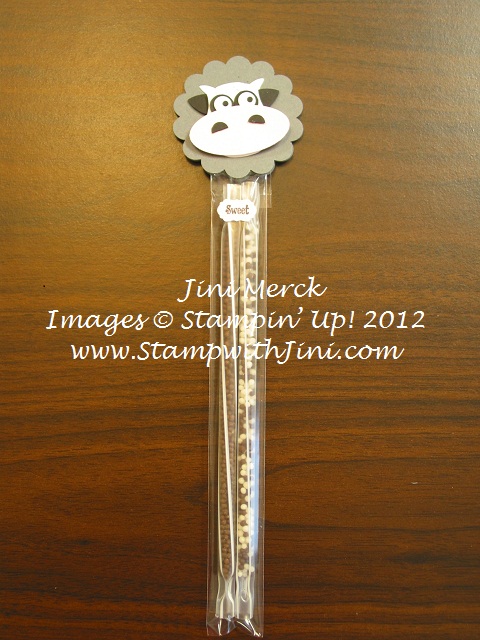
So when my friend Cindy brought this cute little punch art cow to our last Team Meeting it brought a smile to my face. Isn’t it cute?

Inside her 1×8″ Cello Bag that is topped with the punch art cow are two Magic Milk straws that flavor your milk while you sip. How fun is that!

Come back tomorrow and I’ll show you how she made this cute little punch art cow. See you then!

Click here to order your Stampin’ Up! Products online 24/7! (US only)