Holiday Keepsakes Ornament Class

Do you love the ornament on the front of the Holiday Catalog as much as I do? Would you like to learn how to make them for yourself? Did you answer YES to either of these questions? If so I’ve got a special Class just for you.

When you sign up and pay for this class not only will you get to learn how to make these wonderful ornaments, but you’ll get to take home the Ornament Keepsakes Stamp set in your choice of either wood or clear, The Holiday Ornaments Framelits and our NEW Silicone Craft Sheet.

But wait, it gets better. Do you love the NEW Snow Flurry Die? It’s a must have in my book. I was drooling over it as soon as I saw it.

When you add the Snow Flurry Die to your class I’ll give you a FREE tutorial for the (small and medium) Ornaments on page 3 of the Holiday Catalog!

Sound interesting? Want to know the details?

First choose which Ornament KeepsakesStamp bundle you want; Wood or Clear Stamps.

  •  Wood Stamp Set Option $73
  •  Clear Stamp Set Option $65
  •  Wood Stamp Set with Snow Flurry Die Option $91
  •  Clear Stamp Set with Snow Flurry Die Option $99
  • Then email me at StampwithJini@gmail, or call me at (706) 754-7124 to pay for your Class before Monday, October 15th at 8 p.m. so that I can have your bundle here and ready for you at class time.
  • Make sure to let me know which Class time works best for you so I can hold your spot.

A New Bundle Offer for this class  is being offered due to the new Bundle Promotion that began October 1st.

Now you really can have it all. Get your Ornament Keepsakes Stamp Set (wood or clear), Holiday Ornament Framelits, our NEW Silicone Craft Sheet, Candlelight Christmas Specialty DSP and a FREE Festive Paper-Piercing Pack in addition to learning how to make these wonderful ornaments during my class!

  • Wood Stamp Set Option & DSP $85
  • Clear Stamp Set Option & DSP $77
  • Wood Stamp Set, DSP & Snow Flurry Die Option $112
  • Clear Stamp Set, DSP & Snow Flurry Die Option $103

There are two days to choose from.

  •  Sunday, November 4th at 2 p.m.
  •  Tuesday, November 6th at 6 p.m.

That’s it – yes it’s that easy, so why not sign up for the Holiday Keepsakes Ornament Class today!
Patio Party Pinwheel

Wow, the last couple of weeks have been crazy around here with band camp. I’m the secretary of the boosters club so there is a lot of startup stuff that happens. But I’m back now and school doesn’t start for a few days.

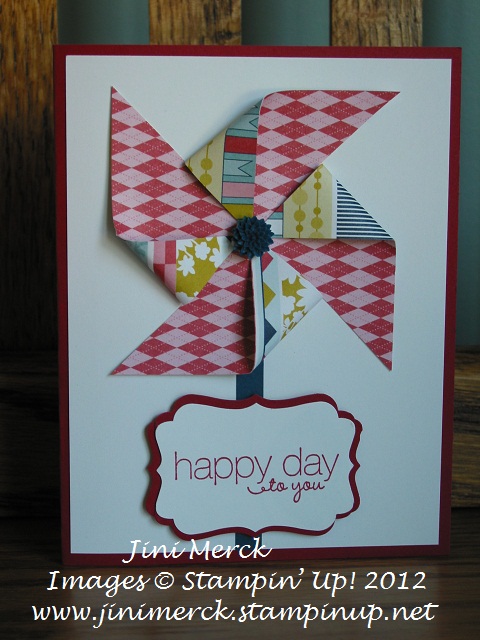
Pinwheel Today I wanted to share with you this little Pinwheel card I made recently. Isn’t it cute? Pinwheels are all the rage right now it seems. I made this card for my last TEAM meeting. Everyone loved the NEW In Color Dahlias that we used for the centers of our pinwheels. The girls had so much fun making them that I thought I would offer the FREE Pinwheel tutorial to you – just for signing up for my email list! (That’s a $9.95 value for FREE) Interested? Click on my link below to sign up today.

Click HERE to sign up for my email list

and receive your FREE Pinwheel tutorial

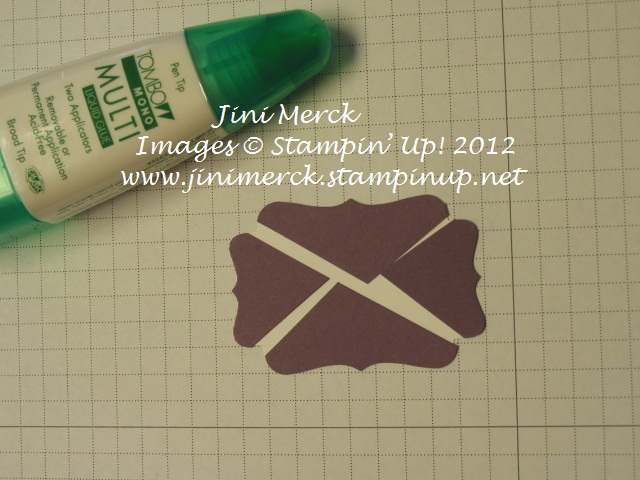
Wonder how I made the sentiment with the Decorative Label Punch? Here is quick shot of the punched piece after I cut it. 

And then adhere it to the back of the already stamped and punched sentiment piece. I like to use our Multipurpose Adhesive to do this since I can move it around after I turn it over and get the pieces right where I want them. 

How quick and easy is that! Do you like to learn new tips and techniques? Why not join my Virtual Club. You can click HERE for more information.

Come back tomorrow, I’ll be posting some of the cards that I received during swaps at convention.

Supplies:

Stamp Set: Friendly Phrases

Inks: Raspberry Ripple

Paper: Patio Party Designer Series Paper, Raspberry Ripple, Midnight Muse and Whisper White

Accessories: In Color Dahlias, Decorative Label Punch

Click here to order your Stampin’ Up! Products online 24/7! (US only)

Double Fold Gate Card

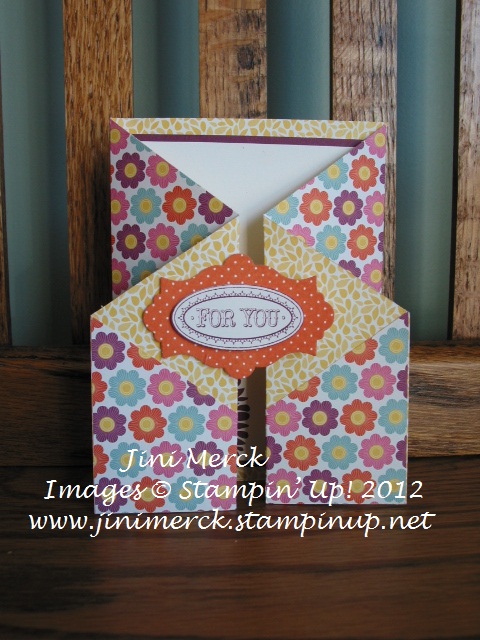
I love to try new things and so recently fell in love with making these cards using the Double Fold Gate technique and the Layered Labels stamp set. It’s a lot of fun to see all the different combinations that you can come up with.

This card in particular that I’m showing you today uses one of my favorite NEW stamps sets from the 2012-2013 Catalog, Layered Labels. First I love it because of the sentiments and secondly because of the fact it has a matching set of Framelits Dies that coordinate with it making it quick and easy to use. After all who doesn’t love their Big Shot? And with all the new goodies in the 2012-2013 Catalog the Big Shot options are endless!

Double Fold Card Tutorial front

I’ve used the Floral District Designer Series Paper for this Double Fold Gate card. The Floral Districts DSP seems to be a DSP that I reach for most often right now– so much so I need to order my 3rd package of it already! I really like the bold, fun colors and patterns it contains.

I think these Double Fold Gate Cards are so much fun to make that I wanted to share with you the Double Fold Gate Card tutorial that I made for it. Grab your favorite pack of Designer Series Paper and see what combinations you can come up with – warning these can become addictive!

Double Fold Gate Card Tutorial

Supplies:

Simply Scored Scoring Tool

Stampin Trimmer

Bone Folder

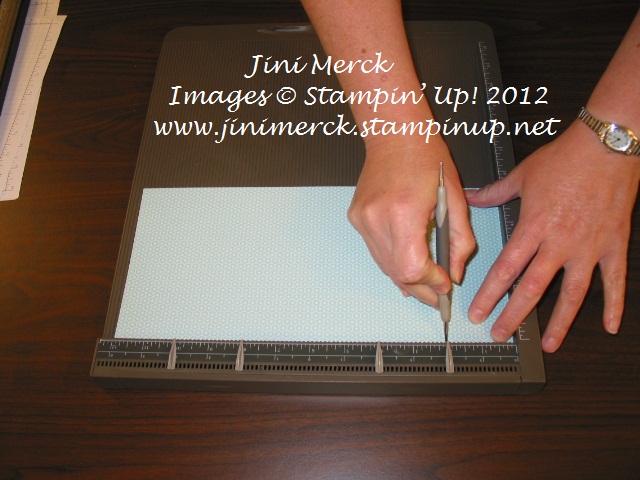
Lay a 12″ x 5 ½” piece of Designer Series Paper on the Simply Scored Board with longest edge at the top. (I used our new Floral District Designer Series Paper.)

Double Fold Card Tutorial step 1

Score at 2″, 4″, 8″ and 10″ marks

Double Fold Card Tutorial step 2

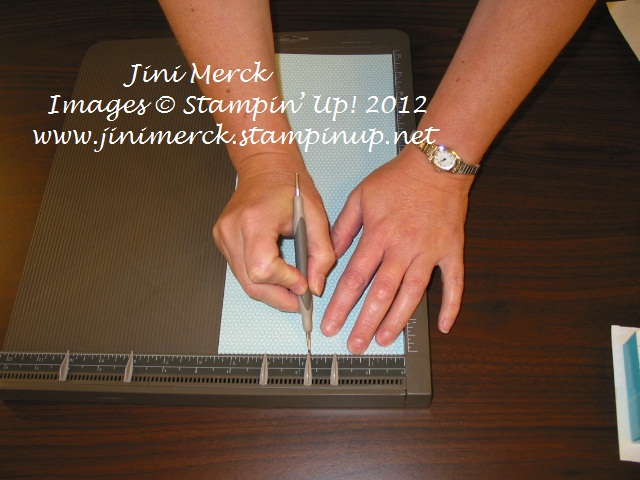
Turn Designer Series Paper and make a small mark each short end at the 2 ¾” mark

Double Fold Card Tutorial step 3Use the bone folder and fold in the two ends on the 4″ and 8″ score lines. (This allows you to see your score lines easier for when you line up your DSP to cut.)

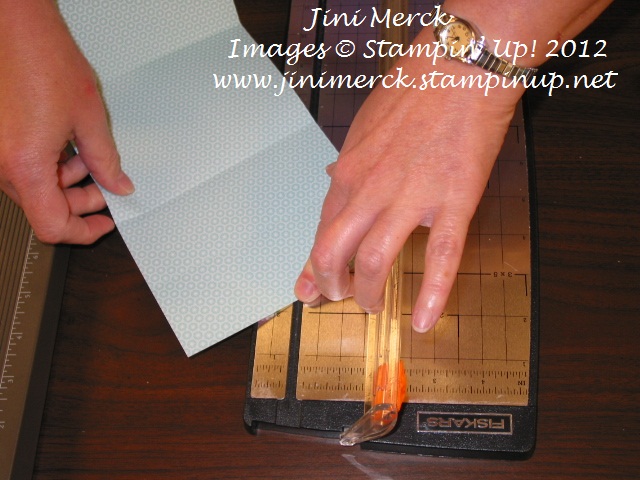
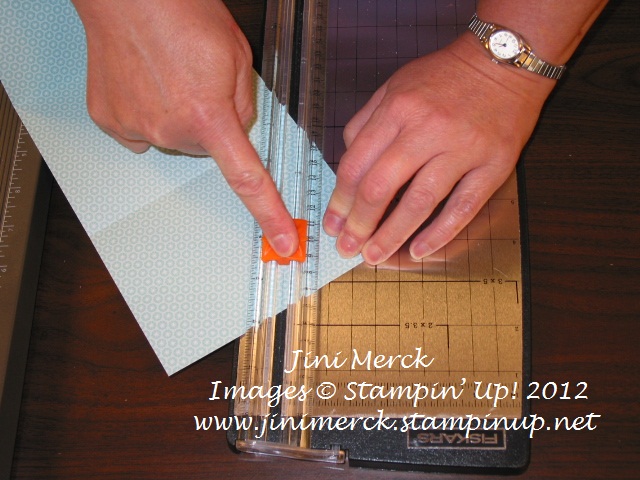
Decide which side is the top of your card and then using the Stampin’ Trimmer to cut a diagonal line on each side. Line up the 2 ¾” mark on the grove where your blade travels. You can hold this in place with your index finger if you would like.

Double Fold Card Tutorial step 4

Then “swing” the top edge of your 4″ score line on the DSP until it is lined up on the grove too.

Cut.

Double Fold Card Tutorial step 5

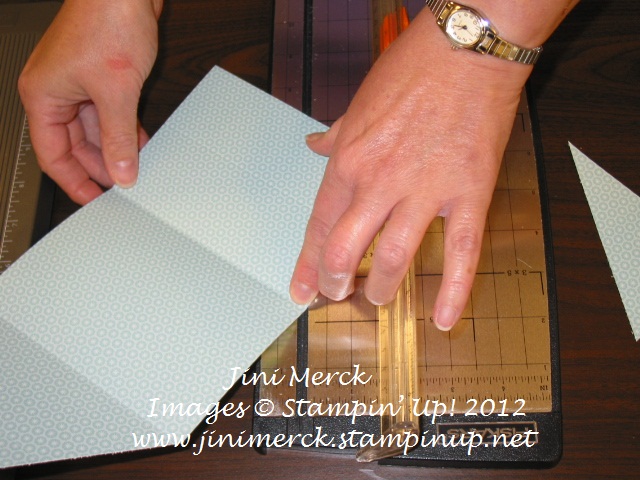
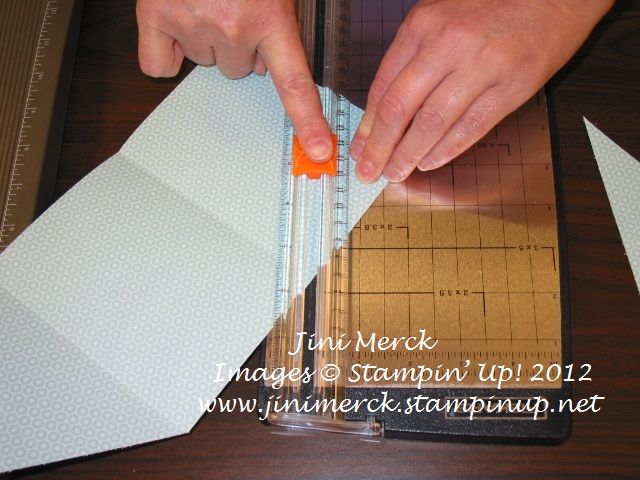
Repeat on the other side Lining up the 8″ score line and your

2 ¾” mark.

Double Fold Card Tutorial step 6

Double Fold Card Tutorial 7

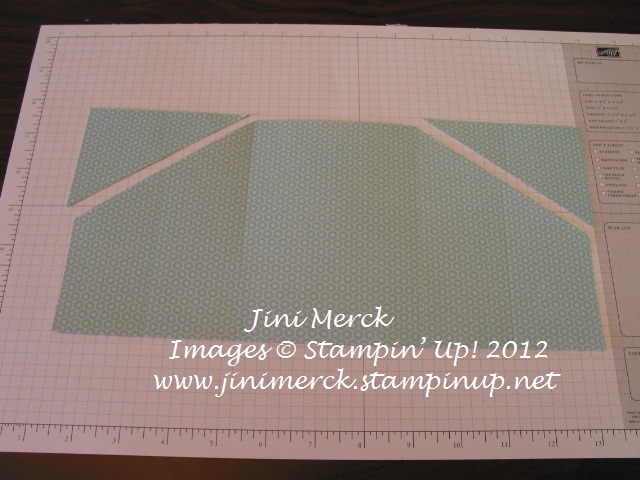
You should have three pieces that look like this.

Double Fold Card Tutorial step 8

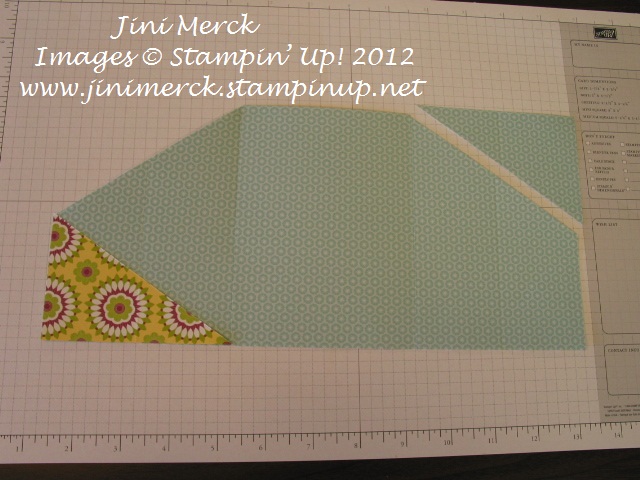
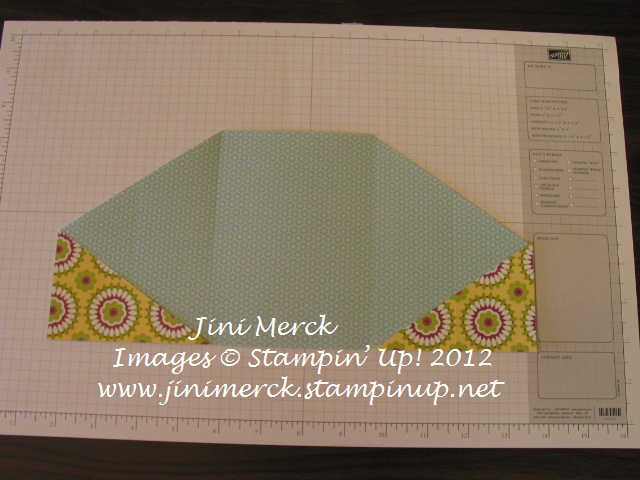
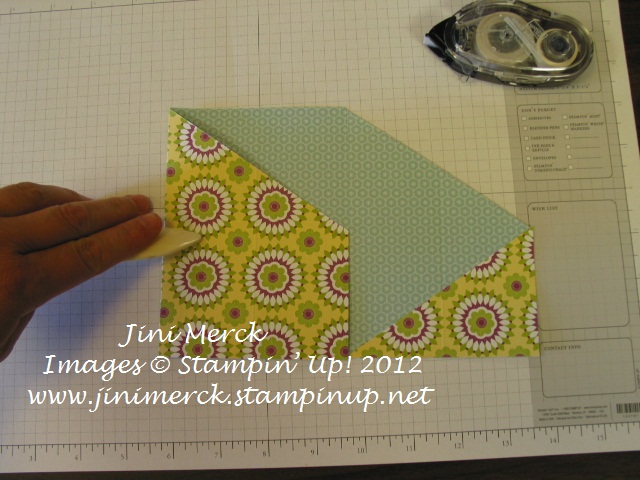
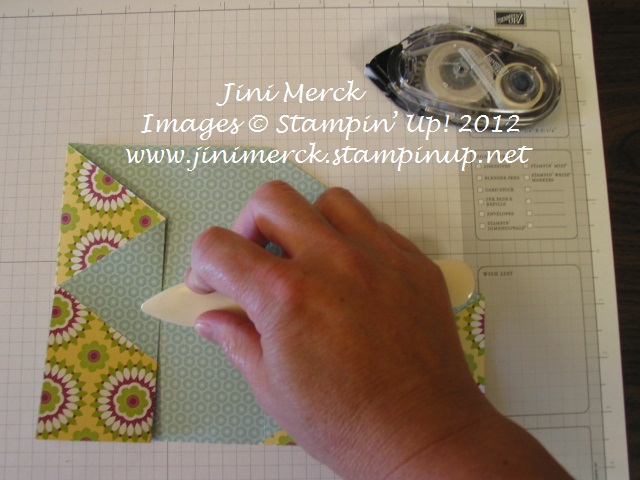
Flip over the piece and adhere to the bottom of card as shown. Repeat on the other side.

Double Fold Card Tutorial step 9

Double Fold Card Tutorial step 10

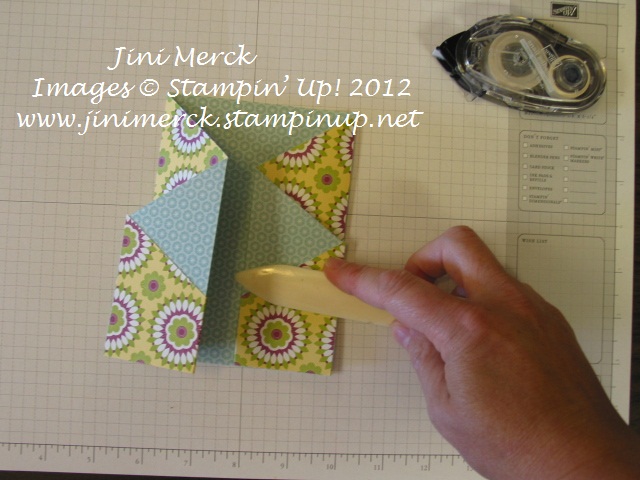
Using the bone folder you can fold the card on the 4″ and 8″ score lines (if you didn’t fold and score before cutting off the corners.)

Double Fold card Tutorial step 11

Using Bone Folder, fold on the 2″ score line in the opposite direction to create Z fold.

Double Fold Card Tutorial step 12

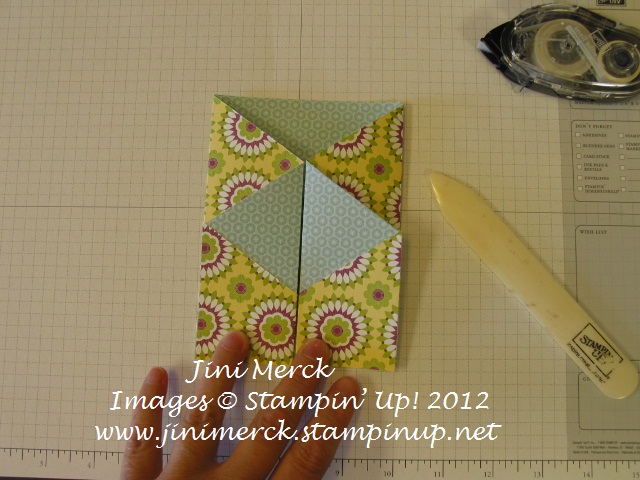
Repeat on the other side Using Bone Folder, fold on the 10″ score line folding in the opposite direction to create Z fold.

Double Fold Card Tutorial step 13

Your card should like this.

Double Fold Card Tutorial step 14

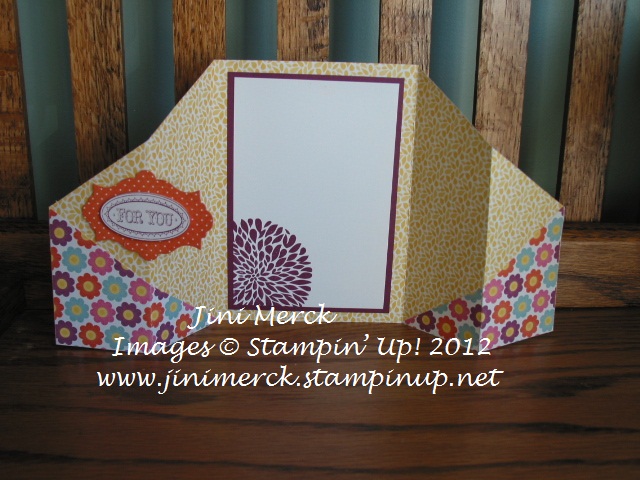
Adhere pieces of card stock to the inside and decorate front as desired. I used a piece of 3 ½” x 5″ Rich Razzleberry card stock with a layer of 3 ¼” x 4 ¾” Whisper White card stock. I used the Betsy’s Blossoms stamp set and stamped the flower image in Rich Razzleberry.

Double Fold Card Tutorial step 15

For the outside image I used our NEW Layered Labels stamp set and the coordinating Apothecary Accents Framelits Dies – Adhering the image only on the one side so that the card opens easily.

And here is the finished card.

Double Fold Card Tutorial front

Did you enjoy this tutorial? Do you like to learn new things?  Would you like to get exclusive tutorials for 2 projects that are just for you every month? Why not join my Virtual Stamp Club?

Watch for more information coming soon – meanwhile why not sign up and become part of my Mailing list NOW. Not only will you receive my Monthly Newsletter, which includes special promotions, tips and helpful hints (in addition to information about my events and my Virtual Club that starts in September), but you’ll also receive a FREE tutorial just for you!

Sign up for my monthly newsletter Click HERE

Click here to order your Stampin’ Up! Products online 24/7! (US only)


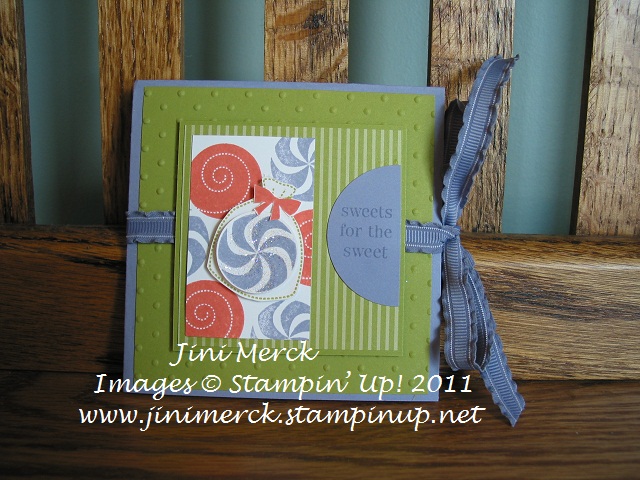
Sweets for the Sweet Amazing Fold Card

Here is the second Make ‘n Take that we made during my Luau Catalog Launch Open House. Who wouldn’t love getting this colorful little card and isn’t the ruffled ribbon just fantastic? This card is an Amazing Fold card that was a special Make ‘n Takes for demonstrators during the Alaskan Cruise this spring.   Each year Stampin’ Up! offers an incentive trip to its demonstrators that they can earn. Demonstrators who earn this trip get an all expense paid vacation for two and get to enjoy fun events with Stampin’ Up!, in addition to sneak peeks and lots of free goodies and stamp sets. Want to learn more about joining my team and being a Stampin’ Up! Demonstrator? Click HERE for more information.

This special card uses the Sweets for the Sweet stamp set which is so much fun to use. For those of you who were unable to attend my Luau Catalog Launch here is the FREE tutorial for this card. Just click HERE to download your FREE tutorial.

Click here to order your Stampin’ Up! Products online 24/7! (US only)


Posted at Aug 13, 2011 12:00 AM     |     Comments [0]

My Friend Tutorial

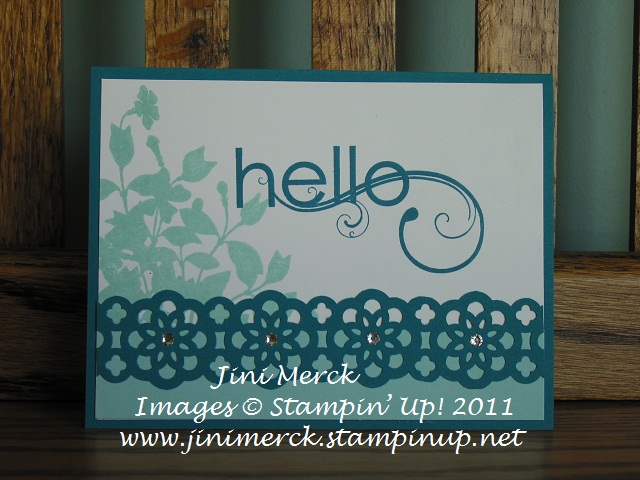
As promised in yesterdays post, here is the card we made at the Luau Catalog Launch. I just love our new In Colors, don’t you? Stamps sets that are nature oriented are always appealing to me and this set, My Friend,  lends itself to so many different techniques – it’s a must have for the new or experienced stamper.

You can click HERE to download a free tutorial on how to make this card along with a supply list.

 Click here to order your Stampin’ Up! Products online 24/7! (US only)