Say Thank You with Spotlight on Nature & More

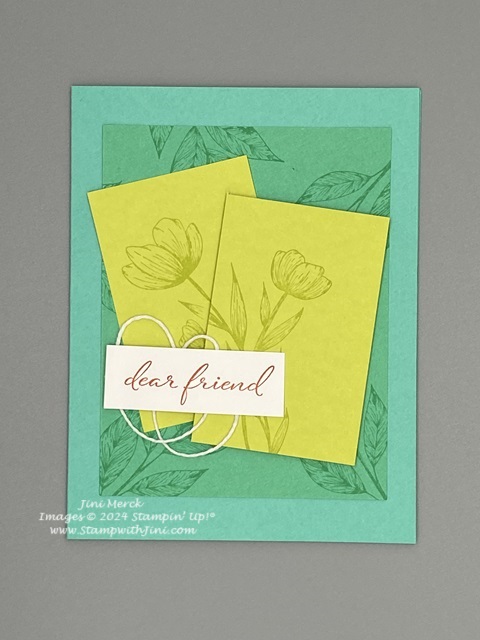
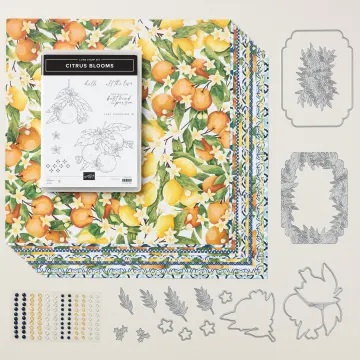
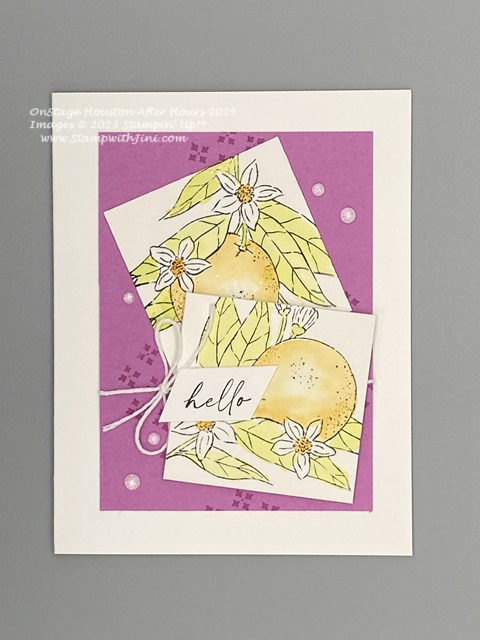
Loving the Spotlight on Nature Stamp set (163579)? This set is filled with lovely images

and wonderful all occasion sentiments and I knew I’d enjoy creating with it as soon as I saw it and stamped with it at our OnStage After Hours event in Houston.

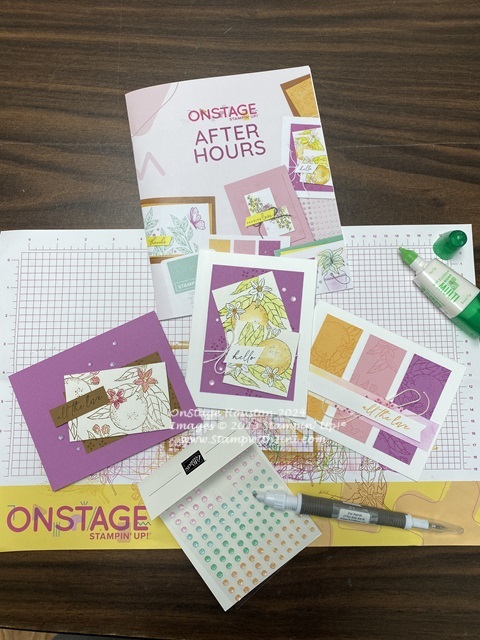
Today I’m sharing the 3rd card we did for our Make n Takes during that event.

This event was a lot of fun and was our first chance to play with the new 2024 In Colors. This card uses a fun way to add texture to your project, water color!

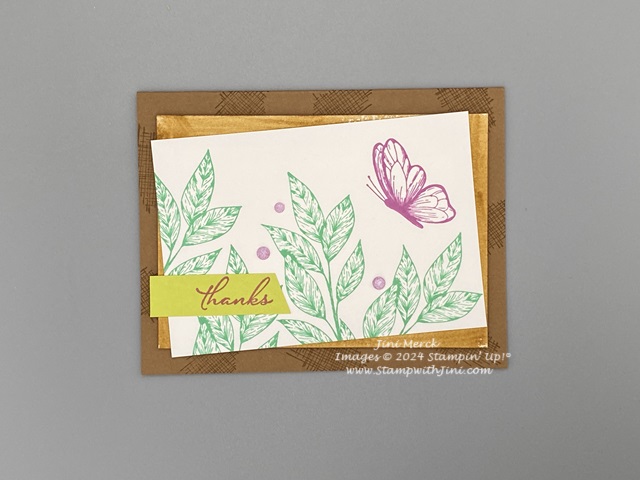
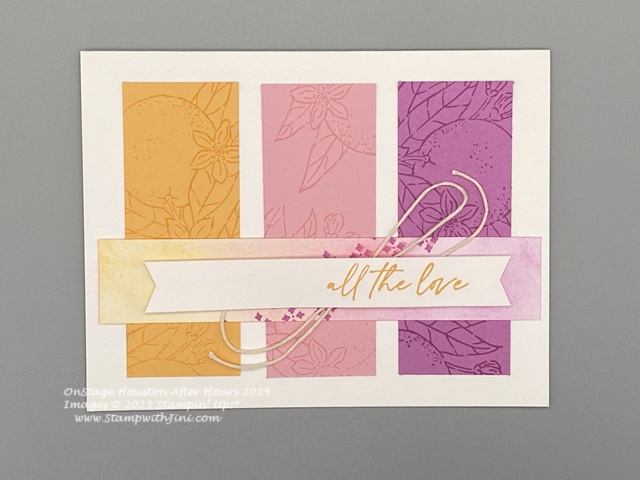
Can you see it? Beneath the stamped panel there is a layer that has been given a simple wash of Pecan Pie. So simple but makes a big impact. Check out my video and pdf tutorial and try it yourself!

As always I’ve included a full supply list, measurements, and step by step instructions. The PDF even has the video link so everything is handy and in one place for you when you’re ready to create.

Spotlight on Nature OnStage Thank You Card Tutorial PDF

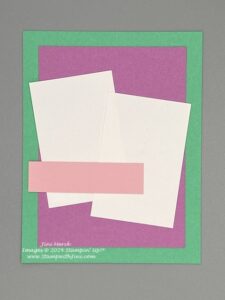
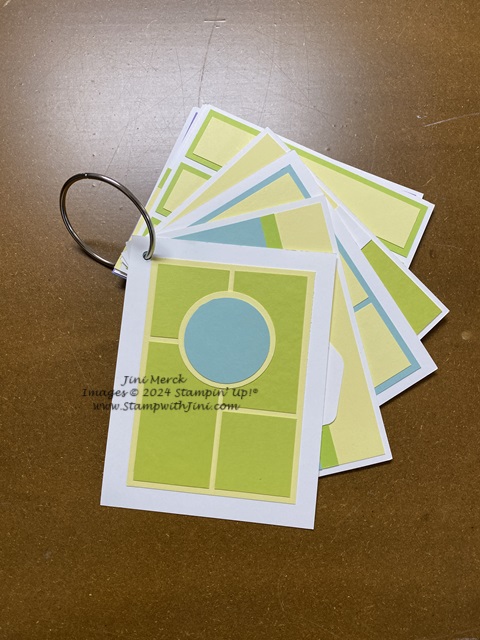
I’ve also got another Card Sketch for you today for you Card Sketch collection to help you create that Stampin’ Up! shared with us.
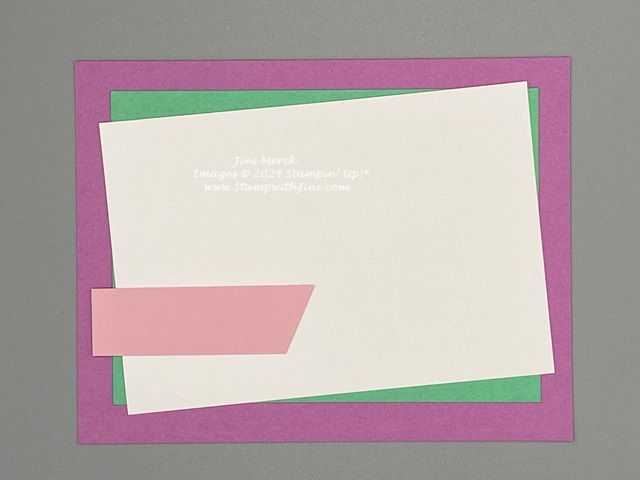
Sketch #25 PDF

Are you enjoying my Card Sketches? Did you know that Stampin’ Up! has also provided card sketches in the Annual Catalog? Why not check them out. They are listed on page 22 at the bottom and then used throughout the catalog with different projects too.

CLICK HERE to order your Stampin’ Up! products Online 24/7! (US only)

Shop at my Online Store and use Host Code XM7XH6F2 with a product order of $50 or more and receive a FREE Gift from me; my Card Kit and my In Color Card Class!

Spotlight on Nature OnStage After Hours Card Tutorial

Today’s card uses a favorite from the 2024 Annual Catalog, the Spotlight on Nature Stamp set (163579).

This set has some lovely images and all occasions sentiments and a versatile set of dies that coordinate with it.

We made this card during our After Hours event in Houston and Stampin’ Up! gave us a sketch that I’ve changed up a little bit and made my own for my Sketch Tool Ring I shared with you earlier. Make sure to scroll down since I’ll share it with you today too.

This will be the first of the 3 cards we made during the After Hours Event. But today here is the card we made using 2 of our NEW In Colors Summer Splash and Shy Shamrock. While they might look similar when apart, you can definitely tell the difference when layered together. I fell in love with the Summer Splash as soon as I saw it and wasn’t real sure about the Shy Shamrock, but am finding I really like using it in my stamping too.

Here is a quick video on how I put this make n take together for you along with the PDF with the supply list, measurements, and step by step instructions.

Spotlight on Nature OnStage Card Tutorial PDF

And of course here is my Card Sketch #27

And here is the PDF so you can make one too as a design tool too.

Card Sketch #27 PDF

Did you know my Card Sketches use different color combinations that can inspire you when you are stamping projects? Create them and add the colors to the back if you’d like and you’ll have color combinations and color swatches too of our card stock to create with!

On a personal note:

You may have noticed I didn’t post every day this week. I had some unexpected appointments that took a lot of time, so I wasn’t able to share like I wanted to. I’ll be having a procedure done next week, and may not be sharing quite as much as I normally do, but I have some things set up that I think you’ll enjoy.

Of course, I’m happy to help and I will be available, but might not be able to respond as quickly as normal.

Enjoy!

CLICK HERE to order your Stampin’ Up! products Online 24/7! (US only)

Shop at my Online Store and use Host Code XM7XH6F2 with a product order of $50 or more and receive a FREE Gift from me; my Card Kit and my In Color Card Class!

Here’s my Citrus Blooms After Hour Card Tutorial

Today I’m going to share with you the final card I made using the Citrus Blooms Bundle (163295) OnStage in Houston during our After Hours event. It’s the third of the three cards that we made during the event with this lovely bundle.

This card is bold with it’s Petunia Pop base and Pecan Pie accents. It once again uses our Water Painters (151298) and the Fluid 100 5×7 Watercolor Paper (149612) to create a different look with the Pecan Pie stamped image and highlighting just the blooms. 

You’ll need the following supplies to make this card.

Supplies:

Paper & More

Measurements:

  • Petunia Pop Card stock: Cut 5 1/2″ x 8 1/2″; scored at 4 1/4″
  • Pecan Pie Card stock: Cut 3 1/2″ x 2 1/4″
  • Watercolor Paper: Cut 3 1/2″ x 2 1/4″
  • Pecan Pie Card stock: Cut 2 ” x 5/8″
  • 2024-2026 In color Shimmer Gems (Petunia Pop): 5 assorted

Assembly:

  1. stamp the small “diamond” image using Pecan Pie Classic Ink onto Pecan Pie panel randomly.
  2. Adhere the panel in the lower right hand corner of the card front about 1/2 – 3/4″ from the bottom ash shown.
  3. Next, stamp the “orange” image onto the Watercolor Paper using Pecan Pie Classic Ink.
  4. Stamp the sentiment “all the love” onto Pecan Pie Card stock strip using StazOn Jet BlackInk Pad.
  5. Using your Water Painter color the flower and bud images using Petunia Pop Classic Ink. Allow to dry. (I like to use a clear block as a pallet for my water coloring – simply tap the ink pad onto the clear block to add ink rather than squeezing your ink pad and using the lid)
  6. Add Stampin’ Dimensionals to the back of the watercolor image and adhere to the card front tilting it to the right as shown.
  7. Add a Stampin’ Dimensional to the left end of the sentiment and adhesive to the right and adhere to the card front so it is the same height as the water colored image.
  8. Finally stamp the inside sentiment and envelope as desired.

I hope you’ve enjoyed these quick and easy cards using this bundle that I’ve shared with you this week. This Stampin’ Up! event was so much fun that I’ll hope they’ll do it again at our next OnStage in North Carolina.

If you are enjoying these cards that I’ve shared with you this week from our OnStage After Hours Make n Takes you’ll want to be sure and check out the Mediterranean Blooms Suite (163300)

that not only has the Citrus Blooms Bundle (163295) that I used for these cards, but also some wonderful Designer Series Paper and accessories too!

Enjoy! and then stop back by for my regular Friday tutorial tomorrow that includes a video and PDF using the Spotlight on Nature stamp set.

CLICK HERE to order your Stampin’ Up! products Online 24/7! (US only)

Shop at my Online Store and use Host Code XM7XH6F2 with a product order of $50 or more and receive a FREE Gift from me; my Card Kit for my In Color Card Class!

Another OnStage After Hours Citrus Blooms Tutorial

Yesterday, I shared the lovely watercolor card I made at OnStage in Houston during our After Hours event. Today I’m sharing the second of the three cards.

I love the linear look this card has and the combination of the 2024-2026 In Colors together.

What do you think? Like the color combination too? I love the soft color behind the sentiment we created with our Small Blending Brushes (160518). Here is how we made this card.

You’ll need the following supplies to make this card.

Supplies:

Paper & More

Measurements:

  • Basic White Thick Card stock: Cut 5 1/2″ x 8 1/2″; scored at 4 1/4″
  • Peach Pie Cards stock: Cut 1 3/8″ x 3 1/2″
  • Pretty in Pink Card stock: Cut 1 3/8″ x 3 1/2″
  • Petunia Pop Card stock: Cut 1 3/8″ x 3 1/2″
  • Basic White Card stock: Cut 5 1/4″ x 1″
  • Basic White Card stock: Cut 4 3/4″ x 5/8″
  • Baker’s Twine Essentials Pack (Very Vanilla): Cut 12″

Assembly:

  • Stamp the “orange” image onto Peach Pie Card stock using Peach Pie Classic Ink.
  • Stamp the “orange” image onto Pretty in Pink Card stock using Pretty in Pink Classic Ink.
  • Stamp the “orange” image onto Petunia Pop Card stock using Petunia Pop Classic Ink.
  • Adhere the 3 panels to the card front. Adhere the Pretty in Pink panel down first in the center and then space out the other two panels evenly on the right and left sides.
  • Using your Blending Brush add color using Petunia Pop, Peach Pie, and Pretty in Pink onto 1″ strip of Basic White Card stock.
  • Then using Petunia Pop Classic Ink and “diamond” image stamp stamp several times at an diagonal across the center of the strip as shown.
  • Adhere the strip to the card front about 1 inch up from the bottom.
  • Tie the Very Vanilla Baker’s Twine into a large bow and adhere it to the card front. The sentiment from the next step will cover the adhesive.
  • Using your Paper Snips cut a banner onto the right and left ends of the Basic White Card stock strip.
  • Stamp the sentiment “all the love” onto the strip of Basic White on the right end using Peach Pie Classic Ink.
  • Using Stampin’ Dimensionals adhere the sentiment on the the card front.
  • Stamp the inside panel and envelope as desired.

That’s it. Then stop by tomorrow when I’ll be sharing the last card we made that night.

Enjoy!

CLICK HERE to order your Stampin’ Up! products Online 24/7! (US only)

Shop at my Online Store and use Host Code XM7XH6F2 with a product order of $50 or more and receive a FREE Gift from me; my Card Kit for my In Color Card Class!

Crafting with Citrus Blooms at OnStage After Hours

I’ve been wanting to share this bundle with you, but unfortunately it got delayed. So today I’m going to share the lovely little cards that we were able to create during the event in Houston. While I didn’t choose this as my bundle for the event, one of my fellow table mates let me borrow hers.

So over the next few days I’ll be sharing these cards made with the Citrus Blooms Bundle (163295) with you along with how we made them.

This bundle is part of our Mediterranean Blooms Suite (163300). So without further delay here’s today’s card.

This card uses our Water Painters (151298) and our Fluid 100 5×7 Watercolor Paper (149612) to create this soft look. Add more ink to your wash for a bolder look if you prefer, the choice is up to you!

You’ll need the following supplies to make this card.

Supplies:

Paper & More

Measurements:

  • Basic White Thick Card stock: Cut 8 1/2″ x 5 1/2″; scored at 4 1/4″
  • Petunia Pop Card stock: Cut 3 1/4″ x 4 1/2″
  • Watercolor Paper: Cut (2) 2 1/4″ x 2 1/4″
  • Basic White Card stock: Cut 2 1/2″ x 5/8″
  • Baker’s Twine Essentials Pack (white): Cut 12″
  • 2024-2026 In color Shimmer Gems (Pretty in Pink): 5 assorted

Assembly:

  1. stamp the small “diamond” image using Petunia Pop Classic Ink onto Petunia Pop panel randomly.
  2. Stamp the sentiment “hello” onto strip of Basic White Card stock using StazOn Ink Pad.
  3. Stamp orange image onto Watercolor Paper using Stazon Ink Pad. Repeat on second square.
  4. Using your Water Painter color the images using Lemon Lime Twist and Peach Pie Classic Ink. Allow to dry. (I like to use a clear block as a pallet for my water coloring – simply tap the ink pad onto the clear block to add ink rather than squeezing your ink pad and using the lid)
  5. Adhere the first water colored panel to the Petunia Pop panel tilted it to the left as shown.
  6. Wrap a piece of Baker’s Twine around the panel and tie into a bow. Adjust as desired.
  7. Using your Stampin’ Dimensionals add the second water colored panel to the card front, tilting it to the right.
  8. If needed adjust bow and trim ends of twine then adhere the layered panel to the card front.
  9. Using your Paper Snips trim the ends of the sentiment panel at an angle on both ends.
  10. Adhere sentiment to the card front.
  11. Add Pretty in Pink Shimmer Gems to the card front randomly using your Take Your Pick Tool.
  12. Stamp inside panel and envelope as desired.

That’s it. Then stop by tomorrow when I’ll be sharing the second card that night.

Enjoy!

CLICK HERE to order your Stampin’ Up! products Online 24/7! (US only)

Shop at my Online Store and use Host Code XM7XH6F2 with a product order of $50 or more and receive a FREE Gift from me; my Card Kit for my In Color Card Class!