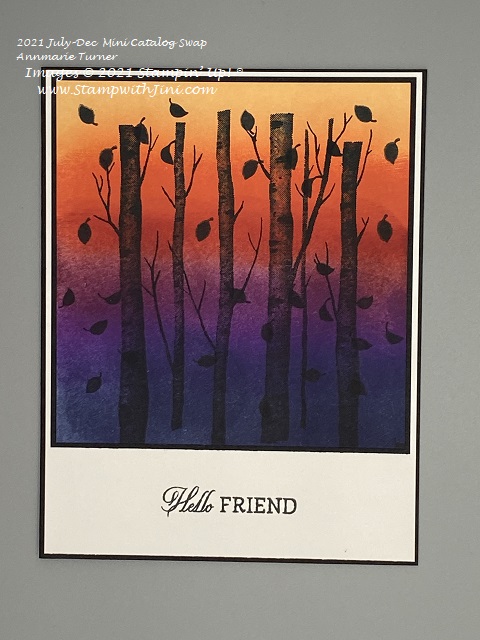
This time of year the outdoors are calling and hiking, camping and spending the day in our North Georgia Mountains becomes extremely popular as the highways heading north are filled with campers, leaf watchers, and those seeking the peace and quiet of a day with nature. The Welcoming Woods stamp set (156550) evokes those kinds of images in my mind and since this set has all occasions sentients and year round options I think you’ll find this set a great one to team up with sets you might already have.
Check out this first card for fall and it’s striking colors.
So what do you think? Love the options this stamp set gives you? Why not stop by my Online Store and check out this and all the items from our Mini Catalog?
Shop at my Online Store and use Host Code HCM37JXW and receive a FREE Gift, an Evening Evergreen Card Class
Click Here to learn more about using the Hostess Code If you order Online make sure your profile information is up to date and you’ve allowed me to send you your free gift.
If your Online order is $150 or more make sure not to use the host code so that you can take advantage of the Host Benefits yourself – No worries, I’ll still send you your free gift. It’s my way of saying thank you for choosing me as your demonstrator!
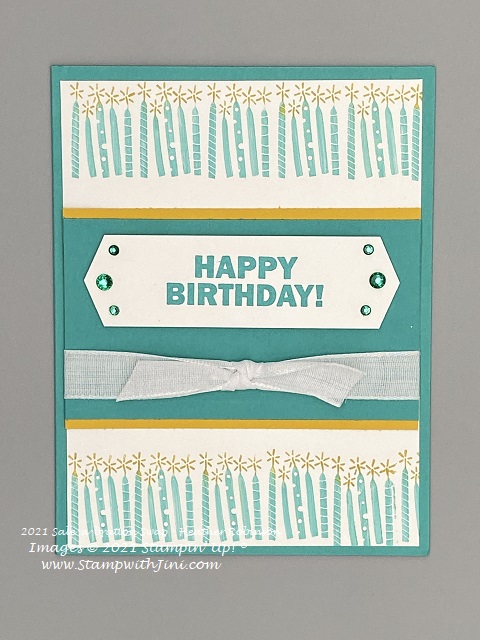
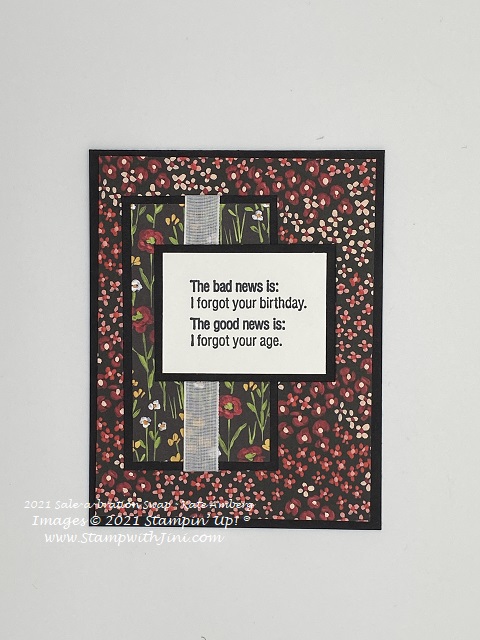
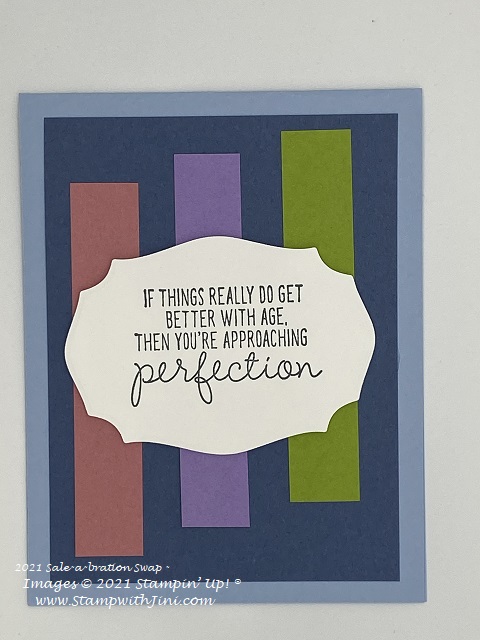
Today’s stamp set Approaching Perfection is another of our Sale-a-bration offerings that you can earn for FREE when placing a minimum order of $50. This set is filled with fun sentiments and simple images great for birthdays.
Want to see some fun cards using this set? Well you’re in luck I’ve got a great variety to share with you today. This first card in the bright cheerful colors of Bermuda Bay and Crushed Curry and it uses our Stampin’ Write Markers for a quick and easy way to add two colors to the candle image.
It’s a great card for all ages.
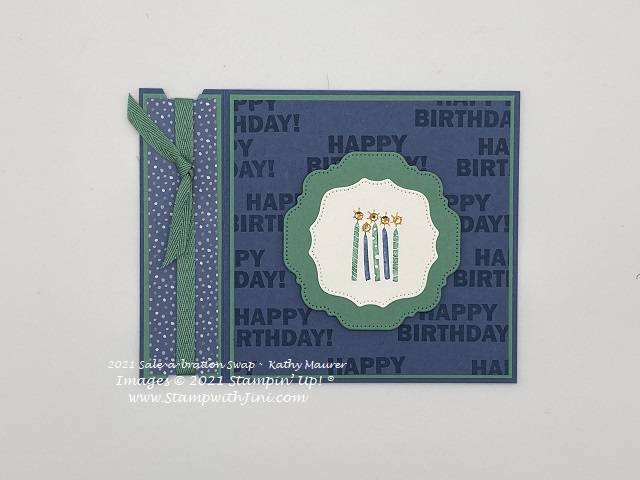
Here is another fun card using the same Stampin’ Write Marker technique, this time in Misty Moonlight and Just Jade. Check out the Champagne Rhinestones (151193) adding a bit of sparkle to the candles.
This next card teams up the bold patterns from the Flower & Field Designer Series Paper (Sale-a-bration 155223) to create this striking card.
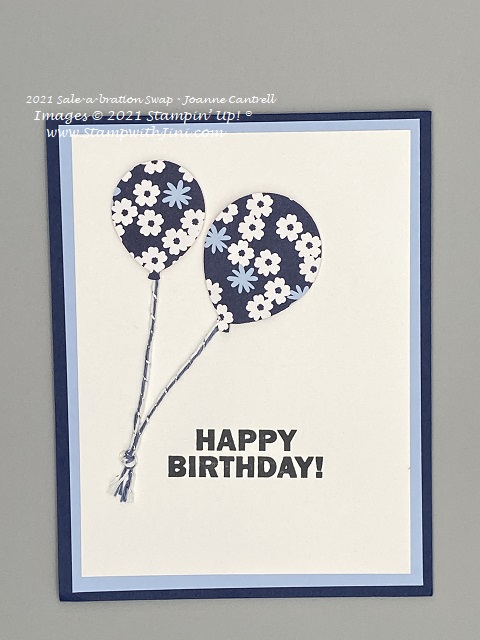
And don’t forget our punches. Here the Balloon Bouquet Punch (140609) was used to punch some balloons from the Paper Blooms Designer Series Paper (Sale-a-bration 155222).
The balloons are tied together with our Misty Moonlight Baker’s Twine from the Flowers for Every Season Ribbon Combo Pack (153620) found in the Annual Catalog. I just LOVE how we can mix and match our products and they work together so well!
And these last two cards use color to highlight the wonderful sentiments in different ways.
How cool is that?
You’ll want to get your favorite items from our Sale-a-bration brochure before Sale-a-bration ends later this month. Did you know there are just 20 days left?
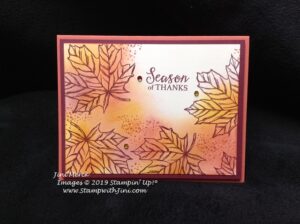
I love the great fall images in the Gather Together stamp set so it was a easy decision to choose it for my November birthday card this month.
You’re going to love just how easy it is to create this fun fall birthday card with it’s faux panel that is created with a couple of easy steps using sticky notes and sponges – A great #simplestamping project since it uses stamps, ink, paper —— and an embellishment of course!
Want to give this simple technique a try? Check out my video tutorial
#imbringingbirthdaysback – Gather Together Card Video Tutorial
And of course a step by step PDF for you too with the supply list for easy reference
#imbringingbirthdaysback – Gather Together Card Tutorial PDF
Shop at my Online Store and use Host
Code YS9WN2UA
Click Here to learn more about using the Hostess Code If you order Online make sure your profile
information is up to date and you’ve allowed me to contact you (If you chose no
contact in the past you’ll need to call 1-800-Stamp Up to have them change your
profile for you.)
Shop at my Online Store and use Host
Code H62N9P3Z
Click Here to learn more about using the Hostess Code If you order Online make sure your profile information is up to date and you’ve allowed me to contact you (If you chose no contact in the past you’ll need to call 1-800-Stamp Up to have them change your profile for you.)
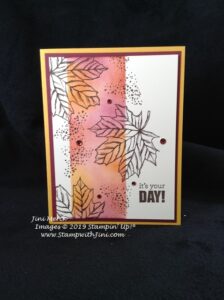
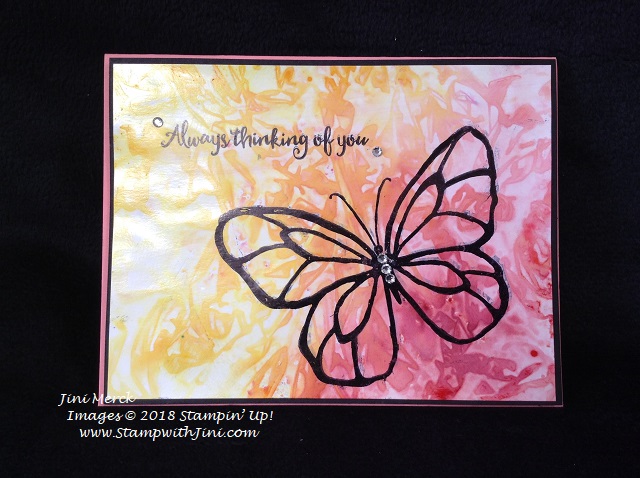
Today’s project that is a lot of fun to make since it includes a fast and easy technique that uses our Brusho Crystal Colors.
Shake and spritz and you’ve got a beautiful fall backdrop for your project! Got to love that and of course I can never resist using my Stampin’ Spritzers they are so much fun!
Want to see how their made so you can make some yourself? I’ve whipped up a quick video tutorial for you.
And how about a complete supply list with step by step directions too?
Shop at my Online Store and use Host Code W2NX46E9
Click Here to learn more about using the Hostess Code If you order Online make sure your profile information is up to date and you’ve allowed me to contact you
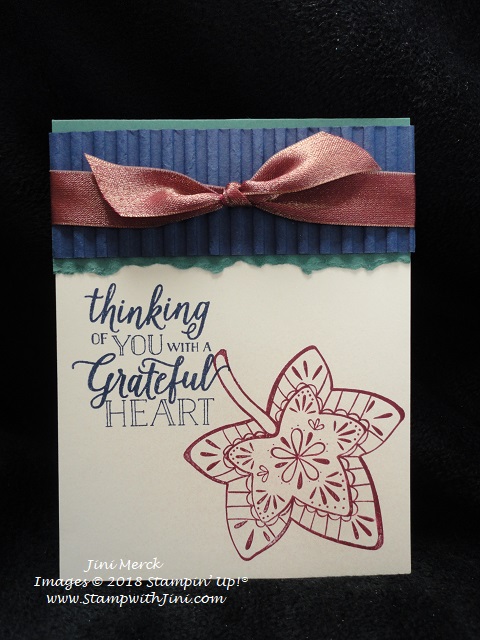
I’ve got another project from my Holiday Catalog Kick Off for you – and a couple more Tutorials too! I originally designed this card for my Team Retreat in August, but couldn’t resist sharing it with you too!
This card is a wow with it’s texture and shimmer, that are created with a Copper Shimmer Mist, torn edge and Corrugated layers. And it’s so easy to do!
I’ve created a couple of tutorials for you. The first is a PDF for the card so you can recreate it for yourself it includes both a complete supply list and directions.
Falling For Leaves Holiday Catalog Card Tutorial PDF
Check out this short little video where I show you how you can create your own Shimmer Mist.
How to Create Shimmer Mist Video Tutorial
Once you play with the Merry Merlot & Copper Reversible Ribbon you’ll want some too – it’s to die for. And the Copper Shimmer Paint! So many ways to use this stuff – you can even use an Uninked Stampin’ Spot (141822) to create your own little Copper ink pad! How cool is that?
On to a couple of things you’ll want to know that are time sensitive:
Did you know that Fast Fuse is back? But it’s only While Supplies Last!
If you’re like me, you thought the days of Fast Fuse were done at Stampin’ Up! (You know . . .since Stampin’ Up! retired the product and everything!) However, our vendor reached out because they manufactured a surplus of Fast Fuse applicators and refills, and they offered to sell their excess Fast Fuse inventory to us. Stampin’ Up! took them up on their offer and purchased 2,500 Fast Fuse applicators and 72,000 Fast Fuse refills.
Whoo! hoo! So you won’t want to delay in ordering yours, since it while supplies last!
Items Approaching Not-Orderable Status
Here’s what Stampin’ Up! has told us.
Sales for the following holiday catalog products have exceeded Stampin’ Up!’s forecast and are continuing strong, resulting in a significant number of back orders. It will be at least 30 days before these items are back in stock.
147905: Santa’s Workshop Memories & More Card Pack 147807: Chicken Wire Elements
These products will remain available until Wednesday, September 19 at 10:00 AM (MT); they will then be placed in not-orderable status. After that you will receive a pop-up notification asking if you would like to be notified via email when these products are back in stock. This will allow you to find out immediately when the status changes for these items and they are again available for purchase.
Thanks for your patience and understanding.
Explanatory note: Costs incurred by backorders can be in the tens and even hundreds of thousands of dollars; therefore, after weighing the variables, we occasionally must make the decision to temporarily turn off an item number rather than permit back orders to accrue. We apologize for any inconvenience this may cause; however, putting a product in not-orderable status while we wait for the stock to replenish allows the company to hold costs down.
Shop at my Online Store and use Host Code FZ3P6HGN
Click Here to learn more about using the Hostess Code If you order Online make sure your profile information is up to date and you’ve allowed me to contact you
Sign up HERE for my FREE Newsletter or Get my Blog Posts delivered right to your inbox HERE
How Do You Get a 2018 Holiday Catalog?
Don’t have a Demonstrator? Email me at StampwithJini@gmail.com include your name, address, and phone number and I’ll be happy to mail you one.
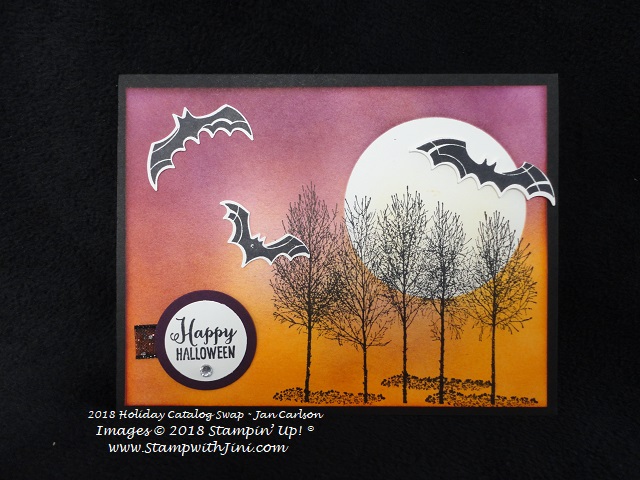
It’s almost fall and that means Halloween is right around the corner – If you love Halloween you’ll want to check out this fun card using the Spooky Treats & Winter Woods stamp sets from the Holiday Catalog.
This card uses simple sponging and masking to create a wonderfully spooky fall night!
How is it done? First you’ll create a mask using one of the Layering Circle Framelits Dies and a sticky note. Place the sticky note where you’d like it on your Whisper White card stock. Then sponge starting with the lightest color Crushed Curry in a circular motion to begin building the layers of color. Add some Pumpkin Pie and then finish with Blackberry Bliss. Remove the mask and you’re ready to finish stamping.
Yep, it’s that easy. Each time you’ll get a little different look based on your sponging which makes it a lot of fun.
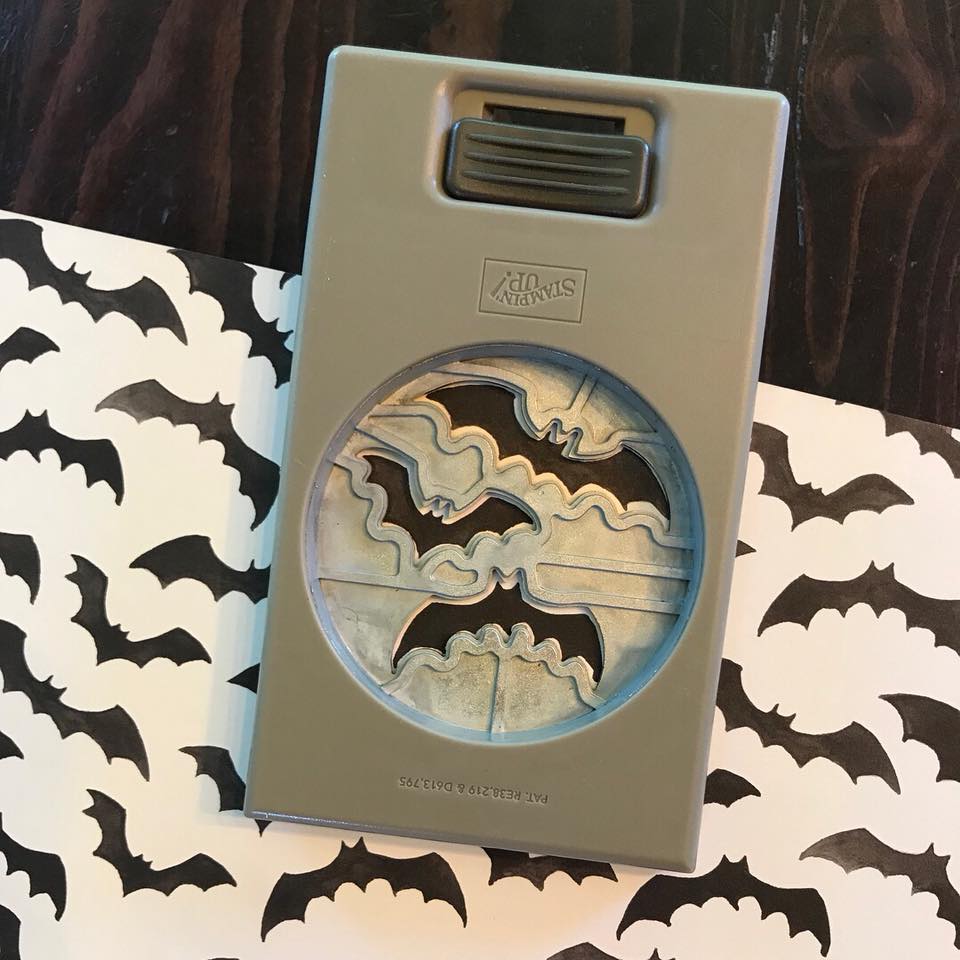
And if you love this punch you’ll love this tip that Sara shared with us yesterday.
The Spooky Bat Punch (148014) cuts out the bats from the Toil & Trouble Designer Series Paper (147531) bat images! How cool is that?
You’re going to LOVE all the fantastic products in the Holiday Catalog! Why not come to my Holiday Catalog Kick Off and check them out? But hurry and RSVP by the end of the day September 12th so I’ll have enough goodies for everyone!
Can’t come? or don’t live local and want a catalog? If you don’t have a demonstrator why not email me at StampwithJini@gmail.com your name, address and phone number and I’ll be happy to mail one to you!
Love this card? Then you’ll want to stop back by tomorrow when I’ll be sharing some more wonderful cards from a swap I recently hosted.
Shop at my Online Store and use Host Code 7GTJDB3N
Click Here to learn more about using the Hostess Code If you order Online make sure your profile information is up to date and you’ve allowed me to contact you
Sign up HERE for my FREE Newsletter or Get my Blog Posts delivered right to your inbox HERE
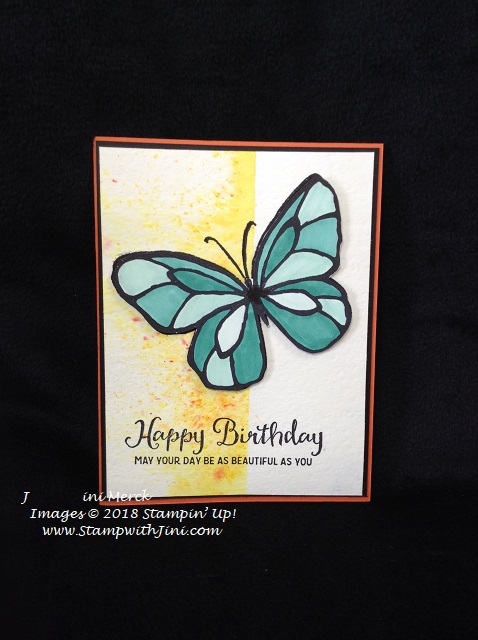
This month’s Thank You’s use a fun new technique using the Stampartaus called Circular Stamping. It’s a lot of fun to do and you can create this fun technique with just a few steps. Check out this card that I created for my stamping friends.
I love the bright and cheerful Mango Medley teamed up here with Berry Burst – how can it not make you smile?
Good news I’ve created a quick tutorial for you so you can make some too.
All Things Thanks Circular Stamping Card Tutorial PDF
I’ve also done a quick video tutorial for you to show how I created the template you need to create for this project.
How to Create a 3″ Circular Stamping Template Video Tutorial
Along with this video to show you how I stamp with the template to create this technique.
Circular Stamping with the Stamparatus Video Tutorial
So much fun, right? Loving it and can’t wait to try it with some other sets too!
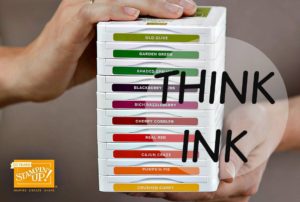
Got Ink?
Why not refresh your pallet of colors with a new ink pad? We’ve got some great new colors such as the Mango Melody used for today’s project.
Stop back by tomorrow when I’ll be sharing some more cards with you along with an organizational item too.
On a personal note I know that my posts have been more inconsistent than normal – we’ve had some family emergencies this summer, the latest being a major car accident that my husband was in. It was quite a scare, but thankfully he is ok and on the mend. I’m hoping things will be back to normal by the end of this week. Thanks for understanding.
Shop at my Online Store and use Host Code AFMUMHHT
Click Here to learn more about using the Hostess Code If you order Online make sure your profile information is up to date and you’ve allowed me to contact you
The Brusho Color Crystals are so much fun to play with I don’t want to stop! If you haven’t tried them yet, you won’t be disappointed with the variety of uses with your projects.
Here is a card we made during our April Team meeting that focused on different Brusho Techniques.
This card uses a simple masking technique that creates a wonderful look and was soooo easy to do with a bit of painter’s tape!
Want to make some too? Here is a tutorial for the card so you can play and create too.
And how about a video tutorial showing you just how simple it is?
Brusho Masking Technique Video Tutorial
Fun, right? If you’d like to see more of the fun Brusho Techniques I’ve shared earlier Click HERE and HERE
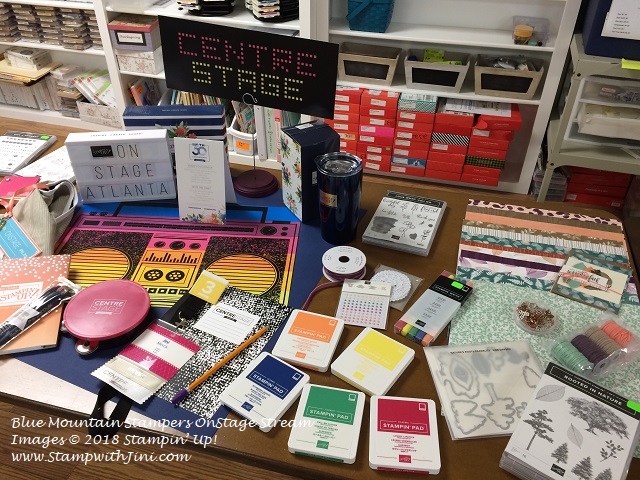
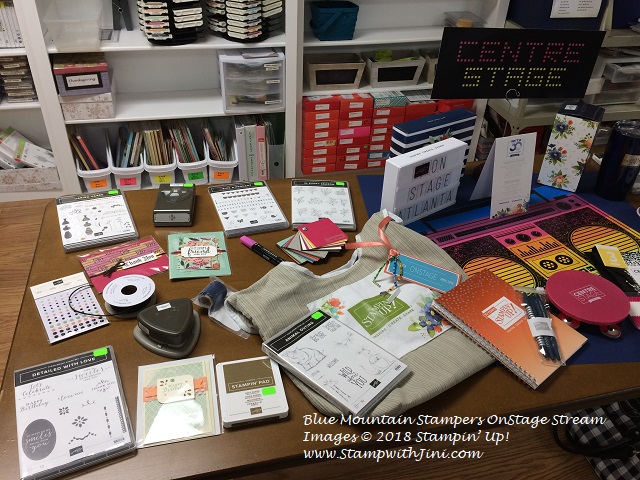
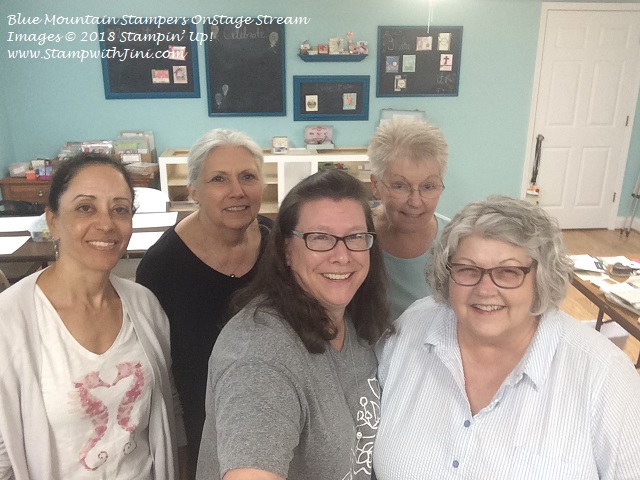
Blue Mountain Stampers’ OnStage Stream Event
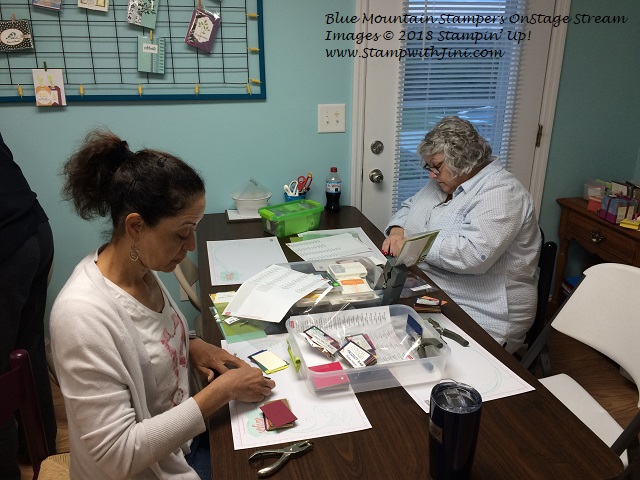
I love to share and so as a team we always gather together to share with those team members who weren’t able to attend the Stampin’ Up! event itself. We gather, have dinner, stream and stamp together with the new products introduced from the latest catalog – this time the NEW 2018 Annual Catalog & the color revamp!
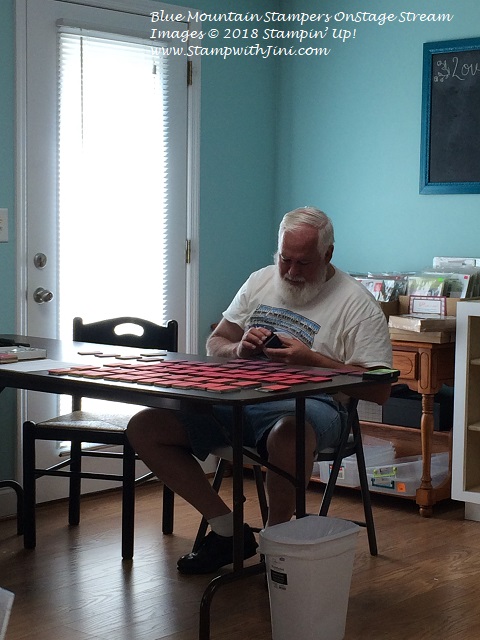
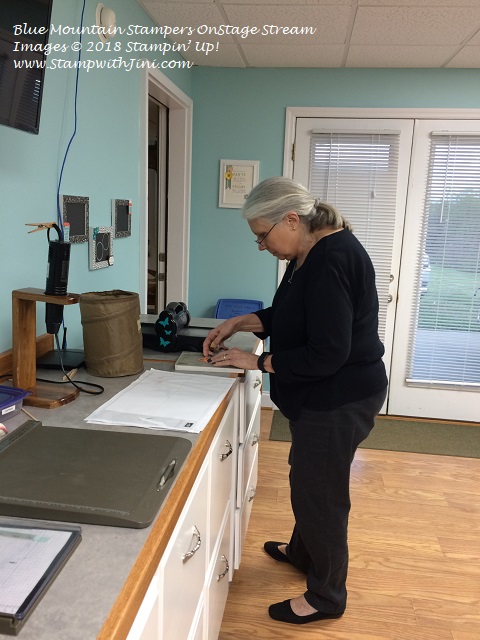
Before the event my husband, Larry helped me do some prepping for one of our Make n Takes – everyone who attended was able to make a 2018 Color Ring with the NEW colors! He’s such a trooper! (Watch for information next month about how you can get one of these too.)
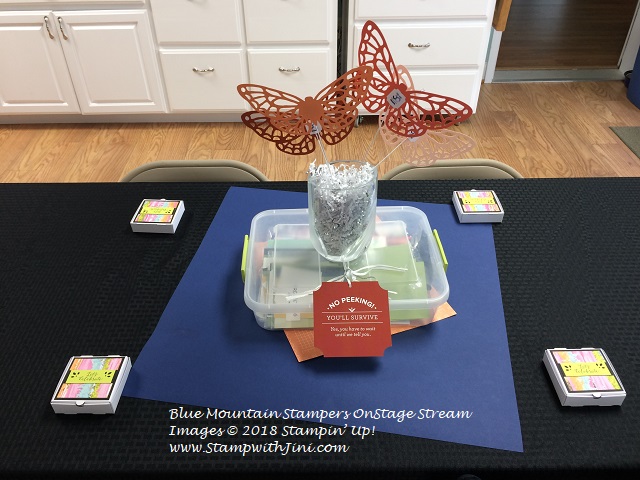
I always try to bring a little taste of OnStage back to the group. This time the lovely little butterflies that decorated the tables – at the end of the night team members were able to choose one to take home, just like at the event.
And of course you have to have some “swag” – So I created these fun little Mini Pizza Boxes (144645) using the Picture Perfect Designer Series Paper (145559) and our new Detailed Trio Punch (available June 1st).
The Mini Pizza Box contained a little charm to go on their key chain commemorating the launch of our new catalog.
And of course NEW product displays
And of course we HAVE to stamp – after all everyone wants to use some of those new products! So we did 3 Make n Take projects. (watch for me to share those projects soon)
Laughter, fellowship, and stamping – what could be better?
If you like to learn new ways to use Stampin’ Up! products and would like to be part of a fun group of stampers, my team the Blue Mountain Stampers might be just the thing you are looking for. Click HERE for more information about joining and getting a fantastic stamping kit too.
Stop back by tomorrow when I’ll be sharing some great cards with you.
Click Here to learn more about using the Hostess Code If you order Online make sure your profile information is up to date and you’ve allowed me to contact you
Sign up for my FREE Newsletter My Newsletters include stamping tips, ideas and updates on what is happening with me! You’ll also receive a FREE Class Tutorial using the 2017-2019 In Colors when you sign up!
Wow!!! #OnStage – Atlanta was Fantastic!!! I don’t know where to start! So I’ll be sharing it over the next few weeks with you starting with my swaps that I made for the event and some video tutorials and how to recreate them. So you’ll want to make sure you stop by daily.
AND don’t forget the Last Chance List will post this afternoon – If you’re on my mailing list you’ll get your list delivered right to your In Box – if not you’ll want to stop by and check it out later this afternoon after 1 pm (MT).
Now onto the card swap – This first swap uses our Brusho Crystal Colors – I love this product but then I love any technique, especially the messy ones. LOL!
How can you not love this bright bold color palette? And our Brusho Crystal Colors definitely give you that! But then they are amazing because not only can you create this bright bold look but add more water and you’ll get a soft subtle look too! What can I say – it’s why I love this product! Can you say versatile? And who doesn’t love that, right?
I bet you want to see how I did this, right? So check out this quick video.
Brusho Saran Wrap Technique Video Tutorial
And here is the PDF so you have a complete supply list, measurements, and the steps you need to assemble your own!