
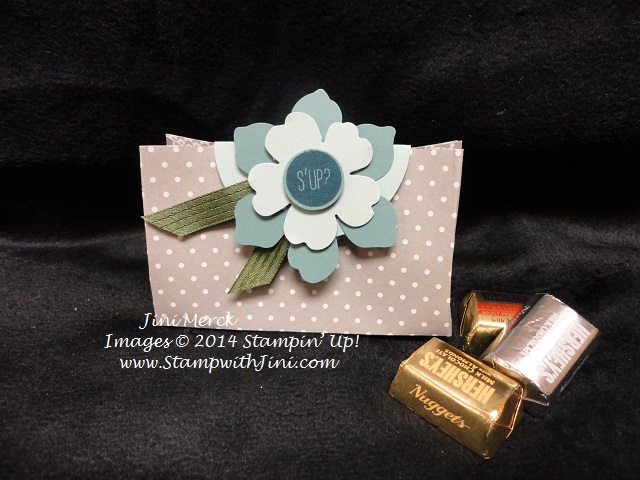
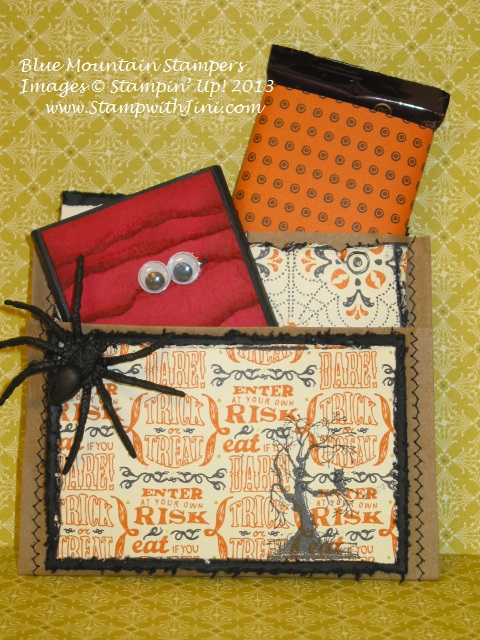
Need a quick and easy treat? How about this cute little treat tent? It’s so simple and when you use the Endless Wishes stamp set with all it’s great sentiments you can customize it sooo easily!
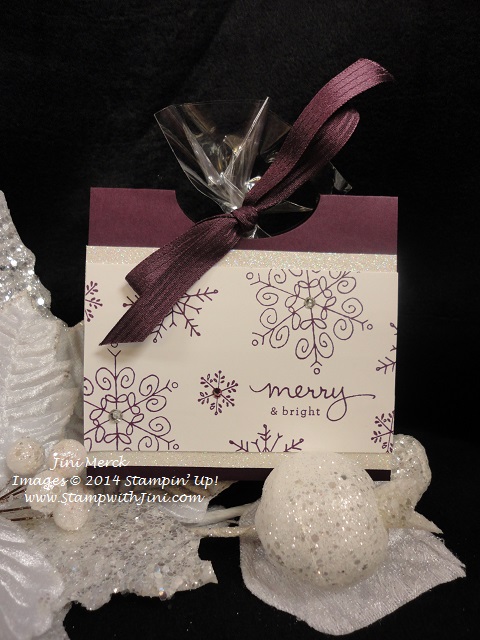
I’ve filled mine with Hershey’s Kisses, but you could fill this with all kinds of little goodies.
Want to know how they are made? Well you’re in luck, I’ve included a FREE PDF Tutorial just for you!
Endless Wishes Treat Tent Tutorial (printable PDF)
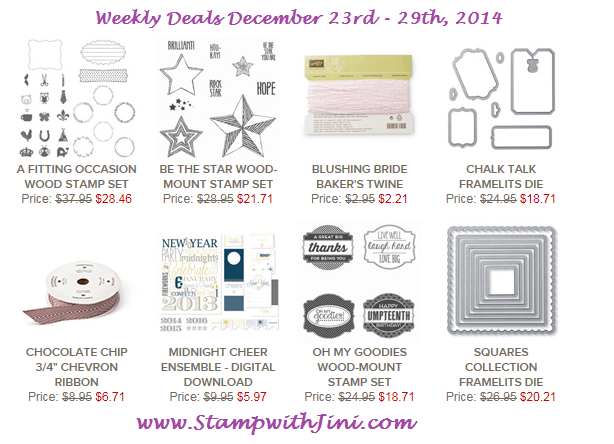
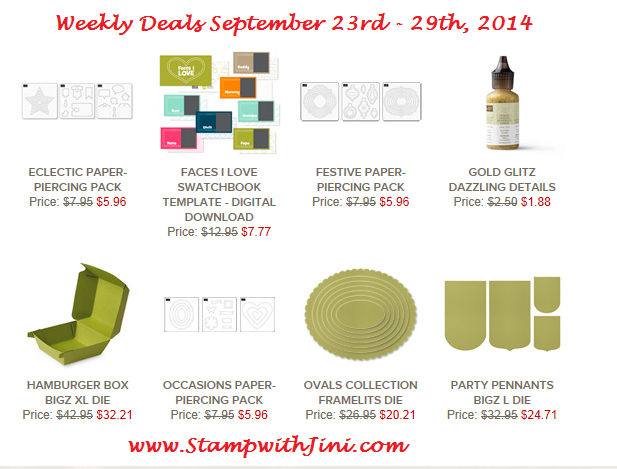
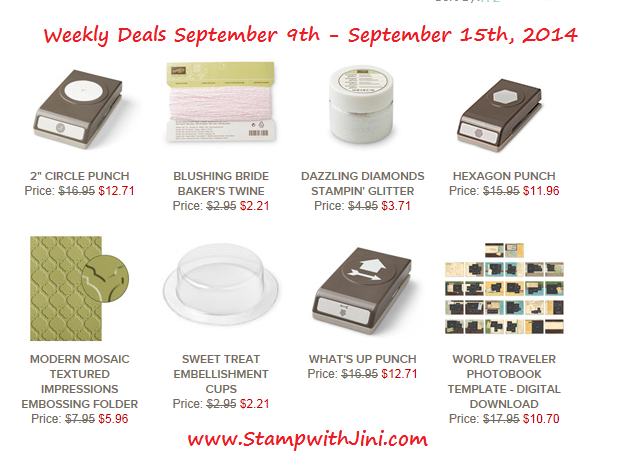
NEW WEEKLY DEALS START TODAY!
Supplies:
Stamp Set: Endless Wishes (136829)
Inks: Blackberry Bliss (133642)
Paper: Dazzling Diamonds Glimmer Paper (135315), Blackberry Bliss (133675), and Whisper White card stock (100730)
Accessories: 4″ x 6″ Cellophane Bags (102757), Blackberry Bliss 3/8″ Stitched Satin Ribbon (133668), Rhinestone Basic Jewels (119246), Rich Razzleberry Stampin’ Blendabilities Markers (131003), and Extra Large Oval Punch (119859)
Click here to order your Stampin’ Up! Products online 24/7! (US only)
Hostess code GF6FWPQT
Place an Online order with me and use my Hostess Code GF6FWPQT and I’ll send you a FREE Tutorial with instructions to create 5 fun projects.
Click Here to learn more about using the Hostess Code
Weekly Deals (Special ends Monday, December 29th, 2014 at 11:50 p.m. (MT)
GREAT NEWS!!! – NEW YEAR END CLOSEOUTS ADDED TODAY!!!

Year- End Closeouts (sale ends January 5th, 2015 or while supplies last)
Holiday Gift Guide (click here for a printable PDF with ideas for your holiday gift giving of all ages) Live local? I’ve got some of these gift items here for you!
Need a Gift? Share the love of crafting with a Prepaid PAPER PUMPKIN Subscription – Contact me today to learn how.


