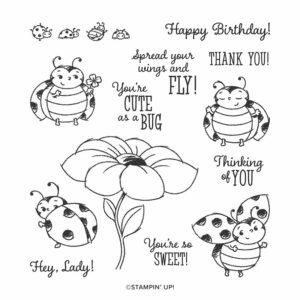
The week continues with another tutorial, this time for the Little Ladybug stamp set. The Little Ladybug stamp set is a bonus set that you receive for hosting during Sale-a-bration. And this set is simply adorable!
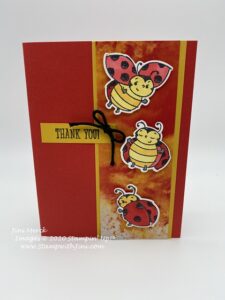
Want to see the thank you card? If you placed an order with me you’ll receive one of these hand stamped cards from me this month.
This card is done in bright bold colors and it uses our Silhouettes Designer Series Paper from the Annual Catalog along with the fun Basic Black Baker’s Twine from the Mini. This card was quick and easy to make since I used the Ladybug Dies (153588). This set of dies along with others will be available starting February 4th during our Coordination Product Release.
Little Ladybug Thank You Card Video Tutorial
.
And of course a printable tutorial with step by step instructions and complete supply list for you.
What do you think? Would you like one of these sets? Why not contact me today to choose a time that works for you, so you can earn yours yours! Private class, face book party, or book party the choice is yours!
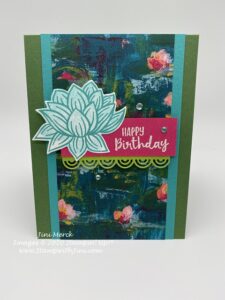
It’s a week of tutorials and today I’ll be starting with a project that uses several of our FREE Sale-a-bration products that coordinate together. When I first saw this Sale-a-bration option I knew it was one I wanted to add to my collection and would reach for over and over again! I shared with you my January #imbringingbirthdaysback birthday card I made earlier HERE.
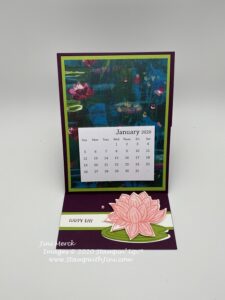
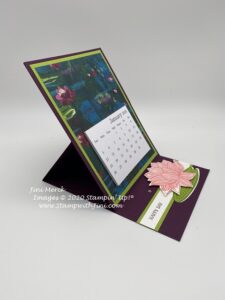
And since I thought it would be a lot of fun to kick the year off with calendars for my stamping friends here is what I came up with.
I’m still in the process of putting them together, but I wanted to share this with you – so if you’re a customer of mine watch for one coming to your mail box soon!
Can you name the set the sentiment is from without looking?
The “Happy Day” sentiment for this project is from one of my favorite sentiment sets, Itty Bitty Greetings. This set holds 32 greetings that cover all kinds of occasions, so it’s a great value and wonderful to team up with your favorite image sets.
Easel fancy folds are perfect for setting this calendar up on your desk and enjoying it though out the year, and with this Lily Impressions Designer Series Paper it’s like looking at a little piece of art.
Want to make one too? I’ve got a video and pdf tutorial for you today.
And then stop by again tomorrow for another project I’ve created along with a free tutorial.
Want to receive my blog posts right to your in box? Why not sign up for my blog feed? CLICK HERE to receive my posts right to your in box. And if you like to receive a tutorial with your class projects, did you know that I include documentation like this with each and ever class I hold? Step by Step instructions and supply lists for the projects you create in class is always handy so that you can create the projects any time you’d like!
Shop at my Online Store and use Host Code NUGKV32K
Click Here to learn more about using the Hostess Code If you order Online make sure your profile
information is up to date and you’ve allowed me to contact you (If you chose no
contact in the past you’ll need to call 1-800-Stamp Up to have them change your
profile for you.)
Have you seen the Sale-a-bration Brochure? If you have I’m sure you have seen the Lovely Lily Pad stamp set. It drew my eye immediately and with it’s coordinating products it’s a have to have.
This project uses several of our Sale-a-bration products and I had a lot of fun creating it. I’ve made a quick video tutorial for you along with a PDF too. Why not take a look and leave me a comment to let me know what you think?
#imbringingbirthdaysback January Lovely Lily Pad Birthday Card Video Tutorial
#imbringingbirthdaysback January – Lovely Lily Pad Card Tutorial PDF
Did you know when you host a private class with me or place a qualifying order you can earn this set for FREE? And during Sale-a-bration you can earn an exclusive stamp set with a qualifying party too! Why not contact me today and set up a time together with your friends to stamp? A in person or virtual class on face book – the choice is yours!
Whew! it’s been a busy month already and I’ve got lot’s to share with you, so why not stop back by tomorrow when I’ll share some projects from my team meeting last week?
And remember if you’d like a birthday card from me during 2020 – you’ll want to send me an email with your name, address and birthday so I can mail you one! It’s a new year and a new start, so I’m starting a new list!
Shop at my Online Store and use Host
Code FSTG4WJK
Click Here to learn more about using the Hostess Code If you order Online make sure your profile
information is up to date and you’ve allowed me to contact you (If you chose no
contact in the past you’ll need to call 1-800-Stamp Up to have them change your
profile for you.)
Yesterday I shared a fun card that I made with you inspired by a demonstration at OnStage. (You can see my post HERE sharing videos and PDF for this project.)
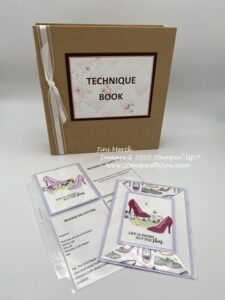
Today I wanted to share my Technique Book with you.
When I started stamping I kept every card I made that used a technique so that I could remember how I created it. Not exactly the point of making a card, right? We should be sending them out!
So, this book is designed as a companion to my Classes and Team Training. It uses our Memories & More 6″ x 8″ Album and pages so it allows you to keep a little sample of the technique along with step by step instructions for that technique all in one handy place – So you can reach for them easily! Now I send those cards instead of hanging on to them and you can too!
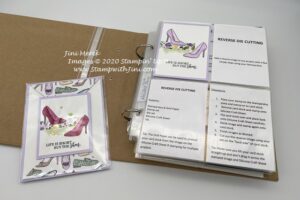
Here is the Reverse Die Cutting Technique Page and assembly instructions PDF for this project, so you can see how it looks and give it a try.
I’m BIG on instructions so I include them with every Class I do, whether it is a LIVE event or KIT to GO Class. And with your first Class/and order album and page order I send you a PDF with the cover labels so you can decorate your Technique Album as desired using your favorite technique.
Enjoy!
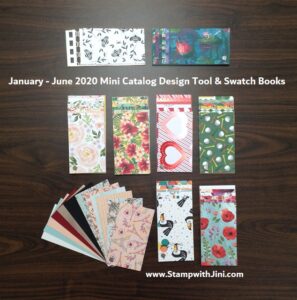
Stop back by next week when I’ll be sharing my organizational items for the NEW Mini Catalog!
Shop at my Online Store and use Host
Code FSTG4WJK
Click Here to learn more about using the Hostess Code If you order Online make sure your profile
information is up to date and you’ve allowed me to contact you (If you chose no
contact in the past you’ll need to call 1-800-Stamp Up to have them change your
profile for you.)
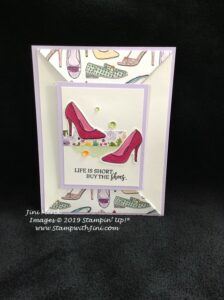
Learning new things is always fun and during OnStage in November one of the presenters showed us a Reverse Die Cutting Technique which I couldn’t resist recreating with my team at our OnStage After Party.
This card not only use a fancy fold called the Double Point, it also uses a fun technique with our dies. It was definitely a wow moment at my table that afternoon. And since I know that if I don’t do something right away I’d forget the steps, I whipped up this project quickly.
Not only are you going to love the New Dressed to Impress Bundle with it’s quirky sayings, but it is perfect for this technique with the shoe image.
This stamp set is part of my March Classes so why not stop by my Calendar of Events and save the date. Not only am I offering it LIVE but it will also be available in a Kit to Go you you can get the free class when you sign up too!
Want to see how I made this card? I’ve got a couple of videos for you so you can make one too!
Then stop back by tomorrow when I’ll be sharing one of the resources with you – my Technique Book.
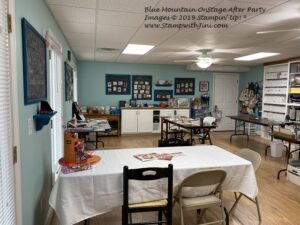
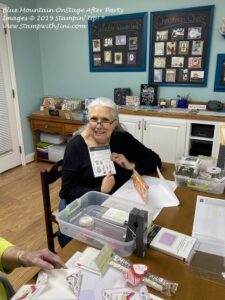
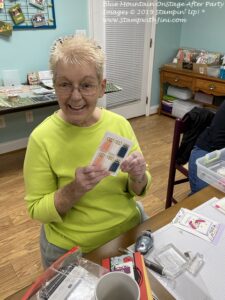
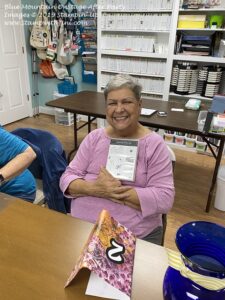
Meanwhile here are some pictures from the OnStage After Party. We started with a nice meal together.
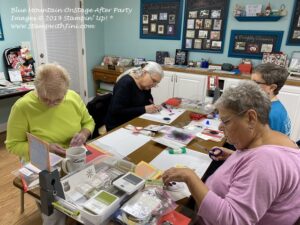
There was lots of fun, stamping and prizes to go around too!
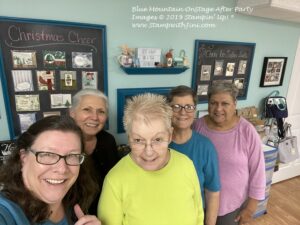
Here is a group photo from that evening.
Sound like fun? Looking for a great group to join and craft with? The Blue Mountain Stampers might be the right fit for you! And in less than 24 hours you can get the Starter Kit, get an exclusive Mini Trimmer, 6″ X 6″ Sampler of our new Designer Series Papers, AND choose ANY stamp set of your choice! That’s on top of the great deal our Starter Kit is already! PLUS FREE shipping! All for just $99.
It’s the best deal in the Catalog – You’ll get to choose up to $125 in product and get all the additional items for just $99 with free shipping starting January 3rd to March 31st during Sale-a-bration!
Want to learn more about the Blue Mountain Stampers? Click HERE
What are the Blue Mountain Stampers?
That’s the name of our stamping community. I enjoy welcoming new
members to our group. We’re from all over. If you’re considering joining
Stampin’ Up!, you may have questions about how I would support you as part of
my team. I do offer a variety of ways to learn, grow and to have FUN as a Blue
Mountain Stamper!
Exclusive Team Resource Page – videos, PDFs and more
Exclusive Face book Group – A great way to share and connect with other team members and share
Monthly Creative Challenges
Swapping Opportunities
Team Retreats
Meetings – both local and online/virtual
Monthly Crafting Day
Monthly Lunch & Learn
Recognition & Incentives
Additional support and business coaching available
We have a very active group that share and answer each other’s questions on
our Exclusive face book group. If you’re looking for fun, a place to grow
and share with others…You’ll fit right in!
Hobbyists are welcome!
Did you know? 90% of my Blue Mountain Stampers’ areHappy Shoppers – purchasing for themselves, (along with their family and friends.) That’s right…you can just get a discount on products you love!
We welcome the hobbyist who’s looking to be a “happy shopper” (and save money), as well as those of you that want to build a business (and make money).
Everyone is welcome after all there’s room for both and everyone in between.
And there is NO Obligation when you purchase your starter kit – Join the Blue Mountain
Stampers and see what it’s all about!
Shop at my Online Store and use Host
Code FX64QSU4
Click Here to learn more about using the Hostess Code If you order Online make sure your profile
information is up to date and you’ve allowed me to contact you (If you chose no
contact in the past you’ll need to call 1-800-Stamp Up to have them change your
profile for you.)
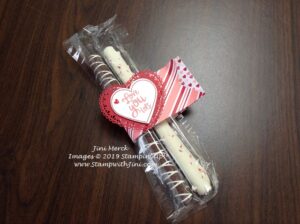
Today’s project is one that I made for my Team OnStage After Party as a treat and it some how got buried on my desk. (lol if you could only see it). That’s the bad news, but because of that the good news is over the next week I’ll be sharing some fun projects and tutorials with you now using NEW 2020 Mini Catalog products from that fun event along with some pictures too! Sound good? Hold on to your hats – this Mini is packed with fantastic product choices for us!!!
Cute? It’s a quick and easy treat for some one you love. Whether you make the treat yourself of buy prepackaged ones it’s sure to be a favorite, since who doesn’t love the salty and sweet combination?
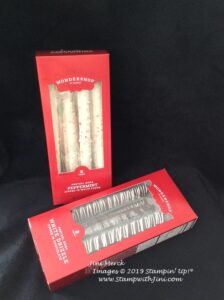
I found these at Target before the holiday, so you might be able to find some on sale some where at this point too.
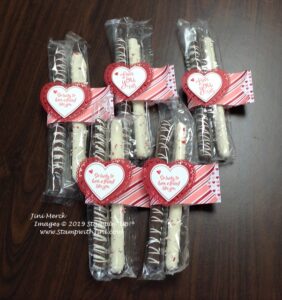
I whipped up a bunch of these quickly for those attending the OnStage After Party.
Want to give them a try? Here is a quick video tutorial showing you how I put them together.
Heartfelt Chocolate Covered Pretzel Treat Video Tutorial
Here is a printable step by step with the complete supply list and measurements for you as a companion to the video.
Heartfelt Chocolate Covered Pretzel Treat PDF Tutorial
Enjoy! And then stop back by to check out more of my FREE tutorials using the 2020 Mini Catalog products as we head into the final week of the year.
Have You Held Your Spot in this first LIVE event of the year?
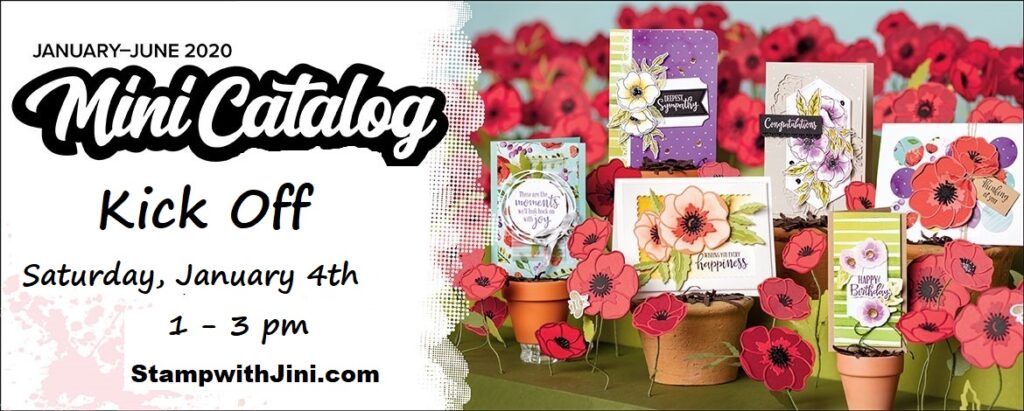
And if you live locally don’t forget my Mini Catalog Kick Off Event – not only will you get to see the products you’ll be creating some fun projects too using some of them!
Why not stop by my calendar of events and see what all is going on during 2020? The beginning of the year is a great time to carve out some time for your creative side and I’m here to help you do that!
Don’t live locally or currently have a demonstrator and want a 2020 January – June Mini Catalog? Email me at StampwithJini@gmail.com your full Name, Address and Phone Number and I’ll be happy to mail you one of your own.
I’ll also have some great PreOrder options for you that include all the wonderful papers in this Mini Catalog. You can check them out HERE.
But you’ll want to hurry and order yours today since the PreOrder deadline is coming up fast! January 2nd is right around the corner.
Supplies:
Stamp Set: Heartfelt (*153775)
Inks: Real Red (147084/103287), Flirty Flamingo (147052/141402), and Real Red Dark Stampin’ Blends (147934)
Shop at my Online Store and use Host
Code FX64QSU4
Click Here to learn more about using the Hostess Code If you order Online make sure your profile information is up to date and you’ve allowed me to contact you (If you chose no contact in the past you’ll need to call 1-800-Stamp Up to have them change your profile for you.)
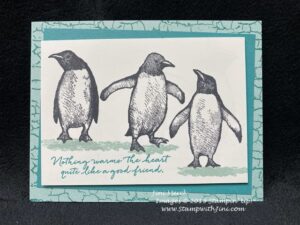
I got started stamping with this fun set and couldn’t stop stamping with them. So here is another card for you made with these delightful birds, this time my December Thank You card.
This time I’ve teamed them up with the Crackle Paint Background Stamp to create this “icy” look.
Done in shades of blue I really like the way it turned out. And when you use your Stamparatus they are a breeze to make!
Shop at my Online Store and use Host Code FX64QSU4
Click Here to learn more about using the Hostess Code If you order Online make sure your profile information is up to date and you’ve allowed me to contact you (If you chose no contact in the past you’ll need to call 1-800-Stamp Up to have them change your profile for you.)
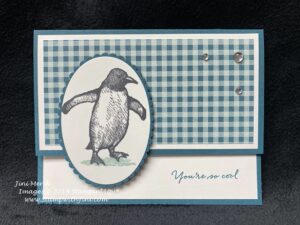
I love these little penguins that you can find in the Playful Penguin stamp set, but then I haven’t met a penguin I don’t like since I was a young adult. LOL!
Today’s card is one that I created for my December birthdays
I’ve used the sentiment from the set for the outside greeting, but chose the Itty Bitty Birthdays stamp set for the inside since it has tons of choices. And since I’m thinking snow today, I reached for my Pretty Peacock and Pool Party Classic Inks to use – they worked great with the Come to Gather Designer Series Paper gingham pattern!
Did you know this adorable little set is part of the Holiday Catalog Retirement List? Sure enough, so that means it is only available for a limited time and then it will be gone! Why not check out our Year End Close Out items, and the new items just added to the Clearance Rack yesterday? You can find some great deals along with this wonderful set!
I’m sending birthday Cards in 2020! Would you like one?
Would you like to receive a birthday card from me in 2020? I’m starting a new list now for 2020 and will be collecting birthdays to add to it starting now through the end of the year for 2020.
So if you want to be one of those who receive a hand stamped birthday card from me, it’s simple just send an email to me at StampwithJini@gmail.com and give me the following information.
Name
Address
Date of birth
(I just need the month and day since we’re all 29. LOL! But you can include the year if you want to. US only)
(fine print: All info will be kept private and be used only for the purposes of sending you a birthday card)
Shop at my Online Store and use Host
Code FX64QSU4
Click Here to learn more about using the Hostess Code If you order Online make sure your profile
information is up to date and you’ve allowed me to contact you (If you chose no
contact in the past you’ll need to call 1-800-Stamp Up to have them change your
profile for you.)
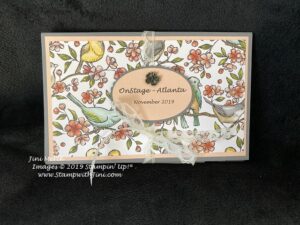
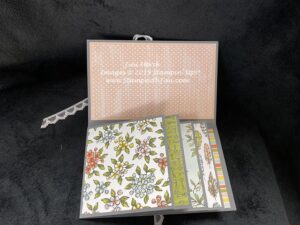
Whew, it’s been a busy weekend and I’m just catching up. I had a fantastic time over the weekend at our OnStage Local in Atlanta. It’s always great to meet new friends! Friday I shared one of the table 3d treats I made for folks and today I wanted to share the fun flip album I made as part of my team gifts for the event.
I just love the Bird Ballard Designer Series Paper with all it’s lovely water colored images so it was a perfect choice for this project as we were getting our first look at the 2020 January-June Mini Catalog & Sale-a-bration Brochure. (You are going to LOVE it!)
This album was fairly easy to whip up and is perfect for all kinds of events, trips, or even a brag book for Grandma! It will hold up to 10 photos including a 4×6, but is compact so it’s easy to store or take along with you.
I’ve made a video tutorial for you so you can see how I created this Flip Album
Bird Ballard Flip Album Video Tutorial
And if you’d like the complete supply list, measurements, and a step by step tutorial that contains some additional photos to go along with it here is my PDF version too.
So what do you think? Like it and want to make one too? Why not leave me a comment and let me know?
#OnStage2019 – Atlanta
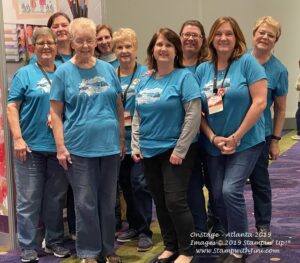
I loved having our largest group yet from our team attend and I think everyone had a blast learning, sharing, and meeting others from across the country. Since we had a large enough group we even sported our first team t-shirt! Spending time with these special ladies was a great way to end my 10th Anniversary year being a Stampin’ Up! Demonstrator.
I’ll be sharing more of our #OnStage2019 experience through out the week as I unpack things. So stop on by to check out some sneak peaks too!
On a personal note my technology has been uncooperative so I apologize for things being a bit scattered lately. I had to spend the day at the Apple store yesterday, so hopefully I’ve got things sorted out now. Next to find a computer person.
Shop at my Online Store and use Host
Code KTYQJ3TY
Click Here to learn more about using the Hostess Code If you order Online make sure your profile
information is up to date and you’ve allowed me to contact you (If you chose no
contact in the past you’ll need to call 1-800-Stamp Up to have them change your
profile for you.)
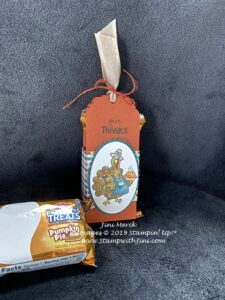
Today I’m going to share a fun project I made for this weekend’s #OnStage Event in Atlanta. I’ll be giving these out to some friends as table treats – just a little something, something for our sweet tooth.
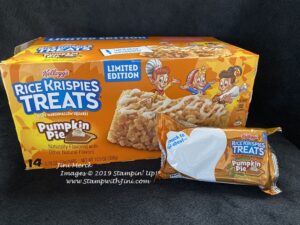
I really love this set with it’s fun images and couldn’t resist using it for this Thanksgiving project when I found these pumpkin pie Rice Krispies treats with their gold wrappers (rather than their blue ones), I thought to my self it’s perfect! I’m always thinking color coordination when I’m looking at the packaging on the store shelf. Have you ever shopped that way?
Actually they actually are pretty good too. So if you run across them you might want to give them a try too. If not the regular ones will work just as well.
Since I’m taking these to share I thought you might like to make some to share too, so I’ve created a video for you.
Not only do I share how to make the holder, but I’ve also shared how I colored this little turkey with our Stampin’ Blends – I just love their bright bold colors for projects like these!
Birds of a Feather Rice Krispies Holder Video Tutorial
Birds of a Feather Rice Krispies Holder Tutorial PDF
I’m going to run since I’ve got to get out the door, but stop back by again next week when I’ll be sharing the team gift I made for #OnStage with you. I ran out of time, so I don’t have the tutorial done yet.
Shop at my Online Store and use Host
Code KTYQJ3TY
Click Here to learn more about using the Hostess Code If you order Online make sure your profile
information is up to date and you’ve allowed me to contact you (If you chose no
contact in the past you’ll need to call 1-800-Stamp Up to have them change your
profile for you.)