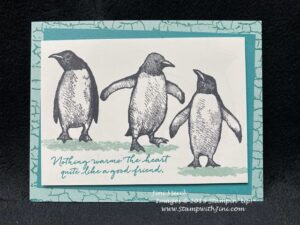
I got started stamping with this fun set and couldn’t stop stamping with them. So here is another card for you made with these delightful birds, this time my December Thank You card.
This time I’ve teamed them up with the Crackle Paint Background Stamp to create this “icy” look.
Done in shades of blue I really like the way it turned out. And when you use your Stamparatus they are a breeze to make!
Shop at my Online Store and use Host Code FX64QSU4
Click Here to learn more about using the Hostess Code If you order Online make sure your profile information is up to date and you’ve allowed me to contact you (If you chose no contact in the past you’ll need to call 1-800-Stamp Up to have them change your profile for you.)
I love these little penguins that you can find in the Playful Penguin stamp set, but then I haven’t met a penguin I don’t like since I was a young adult. LOL!
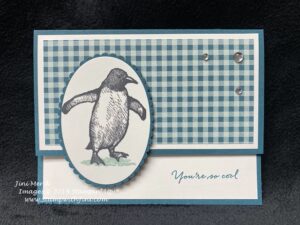
Today’s card is one that I created for my December birthdays
I’ve used the sentiment from the set for the outside greeting, but chose the Itty Bitty Birthdays stamp set for the inside since it has tons of choices. And since I’m thinking snow today, I reached for my Pretty Peacock and Pool Party Classic Inks to use – they worked great with the Come to Gather Designer Series Paper gingham pattern!
Did you know this adorable little set is part of the Holiday Catalog Retirement List? Sure enough, so that means it is only available for a limited time and then it will be gone! Why not check out our Year End Close Out items, and the new items just added to the Clearance Rack yesterday? You can find some great deals along with this wonderful set!
I’m sending birthday Cards in 2020! Would you like one?
Would you like to receive a birthday card from me in 2020? I’m starting a new list now for 2020 and will be collecting birthdays to add to it starting now through the end of the year for 2020.
So if you want to be one of those who receive a hand stamped birthday card from me, it’s simple just send an email to me at StampwithJini@gmail.com and give me the following information.
Name
Address
Date of birth
(I just need the month and day since we’re all 29. LOL! But you can include the year if you want to. US only)
(fine print: All info will be kept private and be used only for the purposes of sending you a birthday card)
Shop at my Online Store and use Host
Code FX64QSU4
Click Here to learn more about using the Hostess Code If you order Online make sure your profile
information is up to date and you’ve allowed me to contact you (If you chose no
contact in the past you’ll need to call 1-800-Stamp Up to have them change your
profile for you.)
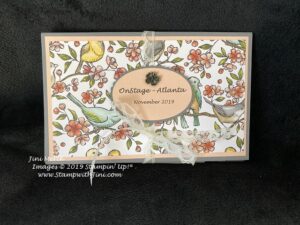
Whew, it’s been a busy weekend and I’m just catching up. I had a fantastic time over the weekend at our OnStage Local in Atlanta. It’s always great to meet new friends! Friday I shared one of the table 3d treats I made for folks and today I wanted to share the fun flip album I made as part of my team gifts for the event.
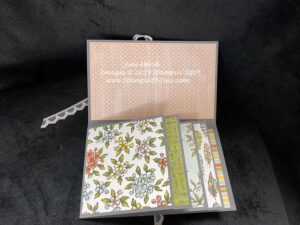
I just love the Bird Ballard Designer Series Paper with all it’s lovely water colored images so it was a perfect choice for this project as we were getting our first look at the 2020 January-June Mini Catalog & Sale-a-bration Brochure. (You are going to LOVE it!)
This album was fairly easy to whip up and is perfect for all kinds of events, trips, or even a brag book for Grandma! It will hold up to 10 photos including a 4×6, but is compact so it’s easy to store or take along with you.
I’ve made a video tutorial for you so you can see how I created this Flip Album
Bird Ballard Flip Album Video Tutorial
And if you’d like the complete supply list, measurements, and a step by step tutorial that contains some additional photos to go along with it here is my PDF version too.
So what do you think? Like it and want to make one too? Why not leave me a comment and let me know?
#OnStage2019 – Atlanta
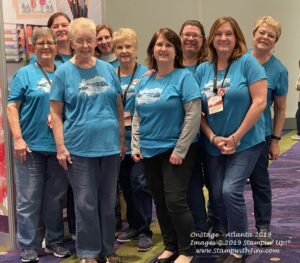
I loved having our largest group yet from our team attend and I think everyone had a blast learning, sharing, and meeting others from across the country. Since we had a large enough group we even sported our first team t-shirt! Spending time with these special ladies was a great way to end my 10th Anniversary year being a Stampin’ Up! Demonstrator.
I’ll be sharing more of our #OnStage2019 experience through out the week as I unpack things. So stop on by to check out some sneak peaks too!
On a personal note my technology has been uncooperative so I apologize for things being a bit scattered lately. I had to spend the day at the Apple store yesterday, so hopefully I’ve got things sorted out now. Next to find a computer person.
Shop at my Online Store and use Host
Code KTYQJ3TY
Click Here to learn more about using the Hostess Code If you order Online make sure your profile
information is up to date and you’ve allowed me to contact you (If you chose no
contact in the past you’ll need to call 1-800-Stamp Up to have them change your
profile for you.)
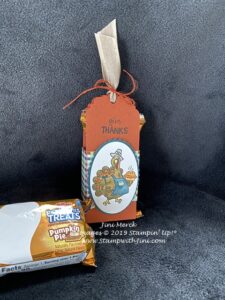
Today I’m going to share a fun project I made for this weekend’s #OnStage Event in Atlanta. I’ll be giving these out to some friends as table treats – just a little something, something for our sweet tooth.
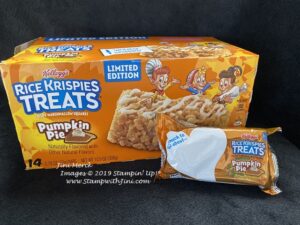
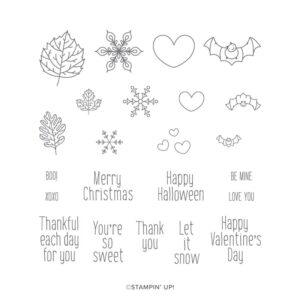
I really love this set with it’s fun images and couldn’t resist using it for this Thanksgiving project when I found these pumpkin pie Rice Krispies treats with their gold wrappers (rather than their blue ones), I thought to my self it’s perfect! I’m always thinking color coordination when I’m looking at the packaging on the store shelf. Have you ever shopped that way?
Actually they actually are pretty good too. So if you run across them you might want to give them a try too. If not the regular ones will work just as well.
Since I’m taking these to share I thought you might like to make some to share too, so I’ve created a video for you.
Not only do I share how to make the holder, but I’ve also shared how I colored this little turkey with our Stampin’ Blends – I just love their bright bold colors for projects like these!
Birds of a Feather Rice Krispies Holder Video Tutorial
Birds of a Feather Rice Krispies Holder Tutorial PDF
I’m going to run since I’ve got to get out the door, but stop back by again next week when I’ll be sharing the team gift I made for #OnStage with you. I ran out of time, so I don’t have the tutorial done yet.
Shop at my Online Store and use Host
Code KTYQJ3TY
Click Here to learn more about using the Hostess Code If you order Online make sure your profile
information is up to date and you’ve allowed me to contact you (If you chose no
contact in the past you’ll need to call 1-800-Stamp Up to have them change your
profile for you.)
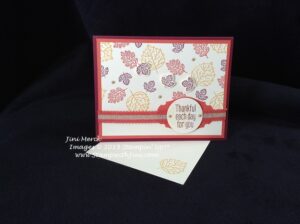
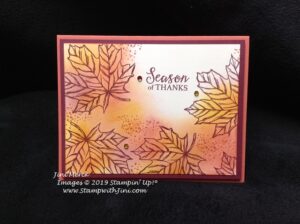
I do love a stamp set that has great images for both cards and treats, add the fact that it has punches and it’s sure to be on my wish list. Today’s project is a thank you card that I’ve whipped up using the To Every Season Bundle’ fall option.
I’ve chosen to highlight our Terracotta Tile 1/2″ Scallop Ribbon on this project since I love the look and feel of this ribbon AND I love the fact I can get it in all 5 of the 2019-2021 In Colors!
Here is the card I created for my November Thank You cards.
While right at the moment it feels like winter here in North Georgia with our 20 degree wake up this morning, it really is fall. In fact the leaves on the mountain sides are simply beautiful right now and were at their peak I think. After our late 90 degree weather and this early blast of arctic cold I think mother nature is a bit confused.
Any how would you like to see how I made this card? Why not check out my Video Tutorial?
To Every Season Thank You Card Video Tutorial
And here is a PDF tutorial for you with the complete supply list and step by step directions.
Shop at my Online Store and use Host
Code KTYQJ3TY
Click Here to learn more about using the Hostess Code If you order Online make sure your profile information is up to date and you’ve allowed me to contact you (If you chose no contact in the past you’ll need to call 1-800-Stamp Up to have them change your profile for you.)
Sign up HERE for my FREE Newsletter or Get my Blog Posts delivered right to your inbox HERE
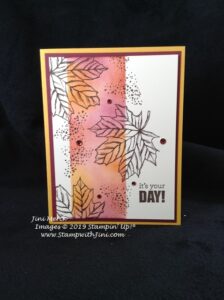
I love the great fall images in the Gather Together stamp set so it was a easy decision to choose it for my November birthday card this month.
You’re going to love just how easy it is to create this fun fall birthday card with it’s faux panel that is created with a couple of easy steps using sticky notes and sponges – A great #simplestamping project since it uses stamps, ink, paper —— and an embellishment of course!
Want to give this simple technique a try? Check out my video tutorial
#imbringingbirthdaysback – Gather Together Card Video Tutorial
And of course a step by step PDF for you too with the supply list for easy reference
#imbringingbirthdaysback – Gather Together Card Tutorial PDF
Shop at my Online Store and use Host
Code YS9WN2UA
Click Here to learn more about using the Hostess Code If you order Online make sure your profile
information is up to date and you’ve allowed me to contact you (If you chose no
contact in the past you’ll need to call 1-800-Stamp Up to have them change your
profile for you.)
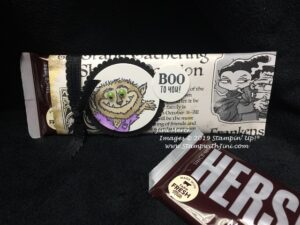
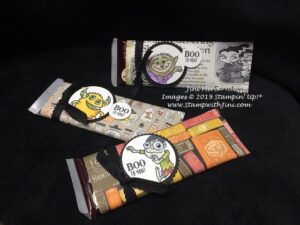
Do you enjoy making treats for family and friends? Halloween treats are not just for kids, but the young at heart too. Right? So I made up a batch of these candy wraps for family and friends and of couldn’t I resist using the Boo to You stamp set since it is filled with fun whimsical images of monsters we all know and love.
Created with our Monster Bash Designer Series Paper, you’ve got lots of choices for the color combinations and designs to choose from. And you are going to love the Basic Black 3/8″ Scalloped Edge Ribbon – it feels and ties wonderfully.
Here is a quick video tutorial showing you how I made them.
Shop at my Online Store and use Host
Code H62N9P3Z
Click Here to learn more about using the Hostess Code If you order Online make sure your profile information is up to date and you’ve allowed me to contact you (If you chose no contact in the past you’ll need to call 1-800-Stamp Up to have them change your profile for you.)
Sign up HERE for my FREE Newsletter with class and event information or Get my Blog Posts delivered right to your inbox HERE
Shop at my Online Store and use Host
Code H62N9P3Z
Click Here to learn more about using the Hostess Code If you order Online make sure your profile information is up to date and you’ve allowed me to contact you (If you chose no contact in the past you’ll need to call 1-800-Stamp Up to have them change your profile for you.)
I’m on a roll with Country Home and loving the images colored with our Stampin’ Blends. Today’s card is one that I made to send out this week for my October birthdays. I wanted the feeling of autumn when I created this card so I reached for the Terracotta Tile and Pretty Peacock. Two of my favorite 2019-2020 In Colors, and here is what I came up with.
Of course, I can’t resist the new Snowfall Accents Puff Paint to create the 3d feel of the cotton pods either.
Here is a quick video tutorial sharing how I colored and used the Snowfall Accents Puff Paint along with a couple of tips for success. I’ve also done a PDF to go along with the video for you.
COUNTRY HOME CARD VIDEO TUTORIAL
#imbringingbirthdaysback October 2019 – Country Home Card Tutorial PDF
Would you like to receive a birthday card from me in 2020? I’m starting a new list now for 2020 and will be collecting birthdays to add to it starting now through the end of the year for 2020.
So if you want to be one of those who receive a hand stamped birthday card from me, it’s simple just send an email to me at StampwithJini@gmail.com and give me the following information.
Name
Address
Date of birth
(I just need the month and day since we’re all 29. LOL! But you can include the year if you want to. US only)
(fine print: All info will be kept private and be used only for the purposes of sending you a birthday card)
I’m asking for yours – so here’s mine March 20th and my address is 2320 Dooley Road Clarkesville GA 30523 – just in case you wanted to know. ?
Clearance Rack Update
The Everything Is Rosy Product Medley is back and available to purchase for 15% off—but only while supplies last
Shop at my Online Store and use Host
Code H62N9P3Z
Click Here to learn more about using the Hostess Code If you order Online make sure your profile
information is up to date and you’ve allowed me to contact you (If you chose no
contact in the past you’ll need to call 1-800-Stamp Up to have them change your
profile for you.)
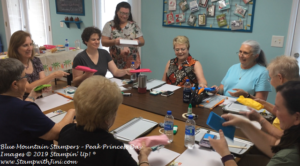
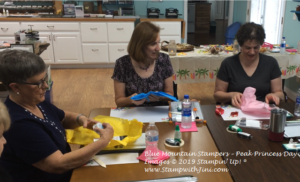
Last weekend was my Peak Princess event. What’s that? Well it is a special afternoon of pampering for those Team members who have earned it. We enjoy the time together, food, played a game, and of course create a project.
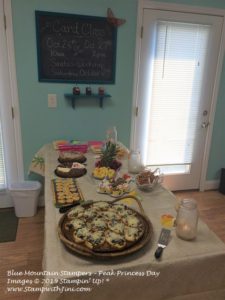
This event was extra special since it was our largest group yet due to everyone’s hard work – and I added a bit of a luau theme to the snack table to celebrate.
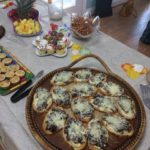
The hit of the snack table was the Artichoke & Mushroom Toast – not really Hawaiian fair, but since the Hawaiian pizza rolls I was planning on were a flop when I tried them, this worked out well since everyone seem to enjoy them.
Here is the recipe if you want to try them yourself. I found them really easy to do and prepped everything the day before and then assembled before the event.
Artichoke &
Mushroom Toast
Taste of Home
36
slices French bread baguette (1/2 inch thick)
3
T. Olive Oil, divided
½
lb. sliced fresh mushrooms
½
lb. sliced baby portobello mushrooms
½
tsp. Italian seasoning
2
T. butter
6
garlic cloves, minced
1
jar (7.5 oz) marinated quartered artichoke hearts, drained
1/3
c. mayonnaise
1
T. Parmesan cheese, shredded
2
c. Swiss cheese, shredded
Place bread on
baking sheets; brush with 2 tablespoons oil. Broil 4-6 inches from heat for 1-2
minutes or until lightly toasted.
In a large
skillet, sauté mushrooms with Italian seasoning in butter and remaining oil
until tender. Add garlic; cook 1 minute longer. Remove from heat and set aside.
Place
artichokes in a food processor; cover and process until finely chopped. Add
mayonnaise and Parmesan cheese; cover and process until blended. Spread over
toast slices; top with mushrooms and sprinkle with Swiss cheese.
Bake at 350
degrees for 4-6 minutes or until cheese is melted.
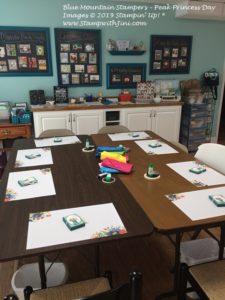
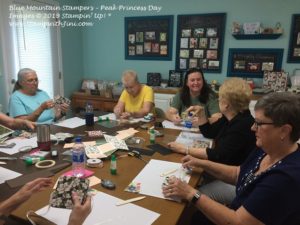
And here is the classroom waiting for everyone to arrive.
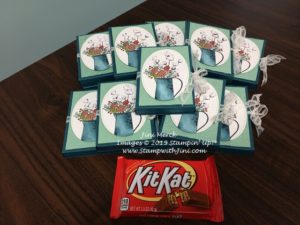
I shared the little Country Home Kit Kat Holders which were everyone’s “pillow gifts” on the table with you yesterday – I thought the thankful greeting was perfect to express my thanks to my team.
We enjoyed a game after everyone settled in –
Have you ever played the Right, Left Game? It’s so simple…. everyone starts with a package and then we passed our packages to the right or left depending on the Ink Pad story I read.
Lot’s of fun and laughter to go around!
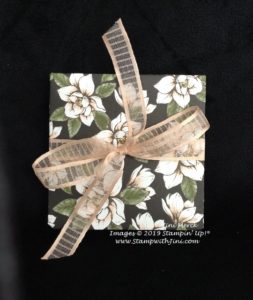
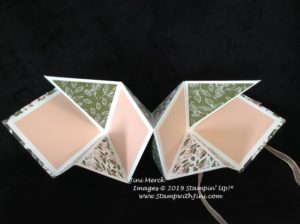
After we did a Make n Take and created these lovely Folding Albums. My friend, Marni gave me one of these little albums last spring in a swap and I loved it so much. I saved it since I knew it was the perfect project for the day. I simply put my own spin on it.
It wasn’t hard to choose the paper I wanted to use. The Magnolia Lane Designer Series Paper is so striking and you’ve got a ton of pattern choices in the package. Here is what the album looks like opened.
I’m looking forward to filling it with some photos!
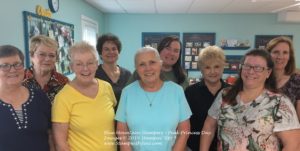
Here is the gang working on theirs
Want to see how I made this album? The Team enjoyed making them so much I thought you would too!
Amazing Magnolia Lane Folding Album Video Tutorial
Oh, I almost forgot the tag or chip board is simply the extra piece in our Specialty Designer Series Paper packs – How great is that? You can up cycle it!
So what do you think? Want to make one for yourself? I think they make great gifts and of course you could stamp on the inside diamonds if you prefer rather than use it as an photo album. I think there are endless ways to use this amazing album!
Here is a printable version with the complete supply list I used.
Shop at my Online Store and use Host
Code H62N9P3Z
Click Here to learn more about using the Hostess Code If you order Online make sure your profile
information is up to date and you’ve allowed me to contact you (If you chose no
contact in the past you’ll need to call 1-800-Stamp Up to have them change your
profile for you.)