Pop ‘n Cuts Gift Card Holder

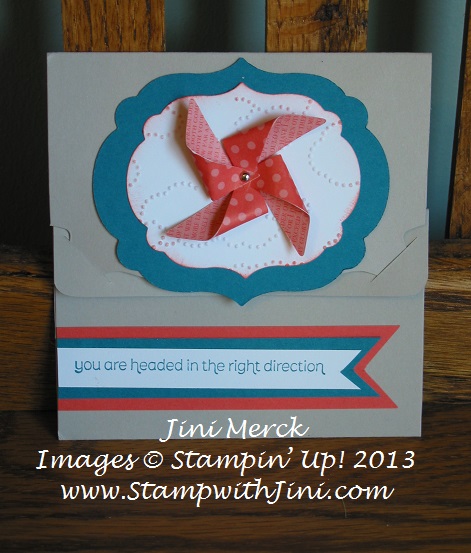
Last week I shared a card that I had created with the Card Base Pop ‘n Cuts Die. Today I am going to share another way to use the Card Base Pop ‘n Cuts Die – this time to make a Pop ‘n Cuts Gift Card Holder.
Pop n Cuts Gift Card Holder

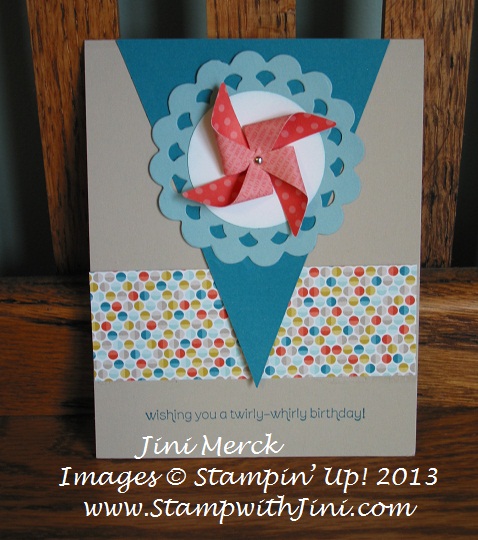
Isn’t this Pop ‘n Cuts Gift Card Holder cute? I love these little pinwheels and so I wanted to use them with the coordinating sentiment stamp set Wishes Your Way. I thought that the little greeting included in this set would be great for a graduate.

And since I’m currently gearing up for my daughters high school graduation I’ve been focusing on ideas for  graduation gifts and cards. Gift card holders are always something I need. How about you? And the Card Base Pop ‘n Cuts Die makes this gift card holder not only cute, but easy too.

Want to learn how to make one of these Pop ‘n Cuts Gift Card Holders for yourself? Why not check out my latest video

Here is a  Pop ‘n Cuts Gift Card Holder Tutorial PDF that you can download or print

Click HERE if you’d like to see the project I posted earlier using the Card Base Pop ‘n Cuts Die?

If you’d like to learn about my videos as I post them, why not sign up for my YouTube Channel? You can click HERE to subscribe.

Supplies:

Stamp Set: Wishes Your Way (item 129153/129156)

Inks: Island Indigo and Calypso Coral

Paper: Sahara Sand, Island Indigo, Calypso Coral and Whisper White

Accessories: Card Base Pop ‘n Cuts Die (item 130099), Big Shot, Pinwheel Sizzlits Die (item 129411), Label Collection Framelts (item 125598), Cloudy Day Embossing Folder (item 127022), and 1/8″ Silver Mini Brads (item 122941)

Click here to order your Stampin’ Up! Products online 24/7! (US only)
 

Fun & Flirty Paper Doily Skirts

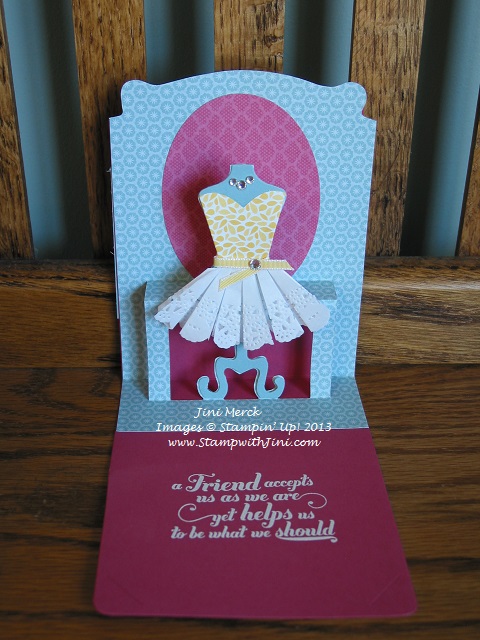
Have you seen the NEW Pop ‘n Cuts die in the Spring Catalog? Well if you loved to play dress up when you were little or if you played with paper dolls you’re going to love this group of coordinating products!

Here is a card I made for my Team Meeting using the Pop ‘n Cuts Die (item 130099) and Dress Form (item 130100). I used our Full Heart Punch for the bodice and would you believe I used one of our Paper Doilies (item 129399) to create the skirt? Well I did!

Fun & Flirty Doily Skirt (1)

I had such a great time creating this project that I thought I would share how I created this skirt with you too. After a lot of trial an error here is what I finally came up with.

So here is my latest video – The Fun & Flirty Doily Skirt Tutorial

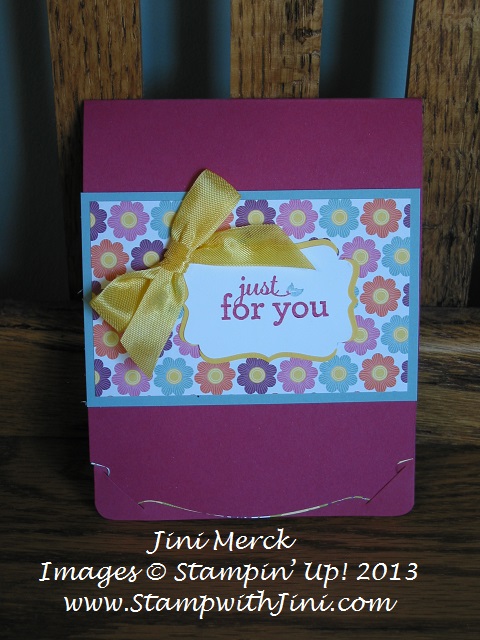
And if you were wondering how I decorated the outside – here is a photo of the outside of the card. Don’t you love the way that the NEW Pop ‘n Cuts die is designed so that it “seals” itself?

Fun & Flirty Doily Skirt (2)

Would you like to learn about my videos as I post them? Why not sign up for my YouTube Channel? You can click HERE

Supplies:

Stamp Set: Feel Goods (item 129681/129684)

Inks: Versa Mark

Paper: Floral District Designer Series Paper (item 126919), Daffodil Delight, Rose Red and Baja Breeze, Whisper White Card Stock

Accessories: Full Heart Punch (119883), Stampin’ Write Markers, Decorative Label Punch (item 120907), Pop Up Posies Designer Kit (item 131395), Rhinestone Basic Jewels (item 119246), Paper Doilies (item 129399), Daffodil Delight Seam Binding (item 125583) and 1/8″ Taffeta Ribbon (item 119254), Big Shot, Card Base Pop ‘n Cuts (item 130099), Dress Form Pop ‘n Cuts (item 130100) and Dress Up Framelits Die (item 130101)

Click here to order your Stampin’ Up! Products online 24/7! (US only)
Get Your FREE Digital Download

It is Tuesday and that means NEW Digital Downloads for My Digital Studio. And with the NEW lower software price who can resist? You can click HERE to read more about the new pricing in my earlier post.

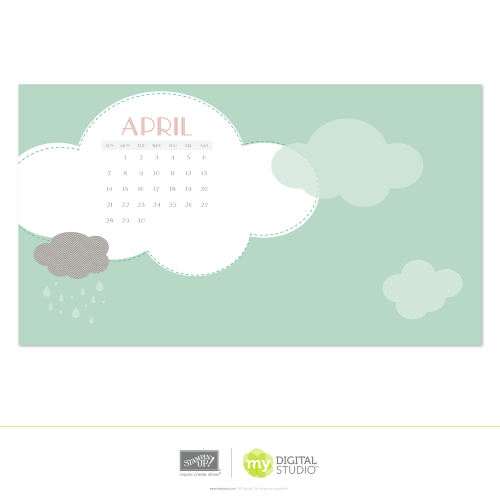
Here is a NEW and FREE Digital Download just in time for April – The April Showers Wallpaper (item #133473)

MDS_DWNLDA_APRIL_SHOWERS_DESKTOP_WALLPAPER

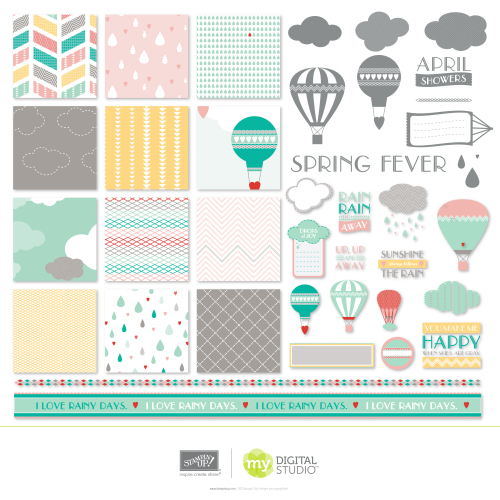
And coordinating with the FREE download – April Showers Kit (item #133472)

MDS_DWNLDA_APRIL_SHOWERS_KIT

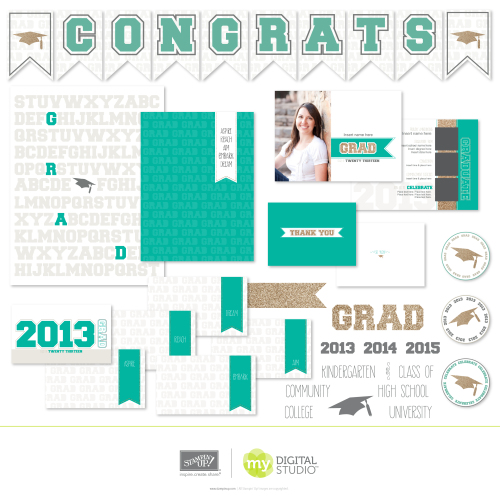
Do you have a high school senior this year? I know I do and the year end is quickly approaching, eek! So I’ll be checking out the Embark Graduate Ensemble Download (item #133467) for my daughter. It should make things so much easier.

MDS_DWNLDA_EMBARK_GRADUATE_ENSEMBLE

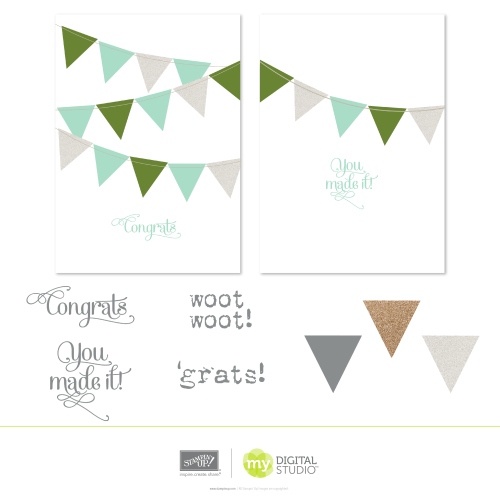
And here is the You Made It Grad Greeting Card Template (item #133527)

MDS_DWNLDA_YOU_MADE_IT_GRAD

Our last NEW Download is the This and That Epic Day Kit (item #133465). This download contains all the This and That traditional projects in digital form – woo hoo!

MDS_DWNLDA_THIS_AND_THAT_EPIC_DAY

So as you can see there is a lot happening with My Digital Studio – MyDigitalStudio.net has gotten a new makeover too. So why not check it out?

Here is a great overview video for you too.

Still not sure? I teach an Introduction to MDS each month. Check out my Calendar of Events by clicking HERE.

Click here to order your Stampin’ Up! Products online 24/7! (US only)
Spring Sampler Treat Box Tutorial

I made this cute little treat box using the Spring Sampler Stamp Set (item 125510/125512). I knew when I saw this set in the Spring Catalog I just had to have it – it’s so me. I could picture making quick and easy treats for all kinds of occasions.

Spring Sampler Treat boxI think the images in the Spring Sampler Stamp Set are just too cute! How about you?

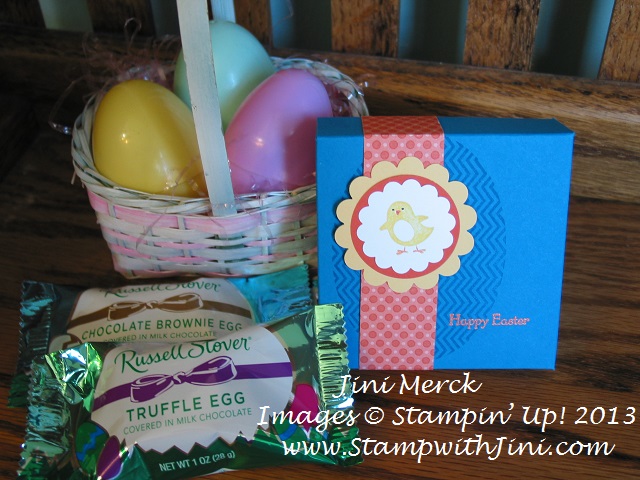
Here is the Treat Box we made as a project during my March Blue Mountain Stampers meeting. We had a lot of fun thinking of different things (mostly chocolate) that we could put in the box. This time  we filled them with these yummy eggs (They come in all kinds of flavors and remind me of those I got as a child.) Shhh… don’t tell my family. They’ll be finding theirs in their rooms Easter morning. I think my hubby will love the cookie dough egg I picked out for him!

Spring Sampler Box with Chocolate

We had so much fun making these quick and easy Treat boxes I thought you’d enjoy making them too for your friends and family. So why not check out my new video below – Spring Sampler Treat Box.


You can Click HERE to print or download your copy of my

FREE Spring Sampler Treat Box Tutorial PDF

Want to see my Valentine Treat Boxes? Click HERE to see my earlier post. You can also click HERE to see the treats I made using the Spring Sampler set recently using the Petite Pocket Die.

Leave me a comment and let me know if you are enjoying my videos and tutorials. Would you like to see them more than every other week? Maybe once a week would be better? I’d love to hear what you think.

Click here to order your Stampin’ Up! Products online 24/7! (US only)
NEW Adding Color Paper Doilies Video

Feel Goods

Do you love the Paper Doilies (item 129399) in the Spring Catalog like I do? I think they are a lot of fun to work with and since you get 24 in a package you can do so many things with them. When I saw the Paper Doilies in the Spring Catalog they quickly caught my attention since they reminded me of my Grandma who was always crocheting. Do you remember those doilies that were always on the arms of the furniture and under things on tables growing up? Oops maybe I’m dating myself….

Anyhow today I’m going to share with you my latest video, Adding Color to Paper Doilies. Why not check it out –it’s just one of the fun ways you can customize these great little Paper Doilies.

Want to make one of these cards for yourself? Well you can, just click HERE for a FREE PDF Tutorial with measurements and directions just for you. Give it a try – I’m sure you’ll have as much fun adding color to your Paper Doilies too!

Warning – Adding Color to Paper Doilies is so much fun it can be addictive!

Want to learn more about stamping? Why not sign up for my FREE Newsletter and Class Information. (Just look for the sign up box above on the right). Sign up and get a FREE Pinwheel Tutorial just for joining. Then you’ll get two emails a month with great information on what is going on with Stamp with Jini along with helpful hints and tips.

Want to take a class using our Paper Doilies? Click HERE for my upcoming class using them.

Click here to order your Stampin’ Up! Products online 24/7! (US only)
Pinwheel Wishes Tutorial

Have you ever wondered what happens at one of my monthly Blue Mountain Stampers’ Meetings? Well I thought I would share with you one of the projects we made during my February TEAM meeting.

Pinwheel Wishes Card

I’ve had several of you ask me if I knew any tricks on how to make these cute little pinwheels using our NEW Pinwheel Sizzlits Die from the Spring Catalog. They are sooo stinking cute, but they are small so they can be a challenge to put together if you don’t know a few tricks.

Since I made about 100 of them for my Leadership swaps in January I had plenty of time to try out different methods of putting them together. Today I thought I’d share with you what method worked best for me so I put together a Tips for Quick & Easy Pinwheels Video Tutorial to show you what I learned.

Want to make one of your own Pinwheel Wishes card? Well you can, just click Here for a FREE PDF TUTORIAL with measurements and directions just for you. I hope you have as much fun making these cute little Pinwheels as I did.

Have you ever thought of becoming a Demonstrator? Want to join the fun and become part of my TEAM? Sale-a-bration is a great time to join since we have a special promotion going on right now. Why not click HERE to learn more about becoming a Demonstrator and becoming part of my Blue Mountain Stampers’ Team. Warning – the fun is contagious! Let me know if you have any questions (stampwithjini@gmail.com) or would like answers to any questions you may have.

Don’t want to become a demonstrator? That’s ok you can join in all the fun during Sale-a-bration by hosting a party of your own! Or why not stop by for my FREE event Sale-a-bration Saturday on March 2nd! Click HERE to see my Calendar of Events for more information. Contact me today and we’ll find what works for you best.

Click here to order your Stampin’ Up! Products online 24/7! (US only)
 

Paper Hearts Video Tutorial

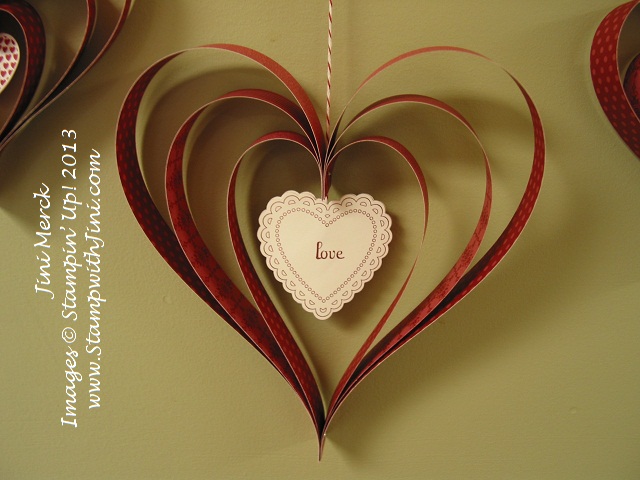
Are you ready for Valentine’s Day? I’m almost ready and since Valentine’s Day is just a few days away I wanted to share my video tutorial with you for these cute little Paper Hearts. I made these Paper Hearts to hang in the windows of my house. I think you’re going to have fun making them too – but be careful they’re so quick and easy they are addicting!

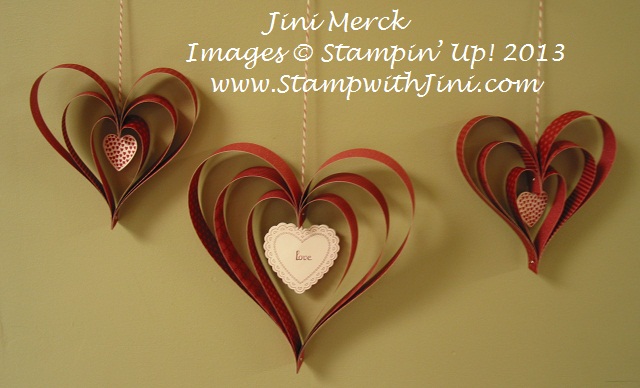
Here are 3 of the Paper Hearts that I made on Saturday.

Paper Hearts group

As you can see I made my Paper Hearts in 2 different sizes and I used the Hearts a Flutter Bundle (item 131098/131097) to create the spinning heart in the center. Can you see the word love stamped on the center of the larger heart? (You can check out the close up below for a better view.) I used the stamp set Fabulous Phrases to stamp the word love on one side, and the word you on the other side, so when it spins it says “Love You”.

Fabulous Phrases (item 117002/120501) is one of those stamp sets I use all the time since it is such a pretty font and it contains 30 stamps that you can make all kind of different phrases with! (Want to see some of the combinations you can make with this set? Click HERE for a PDF and then see how many more you can make!)

Paper Hearts large

Isn’t that fun? I can’t decide which one I like best since I just love the delicate scalloped heart image from the Hearts a Flutter stamp set, it reminds me of my Grandma for some reason. Why not leave me a comment below and let me know which Paper Heart you like the best.

Would you like to know how I made these Paper Hearts? Well why not check out my Paper Hearts Video Tutorial.

Here are the supplies I used to make my Paper Hearts:

Paper Hearts small

Regals Color Collection Designer Series Paper Stock (item117154 $21.95):

Small Paper Heart: ¾” x 4″, ¾” x 6″, ¾” x 8″ (cut 2 of each)

Large Paper Heart: ¾” x 7″, ¾” x 9″, ¾” x 11″ (cut 2 of each)

Cherry Cobbler Baker’s Twine (item 123125  $2.95): 12″ piece

1/8″ Silver Mini Brads (item 122941 $5.50): 2

1/16″ Circle Handheld Punch (item 101227 $8.95)

Whisper White Card Stock (item100730 $8.50)

Cherry Cobbler Classic Ink (item 126966  $5.95)

Hearts a Flutter Bundle (item131098 $42.95/131097 $36.95)

Fabulous Phrases (item 117002 37.95/120501 $26.95)

Please leave me a comment and let me know what you think of today’s Paper Hearts Video Tutorial. I’d love to know what you think of my second video tutorial and if you’d like to see more videos.

Did you know to leave a comment on any post all you have to do is click on the little thought bubble by the title if you don’t see the comment box? And did you know you don’t need to worry about the fact I ask for your email when you leave a comment since no one else will see it except me. My blog only asks for your name and email so it knows you’re a real person and not a robot spammer and I’ll only send you email if you have requested my Newsletter.

Click here to order your Stampin’ Up! Products online 24/7! (US only)
Just Thinking Tutorial

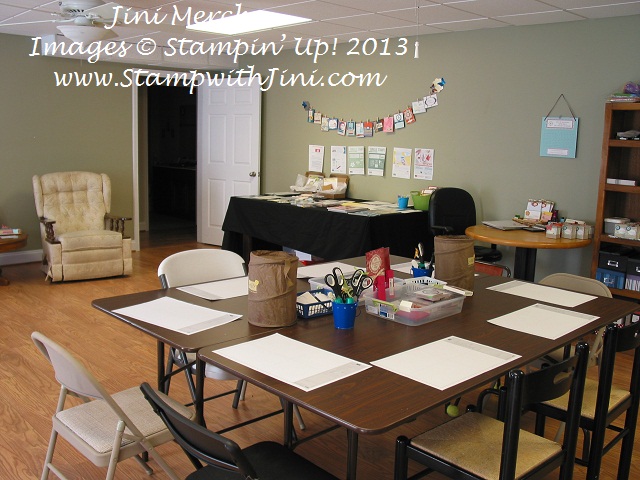
Want to see what we did at my FREE Sale-a-bration Celebration Event? This past Sunday I was able to share the NEW Spring Catalog products and some of the things I brought back with me from Stampin’ Up! Leadership in Orlando.  What fun everyone had together – it’s one of my favorite parts of stamping.

First here are some pictures of my classroom and some of the displays.

Sale-a-bration Celebration Event classroom

Sale-a-bration Celebration Event Display

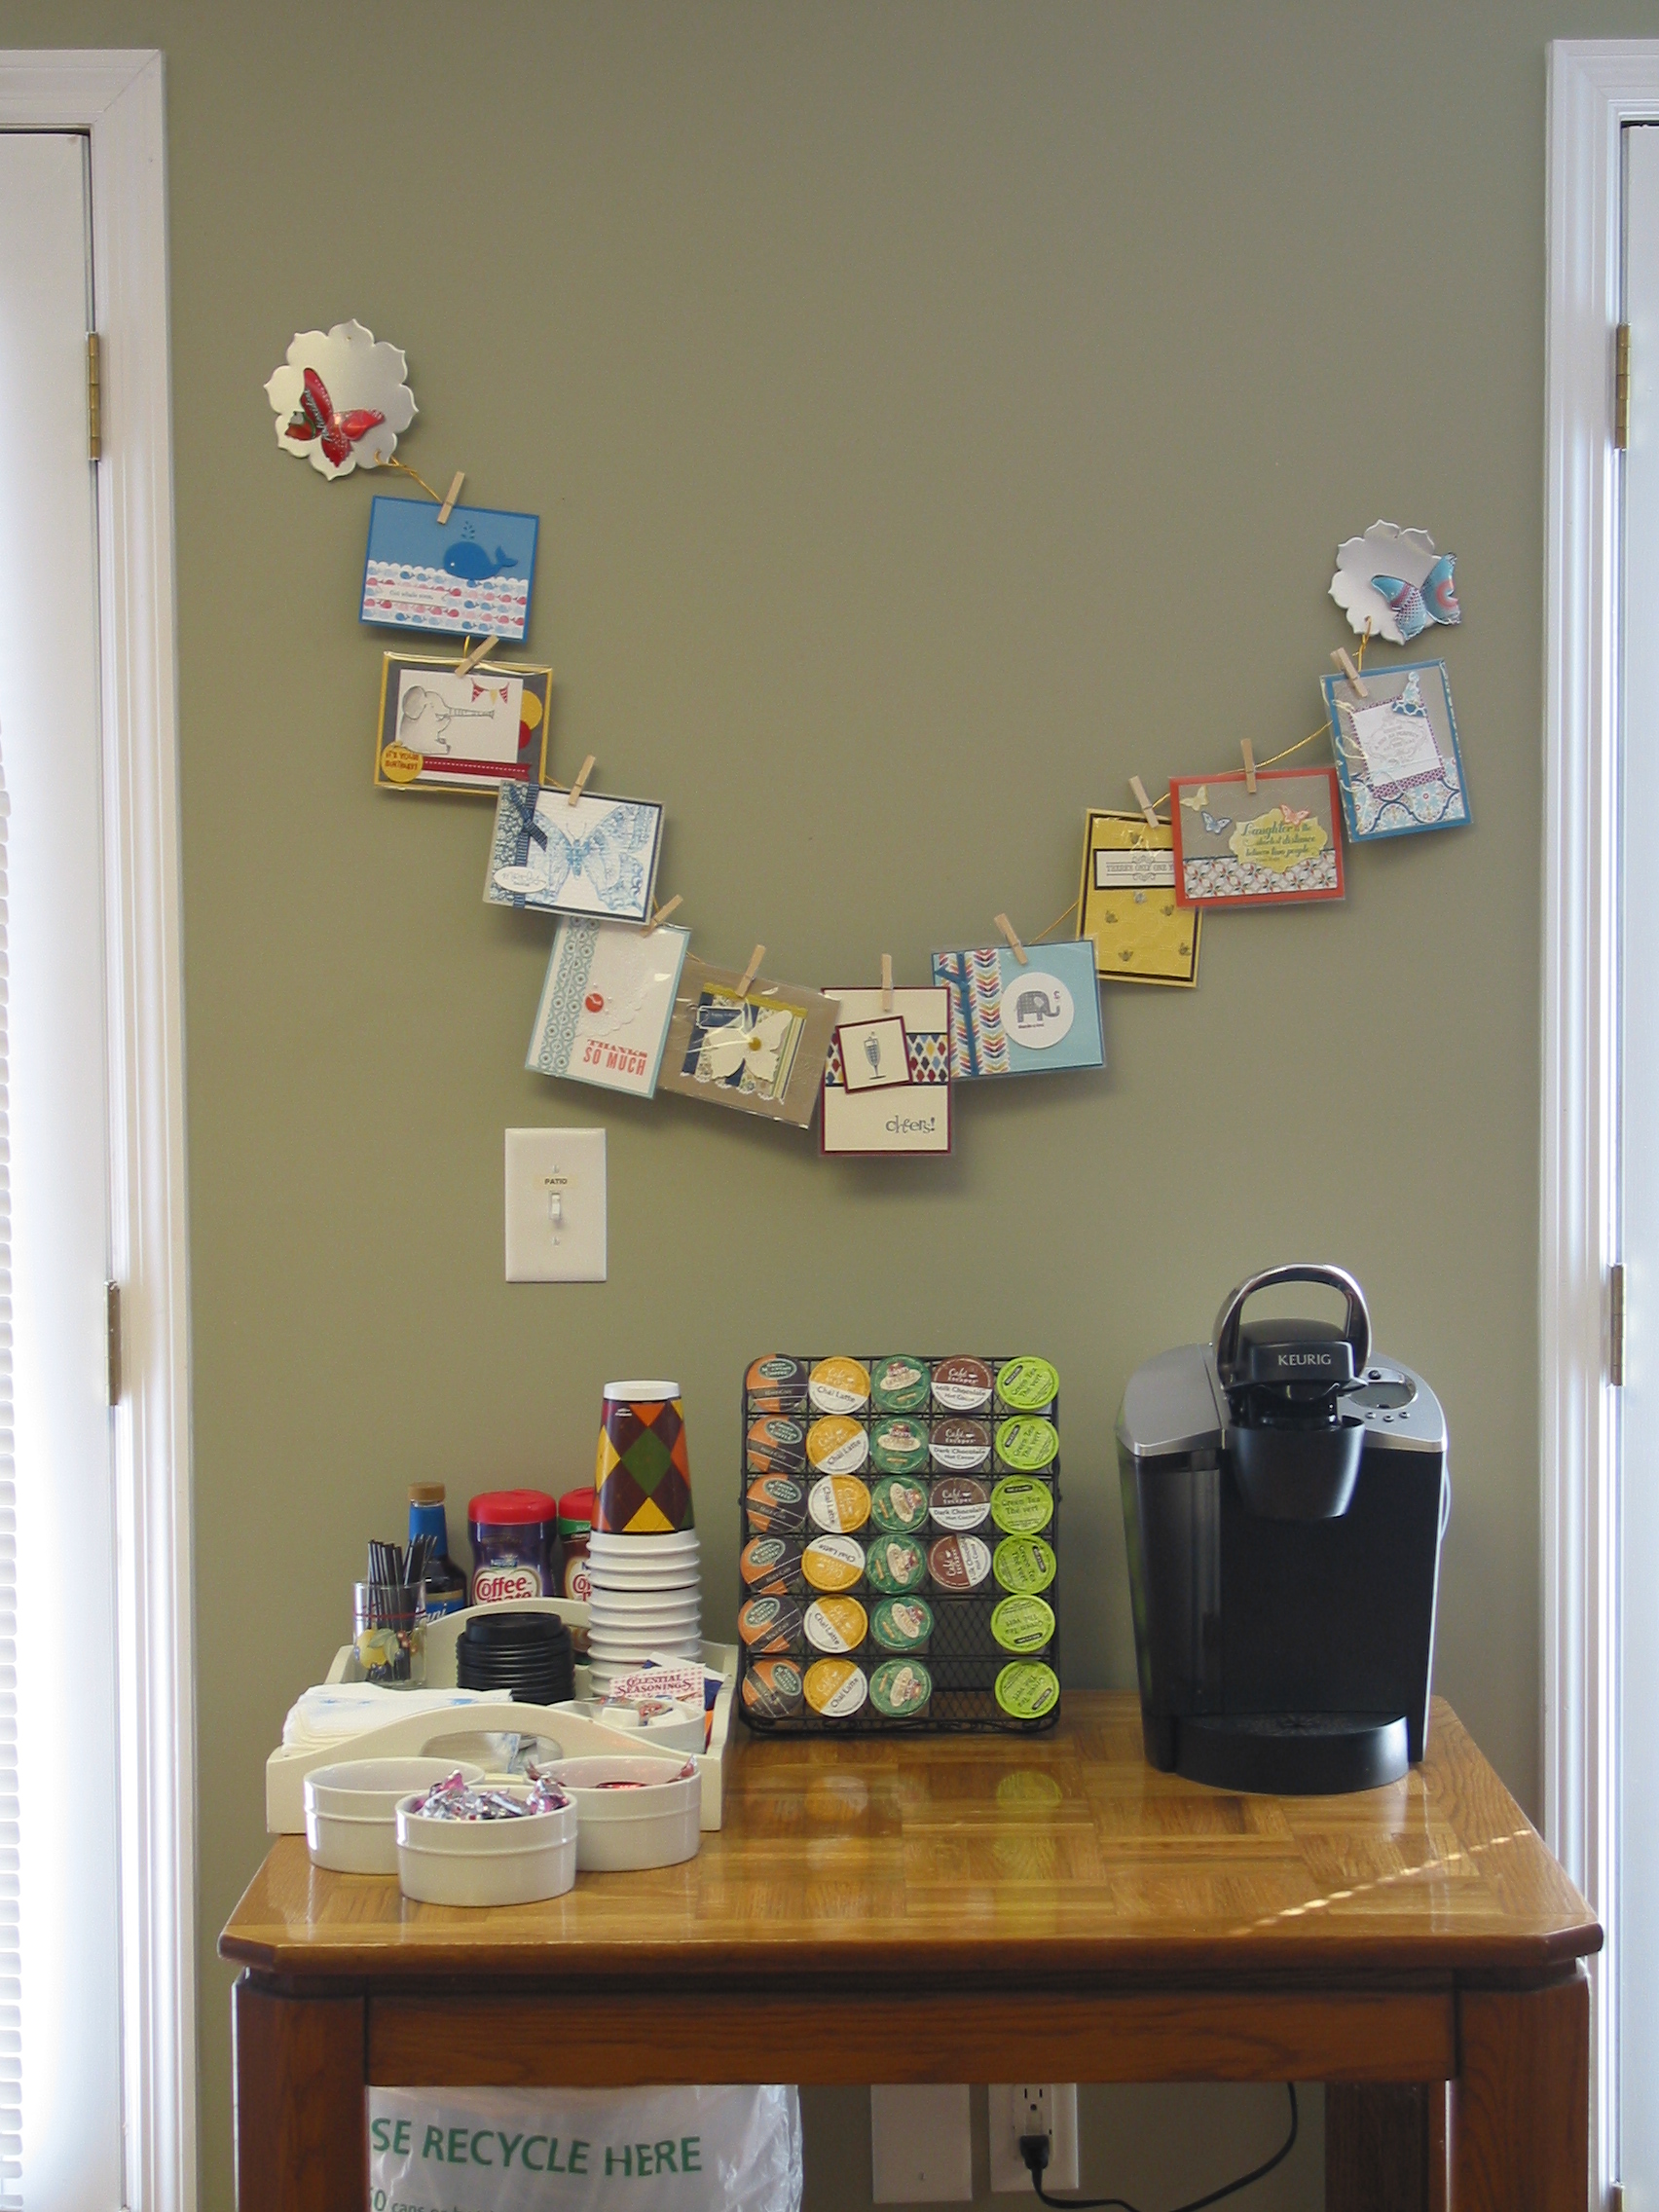
Of course there has to be chocolate – after all what would be stamping without chocolate?

Sale-a-bration Celebration Event snack area

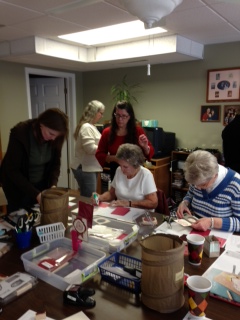
Everyone seemed to have a great time with the two cards they were able to make.

Sale-a-bration Celebration Event group

Sale-a-bration Celebration Event Big Shot

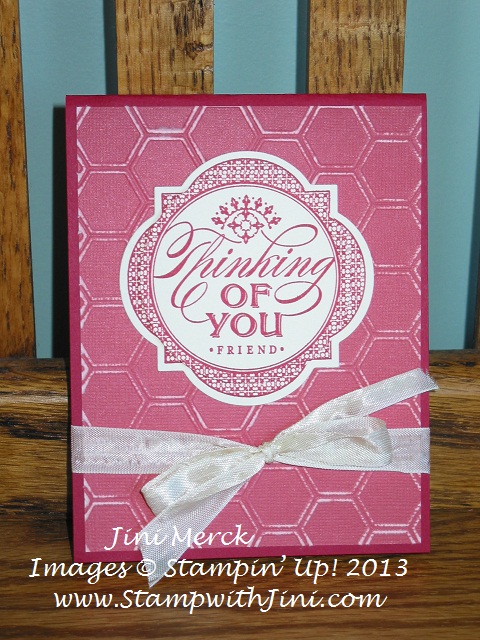
Here is my favorite card that I created for the event using the Just Thinking Stamp from the Spring Catalog. Just Thinking was one of the stamps I just knew I wanted when I saw the Spring Catalog the first time!

Just Thinking

Since not everyone was able to come I thought I would share with you a tutorial on how my Just Thinking card was made, along with my very first video tutorial showing you how to use our Core’dinations Card Stock. I just love the Core’dinations Card Stock and think you will too – it’s a lot of fun to work with and very versatile. Better yet you’ll find three Core’dination Card Stock color choices Pool Party (item 129321), Primrose Petals (item 129322), and Real Red (item 129320) in the Spring Catalog on page 12.

Just Thinking Tutorial

Just Thinking

Supplies:

Raspberry Ripple Card Stock (item 126842 $6.95): 4 ¼” x 11″; scored at 5 ½” and folded

Primrose Petals Core’dinations Card Stock (item 129322 $6.95): 4″ x 5 1/4″

Very Vanilla Card Stock (item 101650 $8.50): 8 1/2″ x 3 ½”

5/8″ Very Vanilla Seam Binding (item 120999 $6.96): 20″

Honeycomb Embossing Folder (item 129378 $7.95)

Stampin’ Sanding Block (item 129367 $3.95)

Window Frames Collection Framelits Dies (item 129021 $26.96)

2 ½” Circle Punch (item 120906 $16.95)

Multipurpose Liquid Adhesive (item 110755 $3.95)

Dimensionals (item 104430 $3.95)

Instructions:

1. Prepare your Core’dinations Card Stock Layer as shown in the video.

2. Adhere the Primrose Petals Core’dinations Card Stock to your card front using Multipurpose Liquid Adhesive. (I like to use this adhesive on anything that has a heavy texture.)

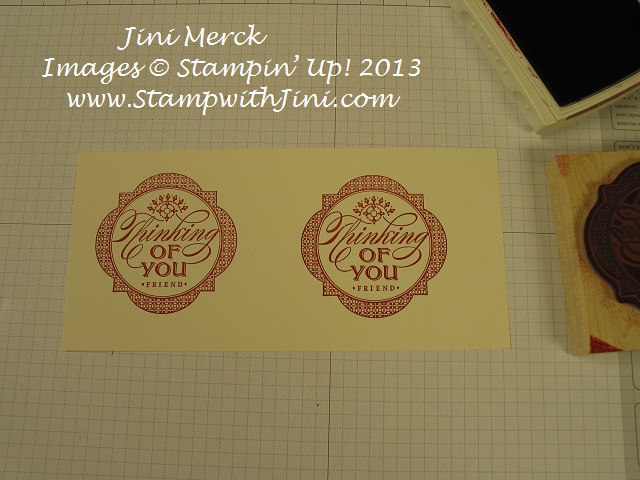
3. Stamp two images onto Very Vanilla Card Stock using Raspberry Ripple Classic Ink.Just Thinking Tutorial

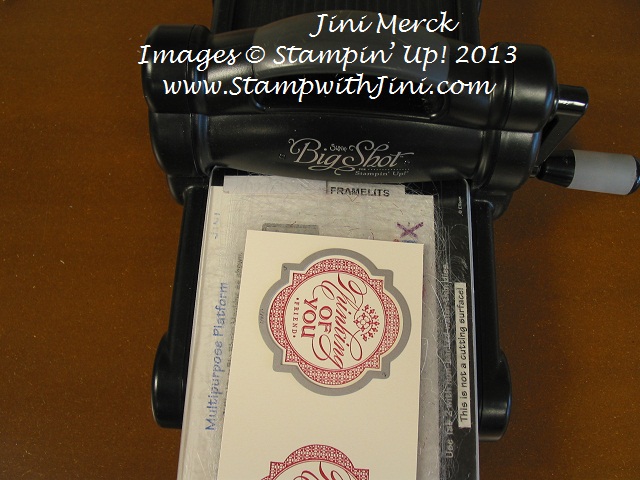
4.  Using the Window Frame Framelits Die and Big Shot cut out one of the images.

Just Thinking Tutorial

5. Adhere to the card front.

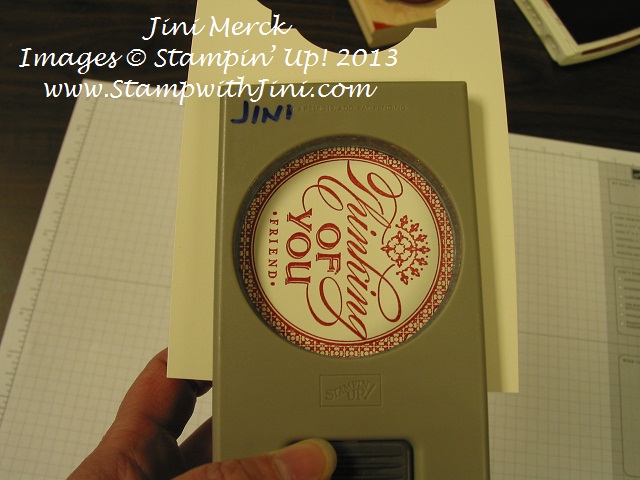
6. Punch the sentiment out of the second stamped image using the 2 ½” Circle Punch.

Just Thinking Tutorial

7. Adhere to the card front using Dimensionals.

8. Loop ribbon around the card front and tie into a bow. Trim ends.

That’s it – now you can send your card to someone you’re thinking about.

You can click here to download a PDF of my Justing Thinking Tutorial

Please leave me a comment and let me know what you think of today’s post. I’d love to know what you think of my first video so leave me a comment after you watch it. And don’t worry about the fact you need to use your email when you leave a comment – no one else will see it except me. My blog only asks for your name and email so it knows you’re a real person and not a robot spammer and I’ll only send you email if you have requested my Newsletter.

Click here to order your Stampin’ Up! Products online 24/7! (US only)
Leadership 2013 – Day 3

Shelli Leadership 2013

I’m sorry to say I didn’t get to post this as soon as I wanted because the last day of Stampin’ Up! Leadership 2013 was a fantastic and full day!  Saturday began with Shelli greeting us and showing us some wonderful projects with our charming Tea for Two Suite projects. You got to love the feel and look of the suite and the fact that everything coordinates together. I love the soft spring colors it includes.

I’m so tickled to say that we were told our Single Stamps has been successful enough that they will be continued with two new groups being offered– whoo hoo! What a great way to get your favorite stamps without buying the set if you choose. Who wouldn’t like that right?

Single StampsSingle Stamps

Another exciting announcement was made about the Best of 25 Years stamp sets that will be released monthly during 2013. Who wouldn’t like that? It’s a chance to get the most popular stamps that we’ve had over the last 25 years along with an NEW exclusive image too!

Best of 25 years January

Next we headed out for break out classes. I really loved these because we got great information in a small group setting. From Creating a Blueprint for Success with Brandi Barnard and Meg Daves to a really awesome downline training class called Strategies to Empower your Downline that Holly Linford and Lynsay Mahon gave. I loved it all and learned wonderful tips and information that made me feel empowered to improve my life and make a difference in my TEAMs lives.

Success Strategies to Empower You Downline

And meeting the people that I’ve been working with and have admired over the last several years was soo much fun. What a wonderful way to share with others what we all love – paper crafting.

During Leadership 2013 Stampin’ Up! gave us the opportunity to make a difference to the children in Florida with a service project designed to get things to children who don’t have access to them. Stampin’ Up! gave us the opportunity to stuff bags and fill them with markers, cardstock and other paper crafting supplies that would be delivered locally to children in need through the schools. How great is that. Watching the Stampin’ Up! semi loaded with supplies for the children of the area – a true feel good moment. Stampin’ Up! does make a difference in our lives and the lives of others.

Leadership 2013 semi

A wonderful lunch which included another delightful meal and fellowship around the table meeting a new friend, Robin whom joined our group.

Leadership 2013 lunch

Leadership has been a chance to grow and reach out to others and spend time getting to know stamping friends even better.

Leadership 2013

Leadership 2013 ended with a special message from the management, a little bit of silliness with Bonnie, and a final message from Shelli, and a final prize patrol of course. After all who doesn’t love prize patrol?

Leadership 2013 prize patrol

Check out this quick little video where Bonne lead us in song – how crazy was that?

What a wonderful experience Leadership 2013 has been.

As we headed off to enjoy dinner together at a local Chinese restaurant we shared our favorite experience of Leadership 2013 with each other.

Leadership 2013

Above Janie and I check out the menu. We had a great time trying new dishes during our time in Orlando. Below is a shot of Kathleen and Janie.

Leadership 2013

One final event Sale-a-bration Celebration after dinner was a ton of fun. What great projects and laughter.  I do hope that Stampin’ Up! will offer this opportunity again in other cities since it was a great chance to share the love of paper crafting and it gives everyone a great opportunity to see how much fun being part of Stampin’ Up! can be.

Leadership 2013 Sale-a-bration

Leadership 2013 Sale-a-bration


Want to see what all the excitement is about? Why not come by on Sunday, January 20th and see all the wonderful Sale-a-bration and Spring Catalog products during my Sale-a-Bration Celebration.

Sale-a-bration 2013

You can click HERE for more details.

I’ll try and post some of the wonderful swaps and more information about all the exciting things going on during the up coming days.


New Product – Talking Tag Just Introduced!

Stampin’ Up! has just introduced this fun new product. Here’s what they have to say:Talking tags banner

With Talking Tag, you can send a gift that is uniquely you. Talking Tagis a message label you can attach to cards, invitations, gifts . . . anything! Personalize birthday cards, Christmas gifts or even record quick instructions for a project. Now your pictures really can say a thousand words!How to send a voice message:

  1. Download the FREE TalkingTagT App on you smartphone from talkingtag.mobi, iTunes® or Google PlayT.
  2. Adhere the message tag to your card or gift.
  3. Open TalkingTagT App and scan the code.
  4. Record your message (recording starts immediately, so make sure your ready!).

You will have the opportunity to listen, re-record, cancel, or confirm your message after you’ve completed recording it. Each label allows up to 60 seconds of a greeting, song, or product message.

To play the message, recipients will need to download the app and scan the code.  Messages are saved for two years, so they can listen to it over and over.

How to Buy Talking Tags:

Buy ’em by the sheet! You get 10 tags for just $7.95 (item 129723).

Check out this video to see how easy it is to use our NEWTalking Tag!


Click here to order your Stampin’ Up! Products online 24/7! (US only)