St. Patty’s Day Ferrero Roche Gift Box Video Tutorial

I recently attending a DIY Retreat and received these yummy little Ferrero Roche Chocolates at dinner. Of course everyone at the table was on a diet right now, so I ended up with a little pile of them. LOL! As I lined them up on my table they made me think of little pots of gold – so I couldn’t resist making a little box for them for St. Patrick’s Day!

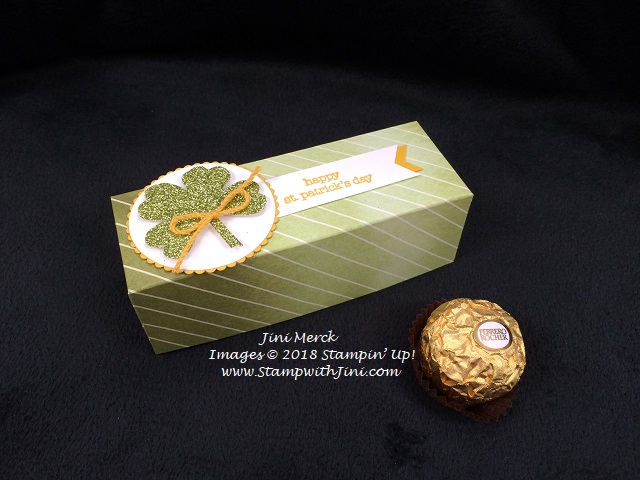
Of course I couldn’t resist adding a little shine to this project, so I pulled out the fabulous Myths & Magic Glimmer Paper. The light green was perfect for this project!

These boxes are quick and easy to make so I whipped up a video tutorial for you in case you wanted to make some too!

So what do you think? Do you want to spread a little luck of the Irish and a little chocolate of course?!

If so I’ve also made a printable PDF tutorial with the supply list and measurements for you to go along with the video.

St. Patty’s Ferrero Roche Gift Box Video Tutorial (printable PDF)

Enjoy!


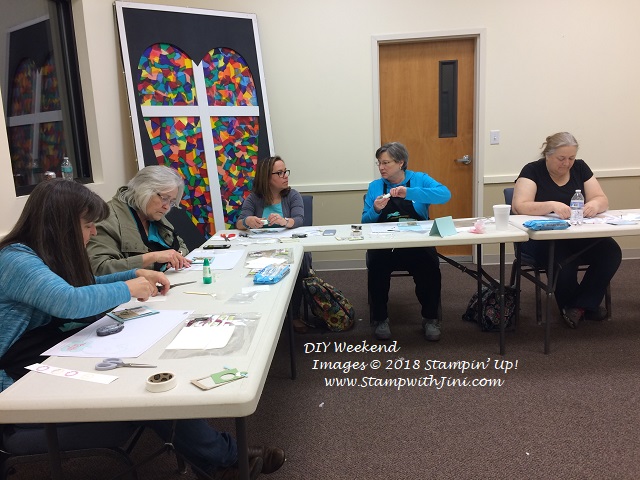
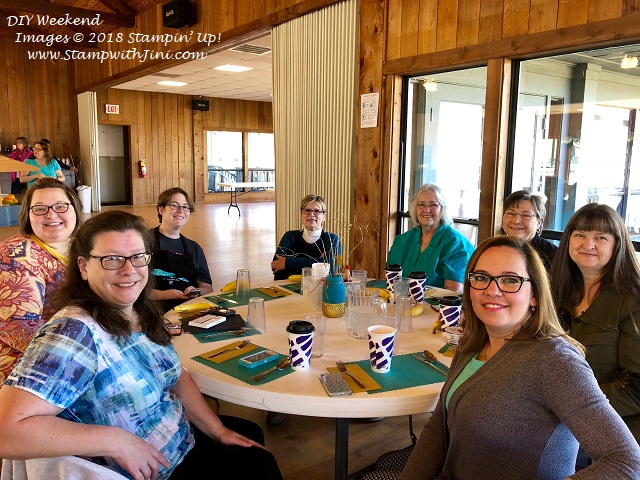
Salvation Army DIY Weekend

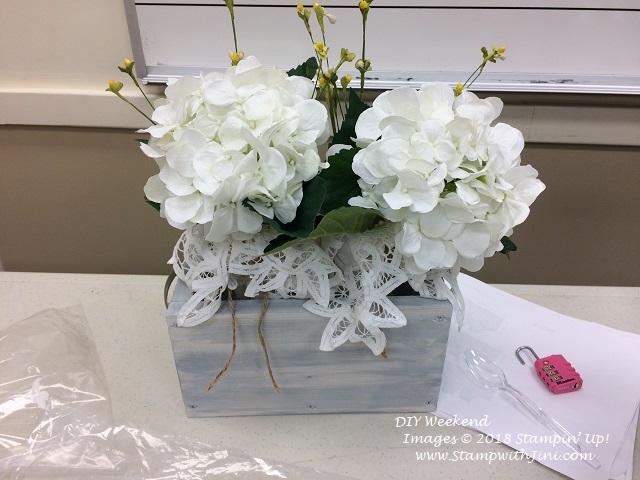
As I mentioned above I was at the DIY retreat when I was inspired by the chocolates so I thought I’d share some pictures with you of the event. It was a wonderfully uplifting weekend that started out a little soggy, but thankfully turned into a sunny event by the end.

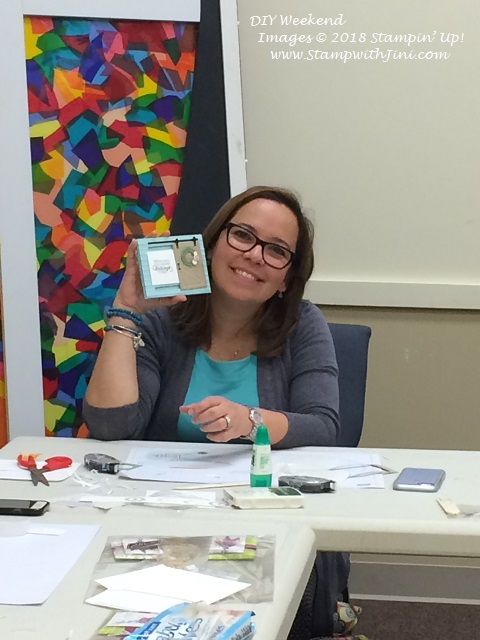
I taught two groups the Barn Door Slider Card in Class

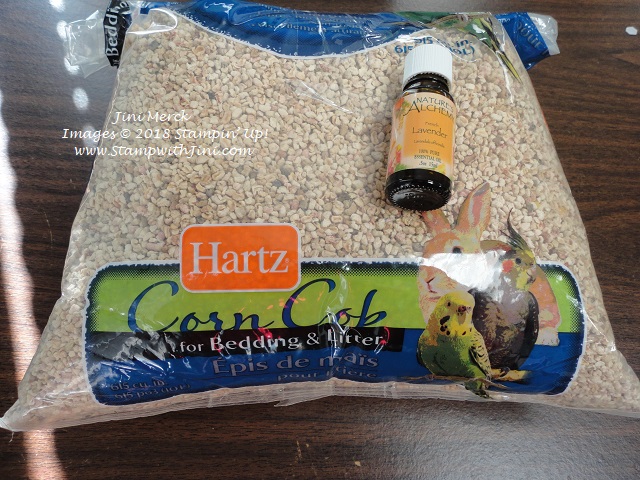
and we also made some Lots of Lavender Sachets that I shared with you HERE.

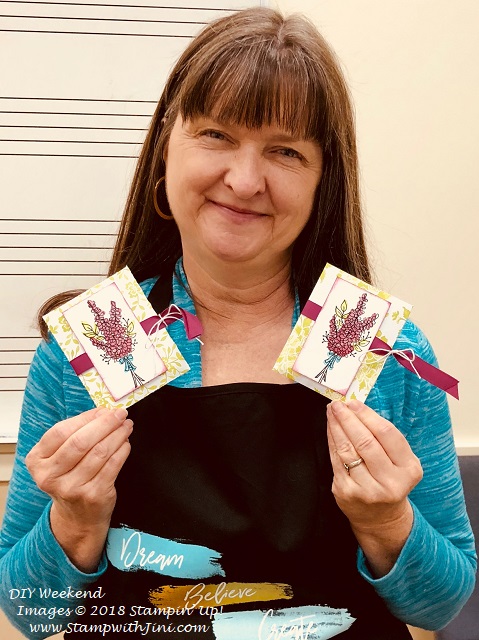
The dining hall was decorated lovely and the tables had coordinating theme center pieces.

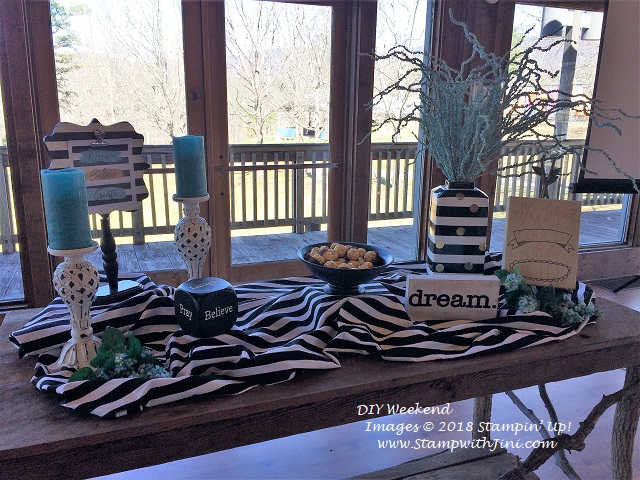
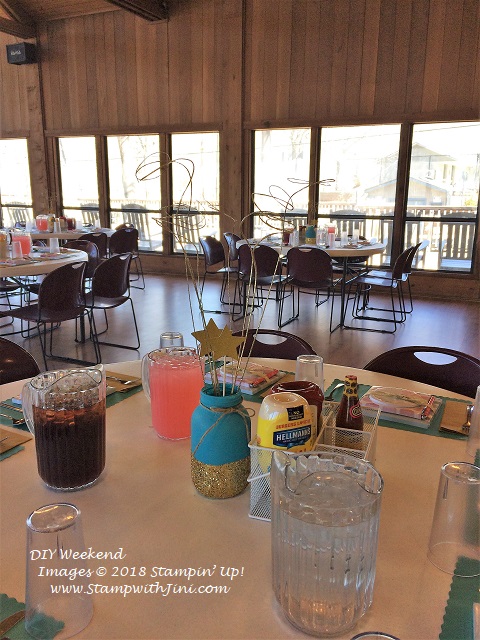
The weekend was filled with good food, great fellowship, fun, and friends.

Along with some learning for me too.

What fun we had!

Well that’s it for today – stop back by tomorrow when I’ll be sharing some fun team swaps from this month’s meeting.

Supplies: 

Stamp Set: Teeny Tiny Wishes (128748/127802)

Inks: Crushed Curry Classic Ink (131173)

Paper: Myths & Magic Glimmer Paper (145601), Delightful Daisy Designer Series Paper (144137), Old Olive (100702), Crushed Curry (131199), Whisper White Card Stock (100730)

Accessories: Simply Scored Scoring Tool (122334), Layering Circles Framelits Dies (141705), Pansy Punch (130698), Triple Banner Punch (138292)

Click here to order your Stampin’ Up! Products online 24/7! (US only)

Shop at my Online Store and use Host Code J77CXF2F


Click Here to learn more about using the Hostess Code If you order Online make sure your profile information is up to date and you’ve allowed me to contact you so I can mail you your FREE gift!


Painted with Love Treat Tent Tutorial

Check out this quick and easy last minute Valentine’s Day Treat Tent that I made for my hubby

– it holds what else, chocolate!

This project uses an old favorite, Teeny Tiny Wishes stamp set since it is filled with tons of all occasions sentiments perfect for this punch and a little something for any project!

I’ve made a video tutorial for you in case you want to make some too.

Painted with Love Treat Tent Video Tutorial

And here is a complete supply list for you.

Enjoy!


Supplies:

Stamp Set: Teeny Tiny Wishes (128748/127802)

Inks: Rich Razzleberry Classic Ink (126950)

Paper: Painted with Love Specialty Designer Series Paper (145580),  Gold Glimmer Paper (133719), Melon Mambo (115320), Rich Razzleberry (115316), and Powder Pink Card stock (144244)

Accessories: Simply Scored Scoring Tool (122334),  Classic Label Punch (141491), and Sweet & Sassy Heart Framelits Dies (141707)

Click here to order your Stampin’ Up! Products online 24/7! (US only)

Shop at my Online Store and use Host Code UCBWYB2B place a $75 order and receive a FREE gift!

Painted with Love Post it Note Holder

I love creating little gifts for family and friends and this one if a practical post it note holder for my husband – a little love, a little help to keep track of things. LOL

This colorful little Post it Note Holder hold a simple little pad of sticky notes I found at my local Walmart recently – cute right?

And the gold little heart just beckoned me since it reminded me of the beautiful Painted with Love Specialty Designer Series Paper and it’s gold foil accents!

I’ve made a quick little tutorial for you too! So why not check it out?

Painted with Love Post it Note Holder Tutorial (printable) PDF

Supplies:

Stamp Set: Petal Palette (*145785/145788)

Inks: Rich Razzleberry Classic Ink (126950)

Paper: Painted with Love Specialty Designer Series Paper (145580), Rich Razzleberry Card stock (115316), Melon Mambo Card stock, Gold Glimmer Paper (133719), and Very Vanilla card stock (101650)

Accessories: Simply Scored Scoring Tool (122334), Petal & More Thinlits Dies (145655), Sweet & Sassy Framelits Dies (141707), and Bone Bolder (102300)

Adhesives: Snail Adhesive (104332/104331) and Stampin’ Dimensionals (104430)

Non Stampin’ Up!: 3″ x 3″ Sticky Note Pad

*Petal Palette Bundle (145973/145974)

Click here to order your Stampin’ Up! Products online 24/7! (US only)

Shop at my Online Store in January and use Host Code RQGVFRW6 place a $75 order and receive a FREE gift!

Click Here to learn more about using the Hostess Code If you order Online make sure your profile information is up to date and you’ve allowed me to contact you so I can mail you your FREE gift!

Sign up for my FREE Newsletter My Newsletters include stamping tips, ideas and updates on what is happening with me! You’ll also receive a FREE Class Tutorial using the 2017-2018 In Colors when you sign up!


Party Pandas Valentine Nugget Treats

Want a quick and easy treat for Valentine’s Day? How about this chocolate filled treat made with the two of our Sale-a-bration items? Just one pack of the Bubbles & Fizz Designer Series Paper will make quite a few of these goodies. So why not grab a bag of Nuggets and get started?

Here are the instructions – the supply list is below for you.

  1. Cut 5 strips of Designer Series Paper 1″ x 3″ (make sure the pattern is going the direction you want. For mine I lined the hearts up along the top edge and cut 1″ strips that then I cut into 4 3 inch sections.)
  2. Using your Glue Dots add one to each end of the Designer Series Paper and place one against the Nugget and wrap the Designer Series Paper all the way around. The second Glue Dot will seal the other end down.
  3. Slide the nuggets into cello bag.
  4. Cut a piece of Blushing Bride Card stock 2 1/4″ x 4 1/2″; score at 2 1/4″
  5. Stamp your sentiment in Basic Black Archival Ink along the bottom of card stock.
  6. Fold the sentiment piece in half and slip over the top of the cello bag and staple. (Your scallop circle will hide the staple on the front.)
  7. Run a piece of Calypso Coral card stock through the Big Shot using the scallop circle Framelits die.
  8. Attach the scallop circle to the nugget topper, leaving it hang a bit above the top.
  9. Stamp your panda image onto Whisper White card stock using Basic Black Archival Ink.
  10. Color in heart using your Powder Pink Stampin’ Write Marker.
  11. Cut panda out using the circle Framelits die.
  12. Adhere the panda image to the scallop circle card stock using Stampin’ Dimensionals.

That’s it! Quick and easy – now you just need to share your treat!

Supplies: 

Stamp Set: Party Pandas (Sale-a-bration 147218/147221) and Teeny Tiny Wishes (128748/127802)

Inks: Basic Black Archival Ink (140931) and Powder Pink Stampin’ Write Marker (144033)

Paper: Bubbles & Fizz Designer Series Paper (Sale-a-bration 147244),   Blushing Bride (131198), Calypso Coral (122925) and Whisper White card stock (100730)

Accessories: 2″ x 8″ Cellophane Bags (141703), Layering Circles Framelits Dies (141705), and Stampin’ Dimensionals (104430)

Click here to order your Stampin’ Up! Products online 24/7! (US only)

Shop at my Online Store in January and use Host Code RQGVFRW6 place a $75 order and receive a FREE gift!

Wondering How to Get YOUR Copy of the Occasions & Sale-a-bration Catalogs?

  • If you haven’t ordered in a while
  • Don’t have a demonstrator

Contact me at stampwithjini@gmail.com or give me a call. I’ll be happy to mail you one or if your local set one aside for pick up

Lift Me Up Chocolate Slider Card

Do you love to make a little something for family and friends for Valentine’s Day? I found these cute little boxes of chocolate recently and couldn’t resist making something with them.

This little project is so quick and easy and since the Lift Me Up stamp set has a lot of sentiments to choose from you could make this project for all kinds of Occasions!

The lid lifts up so that you can write a little something under the lid and the box of chocolate slides out for easy access. My hubby is going to love that. LOL!

Want to learn how to make one for yourself? Here is a quick and easy video tutorial for you.

Lift Me Up Slider Card Video Tutorial

I’ve also made a printable PDF for you too with the complete supply list and instructions since the video focuses on the slider card it self. Why not check it out?

Lift Me Up Slider Card (printable) PDF

Enjoy!


Supplies: 

Stamp Set: Lift Me Up (142893/142896)

Inks: Rich Razzleberry Classic Ink (126950) and Melon Mambo Classic Ink (126948)

Paper: Painted with Love Specialty Designer Series Paper (145580), Powder Pink (144244), Rich Razzleberry (115316), and Whisper White Card stock (100730)

Accessories: Simply Scored Scoring Tool (122334), Up & Away Framelits Dies (142748), Banner Triple Punch (14138292), and Bone Bolder (102300)

Non Stampin’ Up!: Russell Stover 2 oz. chocolate box


Click here to order your Stampin’ Up! Products online 24/7! (US only)

Shop at my Online Store in January and use Host Code RQGVFRW6 place a $75 order and receive a FREE gift!

Click Here to learn more about using the Hostess Code If you order Online make sure your profile information is up to date and you’ve allowed me to contact you so I can mail you your FREE gift!

Sign up for my FREE Newsletter My Newsletters include stamping tips, ideas and updates on what is happening with me! You’ll also receive a FREE Class Tutorial using the 2017-2019 In Colors when you sign up!

Sweet Soiree Box Video Tutorial

Love boxes? Here is a quick and easy one you can make to hold small items. I made this box recently to hold a gift that my Team received – a scissors charm.

The Sweet Soiree Specialty Designer Series Paper is breath taking with the silver foil and one of my first purchases when I was able to do my OnStage Product Purchase Premiere that I shared with you back in November. The package has 12 patterns and each one of the 6 double sided patterns has a side with silver foil on it. So you’ve got lots of designs to choose from!

This adorable little box is so quick and easy to make that I couldn’t resist doing a video tutorial for you so you can make some too.

Sweet Soiree Box Video Tutorial

Easy? I’ve given you a complete supply list below for the box. And would you like to know how I made these charms?

Shrinky Dinks! Yes, you heard me right – a throw back to our childhood. I love watching them curl up and shrink. LOL!

Simply stamp the images from the Crafting Forever stamp set (143955/143958) onto the Shrinky Dinks using Basic Black Archival Ink and color them with Stampin’ Blends or Sharpies. (Be careful not to touch the line image or it may smear.)

I fussy cut the scissors and used a circle punch for the sentiments. After that I punched a 1/8″ circle using my Handheld Circle Punch. Heated according to the directions and then added them to a jump ring so that I could add them to the premade holder.

Quick and easy – since I made the scissors different colors we can all tell our scissors apart now!

Supplies: 

Stamp Set: Lovely Wishes (145924)

Inks: Old Olive (126953) and Berry Burst Classic Ink (144083)

Paper: Sweet Soiree Specialty Designer Series Paper (145664), Old Olive (100703), and Whisper White Card stock (100730)

Accessories: Personal Trimmer (126889) and Silver 3/8″ Metallic-Edge Ribbon (144213)


Click here to order your Stampin’ Up! Products online 24/7! (US only)

Shop at my Online Store in January and use Host Code RQGVFRW6 place a $75 order and receive a FREE gift!

Click Here to learn more about using the Hostess Code If you order Online make sure your profile information is up to date and you’ve allowed me to contact you so I can mail you your FREE gift!

Lots of Lavender Sachet Video Tutorial

I recently held my Occasions Catalog Kick Off the end of December and so I thought I’d share the projects that we made with you over the next few days along with the tutorials for them.  Today’s lavender sachet was their gift for attending.

Everyone was great about the fact I wasn’t able to finish assembling them myself due to a last minute procedure the day before, so it became a third project for them. LOL! I’ve got such a great group of stampers!

We had a lot of fun using the new products and stamping together. Everyone who attended not only made 3 fun projects, but also got to see the fun new products from them for the first time.

Want to see how they are made? I’ve whipped up a quick video tutorial for you and also a printed tutorial too!

Lots of Lavender Sachet Video Tutorial

Lots of Lavender Sachet Tutorial (Printable) PDF

Here is what I used to fill the sachets –

The recipe for the sachet filling is easy to make, I’ve included it in the Tutorial, all you need is some corn cob pet bedding and essential oils.

The Lots of Lavender Stamp Set is part of our FREE Sale-a-bration products. What is Sale-a-bration? It’s a great time of year! When you shop with me, for every $50 you spend (before tax and shipping), you get to choose a FREE product from the Sale-a-bration brochure. Plus, new this year: You can earn even bigger rewards when you spend $100. Just look for the $50 & $100 reward icons when looking through the brochure.

If you are shopping in my Online Store – the ordering system will prompt you and let you know which options you have.

There are 3 ways to save and earn during Sale-a-bration – Shop, Host or Join the choice is yours! Let’s set a private party date today for you and your friends so you can Host and earn an extra $25 in Host Rewards!

Got questions? Please let me know I’m here to help.

Stop back by tomorrow when I’ll be sharing one of the cards we made using the Flying Home stamp set from the Occasions Catalog.

Click here to order your Stampin’ Up! Products online 24/7! (US only)

Shop at my Online Store in January and use Host Code DJ9ZJAKU place a $50 order and receive a FREE gift!

Click Here to learn more about using the Hostess Code If you order Online make sure your profile information is up to date and you’ve allowed me to contact you so I can mail you your FREE gift!


Wondering How to Get YOUR Copy?

  • If you haven’t ordered in a while
  • Don’t have a demonstrator

Contact me at stampwithjini@gmail.com or give me a call. I’ll be happy to mail you one or if your local set one aside for pick up

Last Minute Gifts – Musical Notebooks

Today’s project is a quick one I whipped up for two of my daughter’s friends who just graduated with their Music Therapy degrees. Are you noticing a theme in my house? This note books are quick and easy to make with just a few supplies.

I really like the way they turned out and hope they will too.

How did I make them? First I chose the Designer Series Paper I wanted. You need two sheets to do these composition note books.

I measured and cut my Designer Series Paper, added my favorite adhesive, Tear & Tape and adhered. Yep – It’s just that quick and easy to do! Then I finished decorating as desired.

Supplies:

Paper: Merry Music Specialty Designer Series Paper (144623), Basic Black (121045), Real Red (102482), Bermuda Bay (13197) and Whisper White Card Stock (100730)

Accessories: Layering Ovals Framelits Dies (141706) and Large Letter Framelits Dies (141712), and Bermuda Ab Mini Chevron Ribbon (144198)

Click here to order your Stampin’ Up! Products online 24/7! (US only)

Shop at my Online Store in December and use Hostess Code ANN4HBHX place a $25 order and receive a FREE gift from me!

Click Here to learn more about using the Hostess Code If you order Online make sure your profile information is up to date and you’ve allowed me to contact you so I can mail you your FREE gift!

Sign up for my FREE Newsletter My Newsletters include stamping tips, ideas and updates on what is happening with me! You’ll also receive a FREE Class Tutorial using the 2017-2019 In Colors when you sign up!

Last Minute Stocking Stuffers

I have been limited with my shopping radius lately – so the Dollar Tree has been a favorite spot to stop and I’ve found sound fun items such as the lemon candy canes and these mints.

The tin is Cherry Cobbler so it was perfect to make these little treats that were inspired by the chap stick holders I shared with you HERE.

Here’s what I came up with

I simply cut the Be Merry Designer Series Paper 3″ x 7″ added a bit of Fast Fuse to each end and wrapped it around the tin. I stamped the sentiment in Garden Green Classic Ink and cut it out using the Stitched Oval Framelits Die. Then I layered the sentiment using a couple of Stampin’ Dimensionals onto a Cherry Cobbler Scallop Circle and adhered it to the center of the wrap. Finally I grabbed my Garden Green 3/8″ Stitched Satin Ribbon, wrapped it around the tin and tied a bow. I just LOVE the way this ribbon ties!

Voila! finished in under 5 minutes too!!!

While I used these little treats the tin is about the same as an Altoids tin – I just loved the color of the tin. LOL!

And how about some more cards? These stamp sets can all be found in our Annual Catalog

Supplies: 

Stamp Set: Snowflake Sentiments (144817/144820)

Inks: Garden Green classic Ink (126973)

Paper: Be Merry Designer Series Paper (144111), Cherry Cobbler (119685) and Whisper White Card stock (100730)

Accessories: Garden Green 3/8″ Stitched Satin Ribbon (144181), Layering Ovals Framelits Dies (14176) and Stitched Shapes Framelits Dies (145372)

Click here to order your Stampin’ Up! Products online 24/7! (US only)

Shop at my Online Store in December and use Hostess Code ANN4HBHX place a $25 order and receive a FREE gift from me!

Merry Music Post It Note Holder Tutorial

Here is a project that I’m making for my daughter and her coworkers for the holiday season. I thought it would be a useful item since they are teachers – that is if they can find the ever elusive pen on their desks. LOL!

Hmmm…. maybe I should include a pen holder too? I’m going to have to think about that. I made these in Real Red since the High School colors are Black & Red.

Want to see a video so you can whip some up too?

Merry Moments 3×3 Post It Note Holder Video Tutorial

What do you think? A great gift item? And good news right now you can find 12×12 Card stock in a pack of 24 sheets in Cherry Cobbler (144646) and Old Olive & Kraft (144622) with 12 sheets each on our Holiday Catalog Retirement list so you can make lots of these. We also carry assortment packs in our Annual Catalog like I used here. I’ll give you a complete supply list below.

Oh and here is a printable tutorial for you too!

Merry Music 3×3 Post it Note Holder Tutorial (printable PDF)

Enjoy!

Supplies: 

Stamp Set: Flourishing Phrases (141531/141534)

Inks: Basic Black Archival Ink Pad (140931)

Paper: Merry Music Specialty Designer Series Paper (144623), Best Brights 12×12 Card stock (145409), Basic Black (121045) and Whisper White card stock (100730)

Accessories: Layering Ovals Framelits Dies (141706), Musical Instruments Framelits Dies (144677), and Simply Scored Scoring Tool (122334)

Adhesives: Snail (104332/104331) and  Fast Fuse Adhesive (129026)

Non Stampin’ Up!: 3×3″ Posit It Notes

Click here to order your Stampin’ Up! Products online 24/7! (US only)

Shop at my Online Store in December and use Hostess Code ANN4HBHX place a $25 order and receive a FREE gift from me!

Want a 2018 Occasions Catalog?

  • Are you a frequent customer of mine? You’ll be the first to get one!  If you live locally you can pick up one at my December events. Not local or live out of State? No worries – I’ll be mailing one to you soon.
  • Haven’t ordered from me in a while or are new? Place an order with me during the month of December. (Make sure your Online Profile information is up to date so I can get it to you!)


Click Here to learn more about using the Hostess Code If you order Online make sure your profile information is up to date and you’ve allowed me to contact you so I can mail you your FREE gift!