Need a quick and easy gift? Love to create 3d projects? If so you’re going to love this quick and easy sticky note holder that I created for my Maui Incentive Trip swap. Pop it into one of our little cello bags, add a pen and wrapped it up with some ribbon. Voila!
This cute little project uses our NEW Hand-Penned Designer Series Paper and it’s soft subtles shades perfect for spring! And of course the very popular Brilliant Wings Dies. I just love this die set since you cut multiple butterflies at one time. Makes things quick and easy. I did a trips and tricks video for this die to help you get the best results. You can see that video HERE.
Want to see how I made them? Why not check out my video tutorial? I’ll warn you they are a lot of fun to make and so easy, once you get started you may not want to stop. lol
Brilliant Wings Easel Sticky Note Holder Video Tutorial
And here is a PDF that contains measurements, supply list and step by step directions. As always I’ve included the video link on the PDF so you have everything you need once you get your supplies.
Brilliant Wings Easel Sticky Note Holder Tutorial PDF
Enjoy!
Supplies:
Stamp Set: Enjoy the Moment (155523)
Inks: Basic Gray Classic Ink (149165/149166)
Paper: Hand Penned Designer Series Paper (155499), Mint Macaron (138337), Basic Gray (121044), and Basic White Card stock (159276)
Accessories: Double Oval Punch (154242), Brilliant Wings Dies (*155523), and Genial Gems (155500)
Shop at my Online Store and use Host Code Y3ES9HYC
Click Here to learn more about using the Hostess Code If you order Online make sure your profile information is up to date and you’ve allowed me to send you your free gift, and you’ll receive the new 2021-2023 In Color Swatches
If your Online order is $150 or more make sure not to use the host code so that you can take advantage of the Host Benefits yourself – No worries, I’ll still send you your free gift. It’s my way of saying thank you for choosing me as your demonstrator!
Want a 2021 Annual Catalog?
It’s FREE simply pay the shipping or pick up. Contact me today at stampwithJini@gmail.com for yours today!
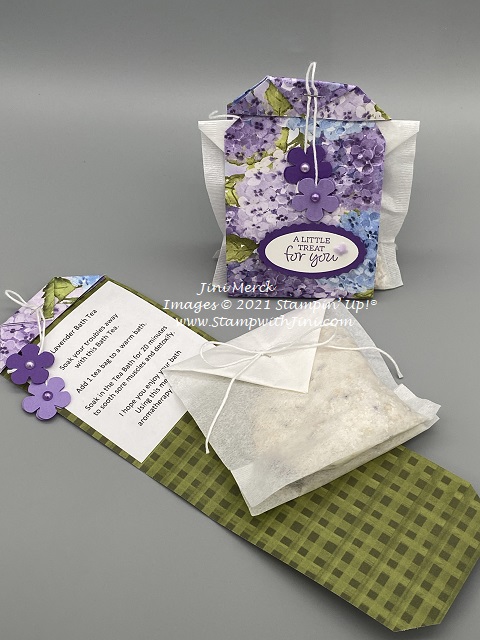
I love to create homemade recipes for pampering myself at home, and last fall I found this fun Lavender Tub Tea that sooths the skin and creates a luxurious bath experience to go along with my sugar scrubs I’ve shared with you in the past. So I knew I wanted to whip some up to share with my Team for their day of pampering at my Peak Princess event. Here is what I came up with.
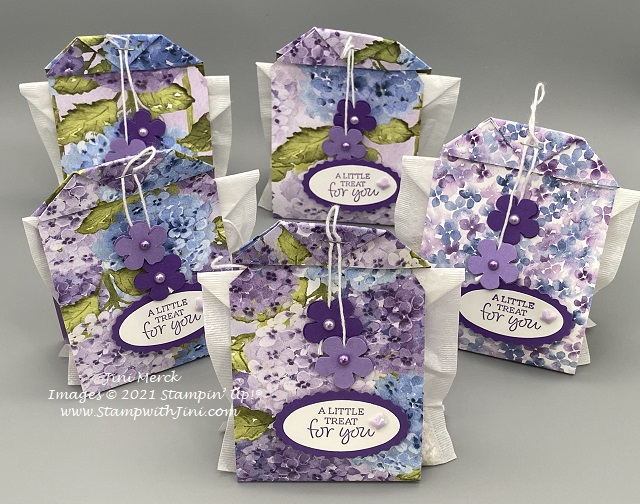
A quick and simple packaging idea to hold this special little tub tea bag. And while I was thinking lilacs instead of lavender when I designed it, don’t ask me why, I think the purples from the Hydrangea Hill Designer Series Paper goes lovely with the tea bags any how. And you can get a ton of holders out of just one package of paper, making it perfect for sharing with friends.
I’ve created a quick video for you so you can see how I made them.
Oval Occasions Bath Tea Holder Video Tutorial
And great news the tub tea is soooo easy to make with ingredients you may even have around the house. This herbal tea is packed with herbs, salts and other skin soothing treatments creating a luxurious bath when steeped. It’s a perfect way to warm up and relax during the cold winter months. When you’re done simply remove the tea bag – no messy clean up!
Lavender Oatmeal Tub Tea Recipe
2 cups Epson Salts
2 heaping Tablespoons Dried Lavender
15-20 drops Lavender Essential Oil
1 cup oatmeal
1 cup powdered milk
9 Extra Large (Size 4) tea filters
Grind the oatmeal in a food processor or blender to get a coarse powder.
Mix the Epson salts, dried lavender and essential oils in a large bowl and stir. Then add in the powdered milk and ground oatmeal. Mix well. Fill your tea bags with about 1/3-1/2 cup of mixture and seal as desired.
I did find that you want to make sure to place this little gift into a cello bag (102210) or Clear Envelope (102619) – It helps fragrance from the dried Lavender and Essential Oil last longer it also helps keep things cleaner too.
And of course it never hurts to have a printable PDF tutorial. This one not only includes a supply list and my step by step instructions. It also has the recipe and labels all in one handy document making it easy to reference again and again.
Wondering where I got the tea bags and lavender? I’ve added the links for the items I used for my gifts on the pdf for you in case you’re wondering where to find them.
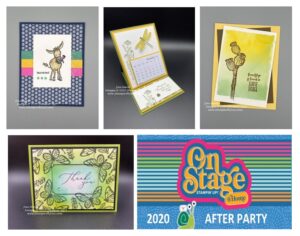
Today’s projects were all created by my team for our last swap. So today I thought I’d share them with you.
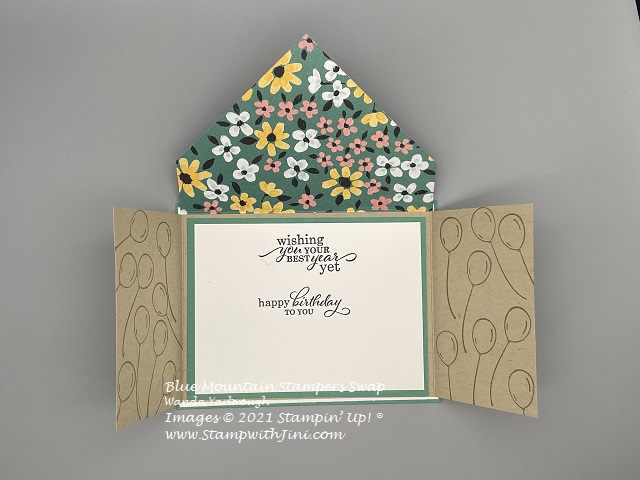
This first card uses a Arrow Flap Gate Fold and the Hey Girlfriend stamp set (154516).
The Flower & Field Designer Series Paper (Sale-a-bration 155223) and Best Year stamp set (152568) were used to create interest for the back drop of this cute little image.
And this next card uses the Friendly Flamingo (154386) stamp set and Flamingo Dies (154313) for this tropical themed birthday card.
This little flamingo is so cute and with just a bit of sponging makes an impact. And if you like both did you know you can save 10% when you purchase the Bundle (156212)?
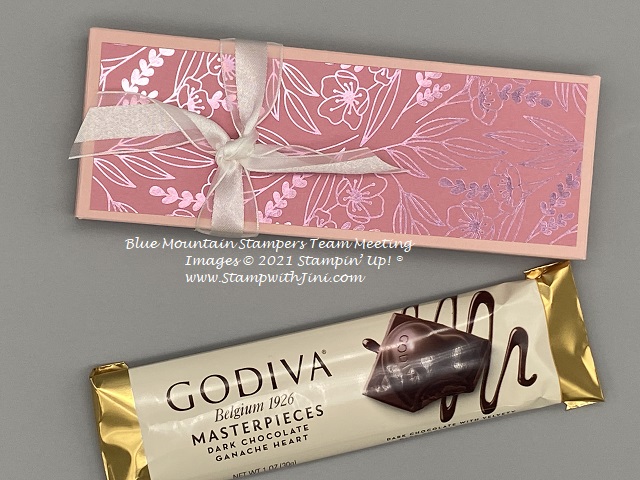
Of course everyone loves a gift box, this next project is a 3d Chocolate bar holder using the Love You Always Specialty Designer Series Paper (154280).
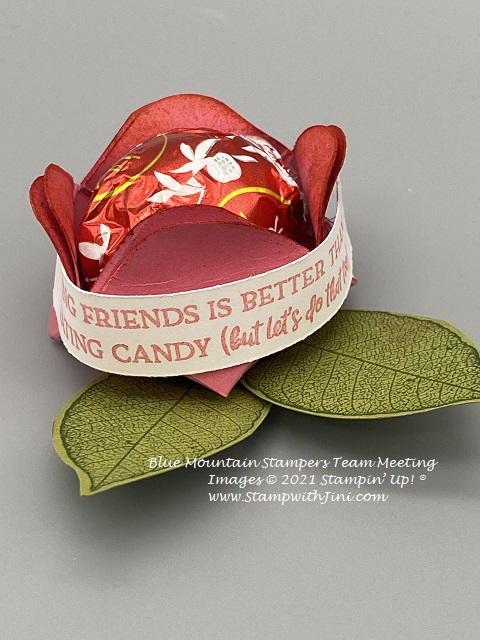
And here is another 3d project using the Heartfelt stamp set (151417) for the little sentiment that wraps around the rose bud. Wanda shared with us how she made them for the Caring with Cards program for our local elementary school this month. I think the staff are really going to enjoy this little treat!
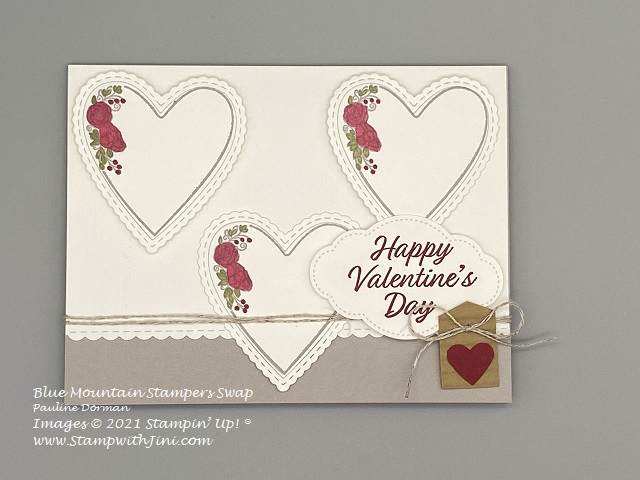
And finally a lovely Valentine, change out the sentiment and it would make a lovely anniversary or wedding card too.
This card uses the Meant to Be stamp set (148626) and Mine Be Stitched Dies (151814) to create this soft sweet card filled with love.
If you’ve ever thought about joining a great group of crafters, the Blue Mountain Stampers might be just the place for you. There are just a few hours left to join during our special Sale-a-bration Promotion that ends tomorrow night.Click HERE to learn more about the special Kit worth almost $200 you can get during Sale-a-bration for just $99
What are the Blue Mountain Stampers?
That’s the name of our stamping community. We enjoy welcoming new members to our group and we’re from all over. If you’re considering joining Stampin’ Up!, you may have questions about how I would support you as part of my team. I do offer a variety of ways to learn, grow and to have FUN as a Blue Mountain Stamper!
Exclusive Team Resource Page – videos, PDFs and more
Exclusive Face book Group – A great way to share and connect with other team members and share
Monthly Creative Challenges
Swapping Opportunities
Team Retreats
Meetings – both local and online/virtual
Monthly Crafting Day
Caring with Cards – a community service project
Monthly Lunch & Learn
Recognition & Incentives
Training available for workshops, clubs, classes and more!
Additional support and business coaching available
We have a very active group that share and answer each other’s questions on our Exclusive face book group. If you’re looking for fun, a place to grow and share with others…You’ll fit right in!
Hobbyists are welcome!
Did you know? 95% of my Blue Mountain Stampers’ areHappy Shoppers – purchasing for themselves, (along with their family and friends.) That’s right…you can just get a discount on products you love!
We welcome the crafter who’s looking to be a “happy shopper” (and save money), as well as those of you that want to build a business (and make money).
Everyone is welcome after all there’s room for both and everyone in between.
And there is NO Obligation when you purchase your starter kit – Join the Blue Mountain Stampers and see what it’s all about!
Yesterday I shared with you a fun little treat holder and today I wanted to share my Easter version with you.
This treat holder is sooo easy to make with a few score lines and the Oh So Ombre Designer Series paper is perfect for this project since it comes in 6×6 and requires no cutting! And even better you get 12 sheets of each pattern so you can make 48 from one pack of paper!
I’ve colored this cute little spring image with my Stampin’ Blends making it quick and easy and gives it a clean look. Do you see the bit of shine in the center of the flowers? Its the 2020-2022 In Color Enamel Dots – So much fun!
You can see how I made these little treats in my video tutorial yesterday, but I wanted to make sure you had a PDF tutorial for this project so you have the step by step instructions that I used too. Why not check it out?
Love this project? The Oh So Ombre Paper is one of our Sale-a-bration products that will be gone for good after Sunday, February 28th. So you’ll want to place and order so you can earn this FREE item with your qualifying order before it’s too late.
Love quick and easy treats? I know I do – I love cute packaging that brings a smile to that special someone’s face. And the Flowers for Every Season 6×6 Designer Series Paper makes these treats quick and easy!
I whipped these up last week for my team’s Peak Princes event on Sunday. This event celebrates my teams accomplishments over the last 6 months, so this sentiment seemed perfect for it. I not only tucked in some chocolate, because who doesn’t love that? I also included their lanyard charm that I created with one of our embellishments too.
Check out just how quick and easy it is to make with just some score lines in my video tutorial so you can whip some up too!
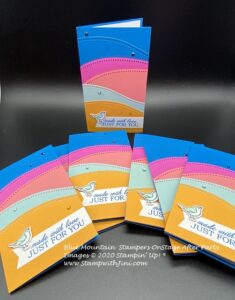
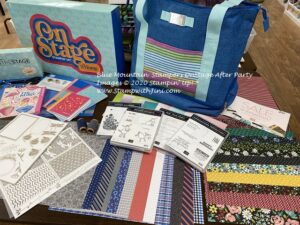
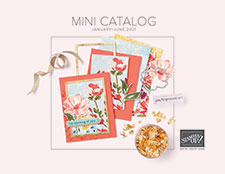
I love sharing with my team and coming home after a Stampin’ Up! event is no different. While this year we gathered virtually we still were able to gather for an After party and share the excitement of the NEW 2021 January – June Mini Catalog.
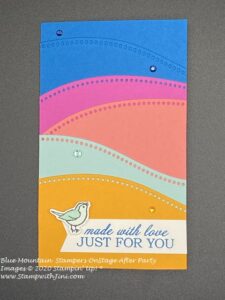
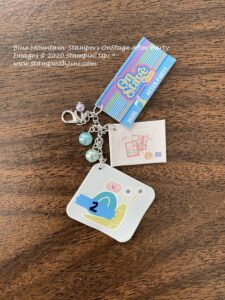
So I created these cute little flag holders using the Quite Curvy Bundle (156228) that is currently available. I just love these little sweet birds!
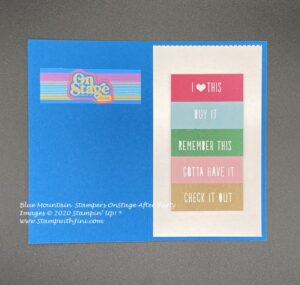
I used the colors from our OnStage@Home swag so everything coordinated
and was able to put the logo on the inside of these folders with the little flag sticky notes. We are going to need lots of sticky notes!!!
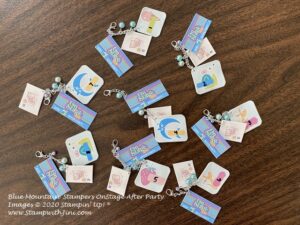
I also put together some little charms using some images from the stamp sets, the catalog, and logo. Each one was a bit different
but they all had one thing in common – a prize patrol number!
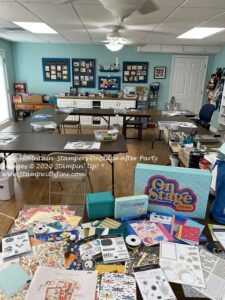
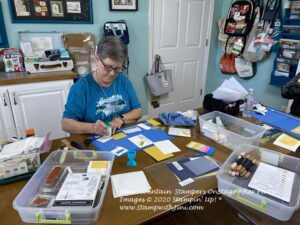
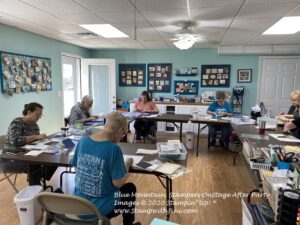
Things were all set up for a light lunch and an couple of hours with the team.
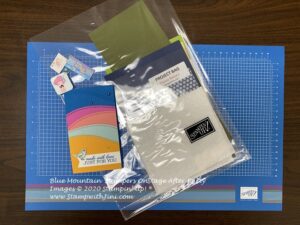
Of course, no team event is without stamping, so I had packets for everyone with their little team gifts waiting for them all their stamping spot.
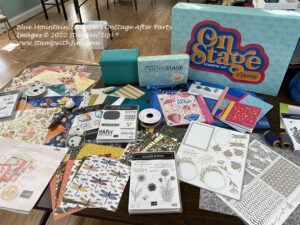
We also had a table to share all the Product Purchase Premiere goodies – there is nothing like being able to touch and feel in person!
And of course I shared my copy of the real Mini & Sale-a-bration Catalogs that they could look at too.
We made 4 projects using new products from the 2021 January – June Mini Catalog and Sale-a-bration brochure.
And of course while we stamped prize patrol numbers were called and prizes were given out!
Lots of smiling faces
Want to see our projects?
Not only did stamp together, we got to use the new Blending Brushes found in the Mini Catalog and learn a fun new technique too.
I’ll be sharing these projects with you later so stop back by to see my tutorials and videos for these projects and more!
So what do you think? Sound like fun? Love the new items too? It’s just a peek of what’s inside the 2021 January – June Mini Catalog! And as I am sure you can guess, being the first to see this new catalog or any of our new catalogs is a very exciting AND a huge perk of being a Demonstrator – after all who wouldn’t want to be first? Right!
Add the fact that you’ll receive a discount on all these products and you can’t lose! If you feel this is a good time to join Stampin’ Up! and my team, the Blue Mountain Stampers, you too can be first too!
What are the Blue Mountain Stampers?
That’s the name of our stamping community. I enjoy welcoming new members to our group. We’re from all over. If you’re considering joining Stampin’ Up!, you may have questions about how I would support you as part of my team. I do offer a variety of ways to learn, grow and to have FUN as a Blue Mountain Stamper!
Exclusive Team Resource Page – videos, PDFs and more
Exclusive Face book Group – A great way to share and connect with other team members and share
Monthly Creative Challenges
Swapping Opportunities
Team Retreats
Meetings – both local and online/virtual
Monthly Crafting Day
Monthly Lunch & Learn
Recognition & Incentives
Training available for workshops, clubs, classes and more!
Additional support and business coaching available
We have a very active group that share and answer each other’s questions on our Exclusive face book group. If you’re looking for fun, a place to grow and share with others…You’ll fit right in!
Crafting Enthusiasts are welcome!
Did you know? 90% of my Blue Mountain Stampers’ areHappy Shoppers – purchasing for themselves, (along with their family and friends.) That’s right…you can just get a discount on products you love!
We welcome the crafter who’s looking to be a “happy shopper” (and save money), as well as those of you that want to build a business (and make money).
Everyone is welcome after all there’s room for both and everyone in between.
And there is NO Obligation when you purchase your starter kit – Join the Blue Mountain Stampers and see what it’s all about!
Shop at my Online Store and use Host Code XDUYBZCA
Click Here to learn more about using the Hostess Code If you order Online make sure your profile information is up to date and you’ve allowed me to send you your free gift, a FREE Class using the Poinsettia Place Suite of Products found in the Mini Catalog.
Are you eligible for a FREE Stampin’ Up! 2021 January-June Mini Catalog?
I’m currently working on my mailing list for shipping the 2021 Catalogs (and will be finalizing it by November 29th) –
You’ll be the first to get one (around the mid December) if:
Are you a frequent customer of mine? If you ordered a minimum of $50 from me in the last three months (or 90 days) you are eligible to receive FREE Stampin’ Up!Catalogs.
Have you hosted a Private Party? If you have gathered with friends in the last 3 months (or 90 days) you are eligible to receive FREE Stampin’ Up! Catalogs.
Haven’t ordered from me for a while or are new? Place an order with me and you are eligible to receive a FREE Stampin’ Up!Catalog. (If you are placing an Online Order make sure your information is up to date and correct).
If you are not a current customer and would like to order a Free 2020-2021 Annual Catalog simply by paying for the Shipping, please contact me by email at StampwithJini@gmail.com so I can send you a PayPal invoice for $7.75 postage OR click the PayPal Button below to pay for the postage (Catalog will be mailed to your PayPal address)
Each month we gather to stamp and share with each other and so today I thought I’d share some of the fun cards that my team members have created over the past 2 months. I can’t believe they got buried on my desk and I haven’t shared them with you before now.
These first 2 cards use the Country Home stamp set (147678) from the Annual Catalog that you can find on page 90. This first one uses the beautiful Plaid Tidings Designer Series Paper (153527) to choose it’s color pallet.
And both these cards have been colored with our Stampin’ Blends which gives them that great bold rich, color.
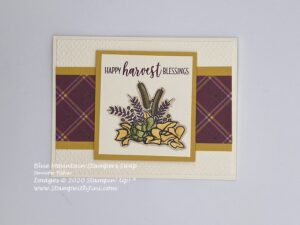
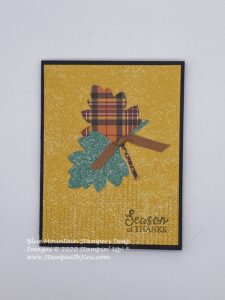
And here is fun fold card using the Beautiful Autumn Stamp set () and lovely Gilded Autumn Specialty Designer Series Paper (153520).
This card uses the fun impossible fold to create a card that pops up but mails flat.
And one using our Stitched Leaves Dies (153567) that has been teamed up with the colorful Plaid Tidings Designer Series Paper (153527) again.
I really like the way these dies have the stitched edging that can be used on negative images like this and on the positive images too.
A gratitude journal made with the lovely Ornate Garden Specialty Designer Series Paper (152488) – done in 6×6 and filled with paper to fill. A page for each person to personalize or use it as a lovely book to use yourself.
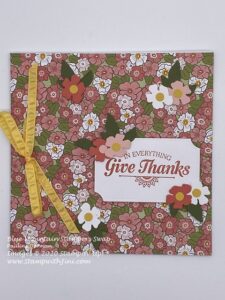
This next project uses the Grace’s Garden stamp set (151513) and is a fun fold card.
That once again folds flat for mailing.
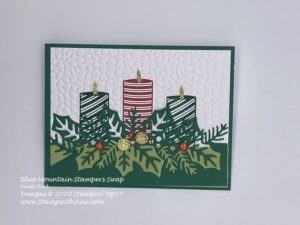
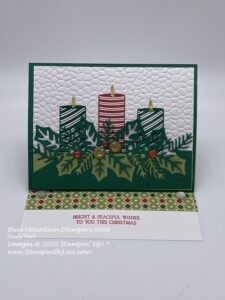
This next grouping of projects is for Christmas and I’ll continue with some more fun folds. First this easel card that uses the Sweetest Time Bundle (155169).
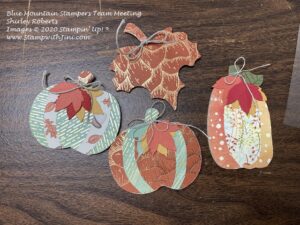
And last but not least Shirley shared some little wooden pumpkins she made using the technique we used during our Peak Princess Event. You can see more and the tutorial for that project about that HERE.
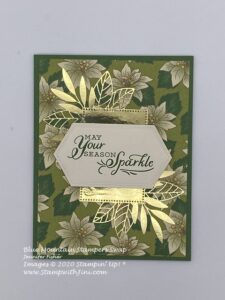
And how about some Christmas projects? This first card uses the Poinsettia Place Designer Series Paper (153487) and teams it up with the beautiful Forever Gold Laser Cut Specialty Paper (152493)
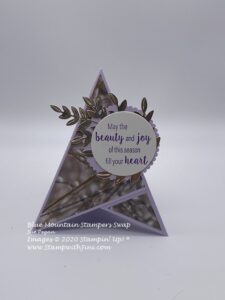
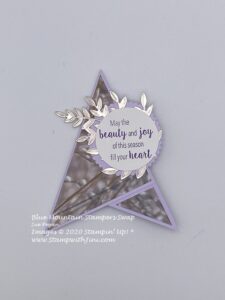
And for a here is a fun fold teepee card using our Feels Like Frost Designer Series Paper (150444) with it’s beautiful images.
Champagne foil Sheets (144748) were cut out using the Forever Flourishing Dies (152714) and were used as a backdrop for the sentiment. This card also folds flat for mailing simply by undoing the well placed velcro dot.
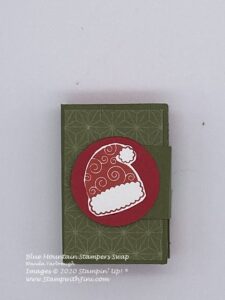
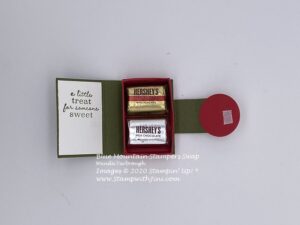
And now for some fun 3d projects – A cute little box that holds a couple of nuggets using the Little Treats stamp set (153516).
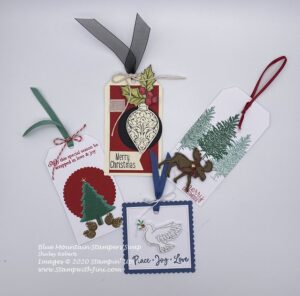
And fun tags using a variety of the holiday stamp sets found in the Annual and Holiday catalog. Can you name them all?
There are 4 different stamp sets used for these tags. Don’t look if you are still guessing but here is the list. Detailed Doves (153406), Christmas Gleaming (150464), Merry Moose (150494), and Perfectly Plaid (149418). Hand made tags for your packages make them extra special and are a lot of fun to make!
whew… what did I tell you, lots of great projects! I’m truly blessed with such a great team to share and stamp with.
If you have ever thought becoming a demonstrator and getting your favorite stamping products at a discount. We’d love to have you join us. CLICK HERE to learn more about my Team the Blue Mountain Stampers.
Shop at my Online Store and use Host Code XDUYBZCA
Click Here to learn more about using the Hostess Code If you order Online make sure your profile information is up to date and you’ve allowed me to send you your free gift, a FREE Class using the Poinsettia Place Suite of Products found in the Mini Catalog.
If your Online order is $150 or more make sure not to use the host code so that you can take advantage of the Host Benefits yourself – No worries, I’ll still send you your free gift. It’s my way of saying thank you for choosing me as your demonstrator!
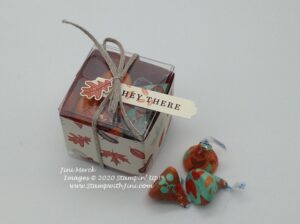
Yesterday I shared the Home Decor project that we made at the Peak Princess event this past weekend, today I thought I’d share the little treat item that I made.
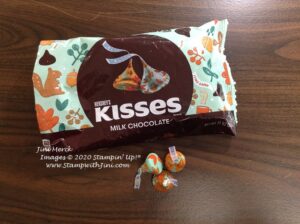
They are filled with these fun fall Hershey’s Kisses that I found locally.
I just love the colors of the candy – yes, I do shop for candy that way. (My daughter thinks this is a pretty crazy way to shop for chocolate, but she is always on the hunt for me too!)
These treats were quick and easy to make for everyone. I have whipped up a quick video so you can make some to if you’d like.
Beautiful Autumn Tiny Treat Box Video Tutorial
And of course it’s always fun to have a PDF that contains a complete supply list for projects. So here it is.
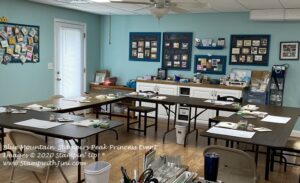
I also mentioned I’d share some more photos so here are a couple from the classroom.
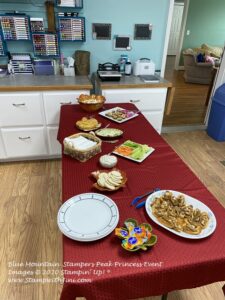
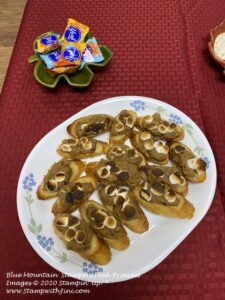
This last picture is of the Sweet Potato Crostini I made for the event. The marshmallows spent a bit too much time under the broiler I’m afraid. Don’t you hate that? But they were still quite tasty.
They were a big hit with my guys so I thought you might enjoy the recipe – they are light, tasty and easy to do.
Sweet Potato Crostini
2 T. sugar
1/2 tsp. cinnamon
24 slices 1/4″ thick French bread baguette
2 to 3 T butter, melted
Topping:
2 c. mashed sweet potatoes
1/4 c. chopped pecans
3 T. packed brown sugar
2 T. butter, melted
1 1/4 c. miniature marshmallows, halved
Preheat oven to 350 degrees. Mix sugar and cinnamon. Arrange bread sliced ona baking sheet. Brush with butter; sprinkle with sugar mixture. Bake until lightly browned, 5-7 minutes. Remove from oven; preheat broiler.
Mix sweet potatoes, pecans, brown sugar, and butter; spread over toasts. Top with marshmallows, pressing lightly. Broil 3-4 inches from heat until marshmallows are lightly toasted, 1-2 minutes.
Shop at my Online Store and use Host Code B74BJ7HF
Click Here to learn more about using the Hostess Code If you order Online make sure your profile information is up to date and you’ve allowed me to send you your free gift, a FREE Class using the Beautiful Autumn Bundle.
If your Online order is $150 or more make sure not to use the host code so that you can take advantage of the Host Benefits yourself – No worries, I’ll still send you your free gift. It’s my way of saying thank you for choosing me as your demonstrator!
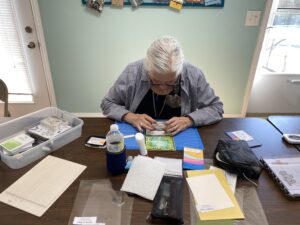
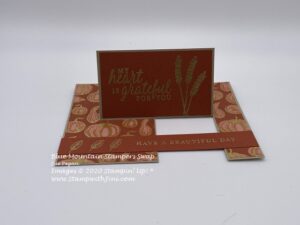
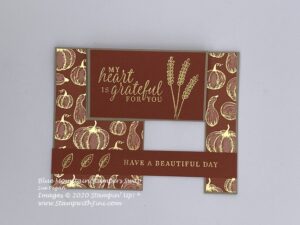
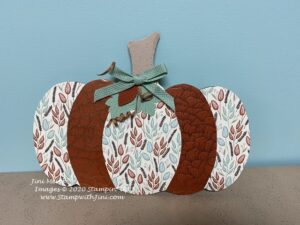
This past weekend I gathered with my Team, The Blue Mountain Stampers for a special biannual event. This event allows us to gather and celebrate everyone’s accomplishments over the last 6 months. We have a special project, along with prizes, and appetizers. So today I thought I’d share our project that we made.
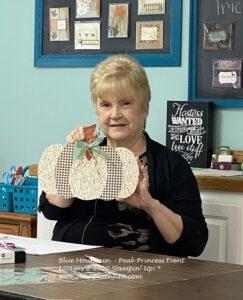
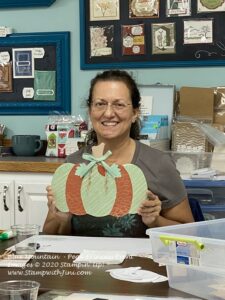
This project was a lot of fun to make and everyone’s turned out differently since they could decide on which patterns they wanted to use. Here is mine.
I really love the colors and patterns of the Gilded Autumn Suite of Products and so I couldn’t resist making a home décor item with them. I also really love the way the little swirls of copper ribbon finish off this project. They are so easy to make – I bet you are wondering how I made them too!
You’ll need a wooden skewer or dowel along with your heat tool and Heavy Spray Starch. Yep, that’s it! You’ll also need a bit of patience as you make them since it does require some dry time tho. I’m not sure how they would hold up outside, but since I’m planning on using this project inside my home I wasn’t worried about our heavy Georgia humidity of late.
Want to see how we made them? Here is a video for you.
Gilded Autumn Pumpkin Home Decor Project Video Tutorial
Gilded Autumn Pumpkin Home Decor Project Tutorial PDF
I’ve also included a link for the pumpkins and PDF pattern on this Tutorial for you.
Want to make some of these too? Here is the information on the wooded pumpkins for you that I found on Amazon along with a PDF pattern for this pumpkin.
I really love these gatherings we have a lot of fun together and it’s a great time to share what’s been happening in our lives, and relax too. Here are a couple of pictures for you of some of the finished projects.
Have you ever thought about getting a discount on your favorite Stampin’ Up! products? Or join a group of crafters who enjoy crafting together? Then the Blue Mountain Stampers might be right for you!
What are the Blue Mountain Stampers?
That’s the name of our stamping community. I enjoy welcoming new members to our group. We’re from all over. If you’re considering joining Stampin’ Up!, you may have questions about how I would support you as part of my team. I do offer a variety of ways to learn, grow and to have FUN as a Blue Mountain Stamper!
Exclusive Team Resource Page – videos, PDFs and more
Exclusive Face book Group – A great way to share and connect with other team members and share
Monthly Creative Challenges
Swapping Opportunities
Team Retreats
Meetings – both local and online/virtual
Monthly Crafting Day
Monthly Lunch & Learn
Recognition & Incentives
Training available for workshops, clubs, classes and more!
Additional support and business coaching available
We have a very active group that share and answer each other’s questions on our Exclusive face book group. If you’re looking for fun, a place to grow and share with others…You’ll fit right in!
Hobbyists are welcome!
Did you know? 90% of my Blue Mountain Stampers’ areHappy Shoppers – purchasing for themselves, (along with their family and friends.) That’s right…you can just get a discount on products you love!
We welcome the crafter who’s looking to be a “happy shopper” (and save money), as well as those of you that want to build a business (and make money).
Everyone is welcome after all there’s room for both and everyone in between.
And there is NO Obligation when you purchase your starter kit – Join the Blue Mountain Stampers and see what it’s all about!
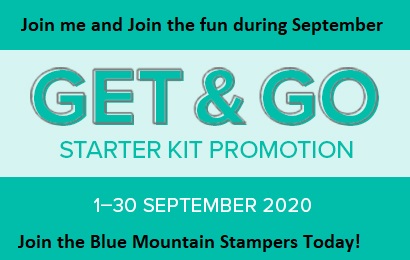
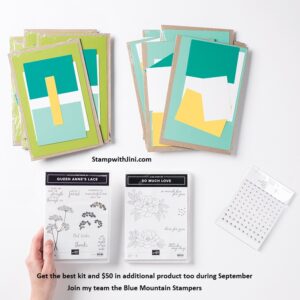
Right now is a great time to join with our GET & GO PROMOTION
Not only will you receive 2 additional Stamp Sets in your kit and card kits to make things with you’ll also get to choose $125 in product too! AND Shipping is free! That’s almost $200 in product for just $99 plus tax!!!
And there is no obligation
But you’ll want to hurry since there are less than 48 hours left to take advantage of this great promotion!
Shop at my Online Store and use Host Code B74BJ7HF
Click Here to learn more about using the Hostess Code If you order Online make sure your profile information is up to date and you’ve allowed me to send you your free gift, a Beautiful Autumn Class with PDF & Videos.
If your Online order is $150 or more make sure not to use the host code so that you can take advantage of the Host Benefits yourself – No worries, I’ll still send you your free gift. It’s my way of saying thank you for choosing me as your demonstrator!
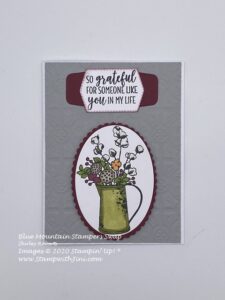
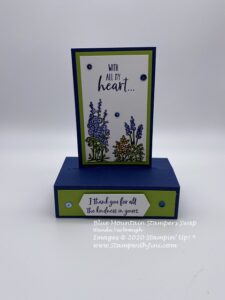
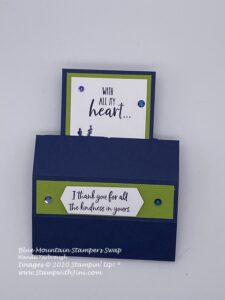
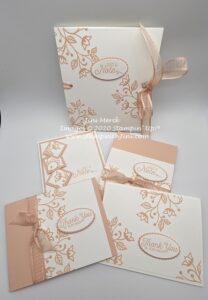
Today’s project is a fun one that creates a lovely set of cards with a holder. It’s done in a soft and subtle classic color combo too so it’s a perfect gift for all kinds of occasions.
Why not create some for your gift giving needs? While we are sheltering and place and have a bit of time at home it’s a great time to plan ahead and get some things done for this years holiday season. Yes, you heard me right, holiday season. I’ve been creating hand stamped projects for gift giving not only to have on hand but to get ahead of the busy holiday season too! Plus as an added bonus stamping and creating reduces my stress level too since it is a chance to relax in my craft space.
And since this set of cards doesn’t require a huge list of supplies to create it’s perfect for those who are beginning to build their stamping supplies too or just want to get something new.
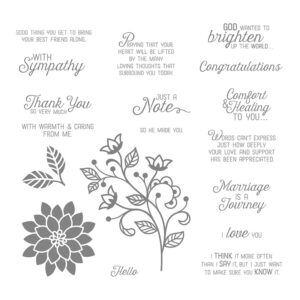
This stamp set has some great images along with a variety of sentiments done in a lovely font – so it is perfect and very versatile for all kinds of projects!
I’ve quickly whipped up a printable tutorial for you today since I wanted to share this with you earlier and it got buried under things in my studio. So why not check it out?
Flourishing Phrases Card Set & Holder Tutorial PDF
Sorry, no videos this time as I wanted to share this with you as quickly as possible. 🙂
Shop at my Online Store and use Host Code F66EBVG6
Click Here to learn more about using the Hostess Code If you order Online make sure your profile information is up to date and you’ve allowed me to contact you and mail you a 2020 Annual Catalog (If you chose no contact in the past you’ll need to call 1-800-Stamp Up to have them change your profile for you.)