Brusho Masking Technique Video Tutorial

The Brusho Color Crystals are so much fun to play with I don’t want to stop! If you haven’t tried them yet, you won’t be disappointed with the variety of uses with your projects.

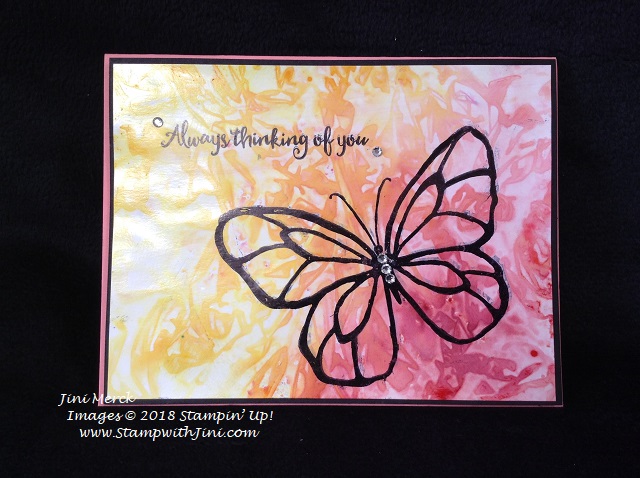
Here is a card we made during our April Team meeting that focused on different Brusho Techniques.

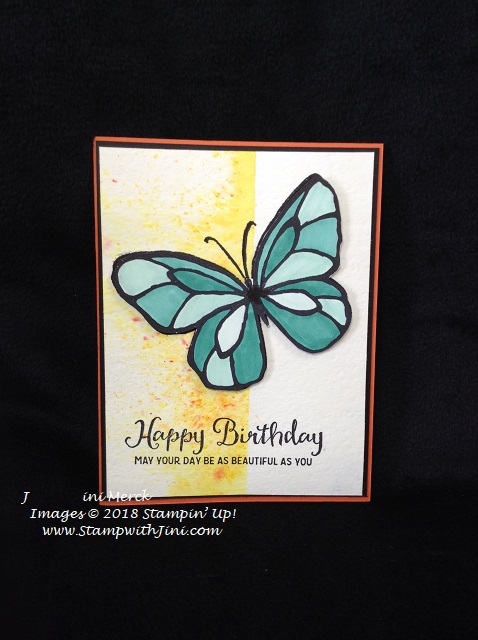
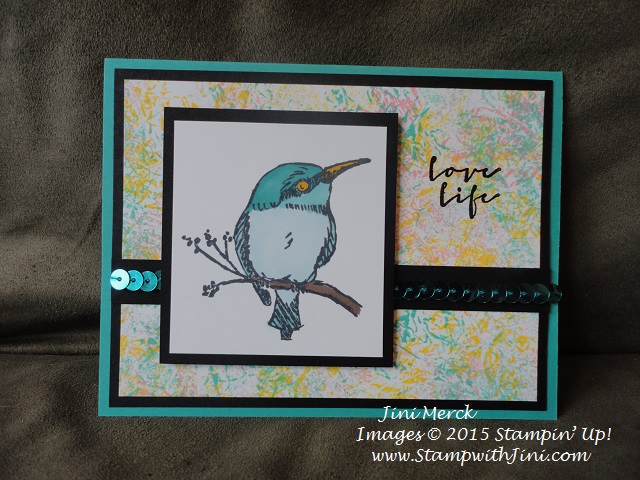
This card uses a simple masking technique that creates a wonderful look and was soooo easy to do with a bit of painter’s tape!

Want to make some too? Here is a tutorial for the card so you can play and create too.

Beautiful Day Brusho Masking Technique Card PDF

And how about a video tutorial showing you just how simple it is?

Brusho Masking Technique Video Tutorial

Fun, right? If you’d like to see more of the fun Brusho Techniques I’ve shared earlier Click HERE and HERE


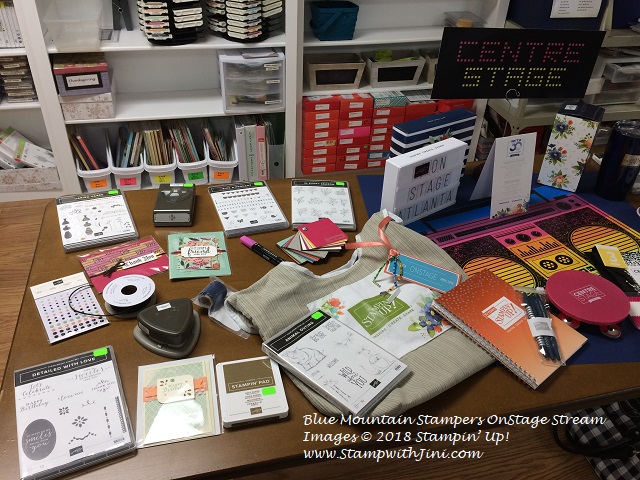
Blue Mountain Stampers’ OnStage Stream Event

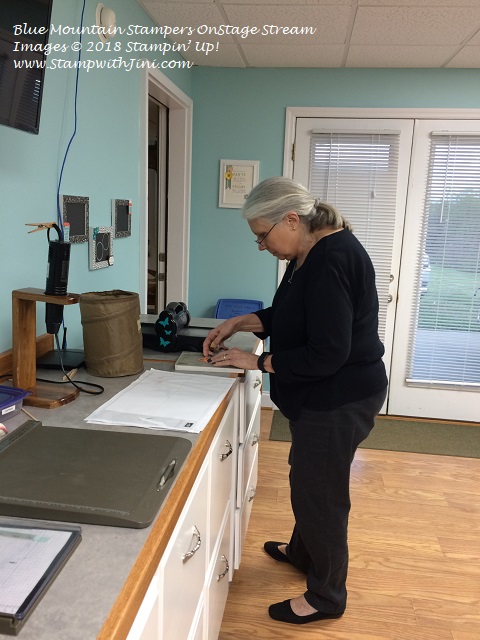
I love to share and so as a team we always gather together to share with those team members who weren’t able to attend the Stampin’ Up! event itself. We gather, have dinner, stream and stamp together with the new products introduced from the latest catalog – this time the NEW 2018 Annual Catalog & the color revamp!

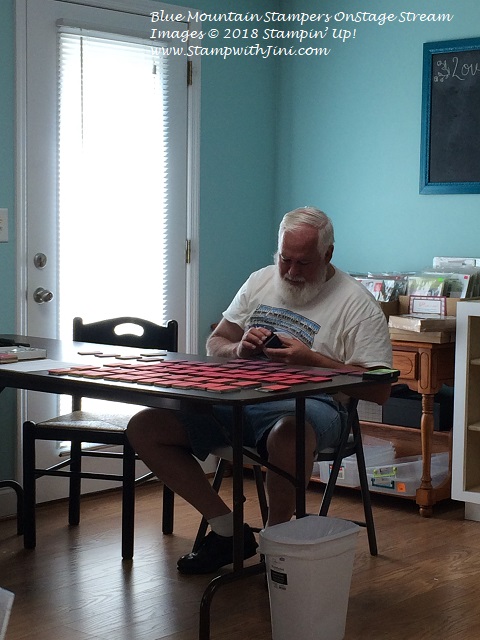
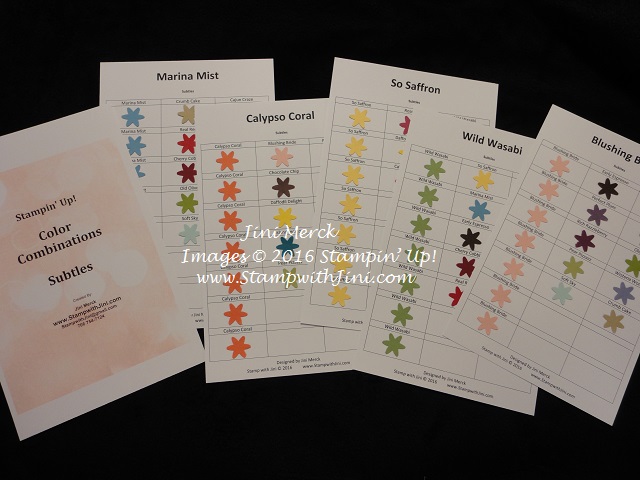
Before the event my husband, Larry helped me do some prepping for one of our Make n Takes – everyone who attended was able to make a 2018 Color Ring with the NEW colors! He’s such a trooper! (Watch for information next month about how you can get one of these too.)

I always try to bring a little taste of OnStage back to the group. This time the lovely little butterflies that decorated the tables – at the end of the night team members were able to choose one to take home, just like at the event.

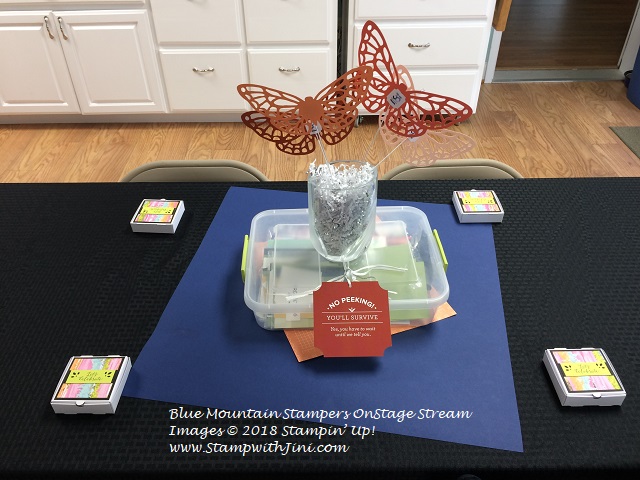
And of course you have to have some “swag” – So I created these fun little Mini Pizza Boxes (144645) using the Picture Perfect Designer Series Paper (145559)  and our new Detailed Trio Punch (available June 1st).

The Mini Pizza Box contained a little charm to go on their key chain commemorating the launch of our new catalog.

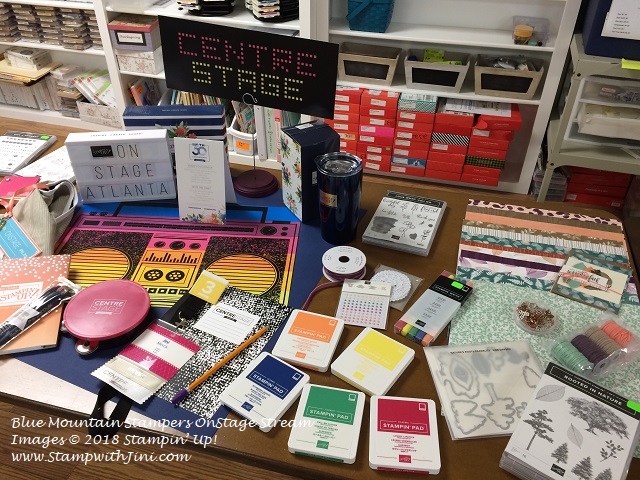
And of course NEW product displays

And of course we HAVE to stamp – after all everyone wants to use some of those new products! So we did 3 Make n Take projects. (watch for me to share those projects soon)

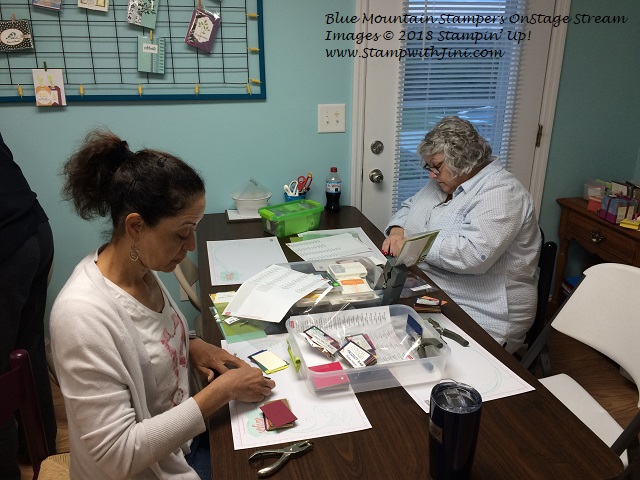
Laughter, fellowship, and stamping – what could be better?

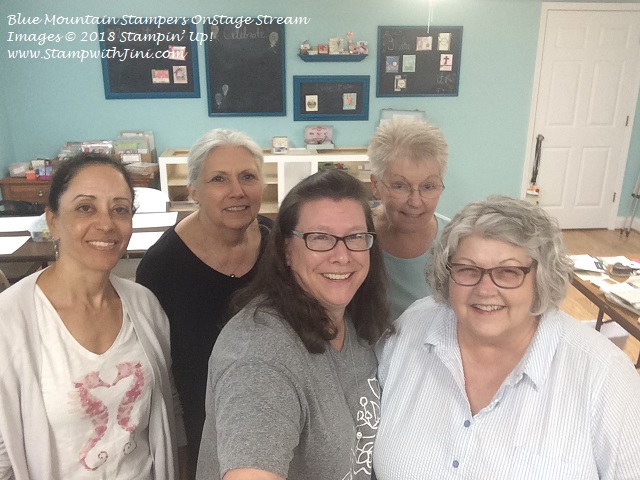
If you like to learn new ways to use Stampin’ Up! products and would like to be part of a fun group of stampers, my team the Blue Mountain Stampers might be just the thing you are looking for. Click HERE for more information about joining and getting a fantastic stamping kit too.

Stop back by tomorrow when I’ll be sharing some great cards with you.

Supplies: 

Stamp Set: Beautiful Day (145912/145915)

Inks: Basic Black Archival Ink (140931)

Paper: Basic Black (121045), Tangerine Tango (111349), and Whisper White Card stock (100730), and Watercolor Paper (122959)

Accessories: Brusho Crystal Colors (144101), Stampin’ Spritzer (126185), Bermuda Bay  (144600) and Pool Party Combo Pack Stampin’ Blends (144605)


Click here to order your Stampin’ Up! Products online 24/7! (US only)

Shop at my Online Store and use Host Code VRSRWD76


Click Here to learn more about using the Hostess Code If you order Online make sure your profile information is up to date and you’ve allowed me to contact you

Sign up for my FREE Newsletter My Newsletters include stamping tips, ideas and updates on what is happening with me! You’ll also receive a FREE Class Tutorial using the 2017-2019 In Colors when you sign up!

Beautiful Day Brusho Technique Card OnStage Swap

Wow!!! #OnStage – Atlanta was Fantastic!!! I don’t know where to start! So I’ll be sharing it over the next few weeks with you starting with my swaps that I made for the event and some video tutorials and how to recreate them. So you’ll want to make sure you stop by daily.

AND don’t forget the Last Chance List will post this afternoon – If you’re on my mailing list you’ll get your list delivered right to your In Box – if not you’ll want to stop by and check it out later this afternoon after 1 pm (MT).

Now onto the card swap – This first swap uses our Brusho Crystal Colors – I love this product but then I love any technique, especially the messy ones. LOL!

How can you not love this bright bold color palette? And our Brusho Crystal Colors definitely give you that! But then they are amazing because not only can you create this bright bold look but add more water and you’ll get a soft subtle look too! What can I say – it’s why I love this product! Can you say versatile? And who doesn’t love that, right?

I bet you want to see how I did this, right? So check out this quick video.

Brusho Saran Wrap Technique Video Tutorial

And here is the PDF so you have a complete supply list, measurements, and the steps you need to assemble your own!

Brusho Saran Wrap Technique Card – #OnStage Tutorial (printable PDF)

Enjoy! And don’t forget to stop back by I’ve got LOTS to share with you over the next few weeks!


Supplies:

 Stamp Set: Beautiful Day (145912/145915)

Inks: Basic Black Archival Ink (140931)

Paper: Glossy White (144240), Flirty Flamingo (141416), Basic Black (121045) and Whisper White Card stock (100730)

Accessories: Brusho Crystal Colors (144101), Basic Rhinestone Jewels (144220) and Stamparatus (146276 available June 1)


Click here to order your Stampin’ Up! Products online 24/7! (US only)

Shop at my Online Store and use Host Code 36G9DRMX

Time of Year

Right now is a great time to choose a date to get together with friends and stamp. And when you do you can earn a FREE Host stamp set such as the Time of Year set. Check out these fun cards below using this set.

Time of Year SC AC Swap 2016 (2)

This first card that Anna gave me uses an resist technique and is quick and simple to do when you use our new Sponge Brayers.

And how about this bright cheerful card from Debby?

Time of Year SC AC Swap 2016 (3)

Why not contact me today to set up a date and time that works for you and your friends?

Supplies:

Stamp Set: Time of Year (Host 141790)

Inks: Watermelon Wonder (138323), Daffodil Delight (126944), and Pool Party Classic Ink (126982)

Paper: Irresistibly Floral Specialty Designer Series Paper (141644), Basic Black (121045) and Whisper White card stock (100730)

Accessories: Lots of Labels Framelits Dies (138281) Bunch of Banners Framelits Dies (141488), and Sponge Brayers (141714)

Click here to order your Stampin’ Up! Products online 24/7! (US only)

Use Hostess Code 2Y2XSSQU and receive a FREE gift from me when you place a minimum order of $50

When you use the Hostess Code – I’ll send you this wonderful Color Combination Chart PDF which I created. This Gift includes a chart for ALL the Subtles and Brights! That’s 70 color combinations!!!

It’s my way of saying thank you for choosing me as your Demonstrator!!!

Color Combination Charts

Click Here to learn more about using the Hostess Code If you order Online make sure your profile information is up to date and you’ve allowed me to contact you


th_thoughtfulbranches_share_newdemo_jul0516_na

Exclusive Thoughtful Branches Stamp Set & Framelits Dies

A Happy Thing

I really loved this FREE Sale-a-bration stamp set as soon as I saw it. I’m not sure what it was exactly about it, but I love both the images and I’ve enjoyed creating with it. Check out this card I made recently using one of the techniques from my Technique Class on Sunday.

A Happy Thing Technique card

This pudgy little fellow is so much fun to color with Stampin’ Blendabilities, but there are lots of different ways to color that you can choose from. And isn’t the Bermuda Bay Sequin Trim fun? A bit of bling never hurts any project.

So what do you think? Would you like to learn new ways to use your products? Why not contact me today to save your spot in Sunday’s class. There is still time to sign up – It’s easy. And what is better than an afternoon stamping together?

Last Chance to Sign Up for my Technique Class

Come learn 4 fun techniques during this class and make a handy reference guide. RSVP today to hold your spot!

Date: Sunday, March 8th

Time: 2 p.m.

Class Fee $25 or free with minimum order

RSVP by the end of the day Friday, March 6th

All supplies are included except your favorite adhesive. Don’t have adhesive? No problem, pick up some at the event.

Click Here to see my entire Calendar of Events

Click here to order your Stampin’ Up! Products online 24/7! (US only)

Hostess code 9DFME9JQ

Weekly Deals (Special ends Monday, March 9th, 2015 at 11:50 p.m. (MT)

Wondrous Wreath in Blues

I really love the Wondrous Wreath Bundle and have been creating all kinds of projects with it. This time my card is for the holidays and has a soft and cool color pallet.

And don’t you love the Silver 5/8″ Satin Ribbon? It has such a rich look and feel to it. I’ve been wanting to use this ribbon for a while and think this was just the card to show off this rich elegant ribbon.

Wondrous Wreath  Mixed Embossing Powder (2)

So what do you think? Can you see the special sparkle on my wreath. I created this sparkle by mixing my Smoky Slate Embossing Powder with the Silver Stampin’ Glittler. It’s a great way to have fun with colored embossing powder and so easy to do!

If you’d like to learn tips and techniques like this why not sign up for my Newsletter. You’ll get a free tutorial when you do along with my monthly Newsletter, Getting Started series and class events. Click HERE or sign up in the box on my side bar.

Supplies:

Stamp Set: Wondrous Wreath (135047*)

Inks: Pool Party Classic Ink (126982) and Versa Mark Pad (102283)

Paper: All is Calm Designer Series Paper (135823), Lost Lagoon (133679), Smoky Slate (131202), and Whisper White Card Stock (100730)

Accessories: Wonderful Wreath Framelits (135851*), Silver 5/8″ Satin Ribbon (134548), Smoky Slate Embossing Powder (129396), Silver Stampin’ Glitter (133756), Silver Glimmer Paper (135314), Heat Tool (129053), Embossing Buddy (103083), Scallop Edge Border Punch (119882) 

*These items are available in a Bundle (item #137624)

Click here to order your Stampin’ Up! Products online 24/7! (US only)

Hostess code T4TV6CAB

Place an Online order with me and use my Hostess Code T4TV6CAB  and I’ll send you a FREE Tutorial with instructions to create 4 fun projects using the Wonderful Wreath stamp set!

Weekly Deals (Special ends Monday, October 27th, 2014 at 11:50 p.m. (MT)

PAPER PUMPKIN Subscription – it’s fun in a box that’s delivered right to your mailbox each month!

Join my Team and get a FREE pack of Designer Series Paper for 6 months! But hurry this special offer ends October 31st!

Just Thinking Tutorial

Want to see what we did at my FREE Sale-a-bration Celebration Event? This past Sunday I was able to share the NEW Spring Catalog products and some of the things I brought back with me from Stampin’ Up! Leadership in Orlando.  What fun everyone had together – it’s one of my favorite parts of stamping.

First here are some pictures of my classroom and some of the displays.

Sale-a-bration Celebration Event classroom

Sale-a-bration Celebration Event Display

Of course there has to be chocolate – after all what would be stamping without chocolate?

Sale-a-bration Celebration Event snack area

Everyone seemed to have a great time with the two cards they were able to make.

Sale-a-bration Celebration Event group

Sale-a-bration Celebration Event Big Shot

Here is my favorite card that I created for the event using the Just Thinking Stamp from the Spring Catalog. Just Thinking was one of the stamps I just knew I wanted when I saw the Spring Catalog the first time!

Just Thinking

Since not everyone was able to come I thought I would share with you a tutorial on how my Just Thinking card was made, along with my very first video tutorial showing you how to use our Core’dinations Card Stock. I just love the Core’dinations Card Stock and think you will too – it’s a lot of fun to work with and very versatile. Better yet you’ll find three Core’dination Card Stock color choices Pool Party (item 129321), Primrose Petals (item 129322), and Real Red (item 129320) in the Spring Catalog on page 12.

Just Thinking Tutorial

Just Thinking

Supplies:

Raspberry Ripple Card Stock (item 126842 $6.95): 4 ¼” x 11″; scored at 5 ½” and folded

Primrose Petals Core’dinations Card Stock (item 129322 $6.95): 4″ x 5 1/4″

Very Vanilla Card Stock (item 101650 $8.50): 8 1/2″ x 3 ½”

5/8″ Very Vanilla Seam Binding (item 120999 $6.96): 20″

Honeycomb Embossing Folder (item 129378 $7.95)

Stampin’ Sanding Block (item 129367 $3.95)

Window Frames Collection Framelits Dies (item 129021 $26.96)

2 ½” Circle Punch (item 120906 $16.95)

Multipurpose Liquid Adhesive (item 110755 $3.95)

Dimensionals (item 104430 $3.95)

Instructions:

1. Prepare your Core’dinations Card Stock Layer as shown in the video.

2. Adhere the Primrose Petals Core’dinations Card Stock to your card front using Multipurpose Liquid Adhesive. (I like to use this adhesive on anything that has a heavy texture.)

3. Stamp two images onto Very Vanilla Card Stock using Raspberry Ripple Classic Ink.Just Thinking Tutorial

4.  Using the Window Frame Framelits Die and Big Shot cut out one of the images.

Just Thinking Tutorial

5. Adhere to the card front.

6. Punch the sentiment out of the second stamped image using the 2 ½” Circle Punch.

Just Thinking Tutorial

7. Adhere to the card front using Dimensionals.

8. Loop ribbon around the card front and tie into a bow. Trim ends.

That’s it – now you can send your card to someone you’re thinking about.

You can click here to download a PDF of my Justing Thinking Tutorial

Please leave me a comment and let me know what you think of today’s post. I’d love to know what you think of my first video so leave me a comment after you watch it. And don’t worry about the fact you need to use your email when you leave a comment – no one else will see it except me. My blog only asks for your name and email so it knows you’re a real person and not a robot spammer and I’ll only send you email if you have requested my Newsletter.

Click here to order your Stampin’ Up! Products online 24/7! (US only)

Patio Party Pinwheel

Wow, the last couple of weeks have been crazy around here with band camp. I’m the secretary of the boosters club so there is a lot of startup stuff that happens. But I’m back now and school doesn’t start for a few days.

Pinwheel Today I wanted to share with you this little Pinwheel card I made recently. Isn’t it cute? Pinwheels are all the rage right now it seems. I made this card for my last TEAM meeting. Everyone loved the NEW In Color Dahlias that we used for the centers of our pinwheels. The girls had so much fun making them that I thought I would offer the FREE Pinwheel tutorial to you – just for signing up for my email list! (That’s a $9.95 value for FREE) Interested? Click on my link below to sign up today.

Click HERE to sign up for my email list

and receive your FREE Pinwheel tutorial

Wonder how I made the sentiment with the Decorative Label Punch? Here is quick shot of the punched piece after I cut it. 

And then adhere it to the back of the already stamped and punched sentiment piece. I like to use our Multipurpose Adhesive to do this since I can move it around after I turn it over and get the pieces right where I want them. 

How quick and easy is that! Do you like to learn new tips and techniques? Why not join my Virtual Club. You can click HERE for more information.

Come back tomorrow, I’ll be posting some of the cards that I received during swaps at convention.

Supplies:

Stamp Set: Friendly Phrases

Inks: Raspberry Ripple

Paper: Patio Party Designer Series Paper, Raspberry Ripple, Midnight Muse and Whisper White

Accessories: In Color Dahlias, Decorative Label Punch

Click here to order your Stampin’ Up! Products online 24/7! (US only)

My Virtual Club is Forming Now

Been stamping awhile or just want to learn new techniques and ideas for your stamping and scrapbook projects? Want to have fun learning new techniques? I’d love to show you how to add a new twist to your stamping!

You can sign up NOW for my new Virtual Club that starts in September that will do just that.

Click here to get more information about my Virtual Club.

Are you asking yourself what is Virtual Club and is this for me?

Do you love Stampin’ Up! products – Our wonderful stamps, family of colors, papers, and accessories?

Do you like to get freebies?

Would you like to get all the Stampin’ Up! Catalogs sent directly to your mailbox three times a year?

Do you like to learn the latest stamping techniques?

Are you new to stamping or just want to learn new things or new twists on your old favorites??

Do you like to be creatively inspired? Or need a creative jump start?

Would you like to order your favorite Stampin’ Up! items a little bit at a time AND get a FREE monthly class?

If you answered any of these questions with a YES my Virtual Club is for you!

Not sure if a Club is for you? Give me a call or drop me an email and I’ll be happy to answer any questions you may have.

Sign up for my Virtual Club by Clicking HERE.

Preregister before August 31st and get a FREE Tutorial (valued at $9.95) when you register.

Click HERE to sign up for my Monthly Newsletter now and receive a FREE Pinwheel Tutorial (that’s a value of $9.95 for FREE!)

Click here to order your Stampin’ Up! Products online 24/7! (US only)

Double Fold Gate Card

I love to try new things and so recently fell in love with making these cards using the Double Fold Gate technique and the Layered Labels stamp set. It’s a lot of fun to see all the different combinations that you can come up with.

This card in particular that I’m showing you today uses one of my favorite NEW stamps sets from the 2012-2013 Catalog, Layered Labels. First I love it because of the sentiments and secondly because of the fact it has a matching set of Framelits Dies that coordinate with it making it quick and easy to use. After all who doesn’t love their Big Shot? And with all the new goodies in the 2012-2013 Catalog the Big Shot options are endless!

Double Fold Card Tutorial front

I’ve used the Floral District Designer Series Paper for this Double Fold Gate card. The Floral Districts DSP seems to be a DSP that I reach for most often right now– so much so I need to order my 3rd package of it already! I really like the bold, fun colors and patterns it contains.

I think these Double Fold Gate Cards are so much fun to make that I wanted to share with you the Double Fold Gate Card tutorial that I made for it. Grab your favorite pack of Designer Series Paper and see what combinations you can come up with – warning these can become addictive!

Double Fold Gate Card Tutorial

Supplies:

Simply Scored Scoring Tool

Stampin Trimmer

Bone Folder

Lay a 12″ x 5 ½” piece of Designer Series Paper on the Simply Scored Board with longest edge at the top. (I used our new Floral District Designer Series Paper.)

Double Fold Card Tutorial step 1

Score at 2″, 4″, 8″ and 10″ marks

Double Fold Card Tutorial step 2

Turn Designer Series Paper and make a small mark each short end at the 2 ¾” mark

Double Fold Card Tutorial step 3Use the bone folder and fold in the two ends on the 4″ and 8″ score lines. (This allows you to see your score lines easier for when you line up your DSP to cut.)

Decide which side is the top of your card and then using the Stampin’ Trimmer to cut a diagonal line on each side. Line up the 2 ¾” mark on the grove where your blade travels. You can hold this in place with your index finger if you would like.

Double Fold Card Tutorial step 4

Then “swing” the top edge of your 4″ score line on the DSP until it is lined up on the grove too.

Cut.

Double Fold Card Tutorial step 5

Repeat on the other side Lining up the 8″ score line and your

2 ¾” mark.

Double Fold Card Tutorial step 6

Double Fold Card Tutorial 7

You should have three pieces that look like this.

Double Fold Card Tutorial step 8

Flip over the piece and adhere to the bottom of card as shown. Repeat on the other side.

Double Fold Card Tutorial step 9

Double Fold Card Tutorial step 10

Using the bone folder you can fold the card on the 4″ and 8″ score lines (if you didn’t fold and score before cutting off the corners.)

Double Fold card Tutorial step 11

Using Bone Folder, fold on the 2″ score line in the opposite direction to create Z fold.

Double Fold Card Tutorial step 12

Repeat on the other side Using Bone Folder, fold on the 10″ score line folding in the opposite direction to create Z fold.

Double Fold Card Tutorial step 13

Your card should like this.

Double Fold Card Tutorial step 14

Adhere pieces of card stock to the inside and decorate front as desired. I used a piece of 3 ½” x 5″ Rich Razzleberry card stock with a layer of 3 ¼” x 4 ¾” Whisper White card stock. I used the Betsy’s Blossoms stamp set and stamped the flower image in Rich Razzleberry.

Double Fold Card Tutorial step 15

For the outside image I used our NEW Layered Labels stamp set and the coordinating Apothecary Accents Framelits Dies – Adhering the image only on the one side so that the card opens easily.

And here is the finished card.

Double Fold Card Tutorial front

Did you enjoy this tutorial? Do you like to learn new things?  Would you like to get exclusive tutorials for 2 projects that are just for you every month? Why not join my Virtual Stamp Club?

Watch for more information coming soon – meanwhile why not sign up and become part of my Mailing list NOW. Not only will you receive my Monthly Newsletter, which includes special promotions, tips and helpful hints (in addition to information about my events and my Virtual Club that starts in September), but you’ll also receive a FREE tutorial just for you!

Sign up for my monthly newsletter Click HERE

Click here to order your Stampin’ Up! Products online 24/7! (US only)