B.Y.O.P Grad

Spring is here and Graduations started in early May in our area. So today’s card is one that I made for a cousin’s son who recently graduated from college in South Carolina.

This card was quick and easy to make and I love the special touch the Red Glimmer Paper adds.

On a personal note as I mentioned earlier, our daughter, Kaitlin graduated  from GCSU on May 6th with her Music Ed degree and is now back home for the summer. While I’m loving having her here I know it won’t be for long.

Larry and I are so proud of her and her accomplishments and think she is going to make a great teacher. She is a natural and loved everything about her student teaching semester in Morgan County.

After the ceremony and a final goodbye in Milledgeville, we loaded the truck to head home. On the way we stopped and had a celebration dinner at Kani House, one of her favorite places to dine. It was great to have the family together to celebrate this special day.

Now it is on to job interviews and new adventures for Kaitlin – the 4 years have flown by!

Stop by tomorrow when I’ll be sharing the projects and pillow gifts I made for my Sale-a-bration Celebration earlier this month.

Supplies:

Stamp Set: B.Y.O.P. (137159)

Inks: Basic Black Archival Ink (140931)

Paper: Red Glimmer Paper (121790), Real Red (102482), Basic Black (121045), and Very Vanilla Card stock (101650)

Accessories: Swirly Scribbles Thinlits (141497) and Large Numbers Framelits Dies (140622)


Click here to order your Stampin’ Up! Products online 24/7! (US only)

Shop at my Online Store and use Hostess Code DMSBD2TZ during May and receive a free Project Tutorial from me!

Click Here to learn more about using the Hostess Code If you order Online make sure your profile information is up to date and you’ve allowed me to contact you so I can mail you your FREE gift!

Save

Save

Save

Save

Save

Save

Save

Save

Save

Save

Save

DIY Retreat, Balloon Adventure Slider Card & More!!!

Do you ever think that you’ve done something and then realized you totally didn’t do it? Well that is what happened with today’s post – I thought I’d already shared my DIY  experience with you, but instead the photos got lost on my computer. LOL!

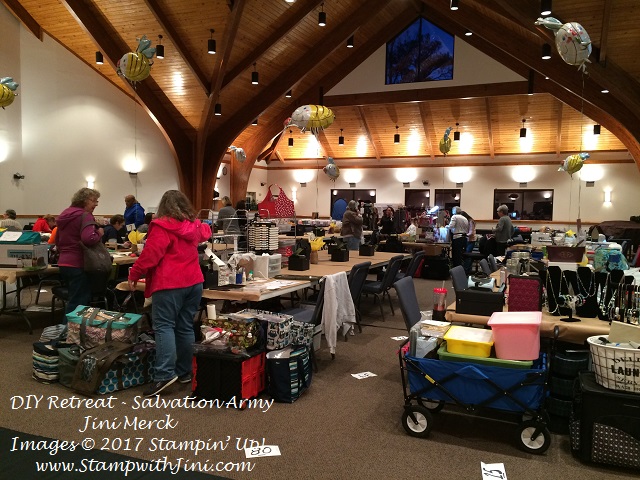
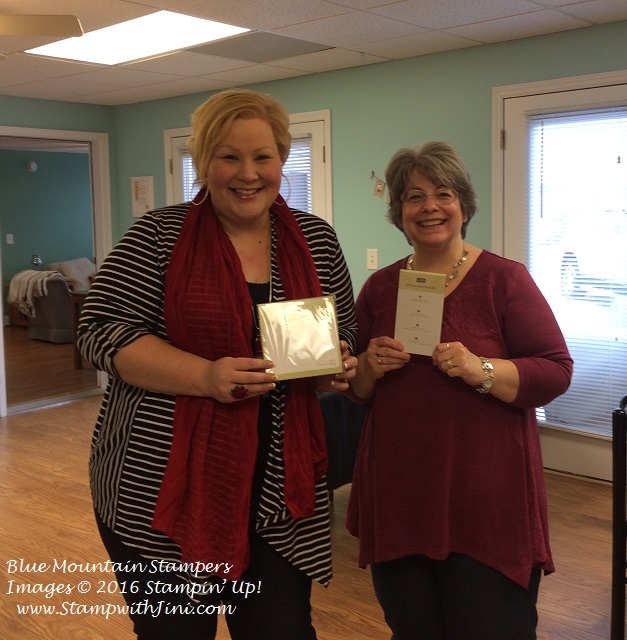
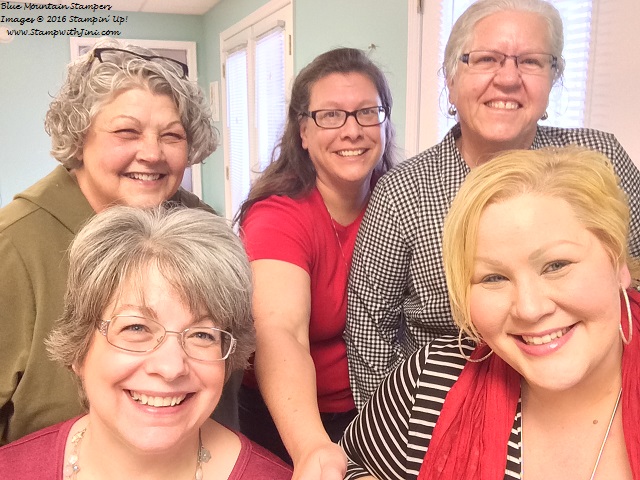
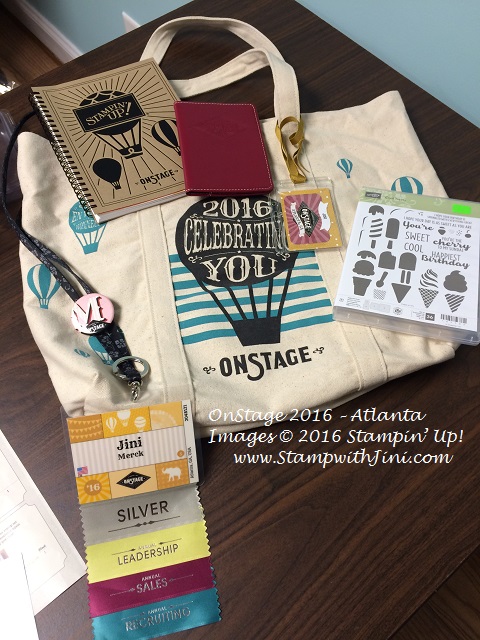
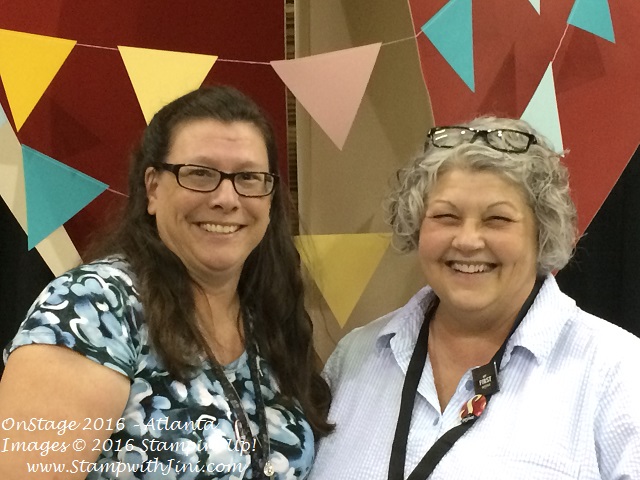
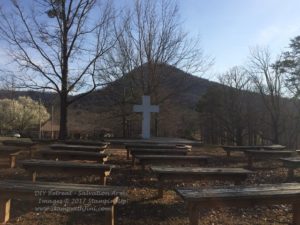
Earlier this month I had the opportunity to be a vendor at the Georgia DIY Retreat held by the Salvation Army in Jasper, Georgia at Camp Grandview with 80 lovely ladies. It was a wonderful weekend of fellowship and crafting, of all types! What could be better right?

When I arrived I set up my vendor space with all kinds of Stampin’ Up! goodies to choose from. (I wasn’t sure what to expect for the DIY weekend since this was my first vendor event, but next time I’ll be more prepared.)

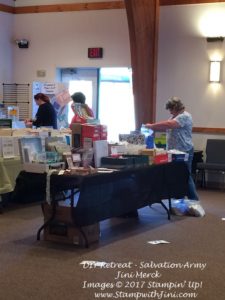
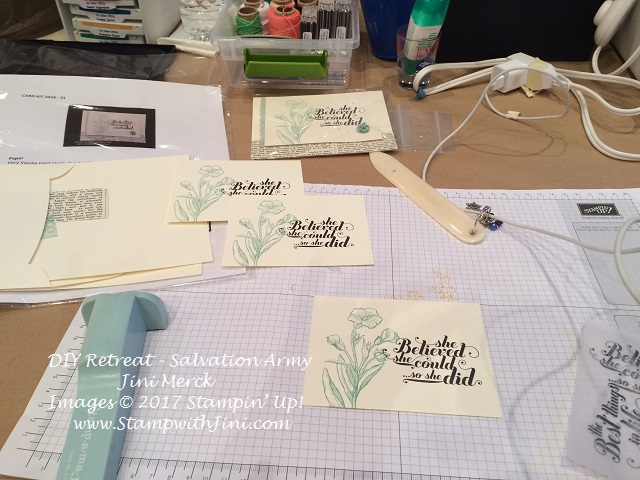
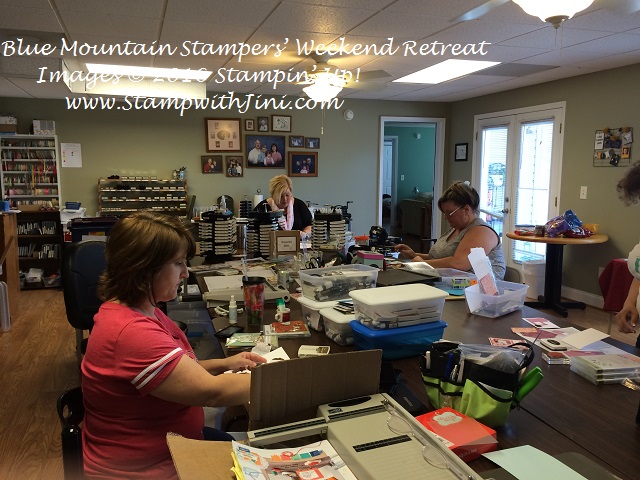
And of course I set up my crafting space too as we all started to arrive!

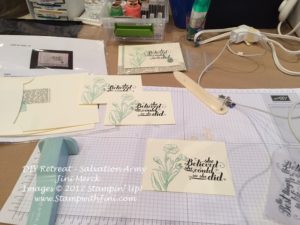
I worked on some past kits and retired items that I had – I plan to use the cards as part of my Christmas gifts this year for family and friends.

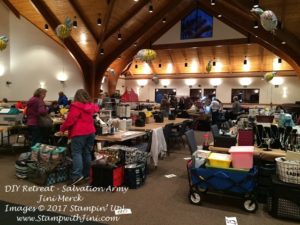
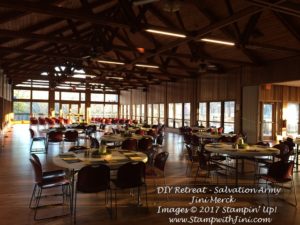
What a wonderful space we had in the chapel to craft in.

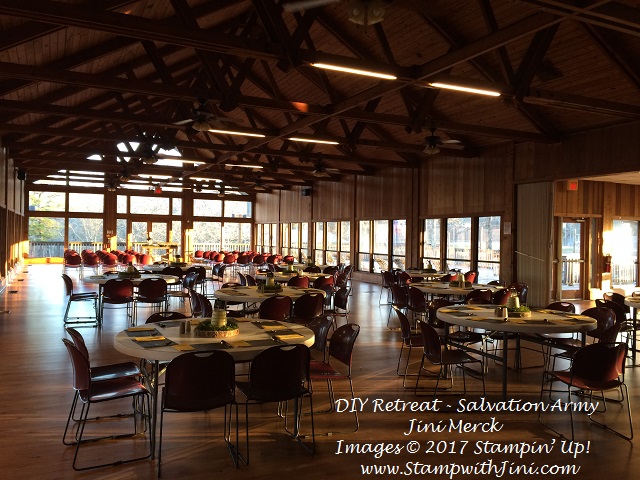
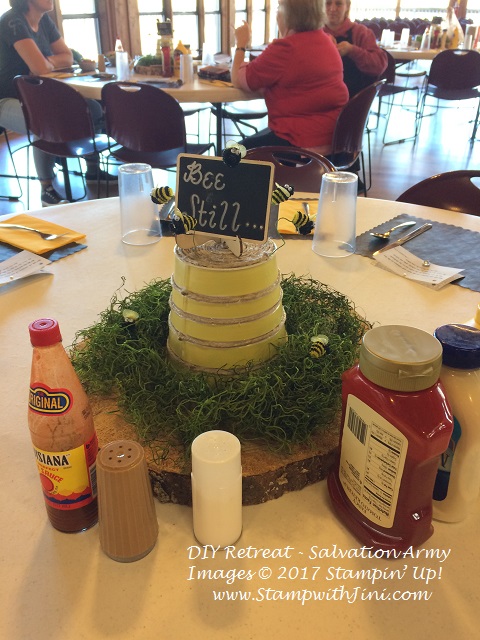
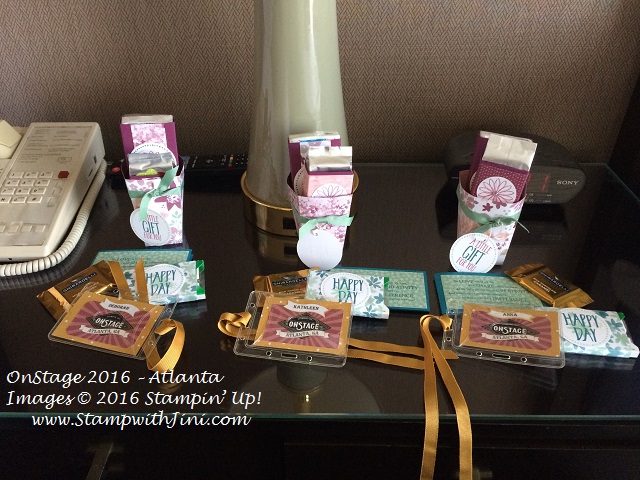
For meals we walked to the dining hall which was decorated so cute. Each table had a bee themed decoration.

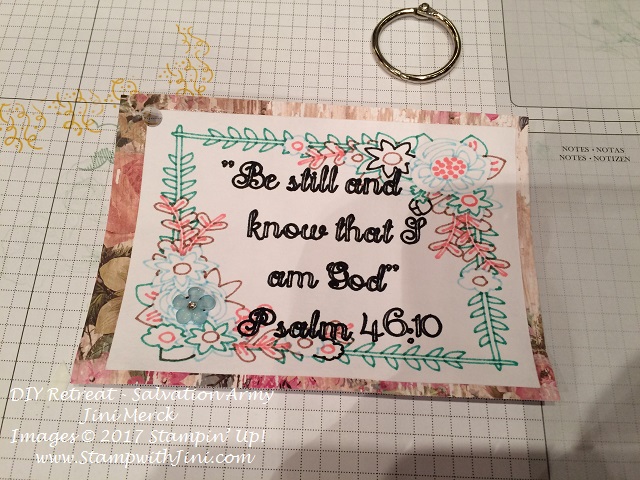
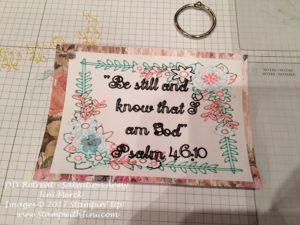
It’s was such a treat not to have to cook for the weekend! And at each meal we were given a bible verse made by the different Salvation Army Divisions from all over the state of Georgia. Each was uniquely decorated and while they were all so different they were all beautifully done.

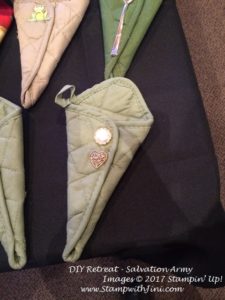
I got to learn more about the Salvation Army and their work in the community. If you’d like to learn more about the Salvation Army too check out their link HERE. During one of the meals Karen shared the story about WWII Donuts girls that I’d never heard before. (It really peaked my interested so I need to do a bit of googling.)

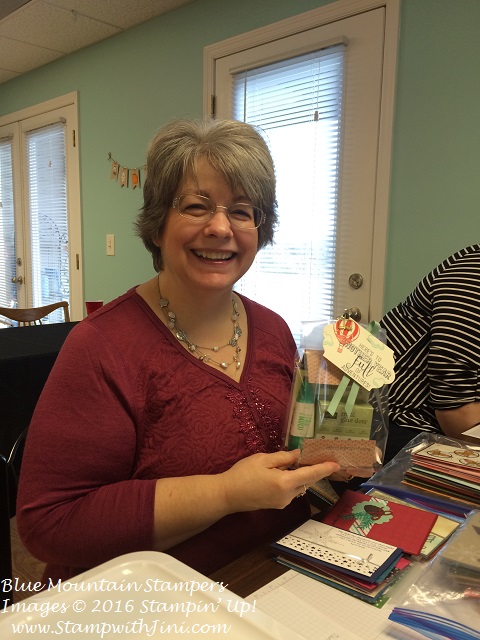
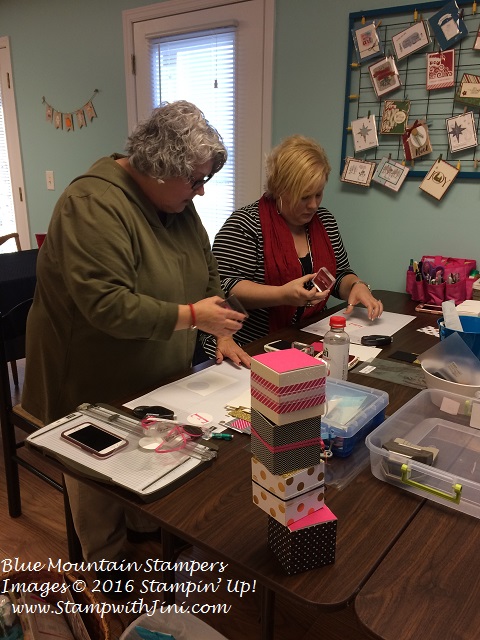
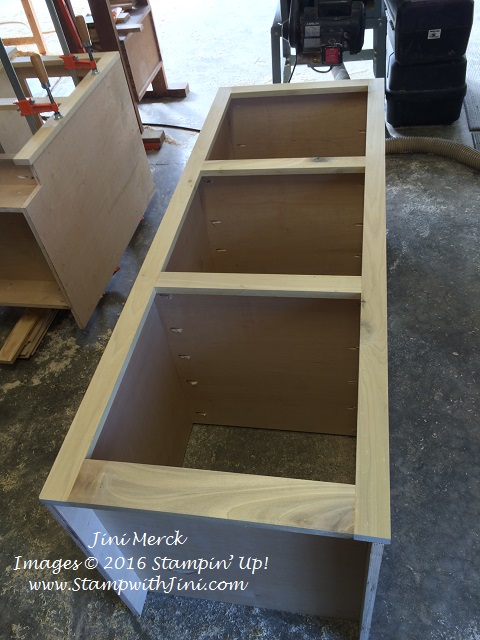
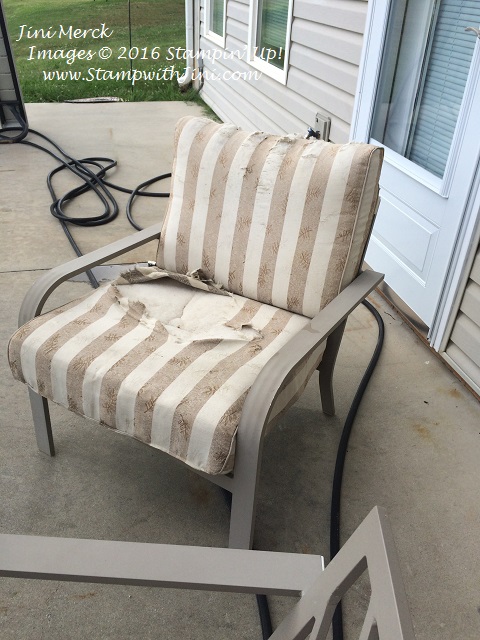
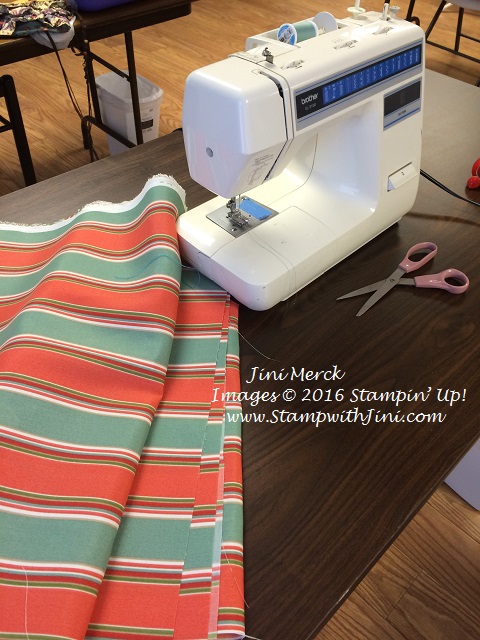
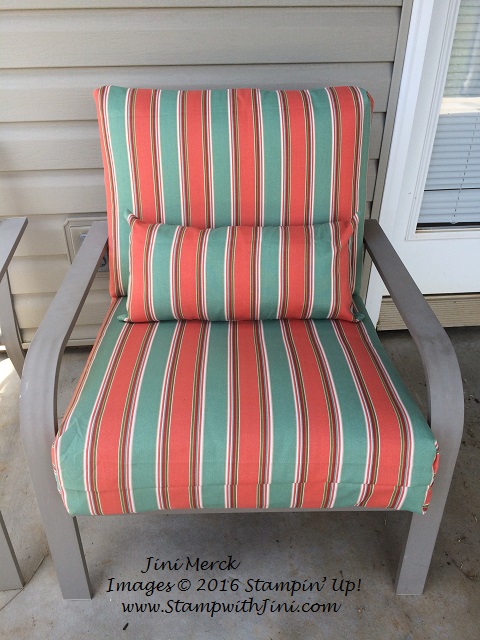
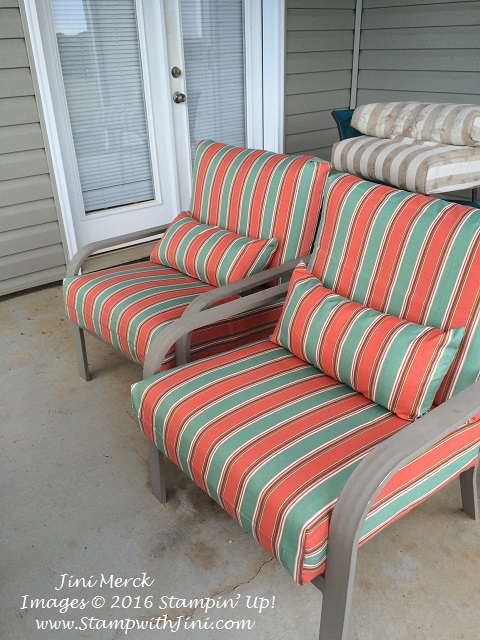
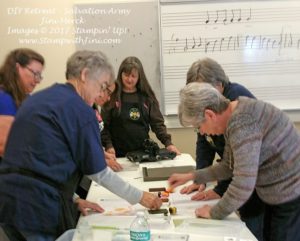
And  of course, there was LOT’S of crafting going on – over the weekend. Sewing machines and computers were humming, knitting, scrap booking, and even furniture was being painted and upholstered. I think every type of crafting project was represented. It was a lot of fun to see what everyone was doing.

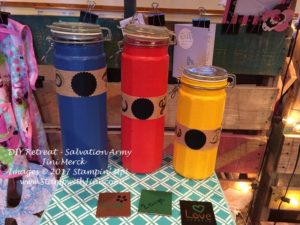
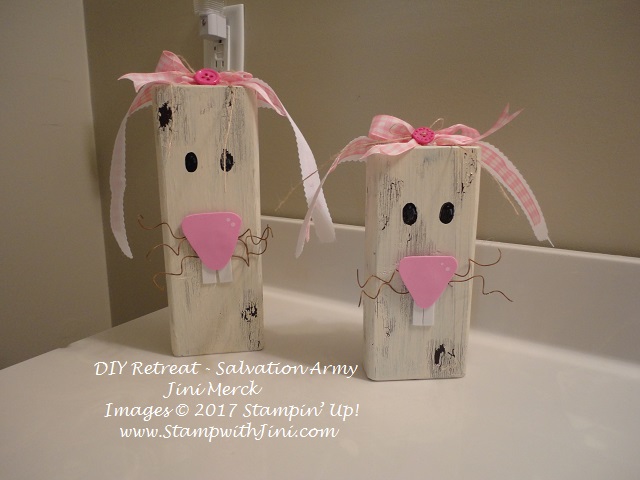
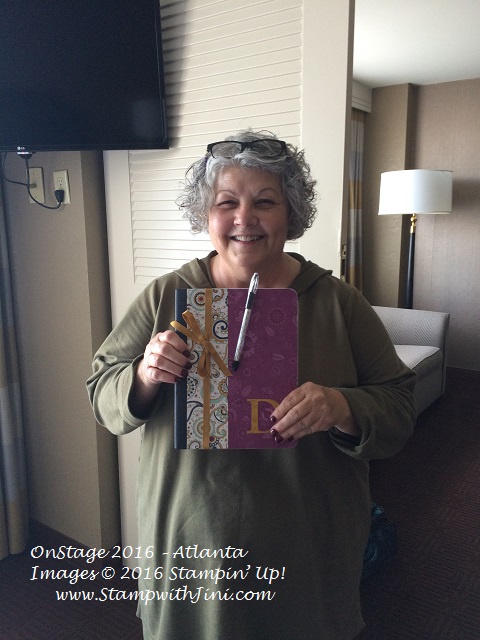
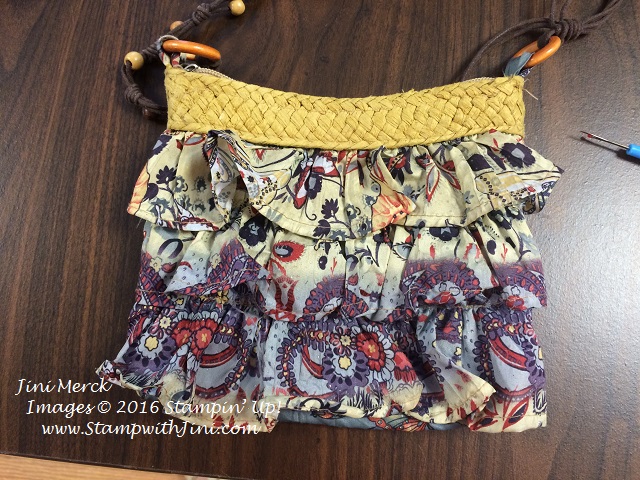
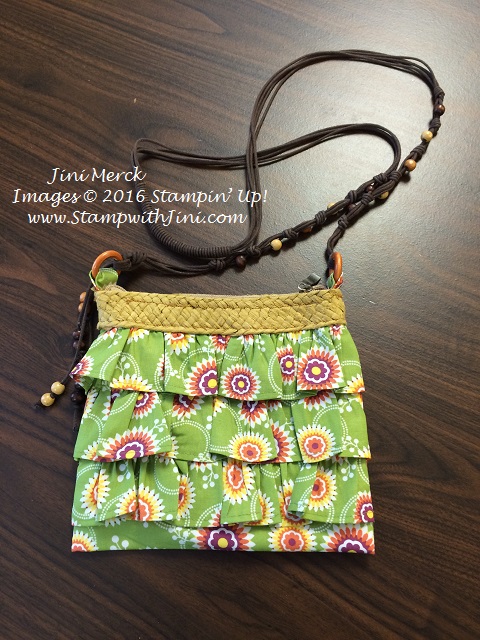
I took a couple of wonderful skills classes – what a treat. I’m a life long crafter and love to learn new things! I couldn’t resist signing up for Rebecca’s class – the project was so cute and perfect for Easter and spring.

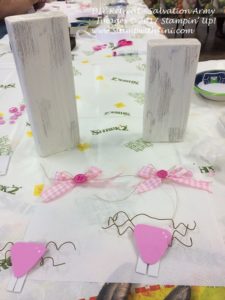
And these little bunnies were so easy to make! (We used Vaseline to create the crackle effect on the paint, but I’m not sure how well that is going to hold up with time and storage. Hmm….) They are hanging out to welcome everyone in my classroom bath.

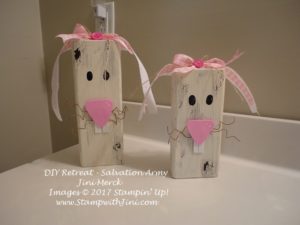
They make me smile every time I see them.

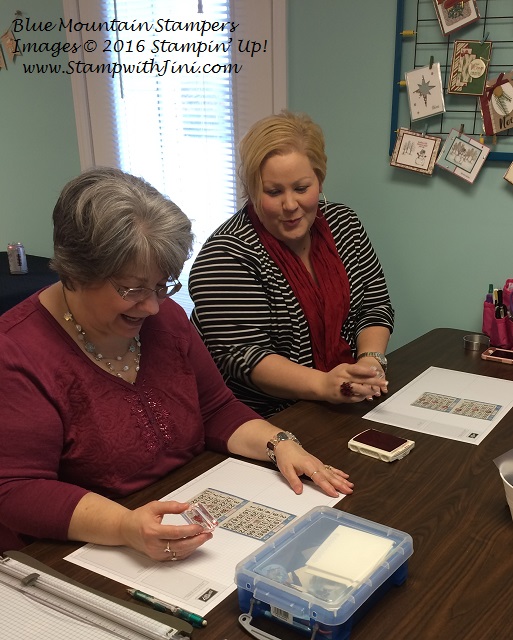
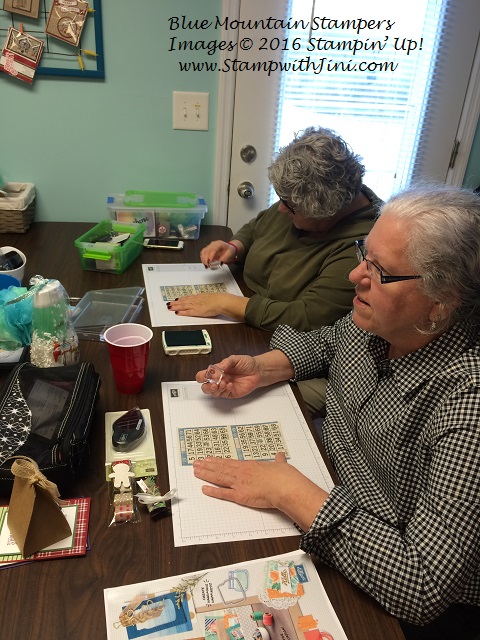
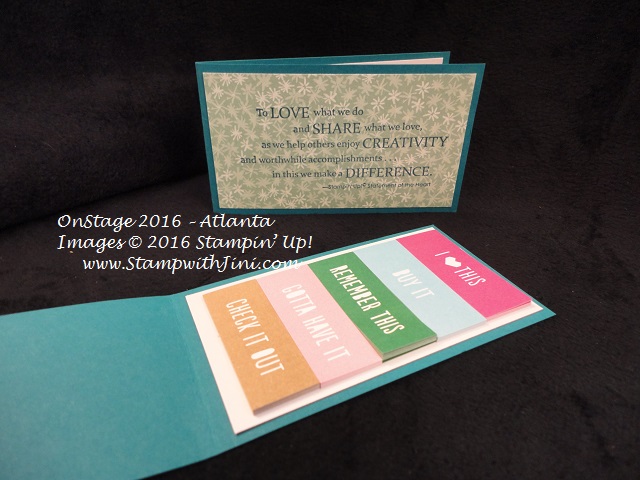
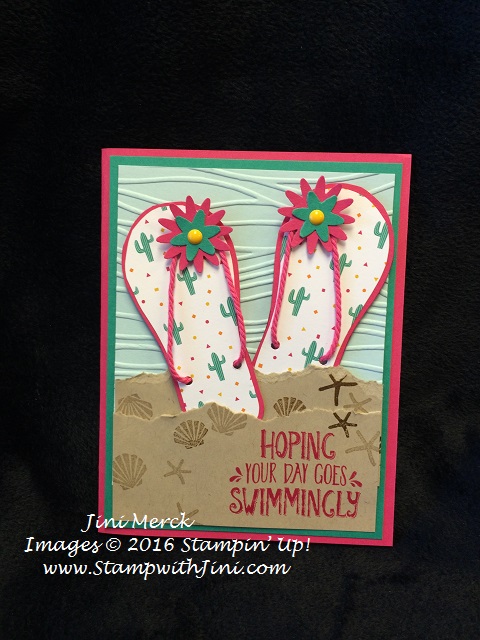
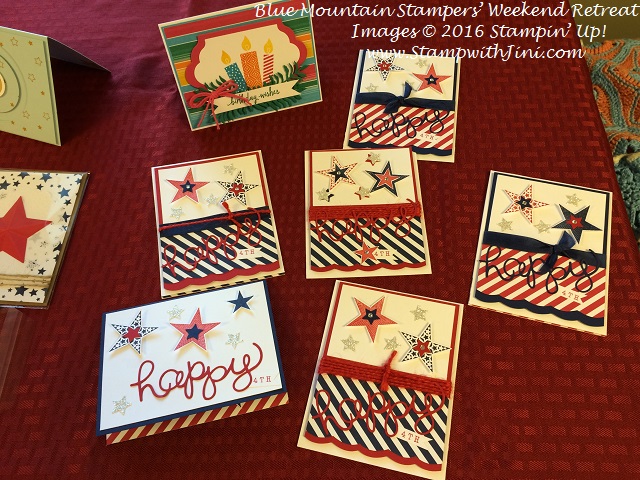
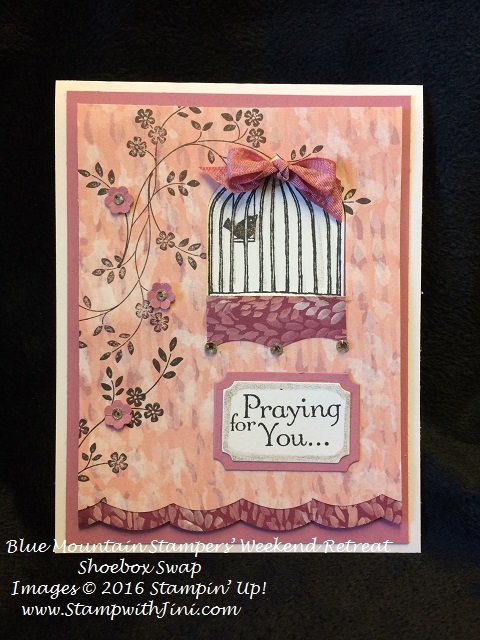
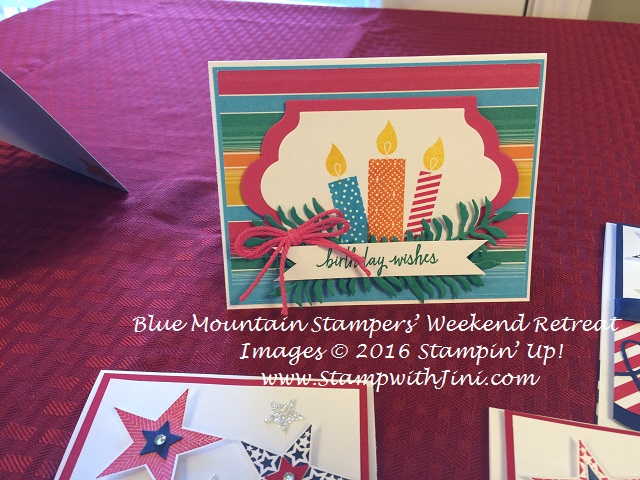
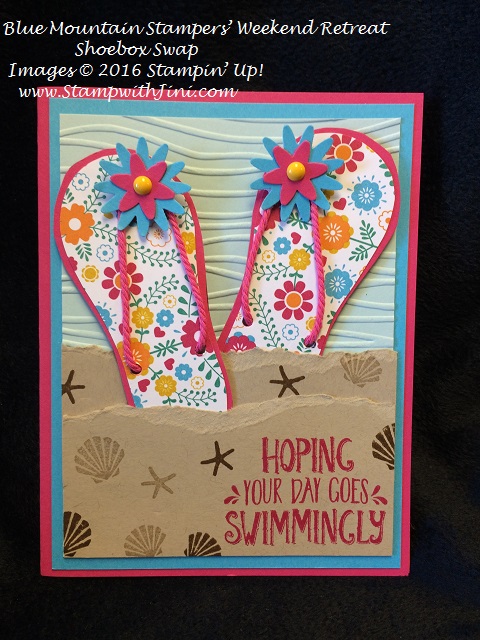
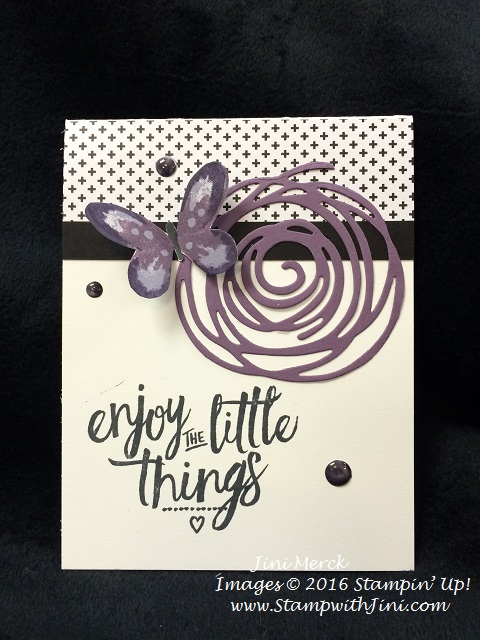
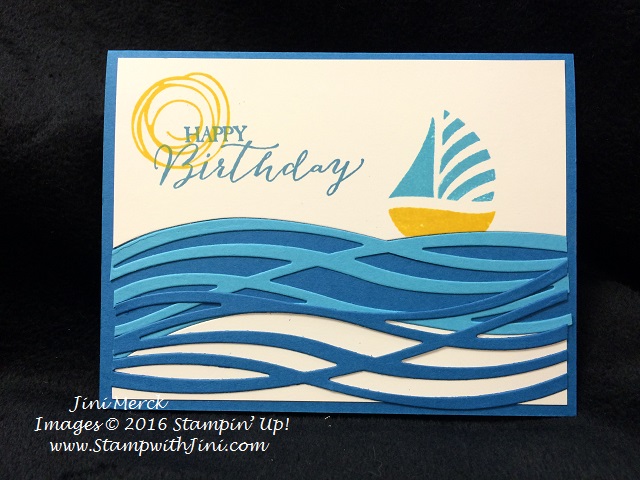
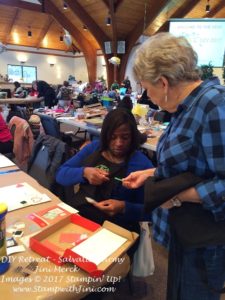
I also taught a skills class – A Spinner Card class and got to paper craft with some lovely ladies whom I enjoyed getting to know.

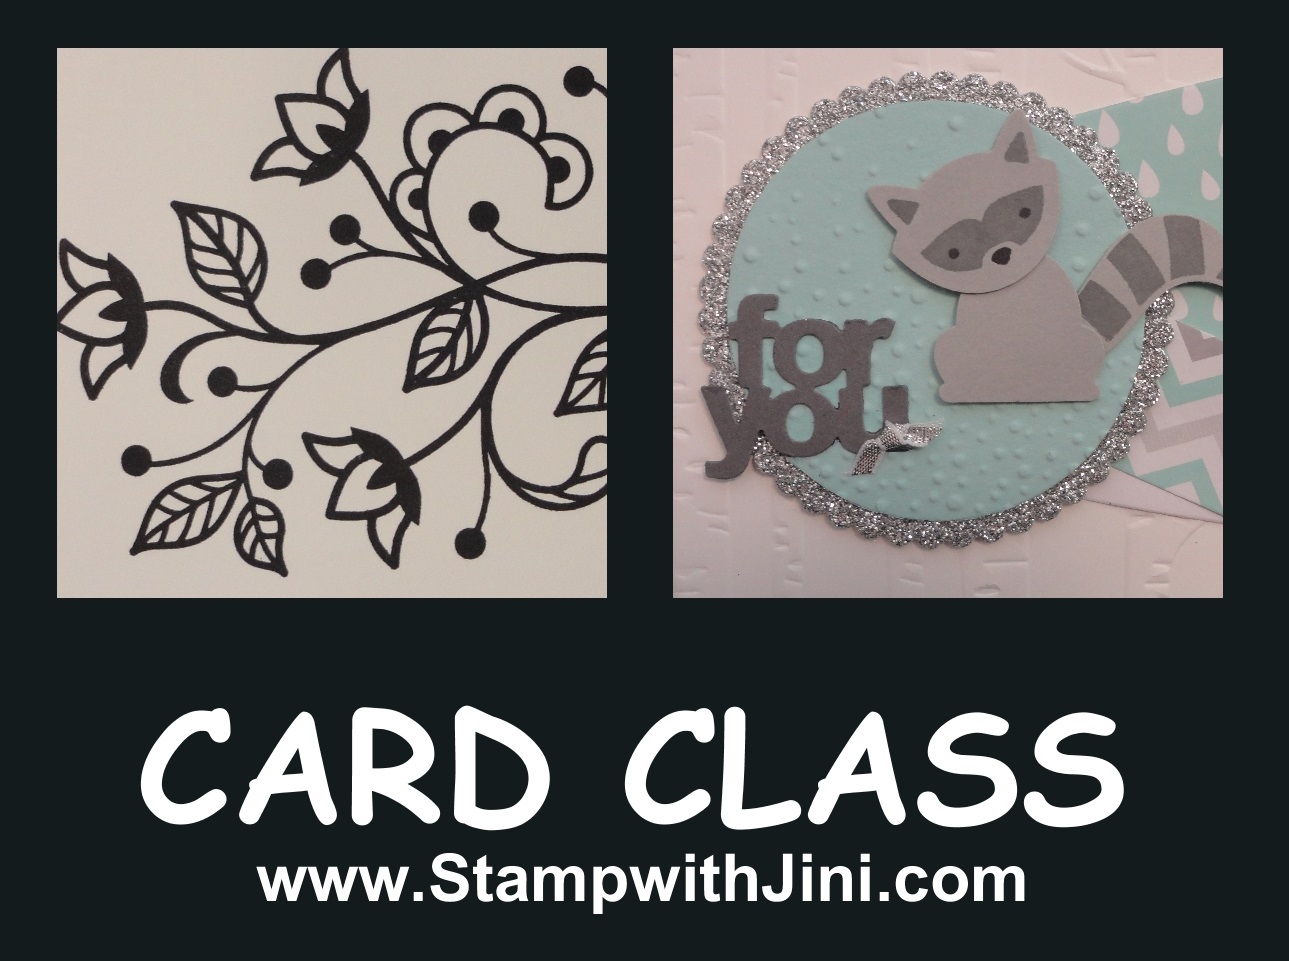
Want to see the cards we made?

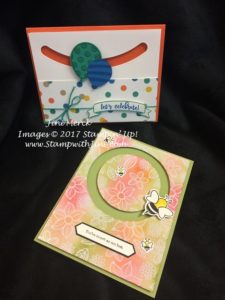
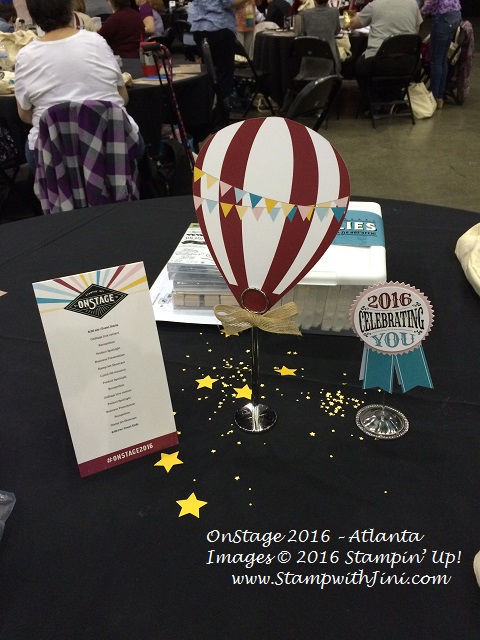
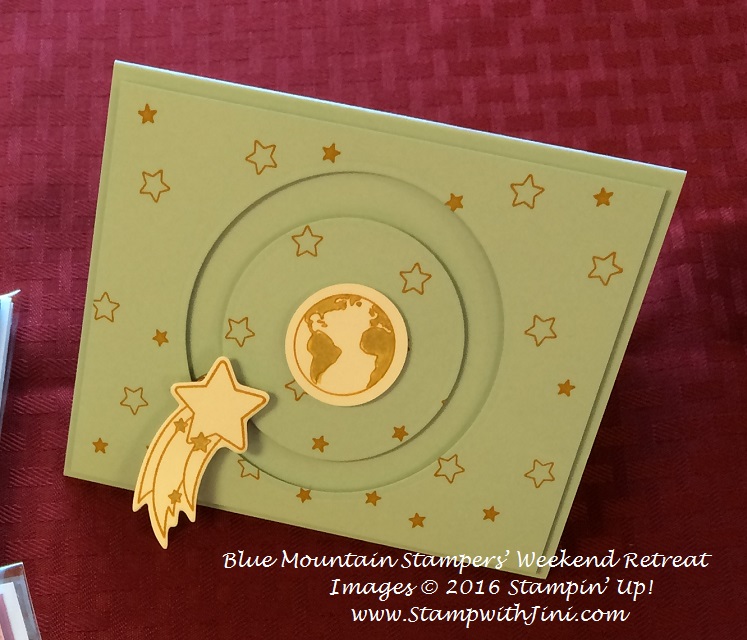
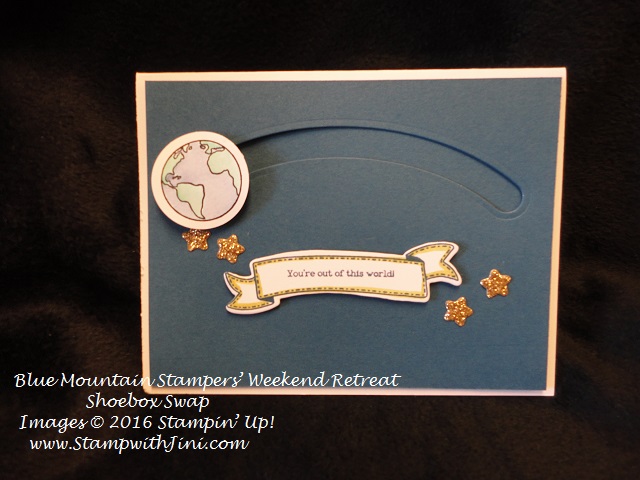
Two great movement cards! Everyone seemed to have a lot of fun making the cards – And the Shooting Star stamp (141616/141619) set fit in perfectly with the theme of the retreat Bee Still and Wait for the Glue to Dry!!! LOL!

So today I thought I’d share a FREE PDF Tutorial for the two cards so you can make them too.

Shooting Star Slider Card PDF Tutorial (printable)

Balloon Adventure Card PDF Tutorial (printable)

If you haven’t build a spinner or slider card yet – You can watch the Getting Started with Slider Cards Video Tutorial HERE.

And Great news: Right now during Sale-a-bration, when you purchase the Shooting Star Bundle (142349/142350) or make ANY $50 purchase in product you can get the Animal Party Designer Series Paper for FREE today! You’ll want to use Sale-a-bration item #147365 (since the regular number won’t work as a Free item). But you won’t want to wait since Sale-a-bration ends tonight at 11:50 pm MT!!!

And I couldn’t resist one final photo as I walked to breakfast of the breath taking mountain view.

Click here to order your Stampin’ Up! Products online 24/7! (US only)

Shop at my Online Store and use Hostess Code 7FDWKVA7 when you order

Click Here to learn more about using the Hostess Code

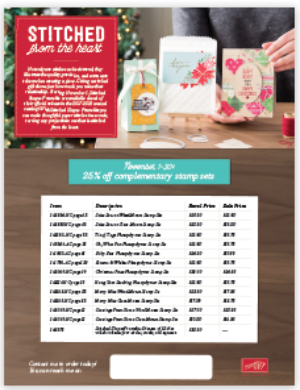
Sale-a-bration  –  MORE FREE ITEMS!!!

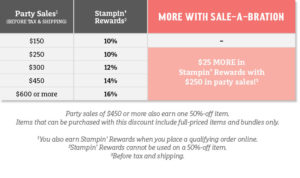
Sale-A-Bration has flown by! Times flies when you’re having fun, though, right? Only a few days are remaining during Sale-A-Bration and Stampin’ Up! has added additional products for you to choose from!!!

Don’t forget you have until tonight at 11:50 pm MT, March 31st to earn free products, join the fun and earn additional $25 in hosting rewards.

Click here to order your Stampin’ Up! Products online 24/7! (US only)

Shop at my Online Store and use Hostess Code 7FDWKVA7 when you order

Click Here to learn more about using the Hostess Code


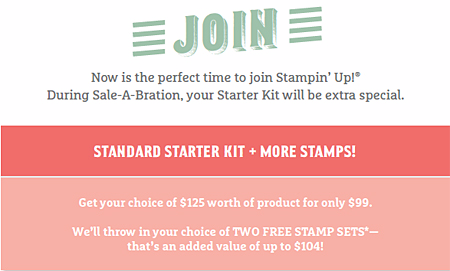
Sale-a-bration is a great time to join!

Join the Blue Mountain Stampers

What are the Blue Mountain Stampers?

That’s the name of our stamping community. I enjoy welcoming new members to our group. We’re from all over. If you’re considering joining Stampin’ Up!, you may have questions about how I would support you as part of my team. I do offer a variety of ways to learn, grow and to have FUN as a Blue Mountain Stamper!

  • Exclusive Team Resource Page – videos, PDFs and more
  • Exclusive Face book Group – A great way to share and connect with other team members and share
  • Swapping Opportunities
  • Team Retreats
  • Meetings – both local and online/virtual
  • Recognition & Incentives
  • Training available for workshops, clubs, classes and more!
  • Additional support and business coaching available

We have a very activity group that share and answer each other’s questions on our Exclusive face book group.  If you’re looking for fun, a place to grow and share with others…You’ll fit right in!

Hobbyists are welcome!

  • Did you know?  90% of my Blue Mountain Stampers’ are Happy Shoppers – purchasing for themselves, (along with their family and friends.)  That’s right…you can just get a discount on products you love!
  • We welcome the hobbyist who’s looking to be a “happy shopper” (and save money), as well as those of you that want to build a business (and make money).
  • Everyone is welcome after all there’s room for both and everyone in between.

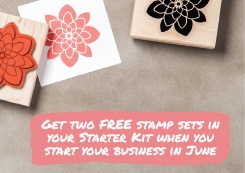
When you join during the Sale-a-Bration promotion, not only will you get the fabulous starter kit for only $99 (and free shipping), but you also get to choose TWO FREE STAMP SETS (that’s an additional value up to $104!)

And there is NO Obligation when you purchase your starter kit – Join the Blue Mountain Stampers and see what it’s all about!

Learn More about the Blue Mountain Stampers

Join the Blue Mountain Stampers

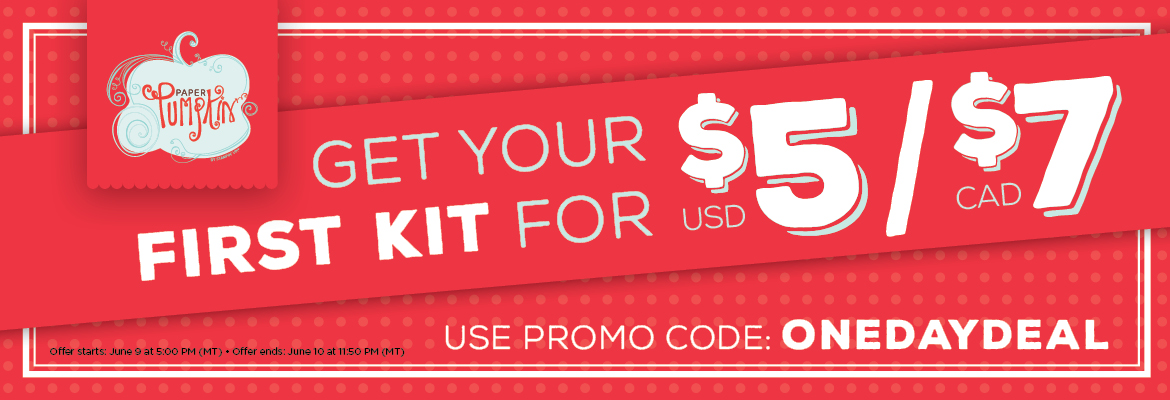
Last Chance for FREE Sale-a-bration items with the purchase of Paper Pumpkin PrePaid Subscriptions


Team Holiday Fun

Last week our Team, the Blue Mountain Stampers had it’s annual Christmas Party so I thought I’d share some of what we did with you.

This year our December meeting consisted of a luncheon, BINGO and of course stamping! Here are some pictures from the event.

BINGO was something new we tried as a team – I’m thinking it was a hit!

team-christas-party-playing-bingo-1 team-christas-party-playing-bingo-3

Everyone was a winner and got to choose goodies from the prize table, including items from the NEW 2017 Occasions Catalog!

bingo-winners-team-dec-2016-3

We celebrated Anniversaries with a little gift. Shared projects that we’ve created,

cindys-5th-anniversary-gift

and had fun making a Home Decor project during our stamping time.

team-christmas-party-make-n-takes-2

And of course I just had to get a group photo of all of us! (I got to try out my selfie stick I daughter got me – LOL!)

team-christmas-party-2016

We had a lot of fun together and I feel so blessed to have these wonderful crafters and stampers on my team. It truly is on of the best parts of being a Stampin’ Up! Demonstrator. Doing what you love, gathering with friends, sharing,  and of course lots of laughter and fun!

Stop by tomorrow when I’ll be sharing some of the wonderful projects my team members brought to the party!

On Stage – Atlanta

Have you ever wondered about what a Stampin’ Up! event is like for Demonstrators? The first weekend in November I was able to attend our regional On Stage event in the Atlanta area! Anticipation was high as Deborah and I drove south from Clarkesville into Atlanta to participate in a Sherrie’s Shoe Box Swap the day before the actual event. It was Deborah’s first Stampin’ Up! event and I knew she was going to love it!

One of the fun things about these events that I enjoy is being able to spend time with  team members, friends and fellow demonstrators from around the country that I’ve met along my stamping journey! And of course I love to pamper my team and room mates.

Want to see what my room mate pillow gifts included? Well here is the batch I made for everyone.

on-stage-pillow-gifts-2

And a close up of of the pillow gift. (I got carried away since I was having so much fun with the pillow gifts.  What’s new right?) The little popcorn box wouldn’t hold it all. LOL!

on-stage-pillow-gifts-3

But that was OK tho since the Blooms & Bliss Designer Series paper I was using is so lovely.. I didn’t want to stop.

Traditionally I always make a name tag for the bag we’ll receive. It helps to keep track of things! Especially when it’s filled with goodies!

on-stage-pillow-gifts-name-tags

This year I used clip art from the event to create the tags  – do you recognize the star pattern paper from the Presents & Pinecones Designer Series Paper? I couldn’t resist putting a little bit of holiday magic into the tags.

Here is what was inside the popcorn box.

on-stage-pillow-gifts-1

Since everyone is always on the move and sharing things I like to include hand sanitizer, too. This year I used these pocket sized wipes.

on-stage-pillow-gifts-wet-wipes

And who can’t use a little package of tissues?

on-stage-pillow-gifts-kleenex

along with some gum and a few pieces of candy.

on-stage-pillow-gifts-gum

I also found these wonderful post it note flags and couldn’t resist!

on-stage-pillow-gifts-catalog-post-it-flags

I thought the flags were perfect for marking our NEW Occasions Catalogs with!!! And OMG – I can’t wait for you to see it! I’m loving everything in it – my poor little post it flags are all used up! LOL! (I can’t wait for you to see the products at my Occasions Catalog Launch – I’ll let you know about it soon. But if you’d like to see it before it goes live, why not join my team? Demonstrators get to see things at least 30 days early!)

These pillow gifts greeted everyone in the hotel room.

on-stage-pillow-gifts

And for my Team member I made a little something special – you can never have enough note books!

on-stage-team-pillow-gift-notebook

I really love the way this turned out. Can you see the watermark images done with the Paisleys & Poises stamp set (142196) on the initial? I also used the Petals & Paisleys Specialty Designer Series Paper (142017) and coordinating 3/8″ Ribbon Trio Pack (142021). LOVE this pack of paper – it’s so pretty and the colors are gorgeous together. (I can’t wait to make some more of these for holiday gifts.)

I think Deborah liked it too.

on-stage-team-pillow-gift-deborah

Stampin’ Up! makes an event special with a themed bag that you receive to hold all those goodies and giveaways!

on-stage-atlanta-2016-bag

And the tables are always decorated lovely – This years theme was based on the Lift Me Up stamp set.

on-stage-atlanta-table

And what can I say Stampin’ Up! out did themselves this year! Lot’s of fun, great ideas, sharing and more. And I can’t believe all the wonderful goodies we were given! Between our bag goodies, prize patrol and all event giveaways I was thrilled with lot’s of great products. And then at the very end of the event Stampin’ Up! announced we could share the items on the table that we’d used for our make n takes too!!! Wow! Starting with the most recent birthday we went around the table and chose items until they were gone! What fun.

on-stage-atlanta-2016

My bag was over flowing by the end of the event.

And finally here is my Team photo of Deborah & I. (Unfortunately the Atlanta event sold out so quickly that not everyone on the Team who wanted to attend was able to go.)

on-stage-blue-mountain-stampers-team-photo

But great news for my team and those of us in the Southeast – Our spring On Stage will be in Savannah, Georgia!!! Whoo hoo! Of course we’re already planning on a team trip!

Sound like fun? Want to learn more about becoming a Stampin’ Up! Demonstrator? Or just get a discount on your crafting supplies? It’s a great time to join with the Occasions Catalog preorder for Demonstrators starting December 1st. Join today and you can be one of the first to get new products too! I’d love to speak with you about joining my team, the Blue Mountain Stampers.

Click HERE for more information or contact me directly at [email protected] or you can call 706 754-7124

Stop by tomorrow when I’ll be sharing some fun treat items I’ve made.

Last Chance to RSVP for this month’s Card Class

card-class-001

Thursday November 17th at 1:30 pm or 6:30 pm and Tuesday, November 22nd 10 am

click HERE for more details

Click here to order your Stampin’ Up! Products online 24/7! (US only)

Use Hostess Code M7RQC4NE and receive a FREE gift from me when you place a minimum order of $50

It’s my way of saying thank you for choosing me as your Demonstrator!!!

Click Here to learn more about using the Hostess Code If you order Online make sure your profile information is up to date and you’ve allowed me to contact you

stitched-from-the-heart-flyer-image


Classroom Makeover

As I mentioned yesterday – I’m going to share my classroom make over with you. As it is so far, anyhow I’m waiting for the next phase.

My son surprised me this summer with the offer to start on some of the things I’ve been wanting to do. Lots of painting later, (which you know is not my favorite thing to do), I’m really happy with things!

As I shared with you back in June – here was the first step. A trip to the for one of several loads of wood. You can click HERE to see more of the beginning steps that I’ve shared with you earlier.

June 20 2016 wood for classroom

I ended up going what definitely was my natural pull when it comes to color! After all who would love be surrounds by colors and a room inspired by this?

classroom-make-over-inpiration

While we live in the mountains I grew up in Milwaukee and around Lake Michigan so I love the water!

Johnathan took my basic ideas of what I wanted and put them into action. He was making some adjustments that he thought I’d like as he worked on things. (I let him do his thing since he custom built everything and designed it himself.) And Larry got into the act by suggesting the oak trim to tie things together in the space.

classroom-14 classroom-make-over-counter-top-2 classroom-make-over-counter-top-with-trim

My classroom was upside down A LOT over the summer as we worked in between events. Everyone was wonderful about classes during the transformation. Here are some photos to give you an idea of what I mean! LOL!!!

classroom-make-over-paint classroom-make-over-painting-shelves-1 classroom-make-over-painting-shelves-3

While the classroom is not quite finished yet, everyone seems to be enjoying the new space. I know I am. Now I’m just trying to be patient until his work slows down so he can start on the upper part of my storage space. LOL!

classroom-13

The classroom is being set up so that  everyone can find what they need to work on a project. The 12×12 file cabinet holds Designer Series Paper that you can thumb through and the smaller drawers hold a rainbow of Card stock. Eventually they’ll have labels. I’ve added a TV of course for my Team Meetings so we can stream and share Stampin’ Up! events and more. And there is  wonderful rainbow colored Ribbon Holder so you can select a bit of something if you are working on a project.

The shelves hold stamp sets, sponges and more that can be easily accessed by everyone. Along with displayed items too.

classroom-makeover-3

I loved the chalk board idea when I saw it. So I found some old frames that Johnathan spray painted for me. I painted the glass (not something I’d do again since if you press to hard…..well I’ll get around to replacing it eventually. LOL! but not right now since they are displaying all kinds of the Holiday Catalog projects.)

classroom-makeover-chalkboard-frames classroom-makeover-2 classroom-makeover-1

I’ve created a little corner store – so if you are looking for something to work on a project you can browse through all kinds of stamps, paper and accessories! Great for upcoming Retreats!

If you want to see even more pictures I’ll be posting more on my face book page tomorrow. So why not stop by and check them out. As you can see this was a family affair. My husband Larry even helped me paint a bit and it was nice to see the guys working on a project like when Johnathan was just a little one. This time the roles were reversed with Johnathan showing Larry tips and tricks! My how he has so quickly grown up into a man! Sigh…. I’m so lucky and proud of these guys! I couldn’t do what I do with out all their love and support.

classroom-3

I won’t be posting tomorrow since I’ll be getting ready for the Fairview Elementary Fall Festival. If you live locally why not stop by and say hi? I’ll be selling cards, treats and gift items for the holiday season. You can check out the school page for more information – https://www.facebook.com/events/632987676881420/

Click here to order your Stampin’ Up! Products online 24/7! (US only)

Use Hostess Code M7RQC4NE and receive a FREE gift from me when you place a minimum order of $50

Just a few more days to take advantage of the October Promotion

dsp-sale-banner

Fun & Flirty Flip Flops

What says summer more than a new pair of flip flops? Today’s card uses our fun bold Designer Series Paper, Festive Birthday to create these fun cactus flip flops.

Seaside Shore Flip Flops (1)

I’ve had several of you ask me how I created these when you saw my shoe box card HERE.

So I thought I’ve put together a video tutorial on how they are made. And I included some tips to make things easier.

Want the pattern? Well I’ve made one up just for you!

Flip Flop Pattern Printable PDF

So, what kind of flip flops do you like? Plain, bright and colorful, or wild patterns? Why not leave me a comment and let me know.

Seaside Shore Flip Flops (2)

What’s Happening Here?

On a personal note I thought I’d share with you what is happening with all this wood my son, Johnathan and I  brought home on June 20th. (Click HERE to see that post).

June 20 2016 wood for classroom

I’m excited to say my guys are making great progress on the project… my classroom!

June 2016 Classroom storage (4)

Johnathan is always happy playing with his “toys” in the garage. (He built his garage cabinetry that you see in the background over his winter break.)

June 2016 Classroom storage (1)

Over the weekend they finished the 12 x 12 paper storage unit.

June 2016 Classroom storage (2)

and the base cabinet too! Wow that was fast!!!

June 2016 Classroom storage (3)

I can’t tell you how excited I am to get painting! And you know how I dislike painting. LOL!!!

Right now, I’m trying to decide a new paint color for the classroom walls. After all, with this great cabinetry going in I need a new coat of paint, right?

I’ve got it narrowed down to two choices at this point.

classroom paint swatches

A more bold one and a safe one. I’m trying to decide how crazy I want to be LOL!!! Pool Party or Sahara Sand ???? Hmmm…. what do you think? I’ve changed my mind so many times already, but these are the two I keep coming back to since I love the Island Indigo display item I already have.

What color would you choose?

Supplies:

Stamp Set: Seaside Shore (141622/141625)

Inks: Melon Mambo (115320), Crumb Cake (126975), and Soft Suede Classic Ink (126978)

Paper: Festive Birthday Designer Series Paper (141630), Melon Mambo (126948), Emerald Envy (141415), Crumb Cake (120953), Soft Sky (131203) and Whisper White Card stock (100730)

Accessories: Seaside Embossing Folder (141481), Melon Mambo tick Baker’s Twine (141689), Blossom Bunch Punch (140612) and Regal Enamel Shapes (141681)


Click here to order your Stampin’ Up! Products online 24/7! (US only)

Use Hostess Code 4JURAZXY and receive a FREE gift when you place a minimum order of $50

Click Here to learn more about using the Hostess Code If you order Online make sure your profile information is up to date and you’ve allowed me to contact you

Team Retreat Fun!

I love to pamper my team – And one of the fun things we do together are retreats! I hold three of them a year so that we can spend time away from the daily grind together.

We love sharing, stamping together and well, honestly just having some fun. After all who doesn’t like a weekend where they can lounge around in their Pjs and stamp?

BMS Weekend Retreat June 2016 (2)

We bring all our new goodies to share and while we all have different projects – it’s a wonderful time crafting together and inspiring each others creativity!

What kind of things do we do? Well Janette’s project this retreat was to get all her 4th of July cards completed and ready to send out when she returned home.

BMS Weekend Retreat June 2016 show & tell table (1)

And Anna’s was to create a birthday card from her son using the NEW Shooting Star Bundle (142349/142350).

BMS Weekend Retreat June 2016 Show & Tell table

On Saturday we have a team Shoe box Swap. It’s a lot of fun. Everyone shares how their card was designed and special tips for assembly before we get started.

Here is Marni sharing how to assemble the penny sandwich for the Sliding Star Framelits (141820) for her card.

BMS Weekend Retreat June 2016 (1)

What fun learning new things together! And it’s a great chance to try new products we don’t have.

BMS Weekend Retreat Shoebox Swap June 2016 (5)

Marni’s card is done in Dapper Denim and uses the Shoot Star Stamp Set (141616) in addition to the Birthday Banners Stamp Set (141506) and Bunch of Banners Framelits Dies (141488). I love the way she used to Gold Glimmer Paper (133719) for the stars to add a bit of bling.

BMS Weekend Retreat Shoebox Swap June 2016 (4)

Anna’s card uses the By the Shore Suite found in the Annual Catalog (page 92 & 93). I really love nautical suite of coordinating products! She used the By the Seashore Designer Series Paper (141640) and Seaside Shore stamp set (141622/141625) in addition to the Seaside Embossing Folder (141481) to create this fun summer themed card for the shoe box.

Melanie who just joined our team in June (and took advantage of the wonderful special to earn 2 addition stamp sets), chose to do a patriotic card using the Perpetual Calendar stamp set (137167) and Star Framelits Dies (133723).

BMS Weekend Retreat Shoebox Swap June 2016 (2)

Janette’s shoe box was a soft and sweet sympathy card done in Sweet Sugarplum. It uses the Best Badges Bundle (142333/142334) and the Thought & Prayers stamp set (128751/127805).

BMS Weekend Retreat Shoebox Swap June 2016 (1)

Can you see the little flowers on the vine? The flowers are part of the Tree Builder punch (138295) and the scallop edge was made using the Best Badge Punch (140633) – how cool is that?

And of course we have a Shoe & Tell table – where we put our creations from the weekend. Here is a fun birthday card using the Festive Birthday Designer Series Paper and Build a Birthday stamp set (138646).

BMS Weekend Retreat June 2016 show & tell table (2)

Oops I almost forgot – What did I do for my shoe box? Well I was in the mood for a fun bold color pallet so I created this little flip flop card using the Festive Birthday Designer Series Paper and the Seaside Shore stamp set. (I’ve included the complete recipe below for you.)

BMS Weekend Retreat Shoebox Swap June 2016 (3)

Want to Join in the Fun?

Did you know there are still 2 days to join and take advantage of the FANTASTIC June promotion?

Join Now June Special image

Yes, there are! You have until the Thursday, June 30th at 11:50 p.m. (MT) to join AND not only get $125 in product for just $99 but you’ll also get to choose any TWO stamp sets!!!! That’s over a $200 value for just $99!!!!

But don’t wait until the last minute!  Click HERE to learn more or to sign up today.

Have some questions? Why not contact me today to learn more? Call 706 754-7124 or email me at [email protected]

When you join you’ll get to be part of my team, the Blue Mountain Stampers and join in the fun too!

Supplies:

Stamp Set: Seaside Shore (141622/141625)

Inks: Crumb Cake (126975), Soft Suede (126978), and Melon Mambo (115320)

Paper: Festive Birthday Designer Series Paper (141630), Crumb Cake (120953), Tempting Turquoise (102067), Melon Mambo (126948), and Soft Sky Card Stock (131203)

Accessories: Seaside Embossing Folder (141481), Melon Mambo Thick Baker’s Twine (141689), Regal Enamel Dots (141681), 1/8″ Circle Handheld Punch (134365) and Blossom Punch (140612)

Click here to order your Stampin’ Up! Products online 24/7! (US only)

Use Hostess Code DJ2RG4PZ

Click Here to learn more about using the Hostess Code If you order Online make sure your profile information is up to date and you’ve allowed me to contact you

Layering Love

Today’s card is one my friend Kathleen designed for our recent get together and I got to stamp. It uses the Layering Love sentiment set along with the Swirly Scribbles Thinlits Die.

Layering Love (2)

These dies are a lot of fun and I’m really loving them for all kinds of projects!

Today is a bit crazy so I’m making this short so I can finish up the organizational items I wanted to share with you this week – I’m hoping I can post them for you tomorrow.

Meanwhile I thought I’d share a photo of what I did this morning. My son surprised me with a trip to the lumber yard! Yippie!

June 20 2016 wood for classroom

I’m so excited! I can’t wait to share with you what this stack of wood will be turned into.

Supplies:

Stamp Set: Layering Love (141962/141497) and  Watercolor Wings (139424)

Inks: Basic Black Archival Ink Pad (140931), Wisteria Wonder (126985), Elegant Eggplant (126969), and Perfect Plum Classic Ink (126963)

Paper: Pop of Pink Designer Series Paper (141648), Thick Whisper White (140272), Perfect Plum (101889) and Basic Black Card stock (121045)

Accessories: Swirly Scribbles thinlit Dies (141497), White Perfect Accents (138416) and Black Sharpie


Click here to order your Stampin’ Up! Products online 24/7! (US only)

Use Hostess Code DJ2RG4PZ

Swirly Bird Fun & a bit more

There is nothing better than playing with new stamp sets and this week I’m going to share some projects that I stamped and received when I got together with some fellow demonstrators last week.

Today’s card was made using the Swirly Bird Bundle (142353).

Swirly Bird Stamp Divas June 2016

Just perfect for a summer birthday! And I’ve got to tell you while this wasn’t on my original wish list it is now!!!

The more I see and use this set the more I love it. It’s just so versatile and the options are endless! I’m so glad that Kathleen shared this project with me.

Stop back by tomorrow when I’ll share a card made with the Moroccan Nights stamp set that Teresa gave me.

On a personal note –

What do you do when you have the house to yourself for a whole weekend? Recently I was at loose ends for a whole uninterrupted weekend of me time. What does that mean? Well I can do things that I’ve been wanting to or as the spirit moves me. Either way that means no cooking and being on my own time table. LOL!

This particular weekend – I got the bug to sew. Of course, this was after seeing my patio furniture dry rotted when it was uncovered for a family cook out!

Sewing Machine Old chairs

After a couple of weeks shopping around and being shocked at the price of replacement cushions. I remembered my friend Cindy recently telling me about recovering hers. Well low and behold there was a fabric sale that came across my email – I was inspired. Armed with limited sewing ability and measurements I headed to town. Straight lines I can do! So I figured I could tackle this project after a bit of googling. LOL!

I fell in love with this fun, bright colorful stripe at the store. Couldn’t resist the Calypso Coral and Mint Macaron combo, there is even a little real red and  Cucumber Crush in there! After cleaning out the store of all they had, I came home thinking I could do all 4 chairs with what I had.

Sewing Machine (1)

I was a bit off – Totally didn’t get what the girl was saying. Now I know why she seemed confused, she must have thought I was a bit crazy. I bet she was shaking her head when I left. ( I didn’t account for the pattern I soon learned!) But that’s okay, I had enough to get me started! Here is my trial run chair.

Sewing Machine Revovered chairs (2)

Simply made a pillow case and whip stitched the back edge. (Since no one will look any ways – that is except my husband! Who checked it out first thing when he got home.)

I was on a roll and soon got the fabric in for the last two chairs – didn’t want to forget what I was doing!

Sewing Machine Revovered chairs (1)

Everyone has been so sweet with their comments – some even thought I’d bought a new set!

Well once the machine was set up in my classroom I couldn’t quit. So since I’ve been wanting to get to this project for ages I thought why not?

old purse

This was a favorite purse of mine. Since it is cloth it is light weight and perfect for travel in the summer. Unfortunately my liner had gotten shredded from all the use so I set it aside a couple of summers ago. (I’m sure you have projects like this too. Thinking you’ll get to it soon, but then time passes. I’ve REALLY got to be in the mood to sew and I was on a high from the patio set sucess!).

Any how. I just knew our retired  Stampin’ Up! fabric that I had would be perfect for this little purse. So here is the finished project. I lined it in the Rich Razzleberry pattern so it won’t show the dirt.

Floral District Fabric Purse

Cute? Not perfect, but all the same I’m going to enjoy using it. The Floral District Designer Series Paper was one of my favorites (not that I’m hording any….shhh don’t tell but it’s sitting right there with my Tea Party Designer Series Paper that I’m saving for a special project!)

Well the machine has been put away for now so the classroom is fully operational again!

What do you do when you have a weekend to yourself? Why not leave me a comment and let me know?

Supplies:

Stamp Set: Swirly Bird (141749) and Butterfly Basics (138813/138816/137154)

Inks: Pacific Point (126951), Tempting Turquoise (126952) and Delightful Dijon Classic Ink (138327)

Paper: Pacific Point (111350), Tempting Turquoise (102067) and Whisper White Card stock (100730)

Accessories: Swirly Scribbles Thinlits Dies (141497) and  Fine Tip Glue Pen (138309)


Click here to order your Stampin’ Up! Products online 24/7! (US only)

Use Hostess Code DJ2RG4PZ

Sign up for my FREE Newsletter My Newsletters include stamping tips, ideas and updates on what is happening with me! You’ll also receive a FREE Pinwheel Tutorial when you sign up!

Framelits & Thinlits Organization 101

I love keeping my Framelit dies in easy to open clear mount cases and so I thought I’d share with you the new labels I created for the NEW 2016 Annual Catalog.

Framelits Case Inserts (3)

It’s always fun to freshen up my crafting space and these new inserts are colorful in addition to having the picture on the front so you know exactly where that framelit came from! (Something my old Framelit inserts didn’t have.)

Here is what the case looks like on the inside.

Inside Framelits case insert

What’s that black sheet? Well believe it or not it is a Magnetic Vent Cover that I find in my local Building Supply big box store. They are inexpensive and work great for this.

Magnetic sheets (1)

I simply cut them with my trimmer and add a little of our Tear & Tape to the back and press. (They come in large 8 x 15 sheets so you can get several cases for your Framelits out of a package when you cut them to fit.) Perfect for holding those Framelits!

Want to get organized too? Well you’re in luck because today I’m sharing files for all the Framelits in the 2016 Annual Catalog that will fit into our Clear Mount cases (119105).

Check out this quick video I made showing you how to use the PDFs and cut them down.

Want to start? Order your Clear Mount Cases HERE. They come in groups of 4 and are perfect for organization of our Framelits in addition to other things too.

Then just print out the following files on Whisper White Card stock (100730) and your ready to go!

Here are the files for the 2016 Annual Catalog Framelits –

  • Baby’s First Framelits Case Insert PDF
  •  Balloon Framelits Case Insert PDF
  • Banners Framelits Case Insert PDF
  • Bear Hugs Framelits Case Insert PDF
  • Birds & Blooms Thinlits Case Insert PDF
  • Bloomin Heart Thinlits Case Insert PDF
  • Bold Butterfly Framelits Case Insert PDF (updated 6/28)
  • Botanical Buider Framelits Case Insert PDF
  • Bunch of Banners Framelits Case Insert PDF
  • Butterfly Thinlits Case Insert PDF
  • Christmas Greetings Framelits Case Insert PDF
  • Cupcake Cutouts Framelits Case Insert PDF
  • Delicate Ornament Thinlits Case Insert PDF
  • Detailed Floral Thinlits Case Insert PDF
  • Everyday Jar Framelits Case Insert PDF
  • Fiesta Time Framelits Case Insert PDF
  • Flower Fair Framelits Case Insert PDF
  •  Flourish Thinlits Case Insert PDF
  • Hearth & Home Framelits Case Insert PDF
  • Hello You Framelits Case Insert PDF
  • Large Letters Framelits Case Insert PDF
  • Large Numbers Framelits Case Insert PDF
  • Layering Circles Framelits Case Insert PDF
  • Layering Ovals Framelits Case Insert PDF
  • Layering Squares Framelits Case Insert PDF
  • Leaflets Framelits Case Insert PDF
  • Lots of Labels Framelits Case Insert PDF
  • May Flowers Framelits Case Insert PDF
  • Outdoor Adventure Framelits Case Insert PDF
  • Party Pop Up Thinlits Case Insert PDF
  • Perfect Pines Framelits Case Insert PDF
  • Popcorn Box Thinlits Case Insert PDF
  • Project Life Cards & Labels Framelits Case Insert PDF
  • Project Life Paper Clips Thinlits Case Insert PDF
  • Rose Garden Framelits Case Insert PDF
  • Sassy & Sweet Framelits Case Insert PDF
  • Sliding Star Framelits Case Insert PDF
  • Snow Friends Framelits Case Insert PDF
  • Stars Framelits Case Insert PDF
  • Sunburst Framelits Case Insert PDF
  • Sunshine Wishes Thinlits Case Insert PDF
  • Swirly Scribbles Thinlits Case Insert PDF
  • Tags & Labels Framelits Case Insert PDF
  • Umbrella Weather Framelits Case Insert PDF
  •  Wish Big Framelits Case Insert PDF
  • Wonderful Wreath Framelits Case Insert PDF


Let me know if you find any mistakes.I may have missed something so just let me know. LOL!

Update 6/21/2016: I’m working on some of the retired Framelits and will be posting them as I get them done. So why not leave me a comment and let me know if there are any retired Framelits you’d like inserts for. That way I can try to post those first.

LAST FEW HOURS TO TRY PAPER PUMPKIN FOR $5

Paper Pumpkin 1 day sale

Ends Tonight, Friday night at 11:50 p.m. (MT)

Use promo code “ONEDAYDEAL”

Click HERE to sign up today and create your account

If you have any problems creating your account or would prefer to call or email me I’ll be happy to help create your account for you.

Here is the fine print:

  • The price of the kit ($5 USD)
  • This offer is open to first-time subscribers only. Discount applies to one kit for June 2016. After the first month, the price for the subscription will return to $19.95 USD
  • Offer starts on Thursday, June 9 at 5:00 PM (MT) and ends Friday, June 10 at 11:50 PM (MT).
  • Available for month-to-month subscriptions, not prepaid subscriptions.

Click here to order your Stampin’ Up! Products online 24/7! (US only)

Use Hostess Code DJ2RG4PZ