Acorny Thank You & Video Tutorial

The Acorny Thank You Bundle (140841) was one I knew I had to have for my fall cards. I thought it was cute and love the bold images and of course it had great possibilities and since it has the coordinating Acorn Builder Punch. After all  who can resist a punch?

Coffee & Cards September 2015 (2)

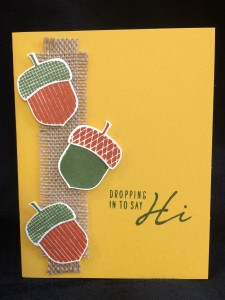
Today’s card was made using the bundle and the acorns were quick and easy with my Acorny Punch Tip!

Want to learn more about making punching easier with this fun bundle? Why not check out my short video tutorial – Acorny Punch Tips?

So what do you think? This tip can be used with all your photopolymer sets and coordinating punches. And it’s so easy. I just keep my little template in the case. Check out my quick tip for storage of the punch templates and Stamp-a-ma-jig imaging sheets HERE. Easy, right? I love easy things that make stamping more fun!

Supplies:

Stamp Set: Acorny Thank You (139718)

Inks: Cajun Craze (126965) and  Mossy Meadow (133645)

Paper: Crushed Curry (131199) and Very Vanilla Card Stock (101650)

Accessories: Acorn Builder Punch (139681), 1 1/4″ Burlap Ribbon (132140), and Stampin’ Dimensionals (104430)

Click here to order your Stampin’ Up! Products online 24/7! (US only)

Hostess code DUU2BCAZ

Save 15% Off Your Stamps – Sale ends Friday, October 23rd!!!

15% off stamps promotion

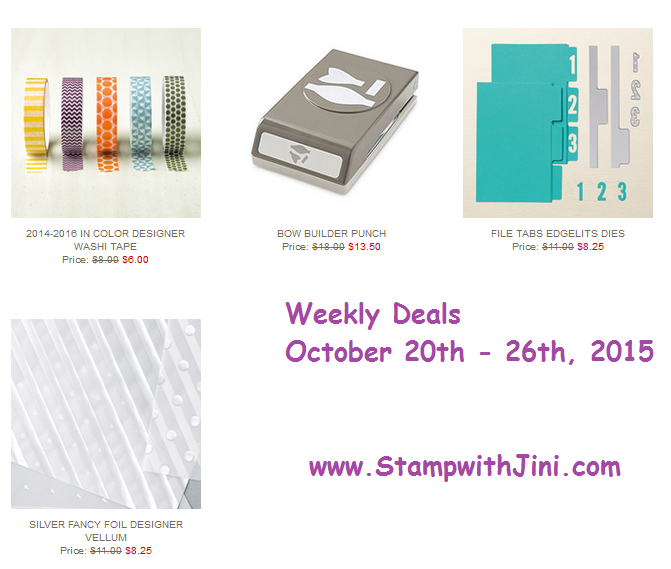
Weekly Deals (Special ends Monday, October 26th, 2015 at 11:50 p.m. (MT)

Stamp-a-ma-jig Storage Tip Tutorial & New Weekly Deals

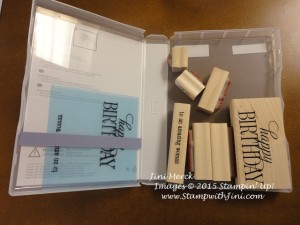
I’ve just realized I hadn’t already shared this quick and easy tip with you for storing your Stamp-a-ma-jig imaging sheet. It really makes stamping with your wood block stamps quick and easy!

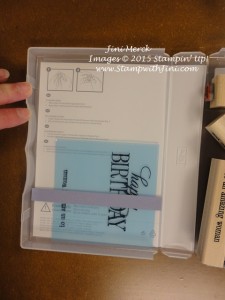
I’ve a wood stamp lover. They are quick – just open the case and go. So using vellum for imaging sheets this is something I’ve been doing forever. But for some reason it dawned on me the other day that my vellum just flopped around in the cases and it bothered me. (No compulsive stamper here, right? LOL).

So today’s post includes and quick video – so why not check it out? The Stamp-a-ma-jig (101049) is a must have tool that I reach for all the time since it allows me to position my images exactly where I want it every time!

Stamp-a-ma-jig Storage Tip Video Tutorial

And for those heavy use sentiment sets such as our Hostess set, Happy Birthday, Everyone (139171/139958) I like to use our Window Sheets (114323). They are really durable and sturdy.

imaging sheet tip for wood mount stamps (2)

Simply stamp on the Window Sheets using StazOn Ink and you’ve got an imaging sheet that can last forever!

imaging sheet tip for wood mount stamps (1)

Wonder why the Window Sheet is blue? Well, it’s simple I simply leave on the protective coating that comes on it. It makes finding the imaging sheet easier on my desk.( If you saw my desk while I’m working you’d understand. LOL!) And when I want to change the imaging sheet I simply peel off the protective coating. How great is that – no cleaning.

Want to learn about Getting Started with the Stamp-a-ma-jig? Why not check out my YouTube video tutorial HERE. It will show you the basics of how to use your Stamp-a-ma-jig and creating your imaging sheet.

NEW WEEKLY DEALS FOR OCTOBER 20TH

Weekly Deals October 20 2015

Click here to order your Stampin’ Up! Products online 24/7! (US only)

Hostess code DUU2BCAZ

Get a FREE gift when you use my Hostess Code and place an Online Order

Garden In Bloom

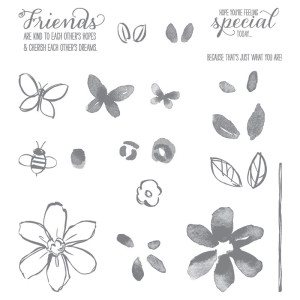
Garden in Bloom is a fun whimsical stamp set that give you a lot of options since it is a two-step set that contains 20 photopolymer stamps.

Garden in Bloom image

You can use just the outline images like I did here on this card we made at the Bingo event.

Garden in Bloom Bingo

or use the sold images to create a softer look – or why not use both to create different look? Versatile is the word when looking at this set. And aren’t the sentiments lovely?

New to Photopolymer stamps? Or maybe want to refresh your memory? Here are some great tips for using our Photopolymer stamps.

Photopolymer Stamp Questions & Answers

Q. How do I clean the photopolymer stamps?

A. Use your Stampin’ Scrub and Stampin’ Mist just as you would with any stamps. If they ever get dusty or lose their stickiness, you can wash them in mild soap and water. If you use them with Stazon, you can also use Stazon cleaner on them. But, use it sparingly and make sure you do not leave traces of the cleaner on the stamps after cleaning.

Q. How do I store the photopolymer stamps?

A. They come in a cello bag, between two sheets of acetate. One of the sheets is conveniently printed with the stamp images for storage. Our clear-mount cases work nicely to store them in if you prefer. Store them indoors—don’t leave them sitting out in direct sunlight.

Q. What kinds of ink can I use with photopolymer stamps?

A. Our classic ink in the firm foam pads is the absolute best choice. Versamark and Stazon are also ok. Make sure you clean your stamps promptly after use to avoid staining or damage.

Q. Will the photopolymer stamps stain?

A. They are more prone to staining. Basic Gray and red inks seem to be the worst. Try to clean your
stamps immediately after use to avoid staining.

Q. Are the photopolymer stamps made in the US?

A. Yes. The photopolymer material is shipped from the UK and the manufacturing of the stamps themselves takes place in the USA.

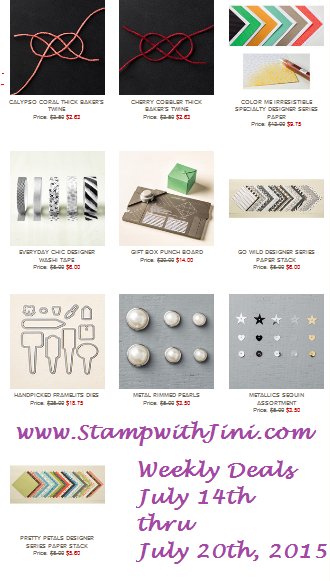
Last Day for Weekly Deals

Weekly Deals July 14 2015

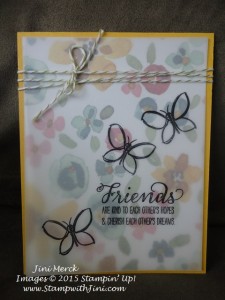
Supplies:

Stamp Set: Garden in Bloom (139433)

Inks:StazOn Jet Black Pad (101406)

Paper: English Garden Designer Series Paper (138440) White Vellum (101856) and Hello Honey Card stock (133643)

Accessories: Old Olive Baker’s Twine and Mini Glue Dots (103683)

Click here to order your Stampin’ Up! Products online 24/7! (US only)

Hostess code 6TKZJVDZ

Use my Hostess Code in July and get a FREE gift! (Minimum purchase of $50)

Spring Catalog Designer Series Paper Chart

Did you know that our Designer Series Paper now has the colors that are used in the paper printed right on the tag board insert? Well they do. Stampin’ Up! has heard our requests and added this for our convenience.  With this addition to our Designer Series Paper I figured you wouldn’t want the chart anymore. However, I’ve had several requests recently for my 2013 Spring Catalog Designer Series Paper Chart. It was great to hear that this is an important resource for some of you. I know I still use it as one of my organizational items since the chart puts all the information in one place.

So, although this is a little bit late, here it is my 2013 Spring Catalog Designer Series Paper Chart.

Click HERE for your printable PDF file for the 2013 Spring Catalog DSP Chart

Click here to order your Stampin’ Up! Products online 24/7! (US only)

Tricky Treat Fun

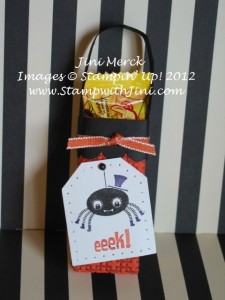
I love punches and the NEW Tricky Treats stamp set in our 2012-2013 Catalog have coordinating punches for all of its images so it makes projects quick and easy. The images in this Tricky Treats set are so cute they just bring a smile to anyone’s face!

Here is a great swap that I received recently that uses the Tricky Treats stamp set. I love all the detail in this little gift item. Isn’t it cute? It holds a piece of laffy taffy – quick hide it from my son!

Did you notice the cute little black pearl on the top of the tag – You can make our Pearls and Rhinestones Basic Jewels and color you wish with a Sharpie ® marker or our Crystal Effects and Reinkers. Its sooo easy to customize them with your favorite color – you’ll never want to stop!

Supplies:

Stamp Set: Tricky Treats

Inks: Basic Black, Pumpkin Pie, Elegant Eggplant

Paper: Basic Black, Pumpkin Pie and Whisper White

Accessories: Essentials  Paper Piercing Pack and Stamping Pierce Mat, Extra Large Tag Punch, Pearls Basic Jewels, Sharpie®, Big Shot and Square Lattice Embossing Folder, 1/8″ Pumpkin Pie Taffeta Ribbon

Click here to order your Stampin’ Up! Products online 24/7! (US only)

It’s Wicked Cool

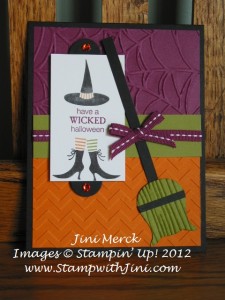
I made this card a while ago and have been meaning to share it with you. I love the little witch’s feet in the Wicked Cool Stamp set, don’t you? I guess I’m dating myself but they always remind me of the shoes sticking out under Dorothy’s house at the beginning of the Wizard of Oz. I remember being so scared watching that move as a child. I ramble, anyhow back to my card.

Coloring directly on the stamp is a great way to color any image and that is what I’ve done here with the Wicked Cool image.  Can you guess which punch I’ve used for the broom? It’s the Owl Builder – You can use that punch for all kinds of things! (Click HERE to see my recent “Got Milk” Tutorial using the Owl Builder Punch.)  And did you notice the Basic Jewels? I just used my orange Sharpie ® to color my Basic Rhinestone. Yep, now you can any color Basic Rhinestones you desire what a great tip, huh?

Supplies:

Stamp Set: Wicked Cool

Inks: Rich Razzleberry and Old Olive

Paper: Whisper White, Old Olive, Rich Razzleberry, Basic Black and Pumpkin Pie

Accessories: Big Shot, Spider Web, Woodgrain, and Chevron Embossing Folders, Apothecary Accents Framelits, ¼” Stitched Grosgrain Ribbon, Basic Rhinestones and Sharpie ®


Click here to order your Stampin’ Up! Products online 24/7! (US only)

Got Milk? Cow Punch Art

As promised yesterday when I showed you my Got Milk? swap from my friend Cindy, I worked on a tutorial for this cute little guy. If you want to see the whole project you can click HERE to see yesterday’s post.
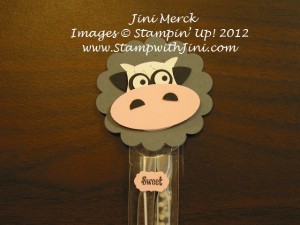
I had the best time yesterday putting together this Cow Punch Art Tutorial for you that even my daughter enjoyed watching the process. As I was putting my little guys together with my fingers covered in my Multipurpose Liquid Glue, I could envision this little feller in one of those great big red barns from my youth.  (No, you’re not alone; I’m not the neatest at gluing tiny pieces together either. Especially since I forgot my “sticky stick” Tip! More later about my Sticky Stick and how to make your own.)

So, I was inspired to create this Cow Punch Art card. My son, Johnathan, when he saw the card said “barns are brown Mom, not red”. I guess he’s right whether it is because we live in Georgia or they just don’t build barns like that any more. The ones I remember from my childhood in Wisconsin were red.

What do you think of my card? I think next time I would make the inside window color Basic Grey not Early Espresso that might make my Cow Punch Art pop a bit more, what do you think? Would you leave me a comment and let me know? I’d love to hear from you – and it would make my day to know that someone out there is looking at my new blog…..
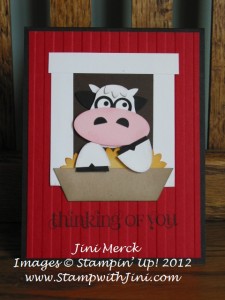
Supplies:

Stamp Set: Curley Cute

Inks: Basic Black, Pretty in Pink, More Mustard, and Basic Grey

Paper: Basic Black, Real Red, Crumb Cake, So Saffron, Pink Pirouette, Early Espresso

Accessories: Big Shot, Stripes Embossing Folder, Paper Snips, Owl Builder, Boho Blossoms, Blossom Petals Builder, and Large Oval Punches, Stampin’ Sponges and Multipurpose Liquid Glue

If you love these little guys too – here is my FREE Cow Punch Art Tutorial on how to make them.

Cow Punch Art Tutorial

Supplies:

Whisper White card stock

Basic Black card stock

Pink Pirouette card stock

Basic Grey card stock

Basic Grey Classic Ink

Pretty in Pink Classic Ink

Stampin’ Sponges or Sponge Daubers

Owl Builder Punch

Boho Blossoms Punch

Blossom Petals Builder Punch

Large Oval Punch

2 3/8″ Scallop Circle Punch

Multipurpose Liquid Glue

Dimensionals

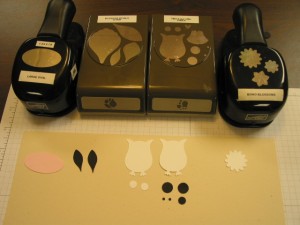
Punch out the following pieces –

Using the Owl Builder Punch and Whisper White card stock, punch 2 bodies and 2 medium circles. Then punch 2 large circles, 1 medium circle, and 2 small circles in Basic Black.

Punch one large flower out of Whisper White card stock using the Boho Blossoms Punch.

Punch 1 Large Oval from the Pink Pirouette card stock.

Finally punch out two of the smallest petals in Basic Black using the Blossom Petals Builder Punch.

You should now have punched out what looks like this:
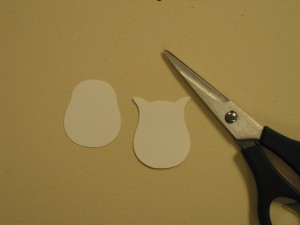
Using the owl pieces trim off the ears from one owl. Then trim off both sets of feet. You can just follow the curve when doing this.
Next take the Boho Blossom and cut off 4 petals. Cut using a slight curve to match the top of the owl’s body.
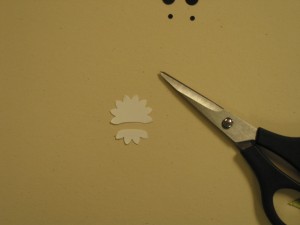
You should now have what looks like this:
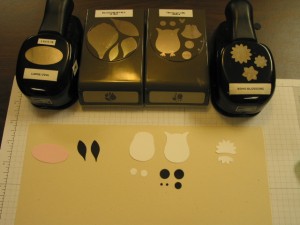
and now you are ready to start assembly on your adorable little feller.

Using the owl body that still has its ears, attach the two Basic Black petals just below the ears on either side. Look mom ears!
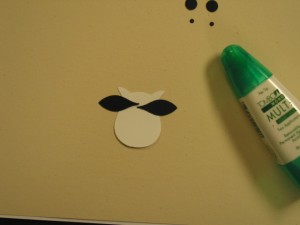
 

Set this aside to dry.

Next, sponge the edge of the cow’s face and Boho Blossom petals using Basic Grey and a Stampin’ Sponge.
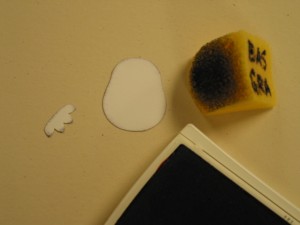
Attach Boho Blossom petals to the top of cow’s head.
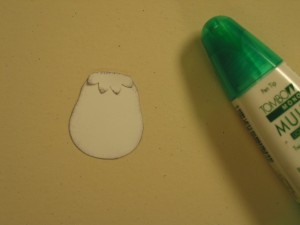
Voila hair!

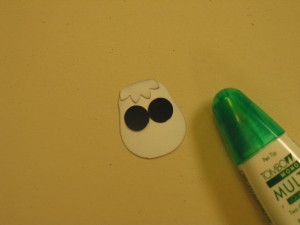
Then attach the large black circles so they touch,
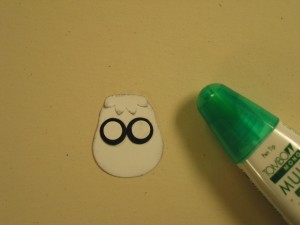
Attach the medium white circles next,
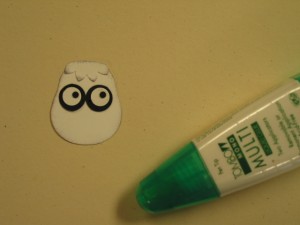
And finally the small Basic Black circles to complete your eyes. Finally the little guy can see!
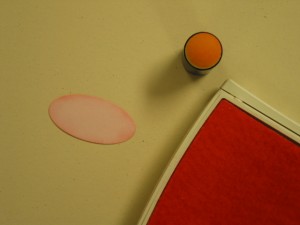
Now for his nose – Sponge the edges of the Pink Pirouette Large Oval piece using Pretty in Pink Ink.
Take the medium Basic Black circle and cut it in half.
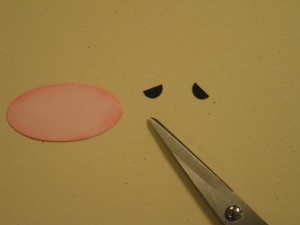
Attach the pieces to the nose.
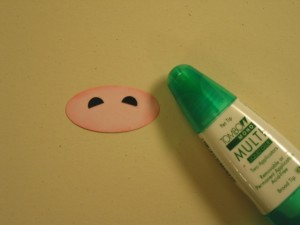
Attach the finished nose to your cow’s face.
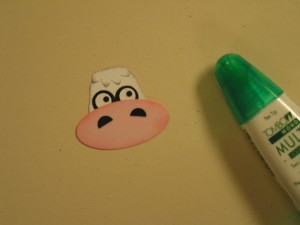
Ahhh, take a deep breath. You’re almost done.

Allow this to dry if needed. Flip the finished piece over and attach 2 Dimensionals to the back.
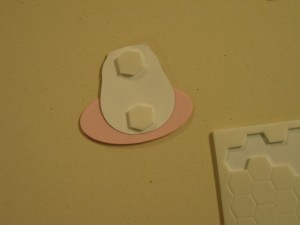
Then attach this to the top of the piece with the ears – and voila’! You have an adorable little guy to use on your next project.
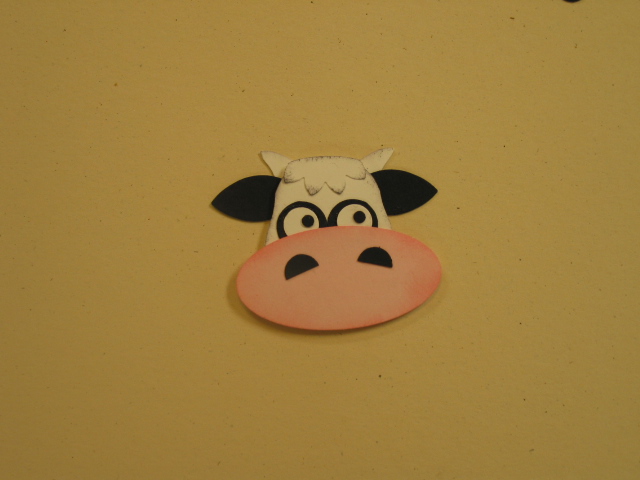
By the way, here’s a little helpful hint to make things a little less sticky along the way.  Make your own “sticky stick”. All you need is a little bit of Multipurpose Liquid Glue, your Silicone Craft Sheet and a tooth pick. Put a little drop of glue on to your Silicone Craft sheet. Roll your tooth pick in it and allow it to dry. Voila’ your very own “sticky stick”.

By the way, in case you didn’t know, our Multipurpose Liquid Glue is a great deal because it is a 2-way glue. When applied wet it adheres with a very strong bond. When allowed to dry first, it acts like a repositioning adhesive. How cool is that?

Did you enjoy this Cow Punch Art Tutorial? Why not join me in my Virtual Club and get exclusive Tutorials every month just for you. Click HERE for more information.

Got to go – it’s almost lunch time. Anyone Got Milk?

Click here to order your Stampin’ Up! Products online 24/7! (US only)

Patio Party Pinwheel

Wow, the last couple of weeks have been crazy around here with band camp. I’m the secretary of the boosters club so there is a lot of startup stuff that happens. But I’m back now and school doesn’t start for a few days.

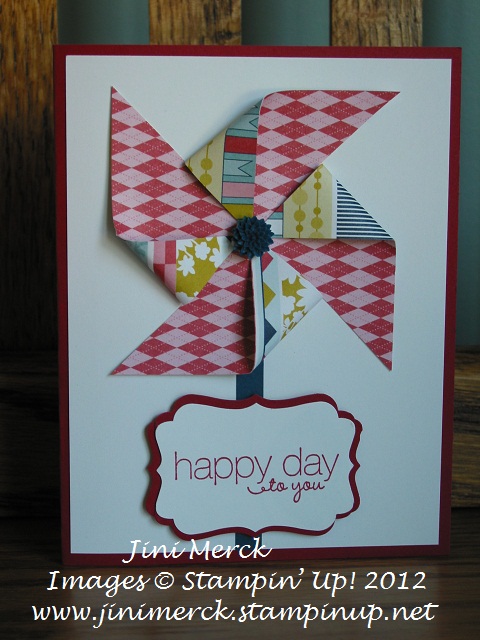
Pinwheel Today I wanted to share with you this little Pinwheel card I made recently. Isn’t it cute? Pinwheels are all the rage right now it seems. I made this card for my last TEAM meeting. Everyone loved the NEW In Color Dahlias that we used for the centers of our pinwheels. The girls had so much fun making them that I thought I would offer the FREE Pinwheel tutorial to you – just for signing up for my email list! (That’s a $9.95 value for FREE) Interested? Click on my link below to sign up today.

Click HERE to sign up for my email list

and receive your FREE Pinwheel tutorial

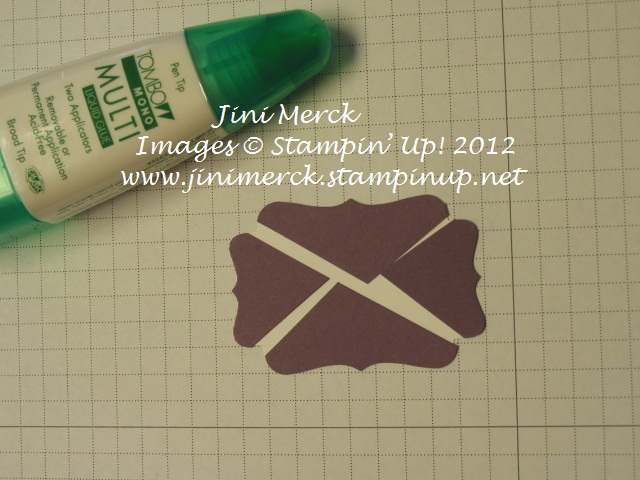
Wonder how I made the sentiment with the Decorative Label Punch? Here is quick shot of the punched piece after I cut it. 

And then adhere it to the back of the already stamped and punched sentiment piece. I like to use our Multipurpose Adhesive to do this since I can move it around after I turn it over and get the pieces right where I want them. 

How quick and easy is that! Do you like to learn new tips and techniques? Why not join my Virtual Club. You can click HERE for more information.

Come back tomorrow, I’ll be posting some of the cards that I received during swaps at convention.

Supplies:

Stamp Set: Friendly Phrases

Inks: Raspberry Ripple

Paper: Patio Party Designer Series Paper, Raspberry Ripple, Midnight Muse and Whisper White

Accessories: In Color Dahlias, Decorative Label Punch

Click here to order your Stampin’ Up! Products online 24/7! (US only)
Getting Organized with the 2012 Holiday Catalog

Today I’m going to share with you one of my organizing items that I have put together for our new 2012-2013 Holiday Catalog that was introduced August 1st. The Holiday Catalog has some wonderful new products in it I think you’ll love and with the new bundles and suites it’s a great way to jump off your holiday projects.

Here is my Designer Series Paper Chart. The chart is an easy reference for you to have and shows all the card stock colors contained in each Designer Series Paper along with some of the specialty papers, etc.

Click HERE for your printable PDF of the Holiday DSP chart

For more of my 2012-2013 Catalog organizational items you can click HERE.