Magnificent Maple Extended Flip Card

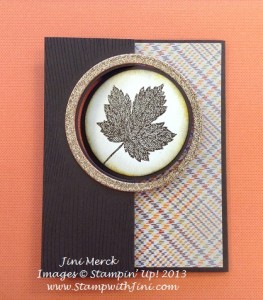
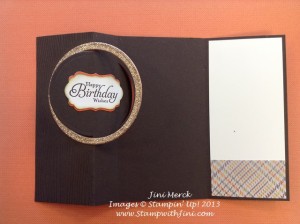
This past week a very special childhood friend of mine celebrated his 81st birthday and I wanted to make him a card he’d flip over – so I made this Magnificent Maple Extended Flip Card for him using our new Circle Card Thinlits Die and the Magnificent Maple single stamp from the Holiday Catalog.

Extended Flip Card front

I thought it would be fun to use the Circle Card Thinlits Die since it makes flip or swing cards so easy to make. And I couldn’t resist adding a bit of “bling” to make it extra special, since Dick has been like a second father to me over the years and always makes me smile. I love getting together with him and hearing his latest joke or funny story. I’m sorry to say it just doesn’t happen frequent enough now a days.

Extended Flip Card Open (1)

Because I wanted to have a little more room to sign this card I created this extended flip card. Want to know how I did it? I made a quick video to show you how – How to Make an Extended Flip Card.

And while I was at it I made a quick tutorial to show you how I created the extended flip card too. Hope you enjoy it!

Magnificent Maple Extended Flip Card Tutorial (PDF)

I think you’ll find these cards so much fun to make you’ll want both the Card Thinlits Dies. After all who can resist the Circle Card or Label Card Thinlits Dies and all the extra pieces they come with?

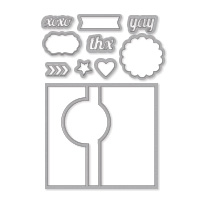
Circle Card Thinlits Die (133480)

Circle Card Thinlits Die image

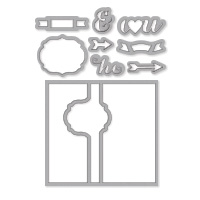
Label Card Thinlits Die (133479)

Label Card Thinlits Die image

Supplies:

Stamp Set: Magnificent Maple (131868), Woodgrain Background (128763/127808), and Simply Sketched (Hostess Set 129669/129672)

Ink: VersaMark (102283), Early Espresso (126974), and Crushed Curry Classic Ink (131173)

Cardstock: Sweater Weather Designer Series Paper (132184), Champagne Glimmer Paper (127885), Early Espresso (119686), Very Vanilla (101650), and Tangerine Tango Card Stock (111349)

Accessories: Circle Card Thinlits Die (133480), Circle Collection Framelits (130911), Early Espresso Embossing Powder (128980), Gold & Silver Stampin’ Glitter (132205), Heat Tool (129053), 2 ½” Circle Punch (120906), and Stampin’ Sponges (101610)

Click here to order your Stampin’ Up! Products online 24/7! (US only)

Mystery Hostess Code

Use Mystery Hostess Code 64XT62GT when placing your order and your name will be entered into my Mystery Hostess Drawing. This Mystery Hostess Code 64XT62GT will be good through Saturday, October 5th. The number of hostess will depend on the total sales and I’ll be drawing a hostess for every $150 in sales.

Click Here to learn more about using the Hostess Code

Holiday Catalog Premiere Party

Christmas Open House Banner Rescheduled

Click HERE to see my flyer with all the details

Want to learn more about stamping? Why not sign up for my FREE Newsletter and Class Information. (Just look for the sign up box above on the right or click HERE). Sign up and get a FREE Pinwheel Tutorial just for joining. Then you’ll get my FREE emails with great information on what is going on with Stamp with Jini along with helpful hints and tips.

Really Good Greetings

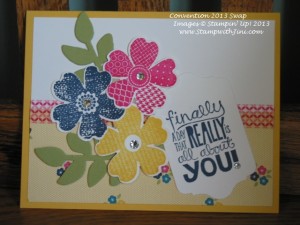
This week I’ll be sharing some more of the great convention swaps that I received. I hope you are enjoying them. So without further ado…. Here is another great card that I received from Wanda at convention using the Really Good Greetings stamp set. There are a lot of fresh, fun greetings that come in this set that I think you’ll really enjoy. This card uses one of my favorites and isn’t it great it fits right inside one of our Chalk Talk Framelits?

Really Good Greetings convention swap 2013

I just love the way Stampin’ Up! items coordinate together. It is one of the things that initially drew me to Stampin’ Up! when I began stamping all those years ago. I quickly learned that I saved money because I wasn’t always trying to find something that would work together with something I already had like I did when I purchased things at my local big box store.

If you love the Flower Shop stamp set as much as I do you’ll want to check out my video with hints on how to assemble your stamps so they line up easily with the coordinating punch. Click HERE to see that post.

Stamp Set: Inks: Really Good Greetings (item 130330/130333) and Flower Shop (item 130939/130942)

Paper: Gingham Garden Designer Series Paper (item 129310), Daffodil Delight, Whisper White, and Pear Pizzazz

Accessories: Gingham Garden Washi Tape, Pansy Punch (item 130698), Rhinestones Basic Jewels (item 119246), Chalk Talk Framelits (item 129983) and Secret Garden Framelits (item 129372)

Click here to order your Stampin’ Up! Products online 24/7! (US only)

Hostess Code TQWHSYW3

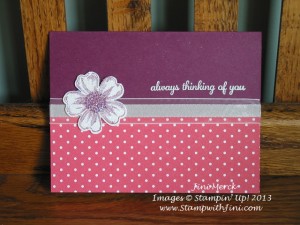
Dazzling Flower Shop

Today’s card uses the Flower Shop stamp set (item 130939/130942) and it may just dazzle you – lol. One of the great things about the Flower Shop stamp set is that it comes with a coordinating punch, the NEW Pansy Punch (item 130698). And I don’t know about you, but I looove punches! (Shhh..don’t tell my husband, but punches are one of my secret obsessions.) And better yet these two coordinating products make up another of our great bundles that save you 15%– The Flower Shop Bundle (item 132727/132726).

Flower Shop

When creating this card I used our yummy Strawberry Slush pattern from the 2013-2015 In Color Designer Series Paper Stack (item 130136) as the layer on the bottom. Polka Dots are so much fun aren’t they? So I was very happy to see them in the Paper Stack again.

Next I used one of my favorite ribbons, the 5/8″ Whisper White Organza Ribbon. I bet you’re asking why it is one of my favorites right. Well it’s because it ties beautifully when making bows and is just a really great basic to have in your card supplies.  You just can’t go wrong with a Whisper White ribbon.

Finally I used my Multipurpose Adhesive Sheets to add the Dazzling Diamonds to the flower to make it sparkle!

This greeting is from the NEW Hostess only stamp set Express Yourself (130336/130339). Isn’t the font lovely? Would you like one of the exclusive Hostess items for yourself? Why not hold a private party with me and have some friends over for an hour of fun – just email me and we’ll pick a date that works best for you!

Pansy Punch Tips Video

Now for my latest video – Pansy Punch Tips. Some of you have been asking me about this bundle and how to make sure you can line up your images easily to punch every time. There are a couple of tricks I’ve come up with so here you go – a quick video showing you my Pansy Punch Tips. I hope you’ll find it helpful.

Supplies:

Stamp Set: Flower Shop (item 130939/130942) and Express Yourself (Hostess item 130336/130339)

Inks: Rich Razzleberry and VersaMark

Paper: 2013-2015 In Color Designer Series Paper Stack (item 130136) and Rich Razzleberry

Accessories: Pansy Punch (item 130698), Heat Tool (item 129053), Multipurpose Adhesive Sheets (item 120805), Dazzling Diamonds (item 102023), 5/8″ Whisper White Organza (item 114319)

Click here to order your Stampin’ Up! Products online 24/7! (US only)

Mystery Hostess Code BFNDTYDQ

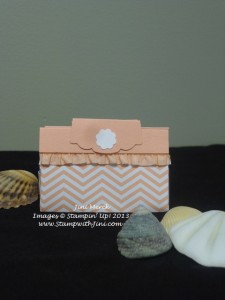
Luau Beach Bag Tutorial

Here is a cute little Luau Beach Bag treat holder that I made for everyone who attended my Luau Catalog Launch last weekend. If you forgot yours – don’t worry I’ll be tucking it in with your order.

I thought that the In Colors this year went perfectly with a beach theme so I pulled out my NEW In Color Collection Designer Series Paper Stack (item 130136). The colors are so yummy – they remind me of the summer or sherbet, how about you? And don’t you just love the new patterns? The chevron in particular is right on trend and I thought was perfect for this little bag.

DSC01827

And if you haven’t already seen it you’re going to fall in love with the new 3/8″ Ruffle Stretch Trim that comes in all 5 In Colors this year! Isn’t it just too stinking cute? I’m finding I’m reaching for it all the time to use in my projects.

I had a lot of fun making these little treats that contain 2 pieces of chocolate for everyone. So without further ado here is my Luau Beach Bag Tutorial Video.

Click HERE for my Luau Beach Bag Tutorial PDF

Leave me a comment and let me know what you think of this project, I’d love to hear from you!

Supplies:

Paper: 2013-2015 In Color Designer Series Paper Stack (item 130136), Crisp Cantaloupe (item 131298), and Whisper White card stock (item 100730)

Accessories: Artisan Label Punch (item 130920), Itty Bitty Shapes Punch Pack (item 118309), Simply Scored Scoring Tool (item 122334), Simply Scored Diagonal Plate (item 122334)

Click here to order your Stampin’ Up! Products online 24/7! (US only)

NEW Greetings Index

Got your new catalog and notice that the greetings are thought out the pages instead of grouped together? Well, I did. So for those of you who are like me and like to find things easily I’ve created a FREE Greetings Index just for you!

Click HERE to print your own Greetings Index

Want a 2013-2014 Catalog and haven’t gotten one yet? Just drop me an email with your name, phone number, and address and I’ll be happy to drop one in the mail to you.

Want to learn more about stamping? Why not sign up for my FREE Newsletter and Class Information. (Just look for the sign up box above on the right). Sign up and get a FREE Pinwheel Tutorial just for joining. Then you’ll get two emails a month with great information on what is going on with Stamp with Jini along with helpful hints and tips.
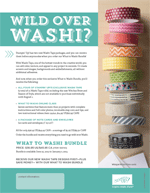
Wild Over Washi?

Stampin’ Up! has just introduced its latest online class What to Washi. This is a digital class offering seven different sections of Washi wisdom and includes everything you need to know to make the most of your Washi Tape.

The What to Washi Class Online Class (item 134742) include seven PDF documents that include written instructions, step-out photos, along with instructional videos, and the supply lists for more than 30 projects.

And wait there’s more! This class is also being offered as part of the What to Washi Bundle (item 134743). When you order the bundle you’ll receive the online class in addition to everything listed below:

  • What to Washi Class
  • Epic Day This and That Designer      Washi Tape
  • Gingham Garden Designer Washi Tape
  • Season of Style Designer Washi      Tape
  • Witches Brew Designer Washi Tape
  • 20 Whisper White Note Cards &      Envelopes

Each Washi Tape package contains three coordinating rolls of Stampin’ Up!’s exclusive Washi Tape  – That’s a total of 12 rolls! And when you order the What to Washi Bundle, you’ll be the first to receive our Season of Style and Witches Brew Washi Tape from the Holiday Catalog; these are available to purchase until August 1st!

Click HERE to see the flyer with all the details.

wild over washi flyer image

Click here to order your Stampin’ Up! Products online 24/7! (US only)

Too Cool – Big Shot Magnetic Platform

I’m posting a bit late today since I side tracked by my new box of goodies that came in that big brown truck. Don’t you love to see it pulling into your driveway? I know I do, it means I get to start creating with new goodies– and with this weekend’s Blue Mountain Stampers’ Retreat I’m getting ready to have a weekend marathon of stamping with my gal pals. Yippie!

I couldn’t wait to try out my NEW Big Shot Magnetic Platform (item 130658) and was truly impressed at how easy it makes things. You are going to love, love, love it! Check out this video showing you how it works.

Cool huh?

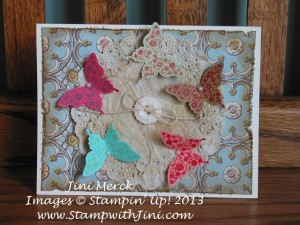
Vintage Soho Subway

Now for the card I promised to show you yesterday. Today’s card is one that came from a recent shoebox swap with my TEAM, the Blue Mountain Stampers. This card was created by JoAnn who loves vintage. She combined the Soho Subway Designer Series Paper with the butterflies made with the NEW 2013-2015 In Colors. When stamping the butterflies JoAnn alternated the colors of ink she used, instead of making them monochromatic. Very clever I thought.

Soho Subway Shoebox Swap

Everyone’s card turns out slightly different since we assemble the cards ourselves using hers as our guide. It’s always great fun to see how everyone changes it up a bit to suit their style.

Supplies:

Stamp Set: Papillon Potpourri (item 132058/123759)

Inks: 2013-2015 In Color Collection (item 131204)

Paper: Soho  Subway Designer Series Paper (item 130140), Very Vanilla, and 2013-2015 In Colors

Accessories: Basic Pearls (item 119247), Tea Lace Paper Doilies (item 129399), Stampin’ Distress Tool (item 127562), Linen Thread (item 104199), Very Vintage Designer Buttons (item 129327), Stampin’ Sponges (item 101610)

Click here to order your Stampin’ Up! Products online 24/7! (US only)

Want a chance to be my Mystery Hostess? Use Hostess Code7DPXDX7R when placing your order Online.

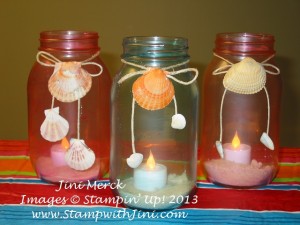
Luau Sea Glass Jar Tutorial

Have you ever had one of those days? Well yesterday was one for me that started with a flat tire and ended with finding out my husband took my camera that contained all the items I wanted to share with you this week to work. So although I didn’t share my Luau Sea Glass Jar Tutorial with you yesterday I’m happy to say I recreated it and that I’m able to today.

Luau Sea Glass Jar

I made these cute little Luau Sea Glass Jars for my daughters Luau Graduation Party on Saturday. I set them around the food table as decorations filled with sand and flickering tea lights for a touch of ambiance.

They seemed to be a hit with the kids and they are sooo easy to make, you’re going to love it! The choices are endless –I’m already seeing cascading flowers made with our punches too, hmm. I think I need to make some more in a new In Colors that will be available tomorrow– lol.

I’m sure that you’ll find your own fun ways to use them. I’d love to hear about it when you do, so come back and share your creations with me. Leave me a comment when you make your own Luau Sea Glass Jars and tell me all about it and what you’ve used them for!

Supplies:

Inks: Pacific Point Classic Stampin’ Ink Refill (item 111840), Melon Mambo Classic Stampin’ Ink Refill (item 115662)

Other supplies: Elmer’s Glue (I used the washable school glue), foam paint brush, bowl, water, measuring spoons, Hemp (67m), sea shells, hot glue gun and glue sticks

Click here to order your Stampin’ Up! Products online 24/7! (US only)

Mystery Hostess Code

Mystery Hostess Code

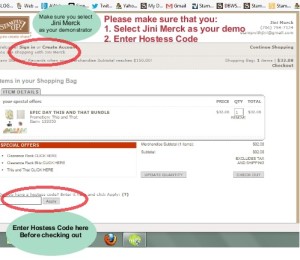
Did you know that tomorrow, Friday, May 31st,  is the last day to order from the Spring Catalog and it is also the first day that you’ll be able to order from the NEW 2013-2014 Catalog – are you excited? I know I am. Online ordering will be down  May 31st at 2 a.m. Eastern Time until 2 p.m. Eastern Time as Stampin’ Up! loads and updates the new catalog items in the system– so if you don’t want to worry about all the details you’re welcome to call me or email me your order and I’ll be happy to place it for you as soon as the system comes up.

Or if you prefer you can use my Hostess Code 7DPXDX7R  and place your own order after 2 p.m. on Friday, May 31st. When you do your name will be entered into my Mystery Hostess Drawing. This Hostess Code will be good through Friday, June 7th. The number of hostess will depend on the total sales and I’ll be drawing a hostess for every $150 in sales.

OL Hostess Code screen image

*Please remember that if you are ordering $150 or more yourself that you will earn your own Hostess Benefits and do not want to use this hostess code.

**fine print orders placed during the Mystery Hostess Drawing using this code do not qualify for my 50/50 Board.

Click here to order your Stampin’ Up! Products online 24/7! (US only)

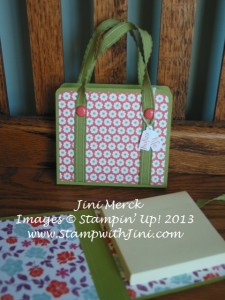
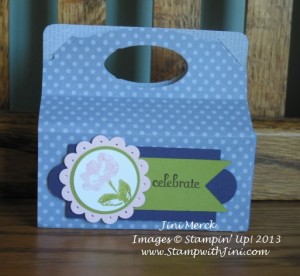
Bon Voyage Post It Note Holders

As promised in yesterday post I’ll be sharing how I made these cute little Bon Voyage Post It Note Holders with you today. A friend of mine showed me how to make these little holders during one of our demonstrator events. I thought they were just too cute so I was excited when I ran across them and decided to use them as my little gift to everyone who attended. After all who doesn’t need Post It Notes right?

Bon Voyage Post it Note Holder

I think these little Bon Voyage Post It Note Holders are sooo cute that not only am I using them for the Retirement Party but also as little gifts to my daughters friends who will be attending her graduation party – I thought the little piece of luggage was in keeping with them heading off to college too since they’ll be heading off to a new adventure in life.

I created these little Bon Voyage Post It Note Holders using some of our current retiring products. I chose Lucky Limeade card stock (item 122926) and my favorite Designer Series Paper, Floral District (item 126919). I love the colors in this Designer Series Paper; it’s just so bright and cheerful. Did you see the little tags? I used the Fabulous Phrases Stamp Set (item 117002/120501) and chose the words enjoy and life to stamp the two little tags with. I’m really like this stamp set, it gives you such great choices to create all kind of phrases.

You can learn how to make these little Bon Voyage Post it Note Holders by watching my latest video below:

If you haven’t seen the list there is still time, just click HERE for your copy. You have until June 3rd to place your order for those items you want. But don’t delay since our accessories are only available while supplies last and things are going fast!

Come back tomorrow and I’ll show you the quick and easy card that we made during my Retirement Party.

Remember –  When you place an order using Hostess Code 69D43KUE thru May 30th I’ll send you a FREE Boutique Boxes Kit PDF class tutorial for a 6 fun filled projects along with alternate ideas!

Supplies:

Stamp Set: Fabulous Phrases Stamp Set (retiring item 117002/120501)

Inks: Tangerine Tango (item 126946)

Paper: Lucky Limeade Card Stock (retiring item 122926) and Floral District Designer (retiring item 126919)

Accessories: Lucky Limeade Ribbon (retiring item 122977), In Color Brad (retiring item 122940), Lucky Limeade Baker’s Twine (retiring item 125572), 3/16″ Corner Punch (item 119871), Jewelry Tag Punch (retiring item 17190),  1/16″ Circle Handheld Punch (retiring item 101227), Paper Piercing Mat & Piercer (item 126199/126189)

Click here to order your Stampin’ Up! Products online 24/7! (US only)

April hostess join now  promotion image

Just a few days left to get an extra $30 in products when you Join My Team – You’ll be the FIRST to see all the NEW and exciting products in the 2013-2014 Catalog! You can click HERE to see more information about joining my TEAM. Please contact me for all the exciting details regarding the NEW 2013-2014 Catalog and joining. This promotion ends May 30th!

Getting Started Video Series

Wow! It’s been a busy week here for us with all the year end events for Kaitlin. Today was honors day for Seniors so I’m posting this a bit later than I had hoped.

For those of you who are new to stamping or want to possibly pick up some new tips on how to use our products I’ll be doing a Getting Started Video Series. I hope that you will find these Getting Started Videos useful to you.

Whether you are new to stamping or an seasoned pro it never hurt to refresh our memories, right?

So today I’ll be sharing with you the second video in my Getting Started Series –

Getting Started with Stampin’ Scrub:

And if you’ve missed it here is my first video in the series Getting Started with Stampin’ Spritzers.


Click here to order your Stampin’ Up! Products online 24/7! (US only)

Retirement Party Banner Image

There is still time to RSVP and join in the fun – call or email me today

Retirement Party Giveaways Image

Have you found all my Retirement Party Giveaways? There are 4 Retirement Party Giveaways at this time that you can find on my blog, facebook, twitter and YouTube Channel.

Oh Hello Pop ‘n Cuts Treat Box

Wow, its Friday already – the week has really flown by. Today I’m going to share with you a new video showing you my Oh, Hello Pop ‘n CutsTreat Box that I recently did with the Blue Mountain Stampers during our monthly TEAM meeting.

Pop 'n Cuts Treat Box close up

I love the way this little Pop ‘n Cuts Treat Box turned out. It is a quick and easy project since you start with our Card Base Pop ‘n Cuts Die (item 130099). And the little box is really good sized so you can get a lot of great chocolate or other goodies into it. Hmm…I’m thinking it may be a great Treat Box for my daughter’s upcoming graduation party. I’ll have to get back to you on that one.

So without further ado…. here is my latest video – Pop ‘n Cuts Treat Box

Want a printable PDF with all the measurements and supplies click HERE.

Did you know if you like my videos that you can subscribe to my YouTube Channel? Well you can, just subscribe to the StampwithJini YouTube Channel when you’re finished watching the video or search for me on YouTube.

Hope you enjoyed my Oh, Hello Pop ‘n Cuts Treat Box project – if you did I’ve love for you to leave me a comment!

Click here to order your Stampin’ Up! Products online 24/7! (US only)

By the Tide Tutorial

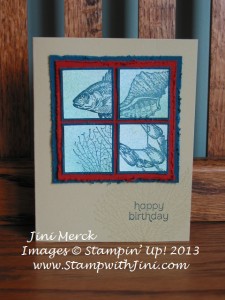
I fell in love with our Stampin’ Spritzers when they came out last summer. Have you had a chance to use them yet? If not you’ll want to check out this great project today using the By the Tide stamp set (item 129117/129120) from the Spring Catalog that uses our Stampin’ Spritzers.

By the Tide card

Stampin’ Spritzer  (item 126185) are inexpensive and soo much fun to use! And Stampin’ Spritzers just seemed like a perfect way to create a wonderful background for these water images. Watch my video to see how I created this card.

Although this project uses two of the colors that are currently on our Color Refresh Retirement List (River Rock and Not Quite Navy) there is still time to get yours. (Remember that when colors retired they tend to go quickly so don’t wait too long to place your order.)

Want a FREE PDF Tutorial with all the instructions and supplies used to make this card? Just click on the link below to get your printable Free PDF Tutorial now.

By the Tide – Fun with Stampin’ Spritzer Tutorial PDF

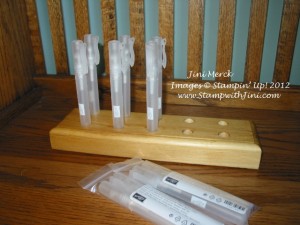
Did your eye spy the great Color Spritzer Stand that my son made for me? I love mine – it keeps everything so organized and easy to find. If you’d like one too click HERE to see more information.

color spritzer


Click here to order your Stampin’ Up! Products online 24/7! (US only)