It’s Wicked Cool

I made this card a while ago and have been meaning to share it with you. I love the little witch’s feet in the Wicked Cool Stamp set, don’t you? I guess I’m dating myself but they always remind me of the shoes sticking out under Dorothy’s house at the beginning of the Wizard of Oz. I remember being so scared watching that move as a child. I ramble, anyhow back to my card.

Coloring directly on the stamp is a great way to color any image and that is what I’ve done here with the Wicked Cool image.  Can you guess which punch I’ve used for the broom? It’s the Owl Builder – You can use that punch for all kinds of things! (Click HERE to see my recent “Got Milk” Tutorial using the Owl Builder Punch.)  And did you notice the Basic Jewels? I just used my orange Sharpie ® to color my Basic Rhinestone. Yep, now you can any color Basic Rhinestones you desire what a great tip, huh?

Supplies:

Stamp Set: Wicked Cool

Inks: Rich Razzleberry and Old Olive

Paper: Whisper White, Old Olive, Rich Razzleberry, Basic Black and Pumpkin Pie

Accessories: Big Shot, Spider Web, Woodgrain, and Chevron Embossing Folders, Apothecary Accents Framelits, ¼” Stitched Grosgrain Ribbon, Basic Rhinestones and Sharpie ®


Click here to order your Stampin’ Up! Products online 24/7! (US only)

This too shall Pass….

Have you been saying this to yourself a lot lately? I know I have, after all I have a teenager daughter, so when I saw the stamp set From My Heart I knew it was one I wanted to put on my shopping list. I just think that the sentiments in the From My Heart stamp set are lovely and I love the images, so I was ticked when my friend Joann gave me this card during a swap last week.

The color combination she used of Summer Starfruit and Gumball green look very striking together, don’t you think?  You’ve got to love the way all of Stampin’ Up! products work together? I know I do – it was one of the things that drew me to Stampin’ Up!

Why not check out the From My Heart stamp set in our 2012-2013 Catalog – I think you’re going to like it as much as I do.

Supplies:

Stamp Set: From My Heart and Itty Bitty Banners

Inks: Gumball Green

Paper: Gumball Green, Summer Starfruit and 2012-2014 In Color Designer Series Paper Stack

Accessories: Big Shot, Labels Collection and Bitty Banners Framelits and 3/8″ Crochet Trim


Click here to order your Stampin’ Up! Products online 24/7! (US only)

Holiday Keepsakes Ornament Class

Do you love the ornament on the front of the Holiday Catalog as much as I do? Would you like to learn how to make them for yourself? Did you answer YES to either of these questions? If so I’ve got a special Class just for you.

When you sign up and pay for this class not only will you get to learn how to make these wonderful ornaments, but you’ll get to take home the Ornament Keepsakes Stamp set in your choice of either wood or clear, The Holiday Ornaments Framelits and our NEW Silicone Craft Sheet.

But wait, it gets better. Do you love the NEW Snow Flurry Die? It’s a must have in my book. I was drooling over it as soon as I saw it.

When you add the Snow Flurry Die to your class I’ll give you a FREE tutorial for the (small and medium) Ornaments on page 3 of the Holiday Catalog!

Sound interesting? Want to know the details?

First choose which Ornament KeepsakesStamp bundle you want; Wood or Clear Stamps.

  •  Wood Stamp Set Option $73
  •  Clear Stamp Set Option $65
  •  Wood Stamp Set with Snow Flurry Die Option $91
  •  Clear Stamp Set with Snow Flurry Die Option $99
  • Then email me at StampwithJini@gmail, or call me at (706) 754-7124 to pay for your Class before Monday, October 15th at 8 p.m. so that I can have your bundle here and ready for you at class time.
  • Make sure to let me know which Class time works best for you so I can hold your spot.

A New Bundle Offer for this class  is being offered due to the new Bundle Promotion that began October 1st.

Now you really can have it all. Get your Ornament Keepsakes Stamp Set (wood or clear), Holiday Ornament Framelits, our NEW Silicone Craft Sheet, Candlelight Christmas Specialty DSP and a FREE Festive Paper-Piercing Pack in addition to learning how to make these wonderful ornaments during my class!

  • Wood Stamp Set Option & DSP $85
  • Clear Stamp Set Option & DSP $77
  • Wood Stamp Set, DSP & Snow Flurry Die Option $112
  • Clear Stamp Set, DSP & Snow Flurry Die Option $103

There are two days to choose from.

  •  Sunday, November 4th at 2 p.m.
  •  Tuesday, November 6th at 6 p.m.

That’s it – yes it’s that easy, so why not sign up for the Holiday Keepsakes Ornament Class today!

Blue Ribbon

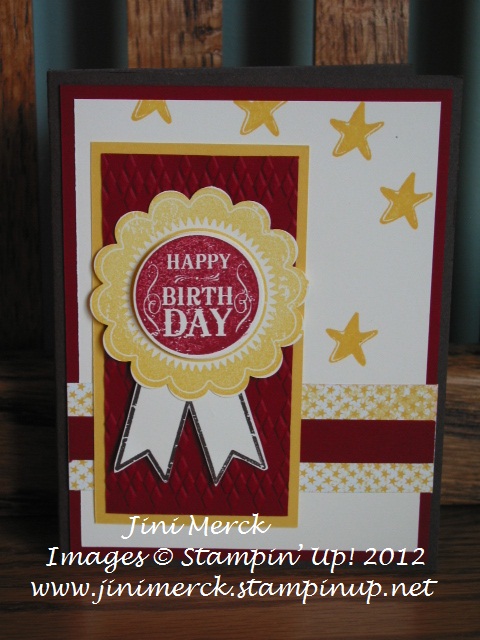
I think everyone should have a stamp set that is fun for kids and easy to use. I think Blue Ribbon could be that set. Not only is it very versatile, but it’s easy enough for your child to use with you. Anything with a coordinating punch is a lot of fun. And not only does the Blue Ribbon set coordinate with punches, and our Designer Series Paper, World Spectacular, but it also coordinates with our Bitty Banners Framelits – now who doesn’t love our new Framelits, they are sooo easy to use!

I don’t know about you but my guys are always willing to punch things out. So that makes the Blue Ribbon stamp set almost fool proof, since you don’t have to worry about making sure things are straight.

Here is a card I received from Amy at convention using the Blue Ribbon Stamp set – isn’t it great?

Blue Ribbon

Supplies:

Stamp Set: Blue Ribbon

Inks: Cherry Cobbler, Early Espresso, and Daffodil Delight

Paper: World Spectacular DSP, Cherry Cobbler, Early Espresso, and Daffodil Delight and Very Vanilla

Accessories: 1 3/8″ Circle Punch, 2 3/8″ Scallop Circle Punch, Paper Snips, Big Shot and the Argyle Embossing Folder


Click here to order your Stampin’ Up! Products online 24/7! (US only)

Click HERE to sign up for my Monthly Newsletter now and receive a free tutorial (that’s a value of $9.95 for FREE!)

Love to learn new things? Check out my Virtual Club by clicking HERE

Double Fold Gate Card

I love to try new things and so recently fell in love with making these cards using the Double Fold Gate technique and the Layered Labels stamp set. It’s a lot of fun to see all the different combinations that you can come up with.

This card in particular that I’m showing you today uses one of my favorite NEW stamps sets from the 2012-2013 Catalog, Layered Labels. First I love it because of the sentiments and secondly because of the fact it has a matching set of Framelits Dies that coordinate with it making it quick and easy to use. After all who doesn’t love their Big Shot? And with all the new goodies in the 2012-2013 Catalog the Big Shot options are endless!
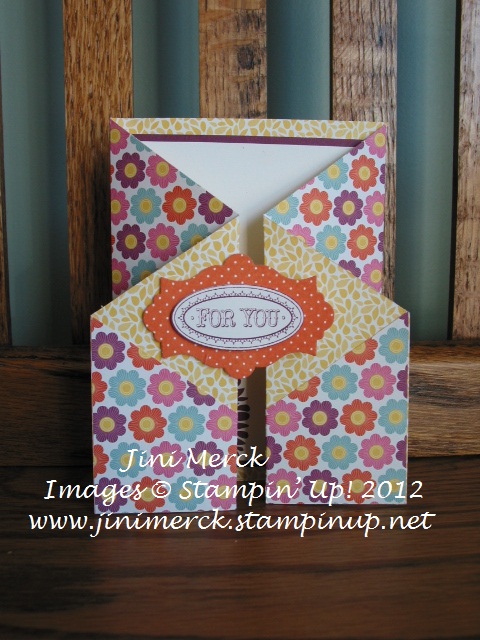
Double Fold Card Tutorial front

I’ve used the Floral District Designer Series Paper for this Double Fold Gate card. The Floral Districts DSP seems to be a DSP that I reach for most often right now– so much so I need to order my 3rd package of it already! I really like the bold, fun colors and patterns it contains.

I think these Double Fold Gate Cards are so much fun to make that I wanted to share with you the Double Fold Gate Card tutorial that I made for it. Grab your favorite pack of Designer Series Paper and see what combinations you can come up with – warning these can become addictive!

Double Fold Gate Card Tutorial

Supplies:

Simply Scored Scoring Tool

Stampin Trimmer

Bone Folder

Lay a 12″ x 5 ½” piece of Designer Series Paper on the Simply Scored Board with longest edge at the top. (I used our new Floral District Designer Series Paper.)
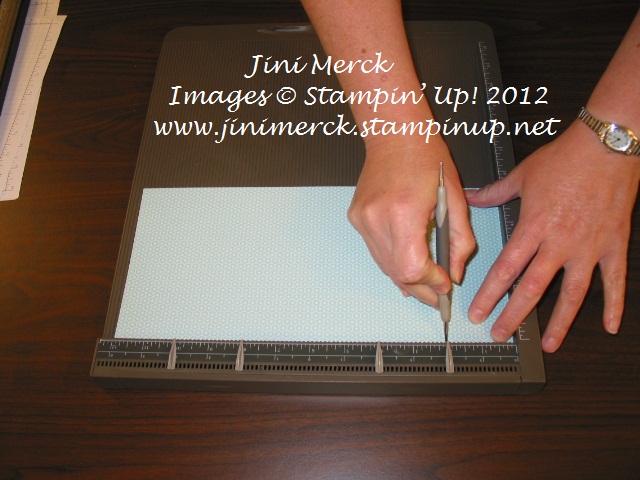
Double Fold Card Tutorial step 1

Score at 2″, 4″, 8″ and 10″ marks

Double Fold Card Tutorial step 2

Turn Designer Series Paper and make a small mark each short end at the 2 ¾” mark
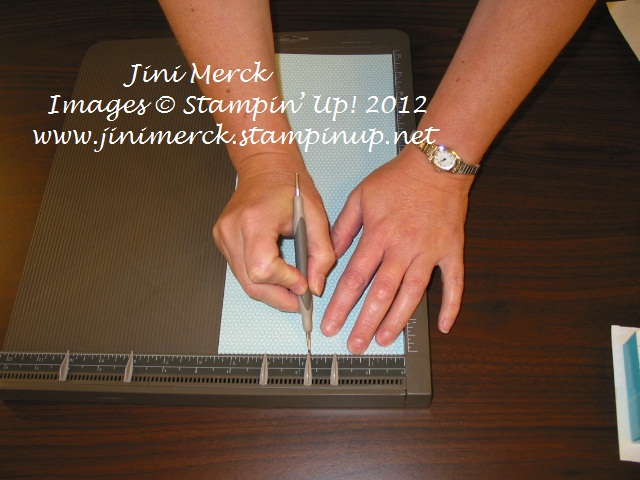
Double Fold Card Tutorial step 3Use the bone folder and fold in the two ends on the 4″ and 8″ score lines. (This allows you to see your score lines easier for when you line up your DSP to cut.)

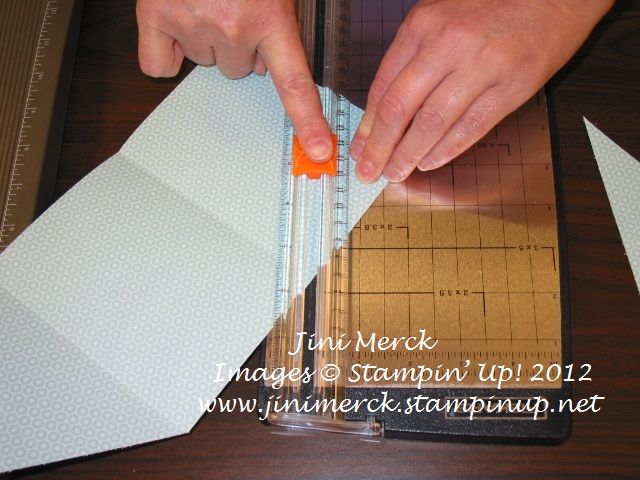
Decide which side is the top of your card and then using the Stampin’ Trimmer to cut a diagonal line on each side. Line up the 2 ¾” mark on the grove where your blade travels. You can hold this in place with your index finger if you would like.
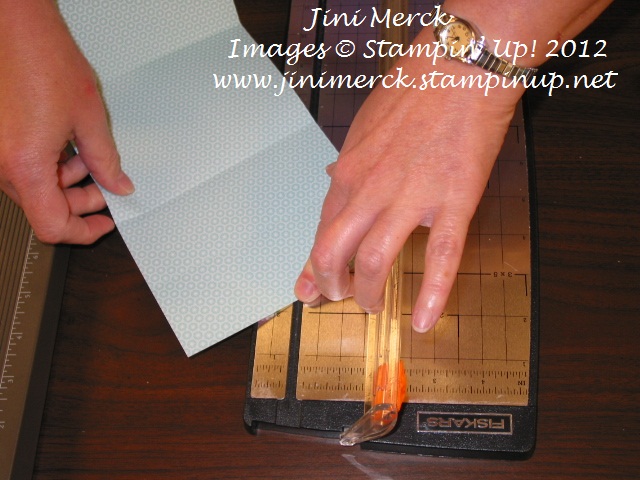
Double Fold Card Tutorial step 4

Then “swing” the top edge of your 4″ score line on the DSP until it is lined up on the grove too.

Cut.
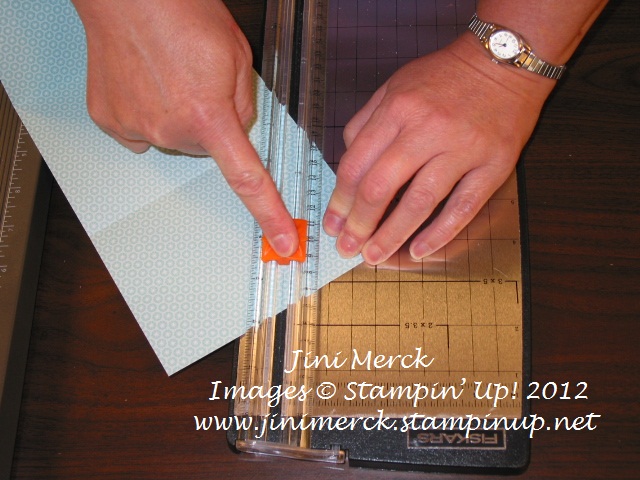
Double Fold Card Tutorial step 5

Repeat on the other side Lining up the 8″ score line and your

2 ¾” mark.
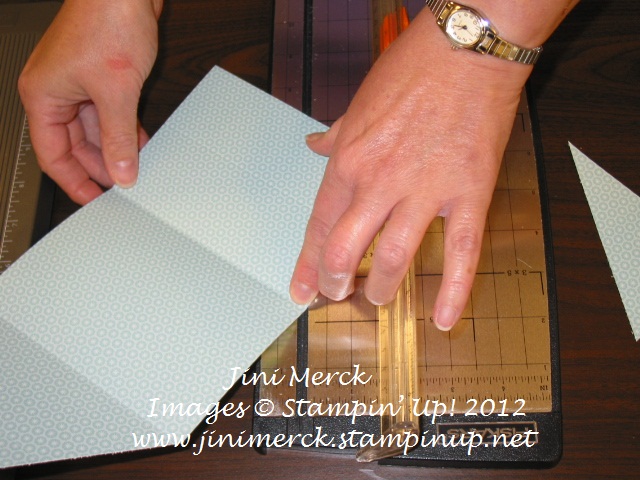
Double Fold Card Tutorial step 6

Double Fold Card Tutorial 7

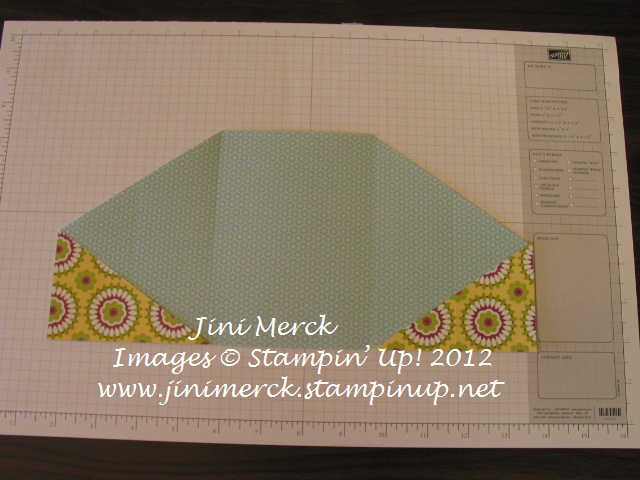
You should have three pieces that look like this.
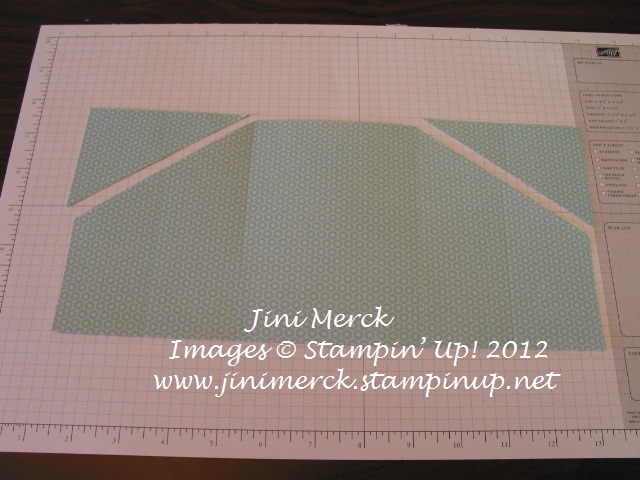
Double Fold Card Tutorial step 8

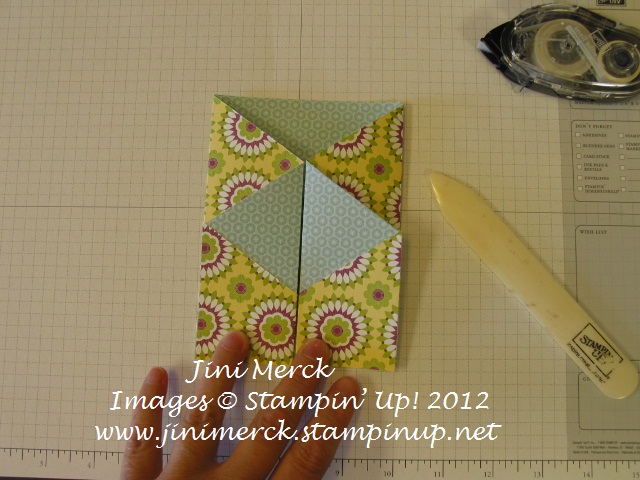
Flip over the piece and adhere to the bottom of card as shown. Repeat on the other side.
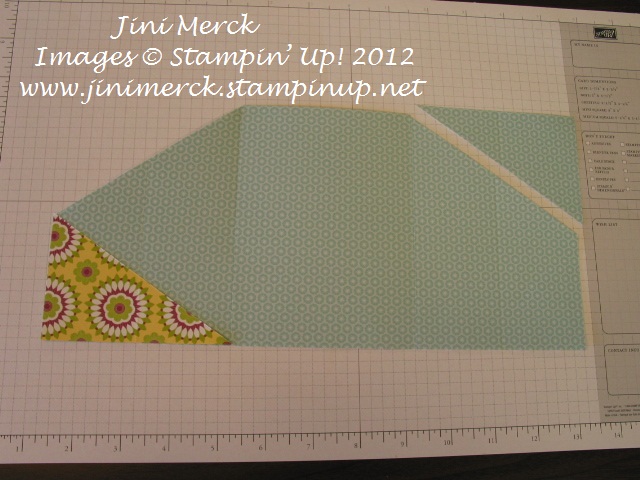
Double Fold Card Tutorial step 9

Double Fold Card Tutorial step 10

Using the bone folder you can fold the card on the 4″ and 8″ score lines (if you didn’t fold and score before cutting off the corners.)
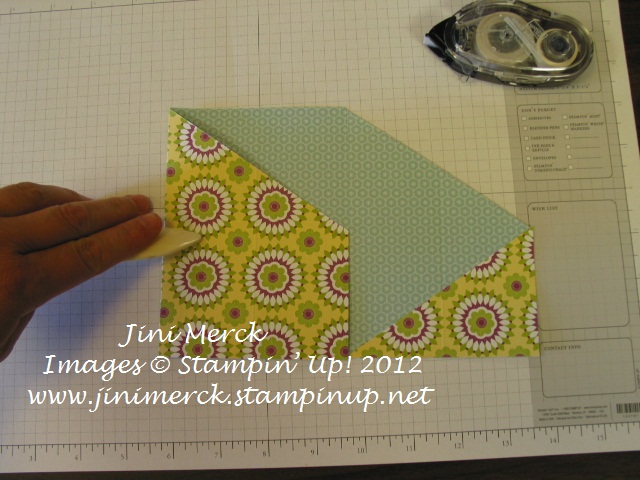
Double Fold card Tutorial step 11

Using Bone Folder, fold on the 2″ score line in the opposite direction to create Z fold.
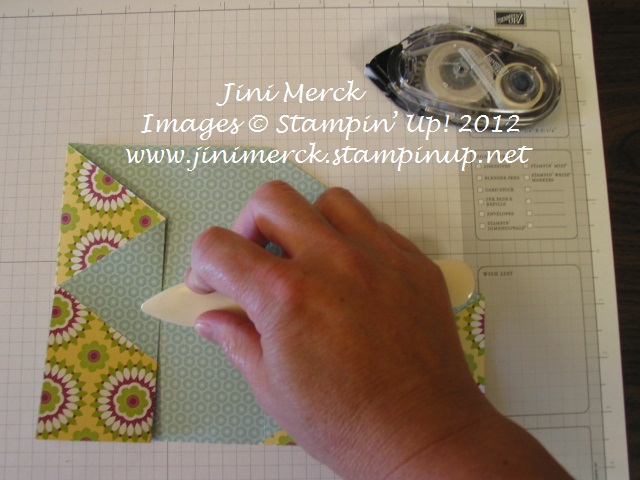
Double Fold Card Tutorial step 12

Repeat on the other side Using Bone Folder, fold on the 10″ score line folding in the opposite direction to create Z fold.
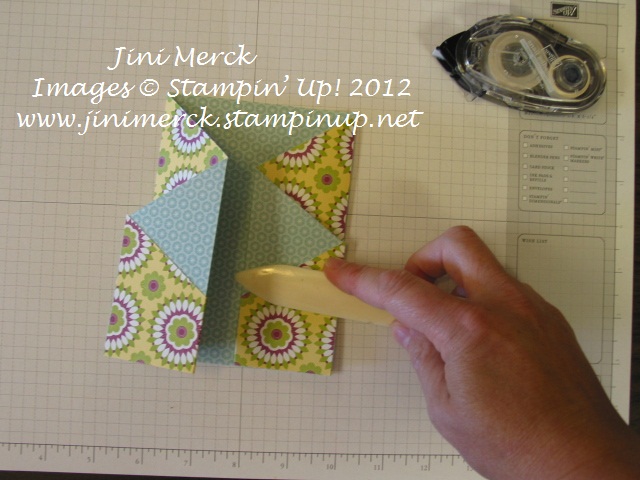
Double Fold Card Tutorial step 13

Your card should like this.

Double Fold Card Tutorial step 14

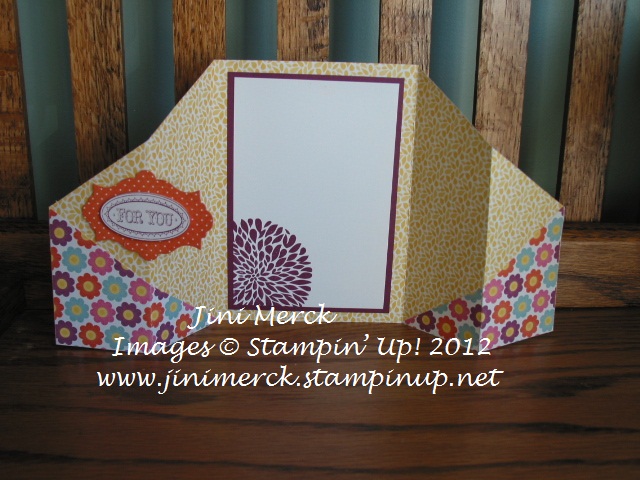
Adhere pieces of card stock to the inside and decorate front as desired. I used a piece of 3 ½” x 5″ Rich Razzleberry card stock with a layer of 3 ¼” x 4 ¾” Whisper White card stock. I used the Betsy’s Blossoms stamp set and stamped the flower image in Rich Razzleberry.
Double Fold Card Tutorial step 15

For the outside image I used our NEW Layered Labels stamp set and the coordinating Apothecary Accents Framelits Dies – Adhering the image only on the one side so that the card opens easily.

And here is the finished card.

Double Fold Card Tutorial front

Did you enjoy this tutorial? Do you like to learn new things?  Would you like to get exclusive tutorials for 2 projects that are just for you every month? Why not join my Virtual Stamp Club?

Watch for more information coming soon – meanwhile why not sign up and become part of my Mailing list NOW. Not only will you receive my Monthly Newsletter, which includes special promotions, tips and helpful hints (in addition to information about my events and my Virtual Club that starts in September), but you’ll also receive a FREE tutorial just for you!

Sign up for my monthly newsletter Click HERE

Click here to order your Stampin’ Up! Products online 24/7! (US only)


The Open Sea

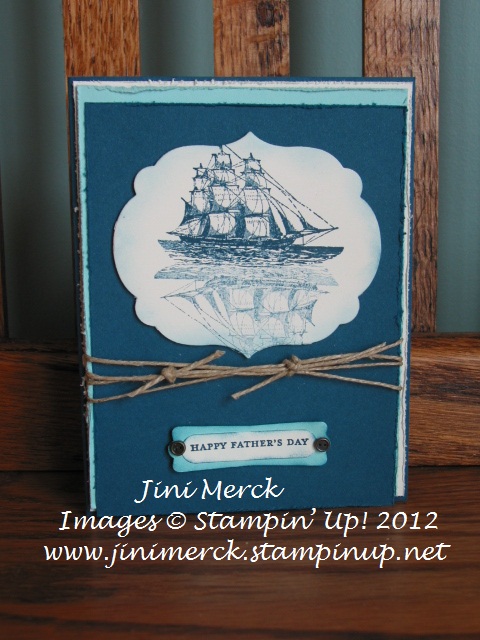
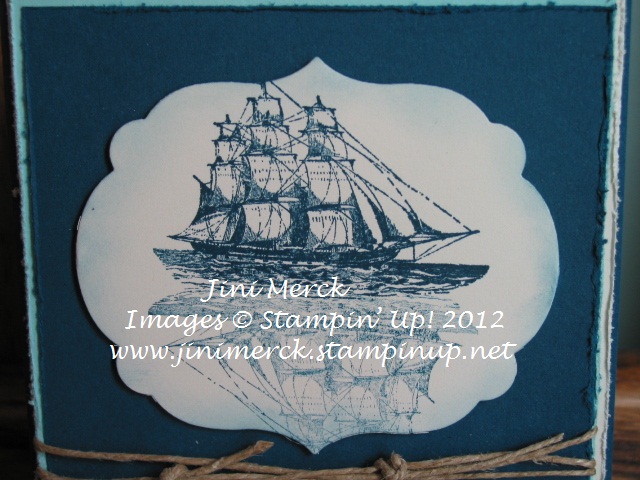
Father’s Day is tomorrow and The Open Sea stamp set is a great one to use when making masculine cards. I love the nautical look and The Open Sea is one of my favorites. Anything water themed is, even though I love living in Georgia I miss Lake Michigan and being able to go to the lake front anytime I want to. I always found watching the waves roll in with my high school friends’ fun and it is one of the things I miss most about Milwaukee.

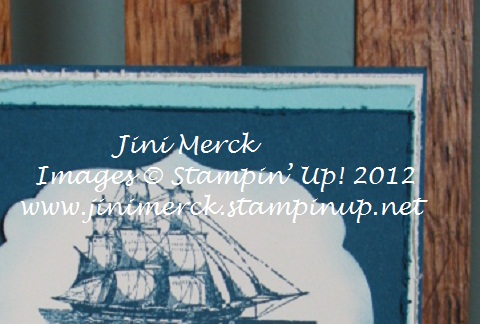
I recently had my TEAM meeting and this is one of the cards we made during the event. I love the way Joann used The Open Sea stamp set and all of the texture too.

Did you notice the mirror image under the boat? This is an example of one of the techniques you can learn when you’re a Club member with me.

Texture is another way to bump up the impact of your cards and its sooo easy.

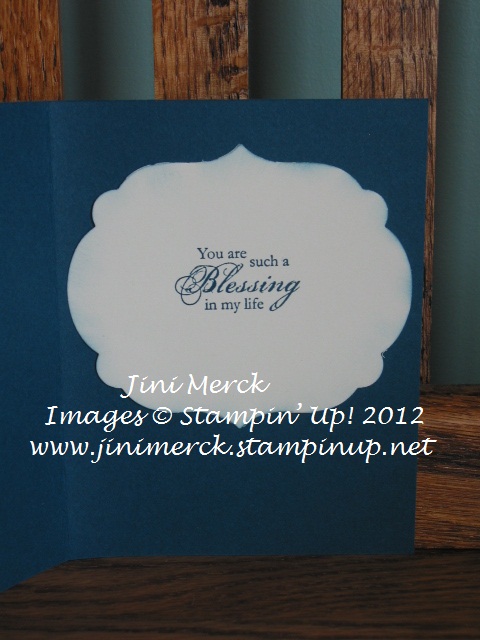
Another trick that makes stamping easy is to place your sentiment onto another piece of card stock instead of directly on the inside of your card. That way if you make a mistake, no problem – you can just do it again. And, of course, the framelits make it really easy and decorative too!

Supplies:

Stamp Set: The Open Sea, Teeny Tiny Wishes, and Blessings from Heaven

Inks: Midnight Muse

Paper: Midnight Muse, Pool Party and Very Vanilla

Accessories: Labels Collection Framelits, Big Shot, Modern Label and Word Window Punches, Vintage Trinkets and Linen Thread

Click here to order your Stampin’ Up! Products online 24/7! (US only)
Layered Labels

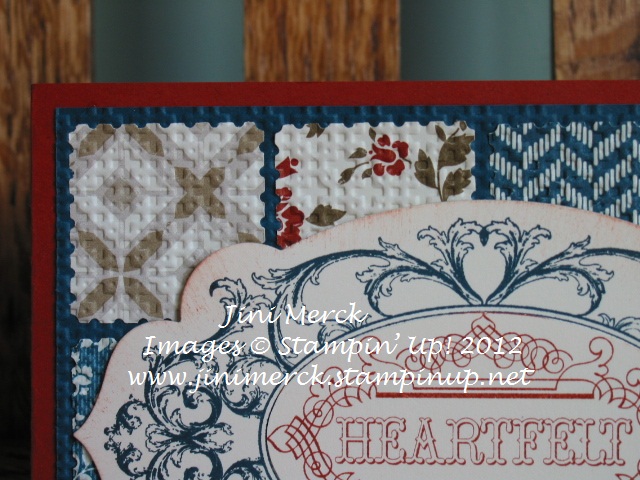
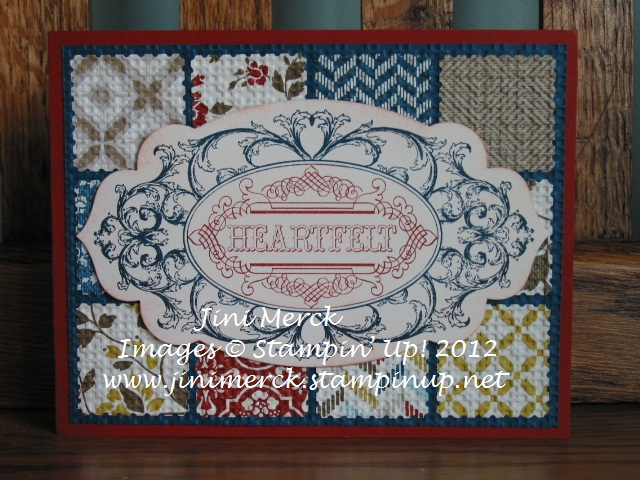
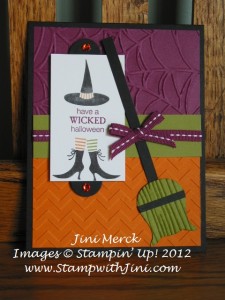
Here is a card that I made recently using the NEW Layered Labels stamp set and the Comfort Café Designer Series Paper from the 2012-2013 Catalog. I’ve used the embedded embossing technique to add texture and make it look “quilted”.

Have you had a chance to see all the new goodies yet in the NEW 2012-2013 Catalog? Some wonderful new products have just been introduced and this card shows you a number of the NEW items. The Layered Labels stamp set coordinates with our NEW Apothecary Accents Framelits. I just love how easy it is to use the Framelits don’t you? You stamp first and just line up the frame over the image the way you want. The combinations are endless. I’m so glad that Stampin’ Up! has introduced several new Framelits and Edgelits in the NEW 2012-2013 Catalog!


Getting together with my stamping friends is soo… much fun and so I’m sorry to say I won’t be able to join them this month. I did however make this swap to share for when they get together today. My husband, Larry is being sweet enough to take them for me while I’m gone so I’ll look forward to seeing what they have made when I return home from my visit with my sister. I’ll try and share some of them when I can.


Supplies:

Stamp Set: Layered Labels

Inks: Cajun Craze and Midnight Muse

Paper: Comfort Café Designer Series Paper, Cajun Craze and Midnight Muse

Accessories: Big Shot, Apothecary Accents Framelits, Square Lattice Folder and Postage Stamp Punch


Click here to order your Stampin’ Up! Products online 24/7! (US only)


Apothecary Art Leadership Swap

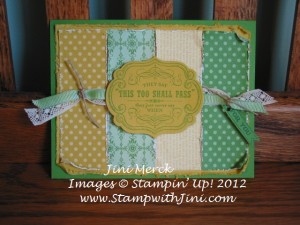
Today’s card uses the Apothecary Art stamp set from the Occasions Mini Catalog and is also one of my Leadership swaps. It’s one of my favorites from the new Occasions Mini and with the coordinating Labels Collection Framelits Die I just couldn’t resist!

Apothecary Art comes with two sentiments but you can also use the Loving Thoughts stamp set with it too which makes it a great stamp set for card making for all occasions!

Apothecary ArtStamp Set: Apothecary Art

Inks: Jet Black StazOn and Riding Hood Red

Paper: Brights Designer Series Paper Stack, Real Red, and Whisper White

Accessories: Big Shot, Labels Collection Framelits, Bender Pen, Paper Snips, Cherry Cobbler Dazzling Details, and Always Artichoke Stampin’ Write Marker


Click here to order your Stampin’ Up! Products online 24/7! (US only)
Take It to Heart Leadership Swap

I love the bird image from the Take It to Heart stamp set and of course our new coordinating Framelits from the new Occasions Mini Catalog don’t you? So I definitely wanted to use it for at least one of my swaps for the upcoming Leadership Conference in Texas that starts on Wednesday.

Soo… This week I’ll be sharing with you some of my swaps that I made for Leadership. I haven’t posted lately since I have been working feverishly on them to get them finished in time. Once again I didn’t start early enough since I couldn’t make up my mind which designs I wanted to make.

Here is the first card I decided to do. It took me a while to come up with the design but I was very happy with the end result and the guys in my house thought it makes a nice masculine card too which is always a plus.

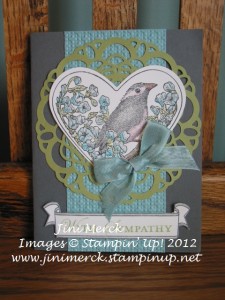
My card uses the Take It to Heart stamp set, Paper Doily Die, and the Hearts Collection Framelits Dies. Don’t you just love all the new coordinating products in the new Occasions Mini? I knew I just had to have the Loving Thoughts stamp set for the sentiment when I saw it– it is just so versatile and is great with the Take It to Heart sets banner. I chose to make a sympathy card this time. I’d love to hear what you think – Leave me a comment and let me know.

Take It to Heart

If you didn’t get a copy of your own Occasions Mini Catalog just email me at [email protected] with your name, address and phone number and I’ll be happy to send one out to you.

Supplies:

Stamp Set: Take It to Heart and Loving Thoughts

Inks: Jet Black StazOn and Pear Pizzazz

Paper: Basic Gray, Pear Pizzazz, Baja Breeze, and Whisper White

Accessories: Baja Breeze ½” Seam Binding Ribbon, Hearts Collection Framelits, Paper Doily Sizzlits Die, Big Shot, Square Lattice Embossing Folder, Wonderful Watercolor Crayons, Bender Pen, Paper Snips and Dimensionals

Click here to order your Stampin’ Up! Products online 24/7! (US only)
Merry Christmas Wishes!

Merry Christmas everyone – I hope that you are able to spend today with your loved ones. I’m going to be spending mine quietly with my family but I wanted to wish you all a Merry Christmas and share with you a wonderful card that my upline Sue sent me. Isn’t it just beautiful? I thought this card that uses our Come to Bethlehem stamp set was fitting to post today.

Come to Bethlehem


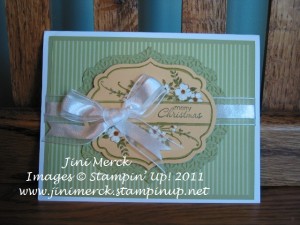
I also thought I would share a Christmas card that I recently made using my sneak peek items from our upcoming Occasions Mini Catalog. Isn’t the Apothecary Art stamp set just beautiful? And you’re going to love our new coordinating Framelits Dies!

Apothecary Art

I’m going to take a long Christmas weekend, but I’ll be back in a couple of  days posting more sneak peeks along with my new events for January. So come back and see me then but first enjoy your Christmas!