Painted Poppies

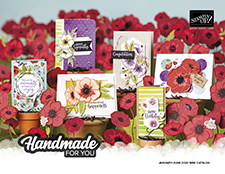
With the beautiful line art images inspired by fields of poppies this stamp set is sure to inspire some wonderful projects.

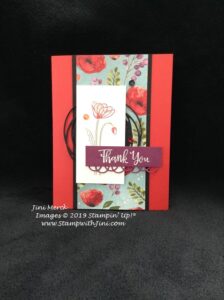
Here is a fun card using the Painted Poppies Bundle (153827) which includes a set of coordinating dies. The Painted Labels Dies not only includes dies that will cut out the images but has 5 dies that you can use as labels and trims to accent all kinds of projects. And since this is part of a Suite of Products you’ll have lots of coordinating products too!
If you love this Peaceful Poppies Suite of Products you’ll want to be sure to stop by my Events Calendar and check out my February Class – It includes the Painted Poppies bundle and the class is available both LIVE and as a Online Kit version. Got questions? Just let me know.

This project was one that I made for my team event after we returned from OnStage in November, and contains a couple of quick and easy techniques that pack a wow. You can see how I created the project in my video below.

Painted Poppies Thank You Card Video Tutorial

And here is a printable PDF tutorial for you with a complete supply list.

Painted Poppies Thank You Card Tutorial PDF

Enjoy!

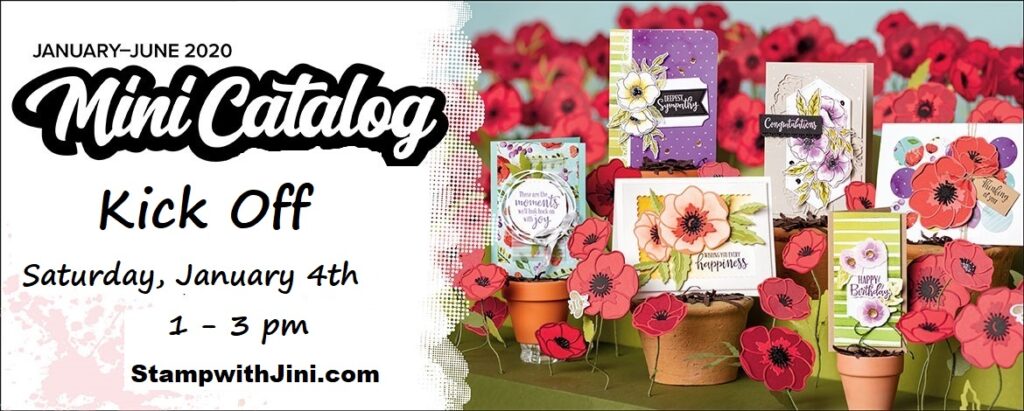
And just a reminder tomorrow is the last day to RSVP for my MIni Catalog Kick Off this Saturday.

It’s a great way to see the new products, stamp with me, and pick up your catalog if you didn’t get one already in the mail from me and it’s FREE when you place a qualifying order at the event!
Last Chance to PreOrder – Ends January 2nd
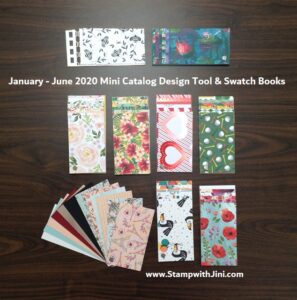
Click HERE for more information about ordering yours Design Tool or Paper Share
Supplies:

Stamp Set: Painted Poppies (*151599) and Peaceful Moments (*151595)

Inks: Calypso Coral Classic Ink (147101/122934), VersaMark Pad (102283/102193), Garden Green and Real Red Stampin’ Write Markers

Paper: Peaceful Poppies Designer Series Paper (151324), Poppy Parade (119793), Basic Black (121045), Rich Razzleberry (115316), and Whisper White Card stock (100730)

Accessories: Painted Labels Dies (*151605), Peaceful Poppies Sequins (151325), White Embossing Powder (109132), Heat Tool (129053) and Embossing Buddy (103083)

*Painted Poppies Bundle (153827)

*Peaceful Moments Bundle (153824)

Peaceful Poppies Suite of Products (153938)

Click here to order your Stampin’ Up! Products online 24/7! (US only)

Shop at my Online Store and use Host Code FX64QSU4

Click Here to learn more about using the Hostess Code If you order Online make sure your profile information is up to date and you’ve allowed me to contact you (If you chose no contact in the past you’ll need to call 1-800-Stamp Up to have them change your profile for you.)

Sign up HERE for my FREE Newsletter or Get my Blog Posts delivered right to your inbox HERE
Timeless Tulip

Here is a fun stamp set that has lots of potential AND it comes with a coordinating punch too so it makes projects quick and easy. You’ll want to watch for punch art ideas that will be sure to follow once the catalog launches January 3rd.

I used our Brights Designer Series Paper for this bright cheerful card and teamed it up with our Grapefruit Grove and Calypso Coral Classic Inks.

Here is a quick video to show you how I put this card together.

Timeless Tulip Card Video Tutorial

And of course a PDF that you can save and print off with a complete supply list and directions as a companion for your crafting needs.

Timeless Tulip Card Tutorial PDF

Enjoy!

Supplies:

Stamp Set: Timeless Tulip (*151534)

Inks: Basic Gray (149165/149166), Daffodil Delight (147094/119672), Calypso Coral (147101/122934), Grapefruit Grove (147142/147181), and Old Olive Classic Ink (147090/100531)

Paper: Brights Collection Designer Series Paper (149613), Grapefruit Grove (146972), and Whisper White Card stock (100730)

Accessories: Tulip Builder Punch (*151295), Whisper White 1/4″ Seam Binding (151326), and Triple Banner Punch (138292)

Click here to order your Stampin’ Up! Products online 24/7! (US only)

Shop at my Online Store and use Host Code FX64QSU4

Click Here to learn more about using the Hostess Code If you order Online make sure your profile information is up to date and you’ve allowed me to contact you (If you chose no contact in the past you’ll need to call 1-800-Stamp Up to have them change your profile for you.)

RSVP Today!

Receive a Birthday card from me in 2020! Click on the image to learn how

Heartfelt Treat

Today’s project is one that I made for my Team OnStage After Party as a treat and it some how got buried on my desk. (lol if you could only see it). That’s the bad news, but because of that the good news is over the next week I’ll be sharing some fun projects and tutorials with you now using NEW 2020 Mini Catalog products from that fun event along with some pictures too! Sound good? Hold on to your hats – this Mini is packed with fantastic product choices for us!!!

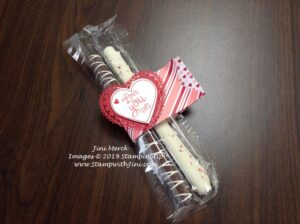
Cute? It’s a quick and easy treat for some one you love. Whether you make the treat yourself of buy prepackaged ones it’s sure to be a favorite, since who doesn’t love the salty and sweet combination?

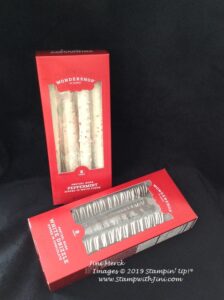
I found these at Target before the holiday, so you might be able to find some on sale some where at this point too.

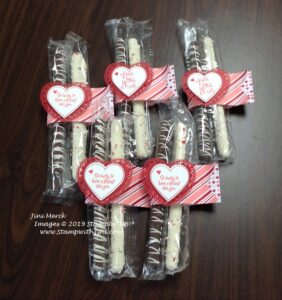
I whipped up a bunch of these quickly for those attending the OnStage After Party.

Want to give them a try? Here is a quick video tutorial showing you how I put them together.

Heartfelt Chocolate Covered Pretzel Treat Video Tutorial

Here is a printable step by step with the complete supply list and measurements for you as a companion to the video.

Heartfelt Chocolate Covered Pretzel Treat PDF Tutorial

Enjoy! And then stop back by to check out more of my FREE tutorials using the 2020 Mini Catalog products as we head into the final week of the year.

Have You Held Your Spot in this first LIVE event of the year?

And if you live locally don’t forget my Mini Catalog Kick Off Event – not only will you get to see the products you’ll be creating some fun projects too using some of them!

Why not stop by my calendar of events and see what all is going on during 2020? The beginning of the year is a great time to carve out some time for your creative side and I’m here to help you do that!

Don’t live locally or currently have a demonstrator and want a 2020 January – June Mini Catalog? Email me at StampwithJini@gmail.com your full Name, Address and Phone Number and I’ll be happy to mail you one of your own.

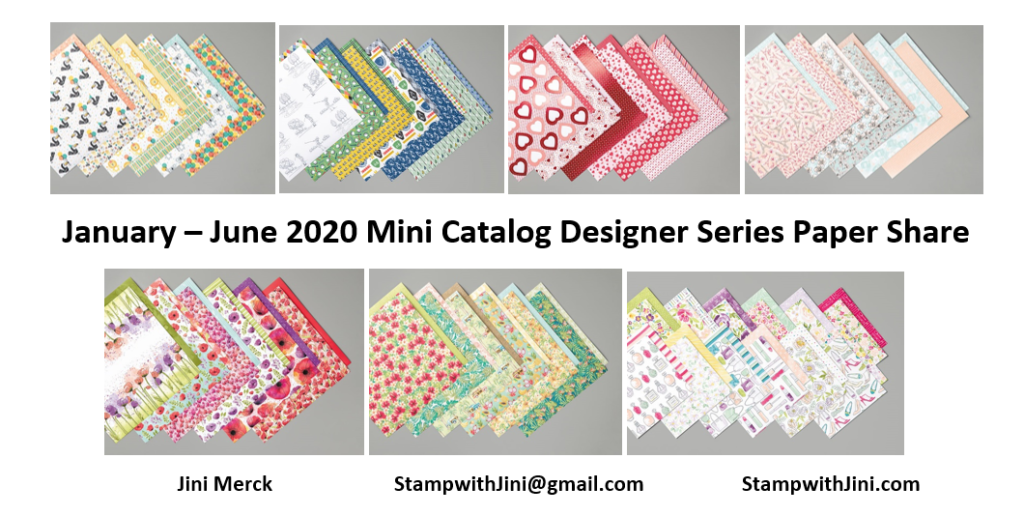
I’ll also have some great PreOrder options for you that include all the wonderful papers in this Mini Catalog. You can check them out HERE.

But you’ll want to hurry and order yours today since the PreOrder deadline is coming up fast! January 2nd is right around the corner.

Supplies:

Stamp Set: Heartfelt (*153775)

Inks: Real Red (147084/103287), Flirty Flamingo (147052/141402), and Real Red Dark Stampin’ Blends (147934)

Paper: From My Heart Specialty Designer Series Paper (151189) and Whisper White Card stock (100730)

Accessories: Heart Punch Pack (*151292), Heart Doilies (151191), Triple Banner Punch (138292), and Heart Epoxy Droplets (148583)

Click here to order your Stampin’ Up! Products online 24/7! (US only)

Shop at my Online Store and use Host Code FX64QSU4

Click Here to learn more about using the Hostess Code If you order Online make sure your profile information is up to date and you’ve allowed me to contact you (If you chose no contact in the past you’ll need to call 1-800-Stamp Up to have them change your profile for you.)

Are you on My Birthday List for 2020?

More Playful Penguins

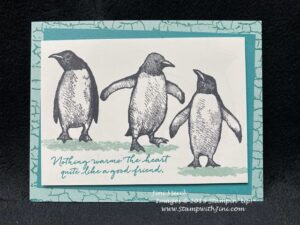
I got started stamping with this fun set and couldn’t stop stamping with them. So here is another card for you made with these delightful birds, this time my December Thank You card.

This time I’ve teamed them up with the Crackle Paint Background Stamp to create this “icy” look.

Done in shades of blue I really like the way it turned out. And when you use your Stamparatus they are a breeze to make!

Check out how I made this card in my video

Playful Penguins Card Video Tutorial

Playful Penguins Thank You Card Tutorial PDF

Supplies:

Stamp Set: Playful Penguins (150532 retiring) and  Crackle Paint Background (148755/148752)

Inks: Memento Tuxedo Black Ink Pad (132708/133456), Pretty Peacock (150083/150090) and Pool Party Classic Ink (147107/122933)

Paper: Pool Party (122924) and  Bermuda Bay (131197), and Whisper White Card stock (100730)

Accessories: Stamparatus (146276) and Small Grid Paper (104430)

Click here to order your Stampin’ Up! Products online 24/7! (US only)

Shop at my Online Store and use Host Code FX64QSU4

Click Here to learn more about using the Hostess Code If you order Online make sure your profile information is up to date and you’ve allowed me to contact you (If you chose no contact in the past you’ll need to call 1-800-Stamp Up to have them change your profile for you.)

Winter Gifts Note Card Tutorial

What a great surprise it is to find my Paper Pumpkin Kit in my mail box every month – it’s a little taste of crafting happiness as I open the box. The kit this month coordinating with the lovely cards from October, but it was a stand alone kit with it’s 24 Tags.

My box was filled with goodies that I couldn’t resist using for other project too, such as today’s card.

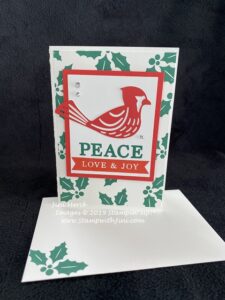
I just fell in love with this bold Poppy Parade cardinal piece that was included.

Want to see how I made this alternate project? Why not check out this quick video tutorial?

Paper Pumpkin November 2019 – Winter Gifts Note Card Tutorial

Note cards are perfect for new stampers since you get both the card and envelope for one great price!

Here is a printable PDF for you that includes the measurements and a complete supply list for you.

Paper Pumpkin November 2019 – Winter Gifts Note Card Tutorial PDF

If you need a quick and easy Holiday Gift Paper Pumpkin is a perfect choice! Gift someone the gift of crafting with these all inclusive kits! You can buy a prepaid subscription to gift someone or create Subscription for it and have it sent direct to them. The choice is yours!

And right now we have some past kits as part of of Year End Sale too so you can stock up on those gifts or get one for yourself

You can find PrePaid Subscription options in my Online Store or you can Subscribe HERE.

Don’t miss out on the December kit – sign up ends December 10th!

Want to learn more? Why not try my Paper Pumpkin Craft Time? You can come and see what it is all about for just $5 and it is free if you subscribe at the event. Just check out my Calendar of Events to see this and all my classes and events.

Then stop back by tomorrow when I’ll be sharing another way I used this fun kit.

Supplies:

Stamp Set: Winter Gifts (Paper Pumpkin November 2019 Kit 152879)

Inks: Shaded Spruce (147088/147165) and Poppy Parade Classic Ink (147050/119891)

Paper: Whisper White Note Cards & Envelopes (144236), Poppy Parade (119793), and Whisper White Card stock (100730)

Accessories: Basic Rhinestone Jewels (144220) and Take Your Pick Tool (144107/150006)

Click here to order your Stampin’ Up! Products online 24/7! (US only)

Shop at my Online Store and use Host Code FX64QSU4

Click Here to learn more about using the Hostess Code If you order Online make sure your profile information is up to date and you’ve allowed me to contact you (If you chose no contact in the past you’ll need to call 1-800-Stamp Up to have them change your profile for you.)

To Every Season Thank You Card

I do love a stamp set that has great images for both cards and treats, add the fact that it has punches and it’s sure to be on my wish list. Today’s project is a thank you card that I’ve whipped up using the To Every Season Bundle’ fall option.

I’ve chosen to highlight our Terracotta Tile 1/2″ Scallop Ribbon on this project since I love the look and feel of this ribbon AND I love the fact I can get it in all 5 of the 2019-2021 In Colors!

Here is the card I created for my November Thank You cards.

While right at the moment it feels like winter here in North Georgia with our 20 degree wake up this morning, it really is fall. In fact the leaves on the mountain sides are simply beautiful right now and were at their peak I think. After our late 90 degree weather and this early blast of arctic cold I think mother nature is a bit confused.

Any how would you like to see how I made this card? Why not check out my Video Tutorial?

To Every Season Thank You Card Video Tutorial

And here is a PDF tutorial for you with the complete supply list and step by step directions.

To Every Season Thank You Card Tutorial PDF

Enjoy!

Supplies:

Stamp Set: To Every Season (*150531)

Inks: Crushed Curry (147087/131158), Terracotta Tile (150086/150093), and Merry Merlot Classic Ink (147112/147170)

Paper: Terracotta Tile (150884), Merry Merlot (146979), and Very Vanilla Card stock (101650)

Accessories: Every Season Punch Pack (*150670), Terracotta Tile 1/2″ Scallop Linen Ribbon (149705), 1 1/2″ Circle Punch (138299), Story Label Punch (150076), Metallic Pearls (146282), and Take Your Pick Tool (144107)

*To Every Season Bundle (153051)

Click here to order your Stampin’ Up! Products online 24/7! (US only)

Shop at my Online Store and use Host Code KTYQJ3TY

Click Here to learn more about using the Hostess Code If you order Online make sure your profile information is up to date and you’ve allowed me to contact you (If you chose no contact in the past you’ll need to call 1-800-Stamp Up to have them change your profile for you.)

Sign up HERE for my FREE Newsletter or Get my Blog Posts delivered right to your inbox HERE

Paper Pumpkin Winter Woods Note Card Tutorial

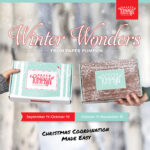
The Winter Wonders Kit is a lot of fun to work with. It is filled with beautiful winter scenes and while I had pieces left over from the kit, I wanted to create a note card that just used the stamps. Here is what I came up with.

I simply took my Night of Navy spot and added the Coastal Cabana spot (from a past kit) and Poppy Parade Classic Ink. The punch makes the sentiment easy since and also adds some interest.

Clean and simple – a great winter card and since I used our Whisper White Note Cards, I had 20 card bases and envelopes to start crating with for just $7

Here is a quick video tutorial for you that I share how I did this card.

Paper Pumpkin October 2019 Winter Wonders Note Card Video Tutorial

Paper Pumpkin October 2019 Winter Wonders Note Card Tutorial PDF

Enjoy!

Why not give Paper Pumpkin a Try?

There are just a few days left to get your Winter Wonders, November Paper Pumpkin Kit –

November Kit details: Makes 24 holiday-themed gift tags of 4 various sizes and designs.

Coordinating colors: Early Espresso, Pool Party, Poppy Parade, and Shaded Spruce

The November kit coordinates with the October kit; however, each kit is all-inclusive and can stands alone.

And when you subscribe to Paper Pumpkin you can join me for my Paper Pumpkin Craft Time each month too – it’s FREE and is a my way of saying Thank You for choosing me as your demonstrator.

Not sure? Why not come to Paper Pumpkin Craft Time and give it a try? You can make 2 projects and there is a $5 Class Fee; but it FREE when you subscribe the day of the event!

Visit PaperPumpkin.com to join today

Got questions? Feel free to email me at StampwithJini@gmail.com or call me at 706 754-7124

Supplies:

Stamps: Winter Woods (October Kit 152333)

Paper: Whisper White Note Cards & Envelopes (144236), Night of Navy Card stock (100867), and Whisper White Card stock (101650)

Ink: Night of Navy Classic Ink (147110/103033), Coastal Cabana Classic Ink (147097/131164), Poppy Parade Classic Ink (147050/119891)

Accessories: Timeless Label Punch (149516), Holiday Rhinestone Jewels (150457), and Take Your Pick Tool (144107/150006)

Click here to order your Stampin’ Up! Products online 24/7! (US only)

Shop at my Online Store and use Host Code YS9WN2UA

Click Here to learn more about using the Hostess Code If you order Online make sure your profile information is up to date and you’ve allowed me to contact you (If you chose no contact in the past you’ll need to call 1-800-Stamp Up to have them change your profile for you.)

Gather Together Thank You Card

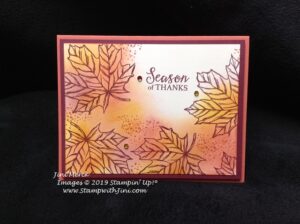
Love fall? Today’s card that simply uses stamps, paper, and ink to create a lovely autumn feel.

Sponging is an easy technique and a great way to add color to any project. I especially love it for cards like this.

Want to see how I created this card? Check out my video tutorial.

And here is a PDF containing the complete supply list and step by step instructions to go along with the video.

Gather Together Thank You Card PDF

Supplies:

Stamp Set: Gather Together (150589)

Inks: Merry Merlot (147112/147170), Terracotta Tile (150086/150093), and Crushed Curry Classic Ink (147087/131158)

Paper: Merry Merlot (146979), Terracotta Tile (150884), and Whisper White Card stock (100730)

Accessories: Stampin’ Sponges (141337) or Sponge Daubers (133773), Take Your Pick Tool (144107), and Holiday Basic Rhinestones (150457)

Click here to order your Stampin’ Up! Products online 24/7! (US only)

Shop at my Online Store and use Host Code H62N9P3Z

Click Here to learn more about using the Hostess Code If you order Online make sure your profile information is up to date and you’ve allowed me to contact you (If you chose no contact in the past you’ll need to call 1-800-Stamp Up to have them change your profile for you.)

#imbringingbirthdaysback with Country Home

I’m on a roll with Country Home and loving the images colored with our Stampin’ Blends. Today’s card is one that I made to send out this week for my October birthdays. I wanted the feeling of autumn when I created this card so I reached for the Terracotta Tile and Pretty Peacock. Two of my favorite 2019-2020 In Colors, and here is what I came up with.

Of course, I can’t resist the new Snowfall Accents Puff Paint to create the 3d feel of the cotton pods either.

Here is a quick video tutorial sharing how I colored and used the Snowfall Accents Puff Paint along with a couple of tips for success. I’ve also done a PDF to go along with the video for you.

COUNTRY HOME CARD VIDEO TUTORIAL

#imbringingbirthdaysback October 2019 – Country Home Card Tutorial PDF

Would you like to receive a birthday card from me in 2020? I’m starting a new list now for 2020 and will be collecting birthdays to add to it starting now through the end of the year for 2020.

So if you want to be one of those who receive a hand stamped birthday card from me, it’s simple just send an email to me at StampwithJini@gmail.com and give me the following information.

Name

Address

Date of birth

(I just need the month and day since we’re all 29. LOL! But you can include the year if you want to. US only)

(fine print: All info will be kept private and be used only for the purposes of sending you a birthday card)

I’m asking for yours – so here’s mine March 20th and my address is 2320 Dooley Road Clarkesville GA 30523 – just in case you wanted to know. ?

Clearance Rack Update

The Everything Is Rosy Product Medley is back and available to purchase for 15% off—but only while supplies last

The Everything Is Rosy Product Medley includes these exclusive products:

  • Everything Is Rosy Photopolymer Stamp Set—18 stamps; suggested blocks: a, b, c
  • Everything Is Rosy Dies—10 dies; largest die 2-7/8″ x 1″ (7.3 x 2.5 cm)
  • 6″ x 6″ (15.2 x 15.2 cm) Designer Series Paper Stack—48 sheets; 8 each of 6 double-sided designs
  • 6″ x 6″ (15.2 x 15.2 cm) rose gold foil paper—8 sheets
  • Printed die cuts—2 sheets
  • Rose gold die cuts—4 sheets; 2 each of 2 designs
  • Rose gold adhesive backed mirror embellishments—60 embellishments; 1/4″ (6.4 mm)
  • Melon Mambo 1/4″ (6.4 mm) Ruched Ribbon—10 yards (9.1 m)
  • Night of Navy/Rose Gold 3/8″ (1 cm) Metallic –Edge Ribbon—10 yards (9.1 m)
  • Rose Gold Shimmer Paint—1/2 oz. (15 ml)

Item #150059 Everything is Rosy Product Medley Bundle Originally $80 NOW just $68

Click here if you want to see projects using the Everything is Rosy Product Bundle

Click HERE to get yours before they are gone!
Supplies:

Stamp Set: Country Home (147678) and Itty Bitty Birthdays (148618)

Inks: Memento Tuxedo Black Ink (132708/133456), Pretty Peacock (144045), Old Olive (144597), and Cajun Craze Stampin’ Blends Combo Pack (147931), and Color Lifter (144608)

Paper: 2019-2021 In Color Designer Series Paper (149617), Pretty Peacock (150880), and Whisper White Card stock (100730)

Accessories: Banner Triple Punch (138292), Layering Ovals Dies (141706), Stitched Shapes Dies (145372), Snowfall Accents Puff Paint (145372), and Heat Tool (129053)

Click here to order your Stampin’ Up! Products online 24/7! (US only)

Shop at my Online Store and use Host Code H62N9P3Z

Click Here to learn more about using the Hostess Code If you order Online make sure your profile information is up to date and you’ve allowed me to contact you (If you chose no contact in the past you’ll need to call 1-800-Stamp Up to have them change your profile for you.)

?Peak Princess Fun & the Amazing Magnolia Lane Folding Album

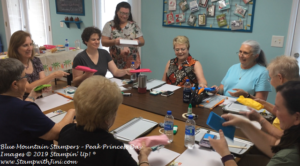
Last weekend was my Peak Princess event. What’s that? Well it is a special afternoon of pampering for those Team members who have earned it. We enjoy the time together, food, played a game, and of course create a project.

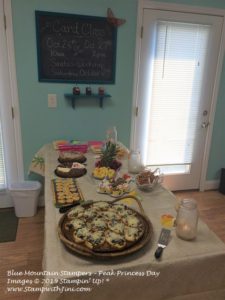
This event was extra special since it was our largest group yet due to everyone’s hard work – and I added a bit of a luau theme to the snack table to celebrate.

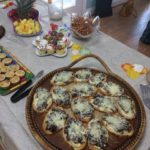
The hit of the snack table was the Artichoke & Mushroom Toast – not really Hawaiian fair, but since the Hawaiian pizza rolls I was planning on were a flop when I tried them, this worked out well since everyone seem to enjoy them.

Here is the recipe if you want to try them yourself. I found them really easy to do and prepped everything the day before and then assembled before the event.

Artichoke & Mushroom Toast

Taste of Home

  • 36 slices French bread baguette (1/2 inch thick)
  • 3 T. Olive Oil, divided
  • ½ lb. sliced fresh mushrooms
  • ½ lb. sliced baby portobello mushrooms
  • ½ tsp. Italian seasoning
  • 2 T. butter
  • 6 garlic cloves, minced
  • 1 jar (7.5 oz) marinated quartered artichoke hearts, drained
  • 1/3 c. mayonnaise
  • 1 T. Parmesan cheese, shredded
  • 2 c. Swiss cheese, shredded

Place bread on baking sheets; brush with 2 tablespoons oil. Broil 4-6 inches from heat for 1-2 minutes or until lightly toasted.

In a large skillet, sauté mushrooms with Italian seasoning in butter and remaining oil until tender. Add garlic; cook 1 minute longer. Remove from heat and set aside.

Place artichokes in a food processor; cover and process until finely chopped. Add mayonnaise and Parmesan cheese; cover and process until blended. Spread over toast slices; top with mushrooms and sprinkle with Swiss cheese.

Bake at 350 degrees for 4-6 minutes or until cheese is melted.

Yield 3 dozen

Print a copy here

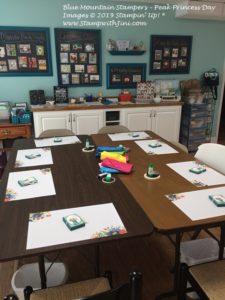
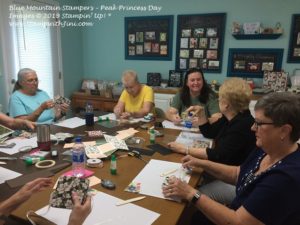
And here is the classroom waiting for everyone to arrive.

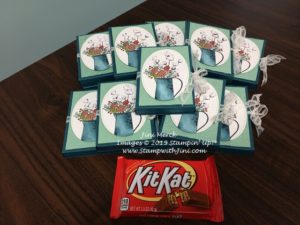
I shared the little Country Home Kit Kat Holders which were everyone’s “pillow gifts” on the table with you yesterday – I thought the thankful greeting was perfect to express my thanks to my team.

We enjoyed a game after everyone settled in –

Have you ever played the Right, Left Game? It’s so simple…. everyone starts with a package and then we passed our packages to the right or left depending on the Ink Pad story I read.

Lot’s of fun and laughter to go around!

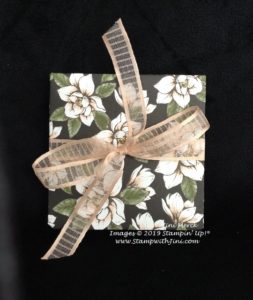
After we did a Make n Take and created these lovely Folding Albums. My friend, Marni gave me one of these little albums last spring in a swap and I loved it so much. I saved it since I knew it was the perfect project for the day. I simply put my own spin on it.

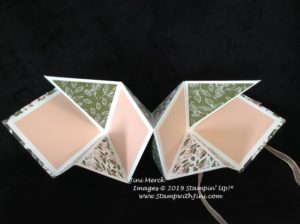
It wasn’t hard to choose the paper I wanted to use. The Magnolia Lane Designer Series Paper is so striking and you’ve got a ton of pattern choices in the package. Here is what the album looks like opened.

I’m looking forward to filling it with some photos!

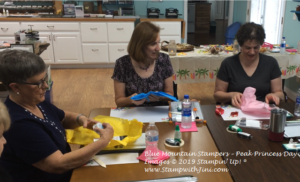
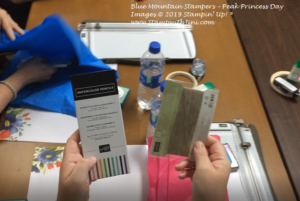
Here is the gang working on theirs

Want to see how I made this album? The Team enjoyed making them so much I thought you would too!

Amazing Magnolia Lane Folding Album Video Tutorial

Oh, I almost forgot the tag or chip board is simply the extra piece in our Specialty Designer Series Paper packs – How great is that? You can up cycle it!

So what do you think? Want to make one for yourself? I think they make great gifts and of course you could stamp on the inside diamonds if you prefer rather than use it as an photo album. I think there are endless ways to use this amazing album!

Here is a printable version with the complete supply list I used.

Amazing Magnolia Lane Folding Album Tutorial PDF

I am so humbled to have such a fantastic Team, they truly inspire me to want to be the best leader I can be.

Stop back by next week when I’ll be sharing some of the projects they made

Supplies:

Paper: Magnolia Lane Designer Series Paper (149484), Petal Pink 5/8″ Organdy Striped Ribbon (149985), and Whisper White Card stock (100730)

Accessories: Petal Pink 5/8″ Organdy Striped Ribbon (149441)

Adhesives: Snail (104332/104331), Tear & Tape (138995), and Multipurpose Liquid Adhesive (110755)

Click here to order your Stampin’ Up! Products online 24/7! (US only)

Shop at my Online Store and use Host Code H62N9P3Z

Click Here to learn more about using the Hostess Code If you order Online make sure your profile information is up to date and you’ve allowed me to contact you (If you chose no contact in the past you’ll need to call 1-800-Stamp Up to have them change your profile for you.)