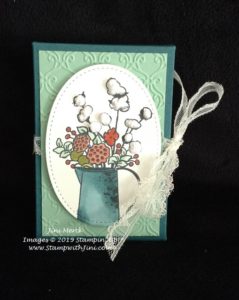
This past weekend was my team Peak Princess event and so I wanted to make something special for my team members that earned this special event during the first quarter. Naturally the Country Home stamp set came to mind with it’s lovely sentiments and images. The fact that I could use the fun new Snowfall Accents Puff Paint on the cotton pods from the Holiday Catalog was an added bonus and a ton of fun!
Check out these elegantly wrapped treats
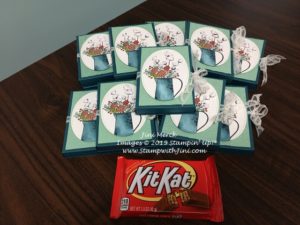
And since this holder fits a full size Kit Kat Bar there is plenty to share if you want too!
They are simple to make, use a sheet of card stock and I really like how the back opens to show your sentiment.
See how I made it and the magic of the Snowfall Accents Puff Paint here in my video tutorial.
COUNTRY HOME KIT KAT HOLDER VIDEO TUTORIAL
And here’s the a complete supply list and printable tutorial for you too. Speaking of which do you find these PDFs helpful? Do you like the PDFs? Why not leave me a comment and let me know.
Shop at my Online Store and use Host
Code H62N9P3Z
Click Here to learn more about using the Hostess Code If you order Online make sure your profile
information is up to date and you’ve allowed me to contact you (If you chose no
contact in the past you’ll need to call 1-800-Stamp Up to have them change your
profile for you.)
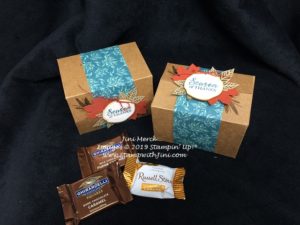
Today’s treat box was created special for my Holiday Catalog Kick Off last Saturday and it will filled with some chocolate goodies. I had a lot of fun making them for my guests.
Any how here is the treat – a made with one of our Mini Shipping Boxes, so it will hold quite a bit.
Clearly I had a thing for caramel when I was shopping since when I started filling the boxes I realized I’d picked up 4 different kinds. Or maybe it was because I was looking at the color coordinating packaging! LOL! Do you ever do that?
I really love how these treat boxes turned out and I can’t wait to share the fun technique for creating these wonderful little leaves and stamping on the wood element pieces that I used to decorate the box. No inky fingers! Ahh….. the magic of stamping.
Why not check out my video tutorial? Not only will you see just how easy these treats were to make but I’ll share a couple of tips and tricks with you too.
Gather Together Mini Shipping Box Video Tutorial
So what do you think? If you’d like to make some fall treats like this I’ve got a PDF with step by step instructions that goes with my video and it contains the complete supply list for you too.
Shop at my Online Store and use Host
Code EFXCZ934
Click Here to learn more about using the Hostess Code If you order Online make sure your profile
information is up to date and you’ve allowed me to contact you (If you chose no
contact in the past you’ll need to call 1-800-Stamp Up to have them change your
profile for you.)
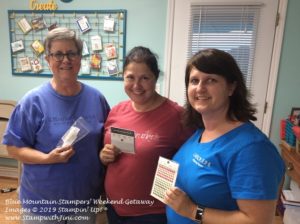
I mentioned last Friday that I was getting ready for my team retreat – we gather 3 times a year for weekends of stamping, laughter, food and fun. I really look forward to these gatherings of uninterrupted crating time with my peeps. They are the best and while it is like a big slumber party we also get to get to use our Holiday PreOrder goodies to create. What could be better?
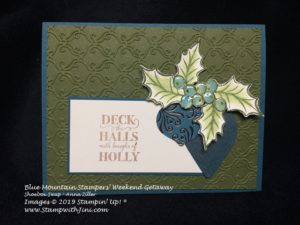
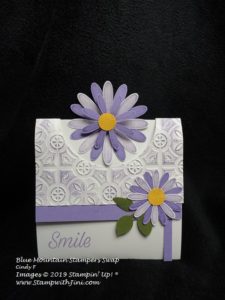
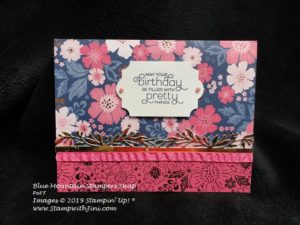
A shoe box swap of course! While it was a small gathering this time due to schedules we still had a wonderful time at our shoe box swap. It is always good fun and I love seeing what everyone is creating. Here are some of the projects.
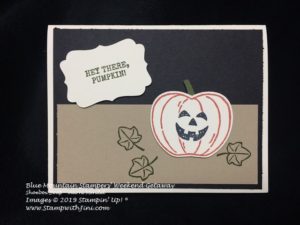
This first card is for Halloween and uses the Apple Builder Punch (150663) and the coordinating Harvest Hello stamp set (150581).
This set is great for quick and easy card since it has a coordinating punch – and a super set for teachers and back to school projects since its got some wonderful sentiments too.
And here is a card that uses a bundle (153006) that is sure to be popular.
The Christmas Gleaming Suite is filled with wonderful products, and the Brightly Gleaming Designer Series paper (150429) includes Copper Foiling that is quite striking. We used the new Copper Delicata Metallic Ink for this project (150707/150708) and can you see the subtle shimmer of the Shimmy Crystal Effects (150892) that we used for the berries? So excited to have these new option for our crafting!
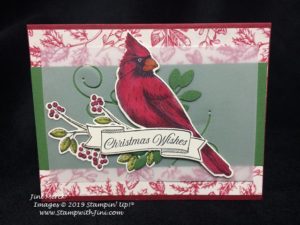
And finally here is my card that I created using the Toile Christmas Bundle (152367) from the Toile Tidings Suite of products.
I just fell in love with this Distinktive stamp set as soon as I saw it – the cardinal is always a favorite of mine. I’ll be working up a tutorial for you and hope to share it in the next week or two as we get closer to the Holiday Catalog launch on September 4th.
And of course, what is a team event with out some door prizes?
Goodies from the Holiday Catalog catalog – winners got to choose their favorite accessories.
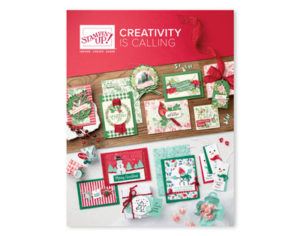
Would you like a 2019 Holiday Catalog? You can pick one up during my August Classes or contact me and I’ll be happy to mail you one.
And of course how about a special event where you can pick up your copy of the catalog AND use some of these fun items too! Why not join me and play with some of the new products?
If your Online order is $150 or more make sure not to use
the host code so that you can take advantage of the Host Benefits yourself – No
worries, I’ll still send you your free gift.
Click Here to learn more about using the Hostess Code If you order Online make sure your profile
information is up to date and you’ve allowed me to contact you (If you chose no
contact in the past you’ll need to call 1-800-Stamp Up to have them change your
profile for you.)
The Holiday Catalog is right
around the corner and I won’t be able to mail you one if you have chosen no
contact.
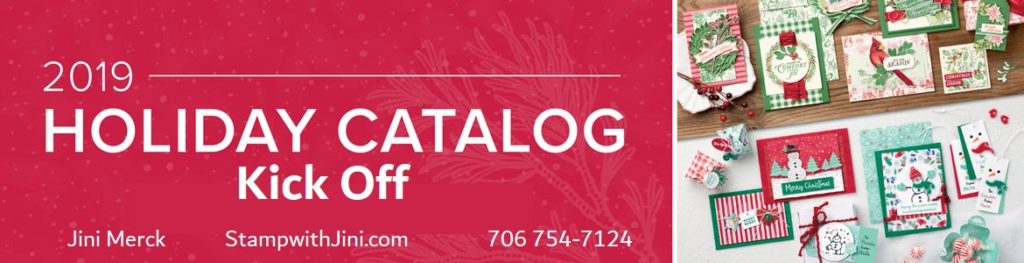
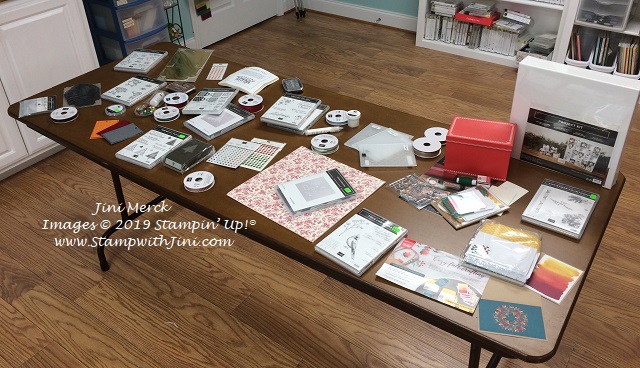
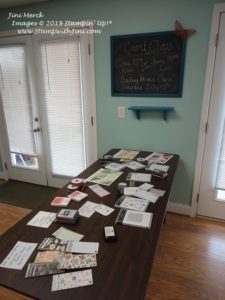
Yesterday was my monthly Team Meeting and while I always enjoy these gatherings yesterday was extra special because I was able to surprise with my box that arrived just in the nick of time – So everyone was able to get their first look at the 2019 Holiday Catalog products too. Who doesn’t love that?
Here is a picture of my table spread out with PreOrder goodies for everyone to see.
And I did a very quick unboxing video the night before of my Holiday Catalog Preorder goodies for you too. I had hoped to share it yesterday evening, but the day went by too fast.
2019 Holiday Catalog Preorder Goodies Video
So what do you think? Does the Holiday Catalog look like it will be a lot of fun? I’m really looking forward to this weekend and my Team Retreat where I’ll get some uninterrupted play time!
Mean while would you like to see some of the wonderful swaps my team made? I can’t pick a favorite – can you?
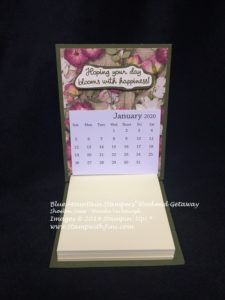
This first swap is a 3d and you know how I love those! This great little Good Morning Magnolia Bag was filled with a couple of pieces of chocolate, Magnolia Lane Designer Series Paper covered note pad and pen.
No, the chocolate didn’t survive long, but I’ll be enjoying the note book and pen for a while yet. LOL
And this final card was created with one of our past Product Medley Bundles, Everything is Rosy.
I’m soooo glad that Stampin’ Up! will be offering another one of these Medleys in our Holiday Catalog. So watch for that coming soon.
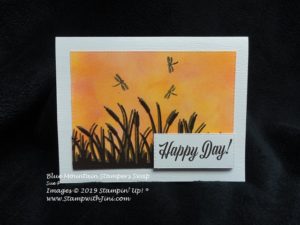
Stamping, Laughter and Fun… The Blue Mountain Stampers
So what do you think? Love the new items in my Holiday Catalog PreOrder video too? It’s just a peek of what’s inside the 2019 Holiday Catalog! And as I am sure you can guess, being the first to see this new catalog or any of our new catalogs is a very exciting AND a huge perk of being a Demonstrator – after all who wouldn’t want to be first? Right! Add the fact that you’ll receive a discount on all these products and you can’t loose!
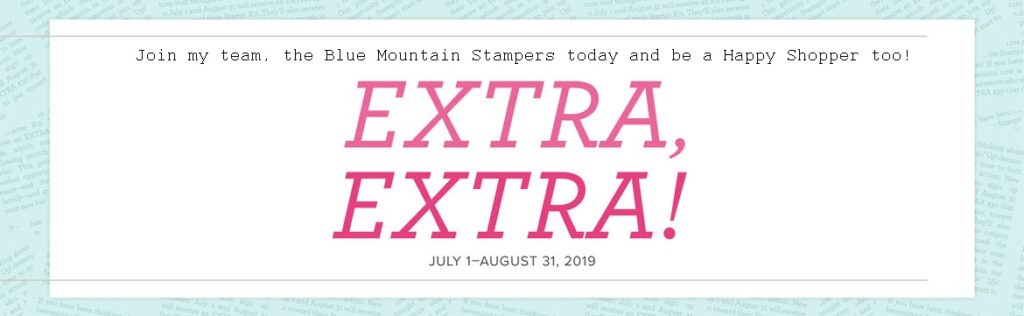
If you feel this is a good time to join Stampin’ Up! and my team, the Blue Mountain Stampers, you too can be first too!
What are the Blue Mountain Stampers?
That’s the name of our stamping community. I enjoy welcoming new members to our group. We’re from all over. And if you’re considering joining Stampin’ Up!, you may have questions about how I would support you as part of my team. I do offer a variety of ways to learn, grow and to have FUN as a Blue Mountain Stamper!
Exclusive Team Resource Page – videos, PDFs and more
Exclusive Face book Group – A great way to share and connect with other team members and share
Monthly Creative Challenges
Swapping Opportunities
Team Retreats
Meetings – both local and online/virtual
Monthly Crafting Day
Monthly Lunch & Learn
Recognition & Incentives
Training available for private parties, clubs, classes and more!
Additional support and business coaching available
We have a very active group that share and answer each other’s questions on
our Exclusive face book group. If you’re looking for fun, a place to grow
and share with others…You’ll fit right in!
Hobbyists are welcome!
Did you know? 90% of my Blue Mountain Stampers’ areHappy Shoppers – purchasing for themselves, (along with their family and friends.) That’s right…you can just get a discount on products you love!
We welcome the hobbyist who’s looking to be a “happy shopper” (and save money), as well as those of you that want to build a business (and make money).
Everyone is welcome; after all there’s room for both and everyone in between.
And there is NO Obligation when you purchase your starter kit – Join the Blue Mountain
Stampers and see what it’s all about!
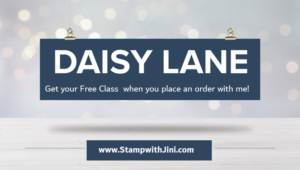
Shop at my Online Store and use Host Code Q2UWTQRW Place a qualifying order of $35 or more with me between now and August 18th and use this host code get a FREE Daisy Lane Note Card & Box Class!
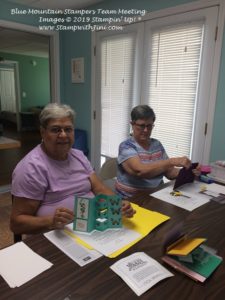
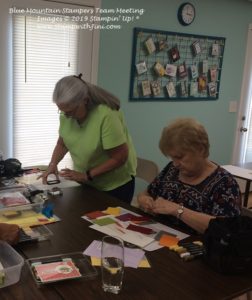
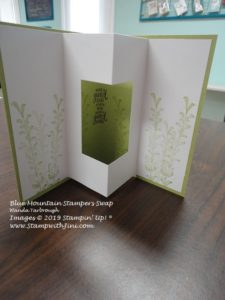
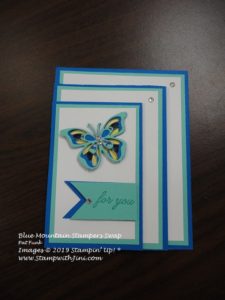
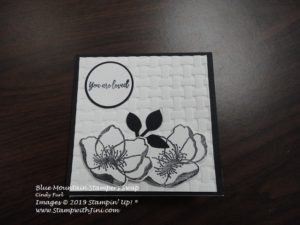
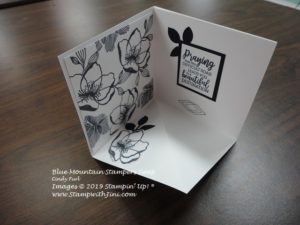
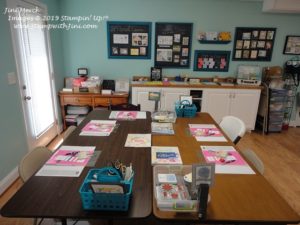
As I mentioned yesterday, today’s cards are all swaps done by my team members at this month’s team meeting. I always love to see what they are creating when we gather – and swapping is a lot of fun since we all have different styles and favorite sets. So we get to see lots of new ideas.
I’ll start with the Fancy Folds which were clearly on a lot of our minds – after all they are a lot of fun to make.
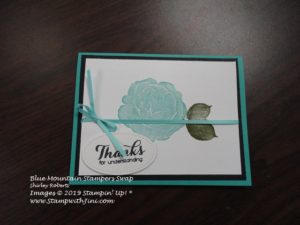
I love the Pacific Point and Coastal Cabana together – clean and crisp. The pop of color on the butterfly wings was done with our Stampin’ Blends.
And of course our classic Black & White – This Pop Up Corner Card using the Beautiful Promenade stamp set (146842) and Basket Weave 3D Embossing Folder (151797 available again soon) is sure to impress.
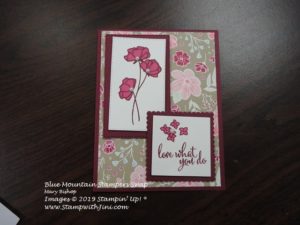
And last but not least the final card for the day uses the Love What You Do stamp set (148042) using Merry Merlot and Lovely Lipstick Stampin’ Blends – a rather striking color combination I thought.
Have a favorite? Why not leave me a comment and let me know – I know I can’t pick just one. LOL.
If having a group of crafters to gather and/or share appeals to you, AND you’d love a discount on your Stampin’ Up! products maybe joining my team, the Blue Mountain Stampers might be the right fit for you. Not only do we gather monthly we also share virtually too so you can join in with what works for you.
Here is a little about the Blue Mountain Stampers
That’s the name of our stamping community. I enjoy welcoming new
members to our group. We’re from all over. If you’re considering joining
Stampin’ Up!, you may have questions about how I would support you as part of
my team. I do offer a variety of ways to learn, grow and to have FUN as a Blue
Mountain Stamper!
Exclusive Team Resource Page – videos, PDFs and more
Exclusive Face book Group – A great way to share and connect with other team members and share
Monthly Creative Challenges
Swapping Opportunities
Team Retreats
Meetings – both local and online/virtual
Monthly Crafting Day
Monthly Lunch & Learn
Recognition & Incentives
Training available for workshops, clubs, classes and more!
Additional support and business coaching available
We have a very active group that share and answer each other’s questions on
our Exclusive face book group. If you’re looking for fun, a place to grow
and share with others…You’ll fit right in!
Hobbyists are welcome!
Did you know? 90% of my Blue Mountain Stampers’ areHappy Shoppers – purchasing for themselves, (along with their family and friends.) That’s right…you can just get a discount on products you love!
We welcome the hobbyist who’s looking to be a “happy shopper” (and save money), as well as those of you that want to build a business (and make money).
Everyone is welcome after all there’s room for both and everyone in between.
And there is NO Obligation when you purchase your starter kit – Join the Blue Mountain Stampers and see what it’s all about!
Got questions? I’m happy to speak with you, simply contact me by email at StampwithJini@gmail.com or give me a call at 706 754-7124
Shop at my Online Store and use Host
Code VNQH4QYC Place
an order with me and use this host code get a FREE Gift from me – 2019 In Color
Swatches!
If your Online order is $150 or more make sure not to use
the host code so that you can take advantage of the Host Benefits yourself – No
worries, I’ll still send you your free gift.
Have you seen the Modern Mood Specialty Designer Series Paper from the NEW 2019 Annual Catalog? If you haven’t it is absolutely gorgeous with it’s shinny accents – This pack has 12 gorgeous patterns too!
I couldn’t wait to get creating with this pack of paper when I received it in April at OnStage – I knew just what I wanted to make. And when I saw them on display I knew just what I wanted to use on the clasp too – you’re going to LOVE these new Gems that are available now they are sooooo pretty!
Here is my finished project – a cute little mini composition notebook purse
There were perfect as a little gift for my 2019 Annual Catalog Kick Off last weekend.
If you’d like to make some to I’ve done a quick video tutorial and PDF also for you so why not check them out?
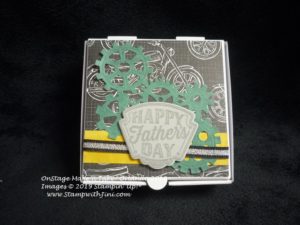
Father’s Day is right around the corner and here is a cute way to give a gift card or other small gift to dad.
I made this little box with the Geared Up Garage Bundle (150610) from the Occasions Catalog – a perfect set for the guys in our lives! I meant to share this earlier with you since I made it back at OnStage, but the tutorial got lost on my computer and I ran across it the other day. Do you ever do that? LOL if I don’t see it… you know how it goes.
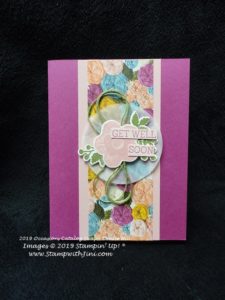
Swapping at an OnStage event is a lot of fun – it allows me to meet my fellow demonstrators from around the country and share ideas. So today I’ll be sharing some more of the wonderful swaps I received in Charlotte.
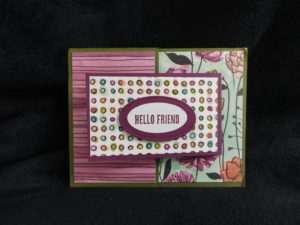
Today’s cards all use the Share What You Love Specialty Designer Series Paper (146926). This pack of papers is one of my favorites since not only is it heavier it has a beautiful pearl finish too.
These first two cards have been teamed up with the Layering Ovals Framelit Dies (141706).
Done in Tranquil Tide this card uses the Detailed with Love stamp set 146603/146606)and beautiful 3/8″ Mini Ruffled Ribbon (146948). And can you see the texture in the background created with the Ruffled Embossing Folder (143699)?
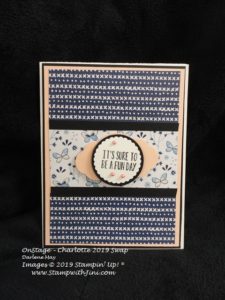
And this next card uses the Wood Words stamp set (143925/143928) for it’s sentiment.
And how about this card using the Amazing Life stamp set (148750) that is part of the Last Chance List?
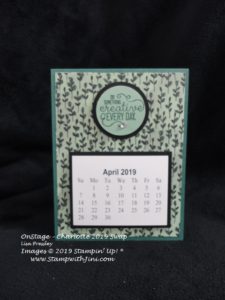
And finally this card uses the Crafting Forever set (143955/143958) as it’s sentiment for this calendar card.
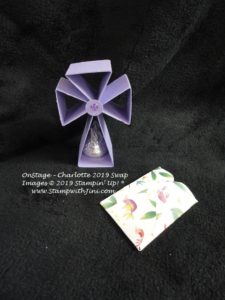
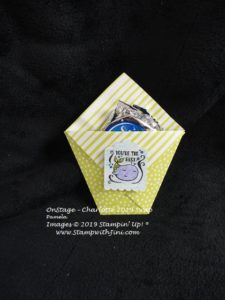
And would you like to see a couple of the 3d items I received in swaps at OnStage Charlotte?
This first one is a couple of small treat items –
The little Animal Expedition Designer Series Paper (146902) pouch was made with the Envelope Punch Board and holds a little pack of tic tacs.
And a fun diaper fold using the Cute Crew Punch Box (148535) it’s part of the Last Chance list.
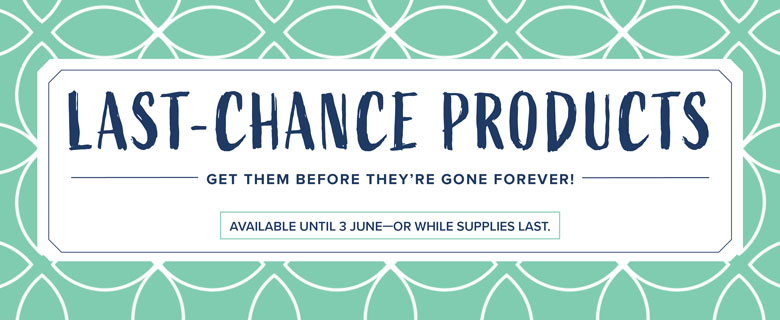
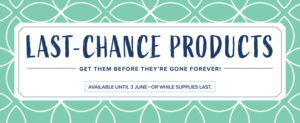
If you have any questions about the Last Chance List please let me know. You can see all the items in my Online Store.
Shop
at my Online Store and use Host Code GXJ4CGDM
Click Here to learn more about using the Hostess Code If you order Online make sure your profile
information is up to date and you’ve allowed me to contact you (If you chose no
contact in the past you’ll need to call 1-800-Stamp Up to have them change your
profile for you.)
Here are a couple of more cards using the Needle & Thread Suite of products. I really like the way this first card uses the Old Olive Linen Thread and Vellum card stock that has been run through the Big Shot using the stitched die image to create lots of texture.
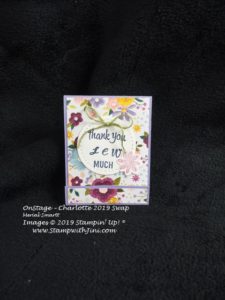
And this card from an OnStage swap highlights the Needlepoint Nook Designer Series Paper (148807) while using the Itty Bitty Birthday stamp set (148807) and our Pretty Label (143715) and 1 3/8″ Scallop Circle Punch (146139).
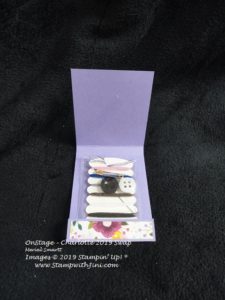
And here is a fun 3d swap using the Needle & Thread Bundle and the Make a Difference (146676) and Thoughtful Banners stamp sets (Retiring 141614).
When you open it you can find a little sewing kit – how cute is that?
So what do you think? You can see all of these products in my Online Store – just check out the last chance list for the Needle & Thread Suite of products simply by clicking on the image below.
That’s it for the day – short and sweet. Stop back by tomorrow when I’ll be sharing more of my OnStage swaps with you.
Shop
at my Online Store and use Host Code GXJ4CGDM
Click Here to learn more about using the Hostess Code If you order Online make sure your profile
information is up to date and you’ve allowed me to contact you (If you chose no
contact in the past you’ll need to call 1-800-Stamp Up to have them change your
profile for you.)
The Annual Catalog is right around the corner and I won’t be able to mail you one if you have chosen no contact.
It’s been a rough night here in North Georgia as the storms associated with this latest front moves through, and I’m a bit sleep deprived from the storms. I hope that as you read this you are safe this Easter weekend where ever you are.
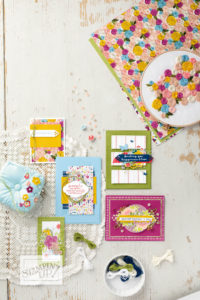
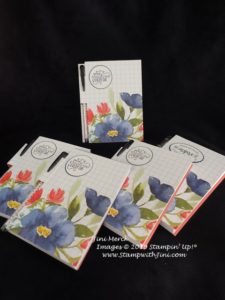
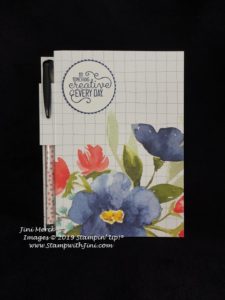
Today’s post is going to share the project that I made for my team members as part of their OnStage gifts last weekend.
I’ve had several ask me how they were made – so while I’m using a demonstrator supply item to create these, I’ll be giving you an option so you can make some too. Here is a close up.
These Note Pad & Pen Holders have a 4×6 pad of paper in them that I picked up at my local dollar store. Perfect for jotting tons of notes – I’m always creating a list so I knew these would be great for my Team members too.
Here is a my video tutorial for you
Crafting Forever Note Pad & Pen Holder Video Tutorial
If you love the floral image I used – you can make some too by using our Floral Grid Paper (150819). This is a special package of our grid paper and it is being offered while supplies last. You can see it in my video and while it isn’t exactly the same – it will work. Simply create a folder using a piece of card stock or even the tag board from your Designer Series Paper pack and cut the grid paper as desired to fit. Yep, it’s that easy! It’s not just grid paper LOL! I’ve included this option in the PDF also.
Shop
at my Online Store and use Host Code GXJ4CGDM
Click Here to learn more about using the Hostess Code If you order Online make sure your profile
information is up to date and you’ve allowed me to contact you (If you chose no
contact in the past you’ll need to call 1-800-Stamp Up to have them change your
profile for you.)
The Annual Catalog is right
around the corner and I won’t be able to mail you one if you have chosen no
contact.
Sign up HERE for my FREE Newsletter or Get my Blog Posts delivered right to your inbox HERE